How to Customize Home Assistant
Introduction
In previous wikis, we explained how to install Home Assistant on the reTerminal, ODYSSEY-X86 and display the dashboard UI on PC, smartphones, tablets and Kiosk mode on the reTerminal LCD.
This wiki will walkthrough step-by-step on how to build out the dashboard by doing the necessary configurations and also how to use some of the important add-ons that comes with Home Assistant. So let's get started!
Add-ons, HACS and Integrations
Home Assistant offers mainly three ways to extend it's capabilities:
- Add-ons
- Integrations
- HACS (Home Assistant Community Store)
Addons allow you to extend the functionality around Home Assistant by installing additional applications. For example, connect with smart sensors with ESPHome, automatic backup of Home Assistant to Google Drive and more.
Integrations allow you to connect Home Assistant with other services. For example, connect with smart lights, CCTV cameras and more.
HACS (Home Assistant Community Store) allows you to add components for custom Front-end integrations inside Home Assistant. For example, new hardware/sensor support, new themes.
This wiki will dive briefly into the above-mentioned capabilities. However, if you want to learn more, there are a ton of resources online revolving around Home Assistant and here are some of the YouTube channels that can guide you well.
- EverythingSmartHome
- TheHookUp
- PaulHibbert
- MakeItWorkTech
- MarkWattTech
- SmartHomeSolver
- mostlychris
- KPeyanski
Addons
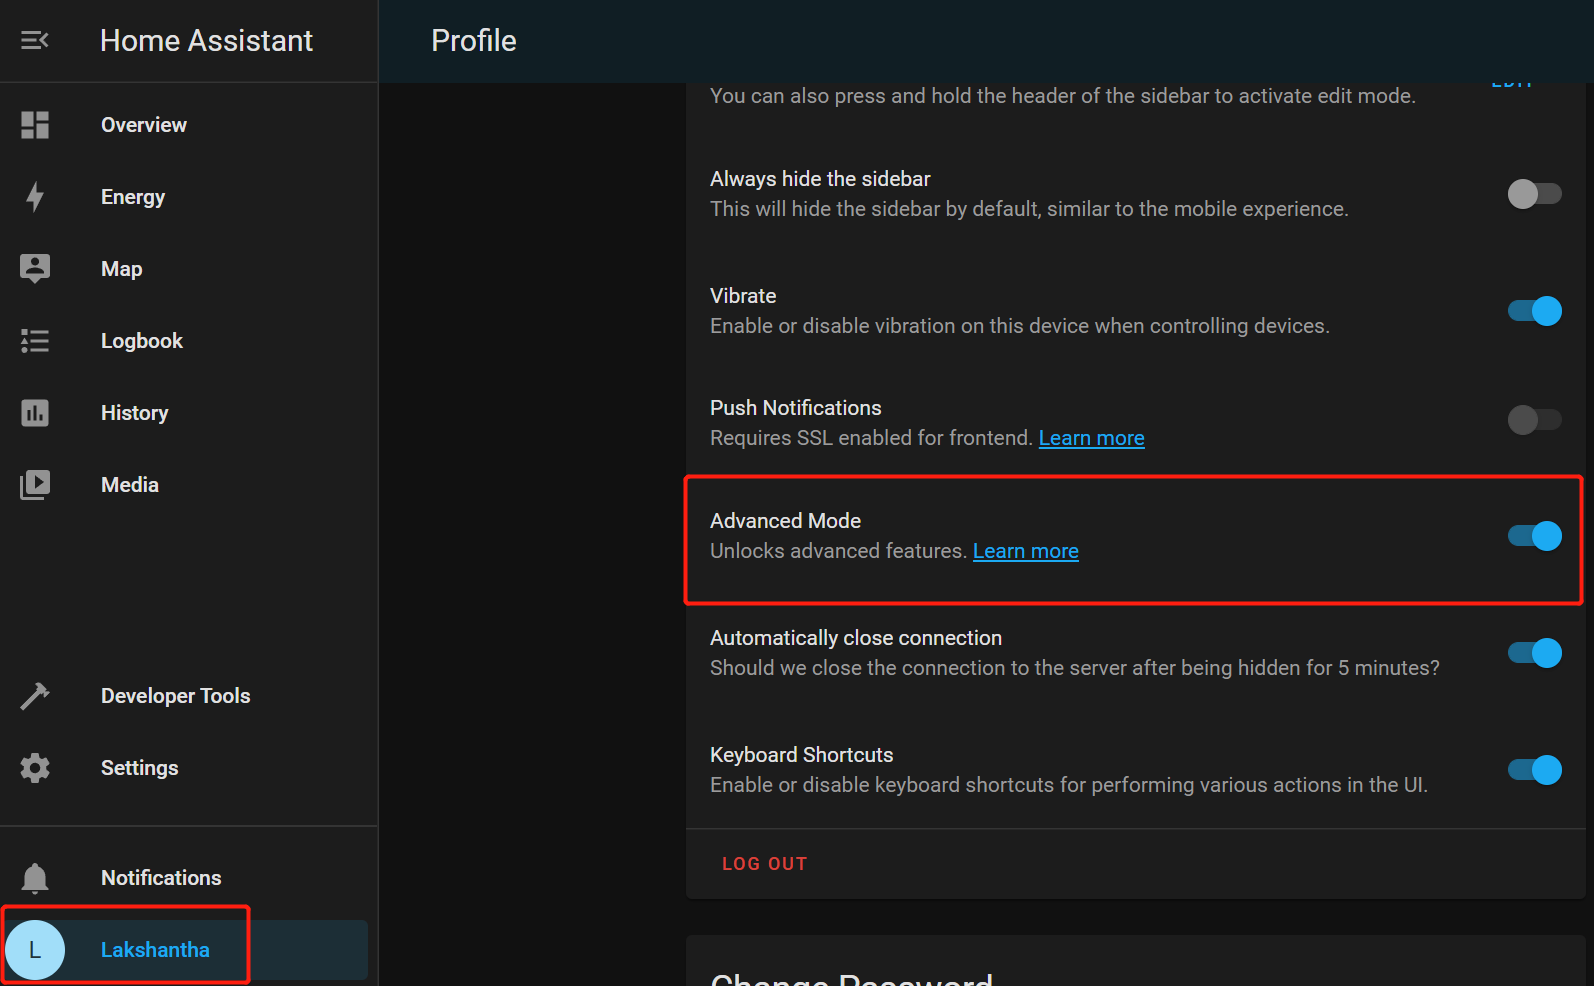
By default, not all Add-ons will be enabled. So to enable all the add-ons, you need to enable "Advanced Mode"
- Step 1. Click on the username and enable Advanced Mode
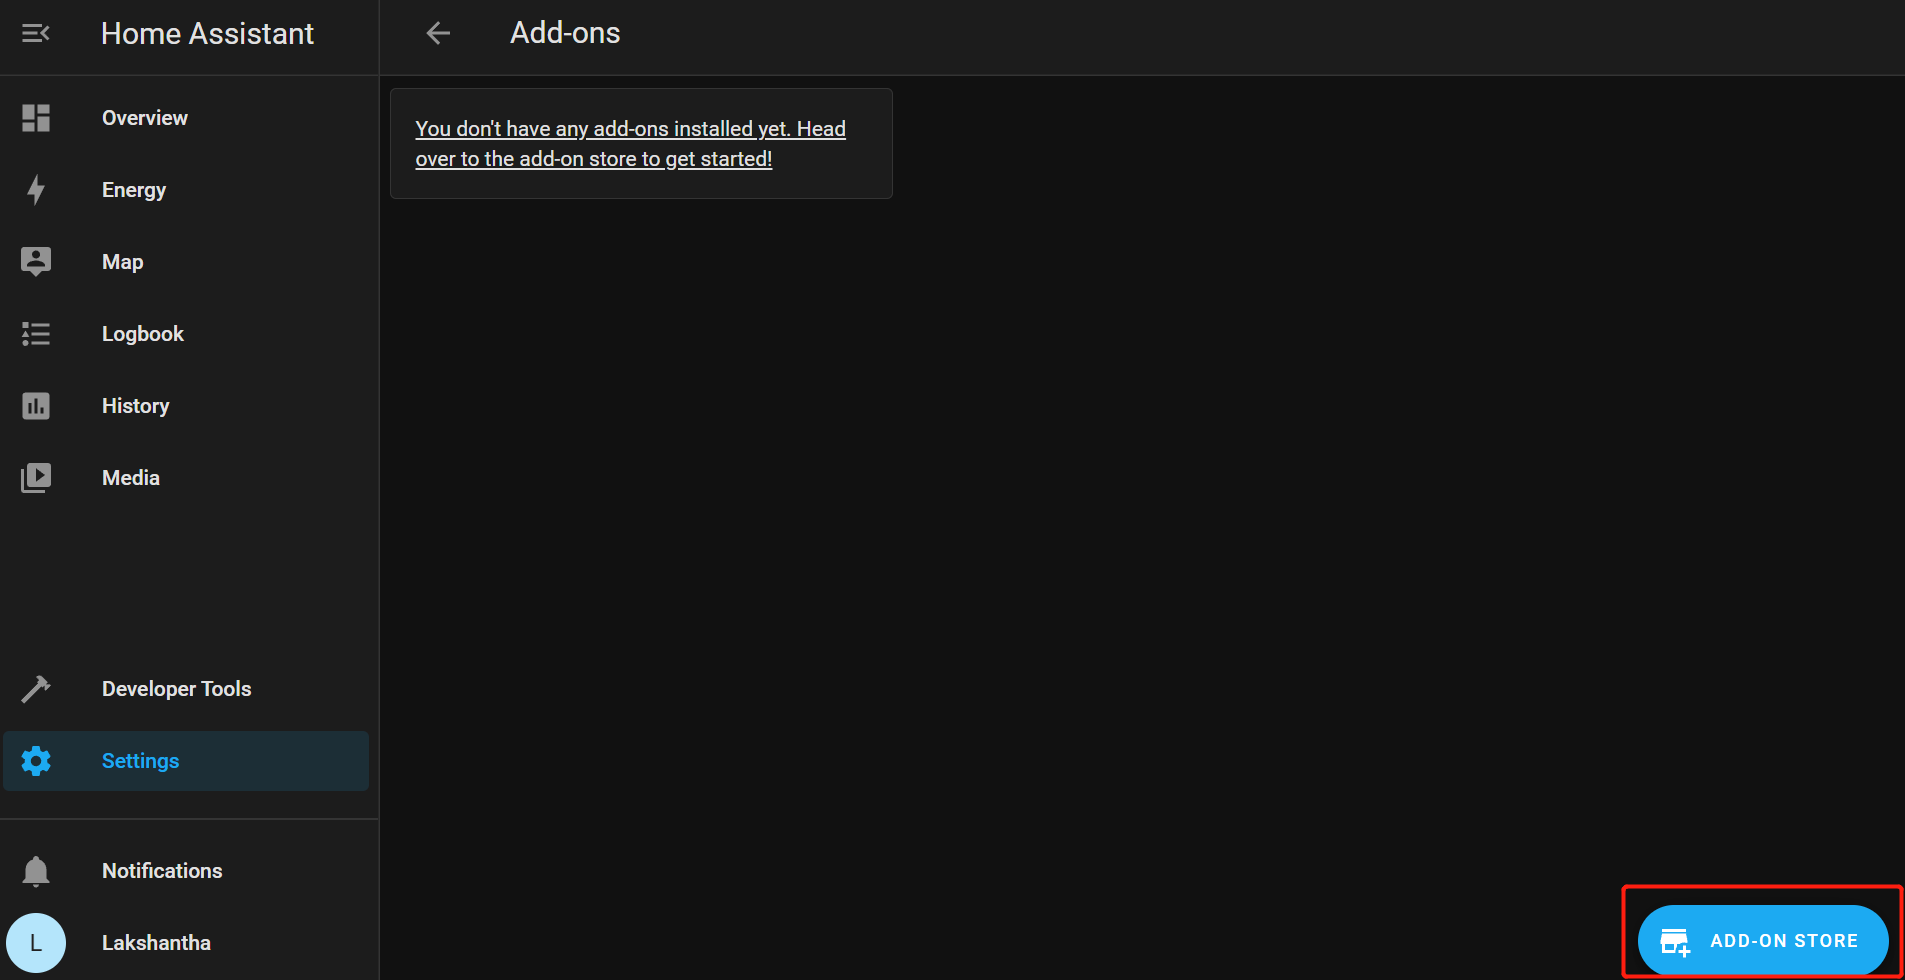
Now we need to access the Add-ons panel
- Step 2. Navigate to Settings > Add-ons

- Step 3. Click ADD-ON STORE
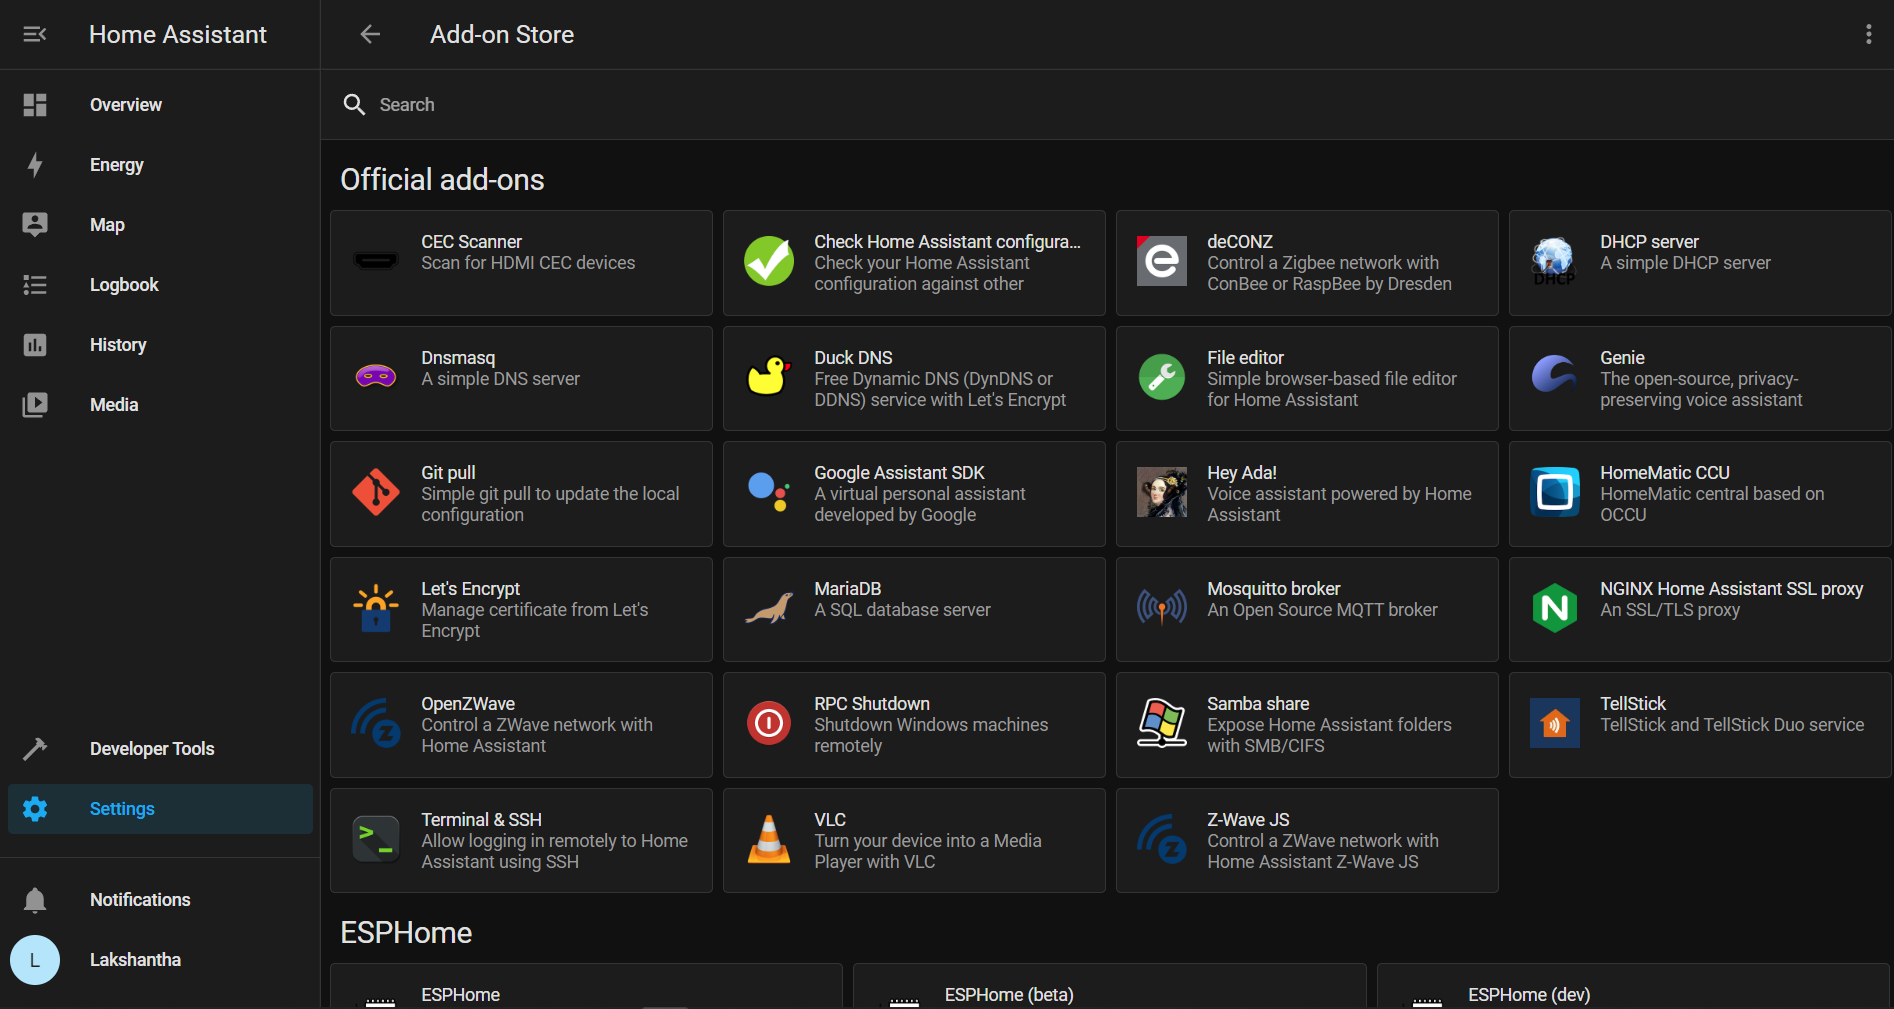
Apart from the default add-ons by Home Assistant, you can add 3rd party addons developed by the community. However, these are not maintained by Home Assistant developers. Later we will show you how to add these 3rd party addons.
Getting started with Addons
Now let's set up some of the addons. Here we will show you how to setup the following add-ons.
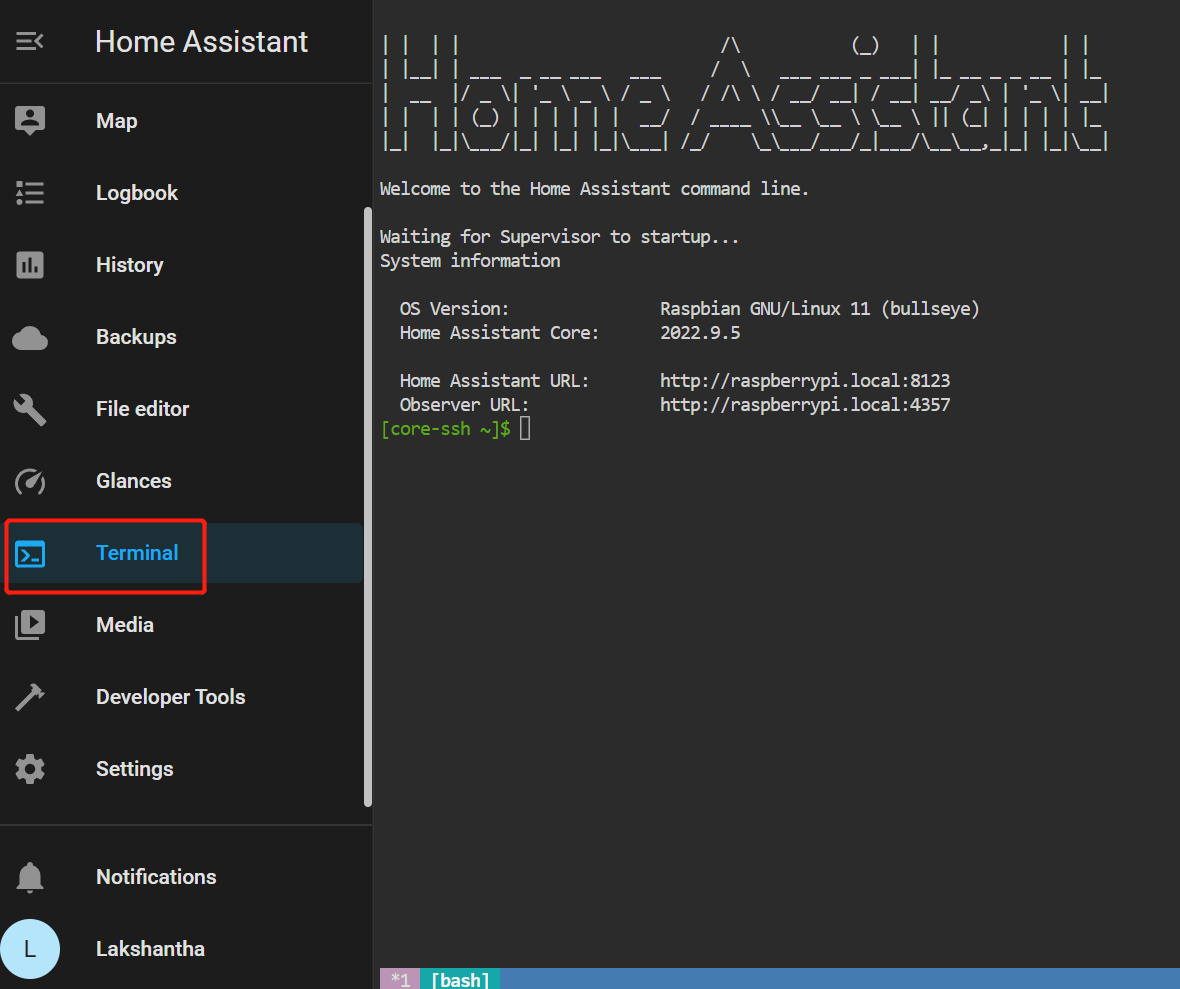
- Terminal & SSH
- File editor
- Glances
- Google Drive Backup
You can also set up add-ons such as Node-RED, ESPHome, Adguard Home, BitWarden, Samba Share, Mosquitto broker, BookStack, Uptime Kuma, Cloudflared Tunnel and more
Installing an addon
The process of installing an add-on is common to all the add-ons. So we will explain it here
-
Step 1. Visit Add-on Store as explained before
-
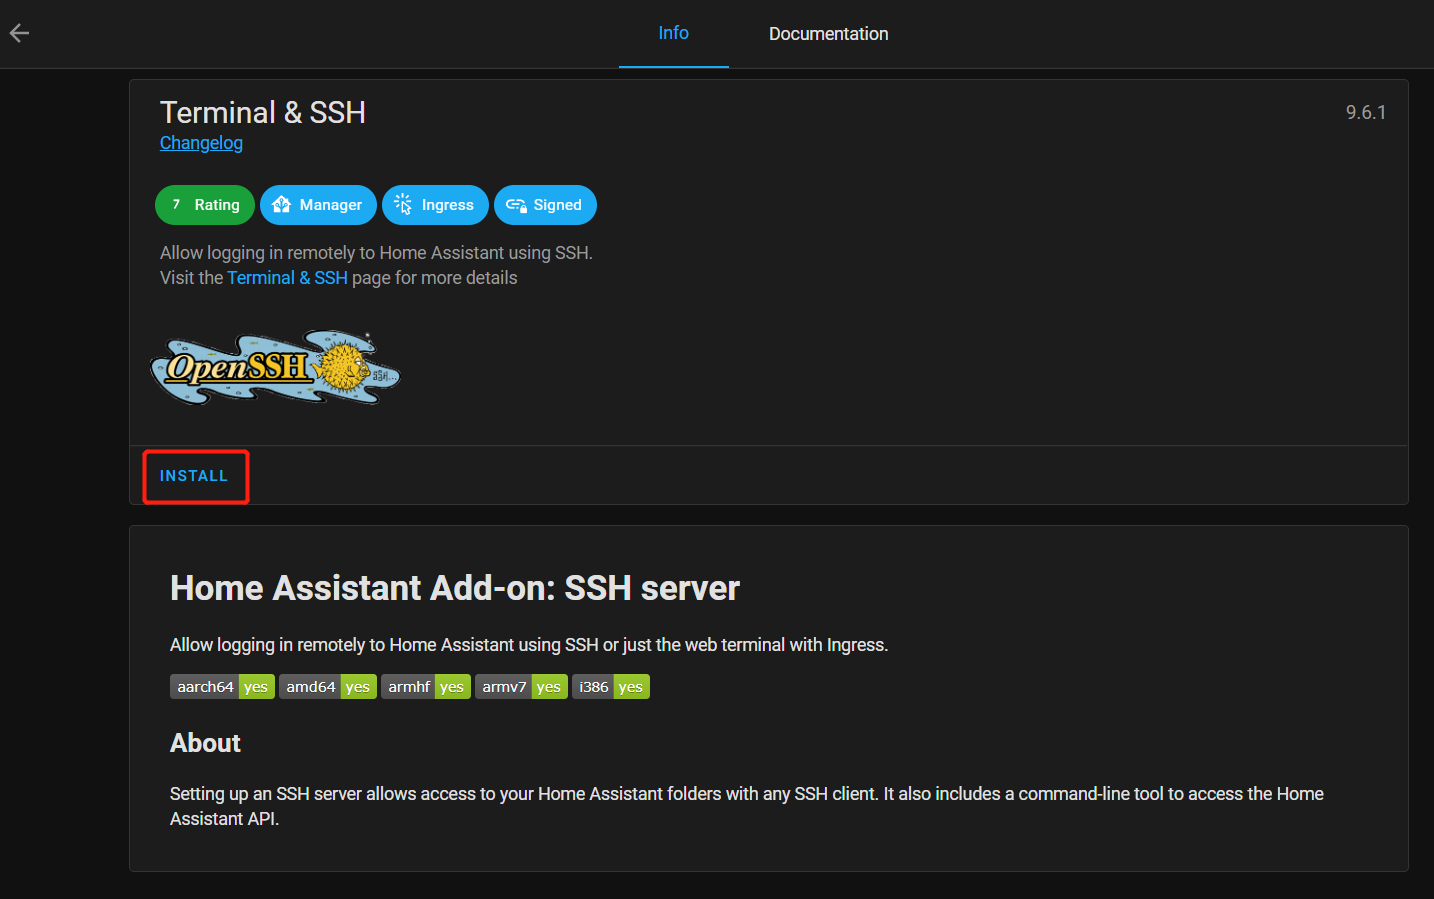
Step 2. Select an Add-on or type in the search bar. For example, here we will select Terminal & SSH Add-on

- Step 3. Click INSTALL
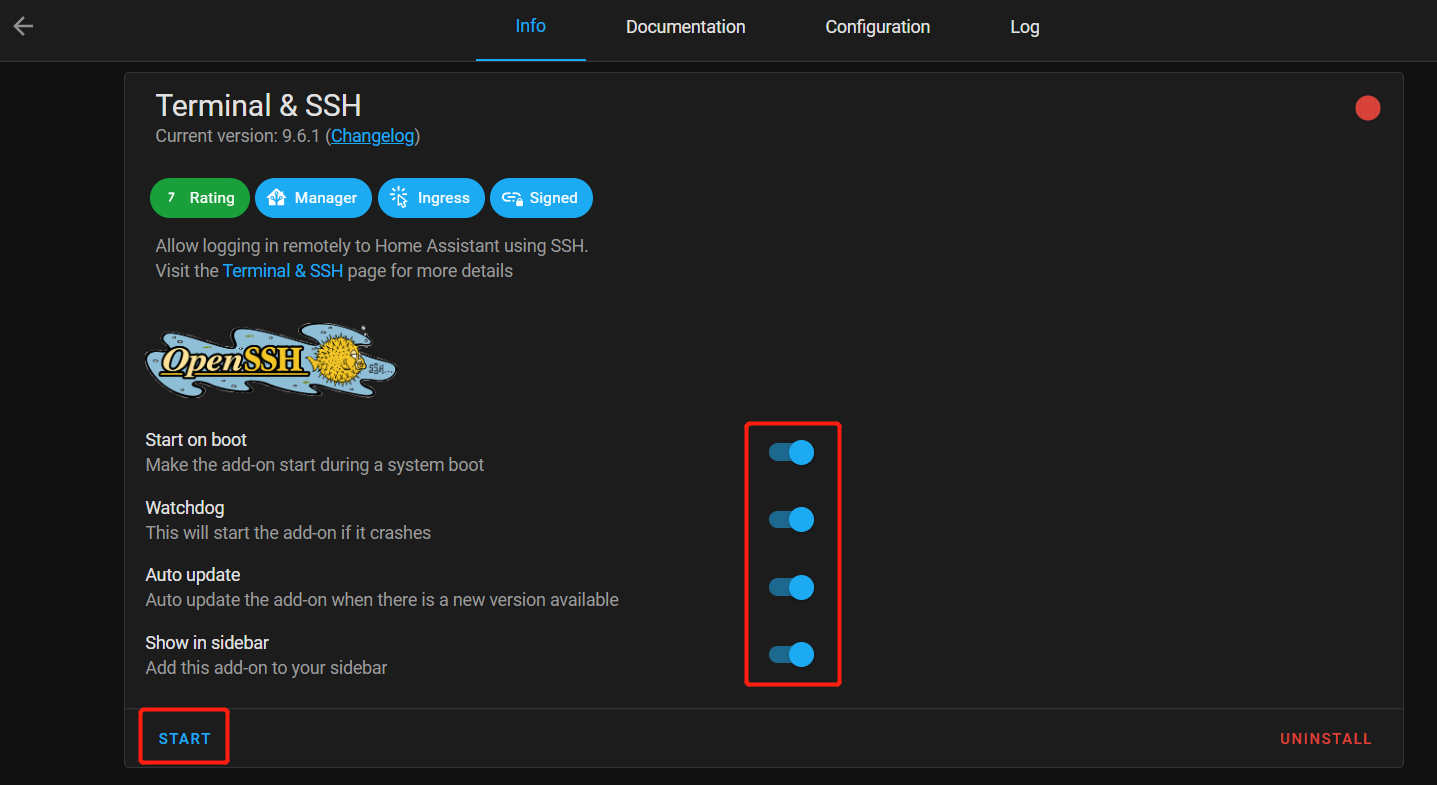
- Step 4. Configure more settings such as Start on boot, Watchdog, Auto update and Show in sidebar. You can turn them all if you prefer and then click START
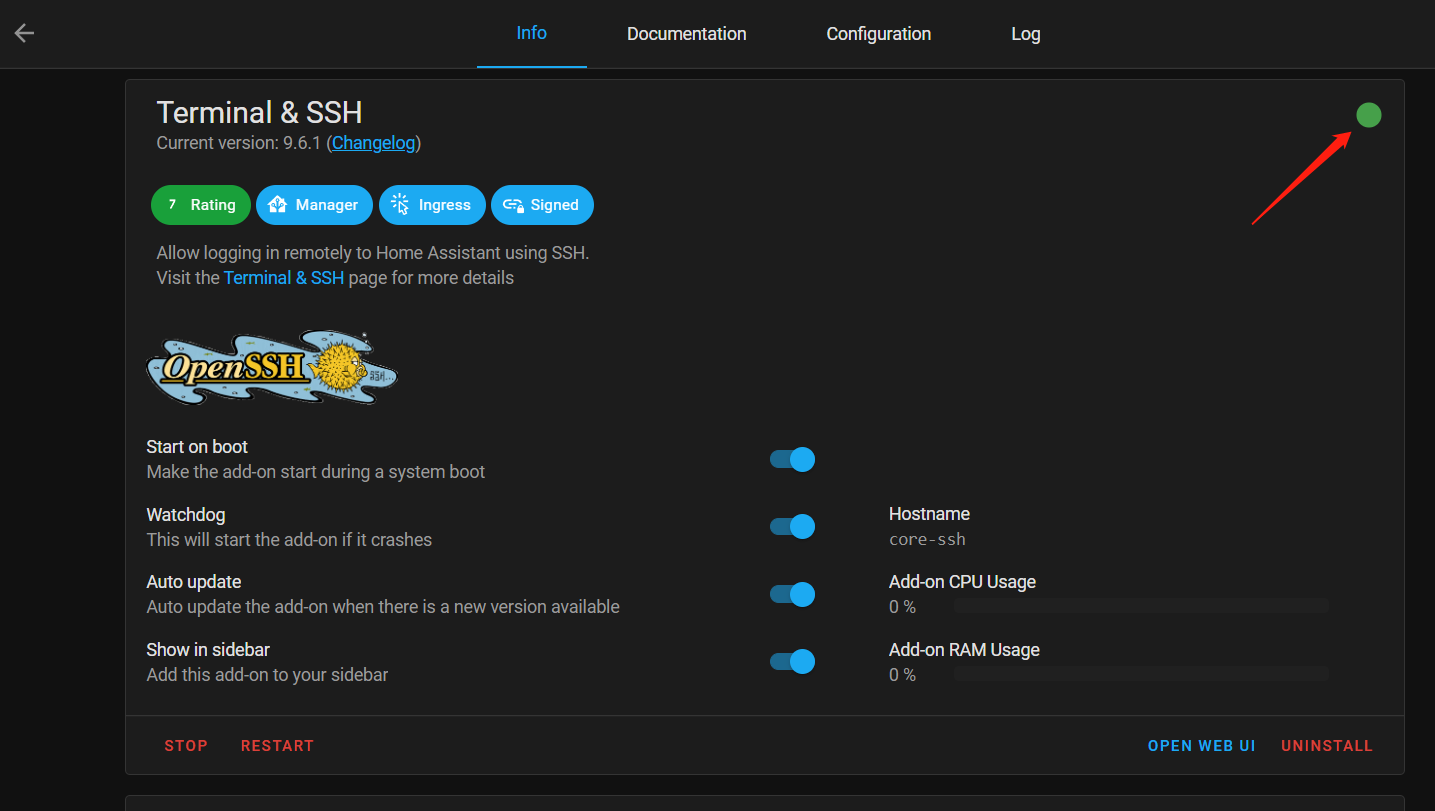
You will see this Green Dot if the add-on is started and running
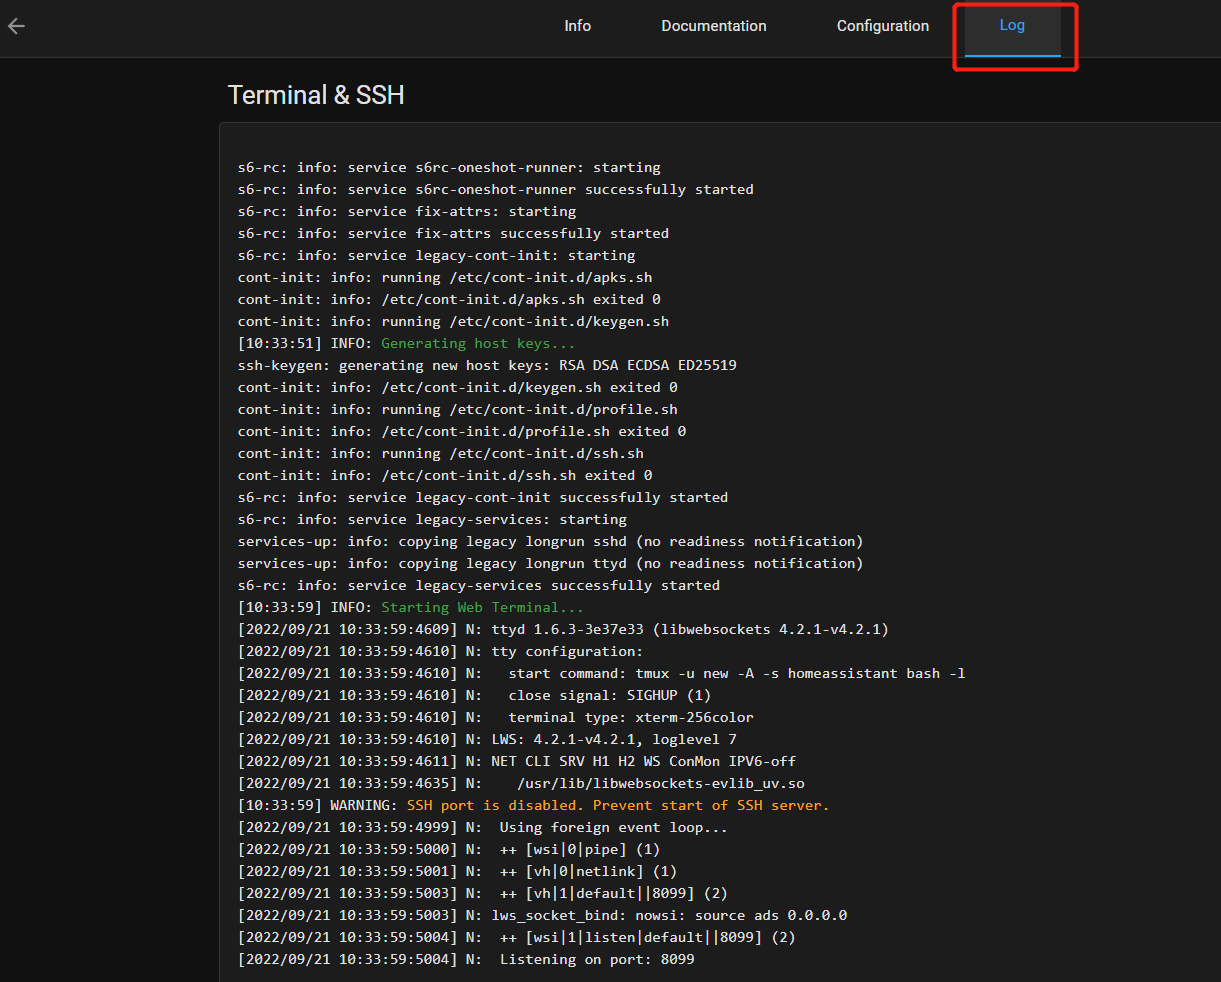
- Step 5. After the Add-on is started, click the Log tab and check whether the Add-on is started properly
File editor add-on
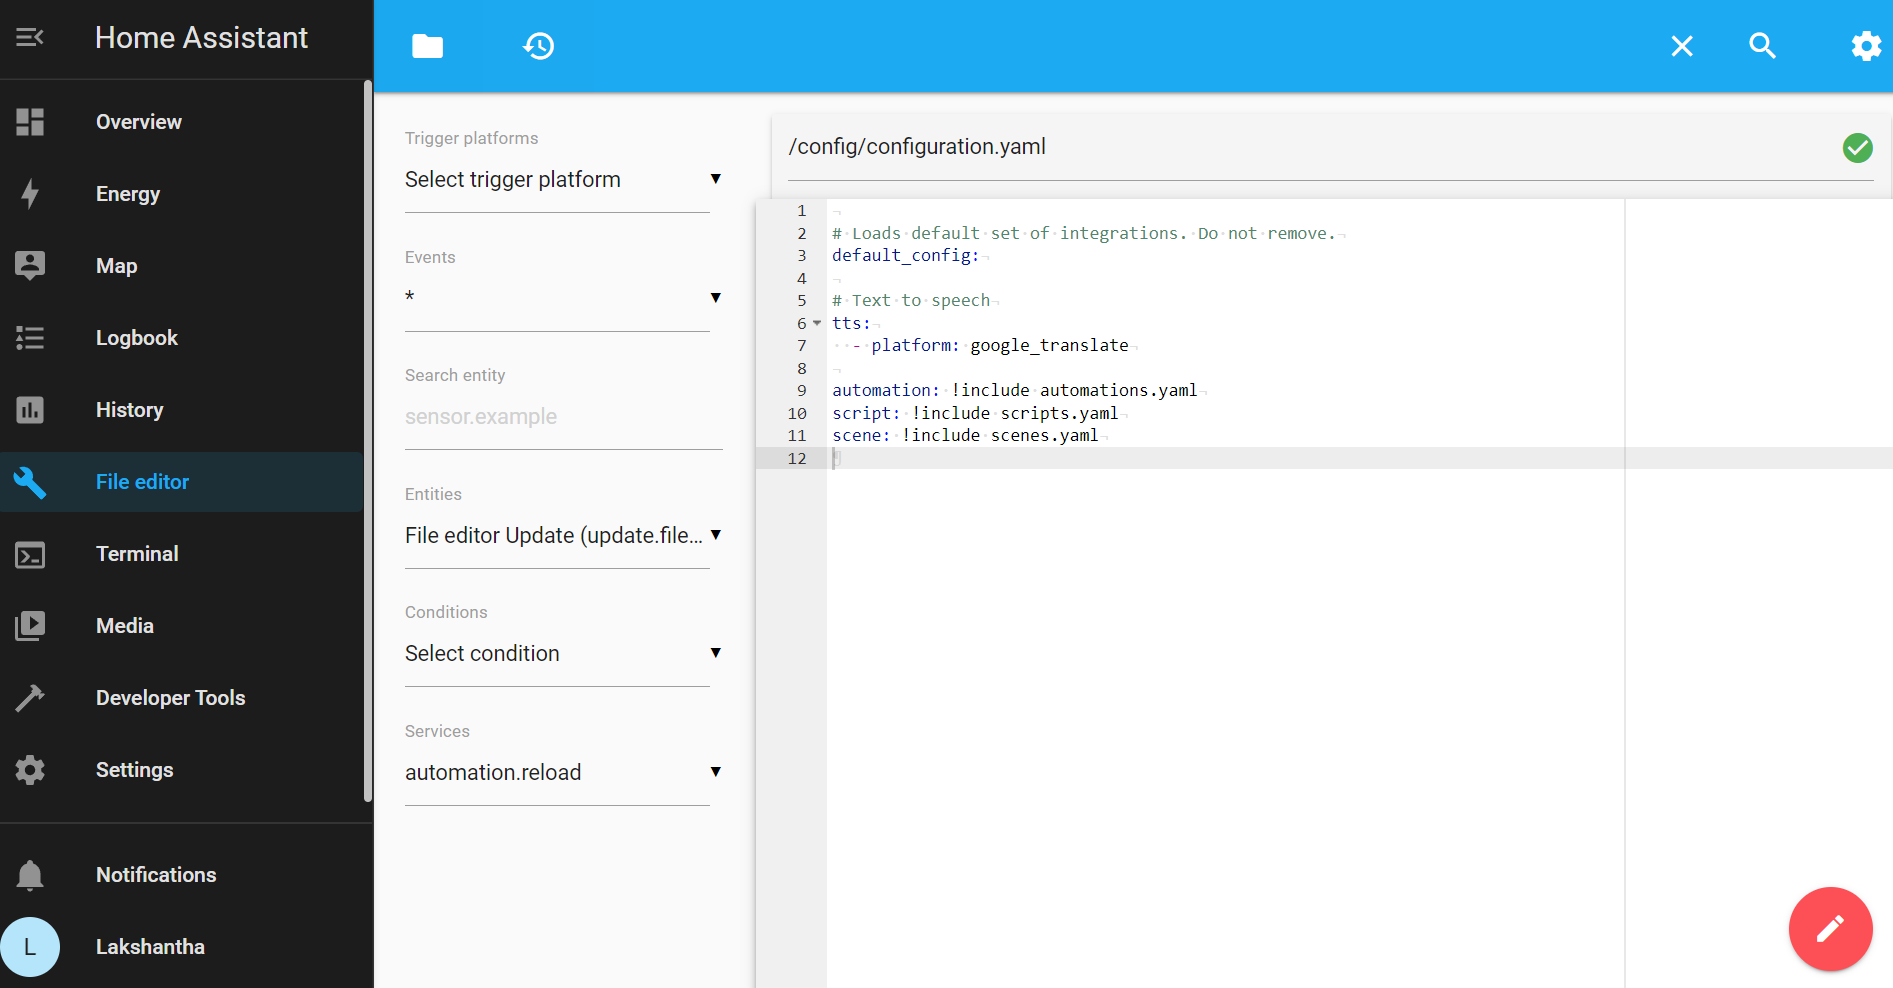
While you can configure most of Home Assistant directly from the user interface under Settings, some parts need you to edit some files such as configuration.yaml which contains integrations to be loaded along with their configurations. You can add code snippets to this configuration file to enable specific functionality.
However, in order to access these configuration files, we need a file editor. That's where File editor add-on comes into use.
-
Step 1. Look for File editor add-on inside Add-on Store, INSTALL and START it.
-
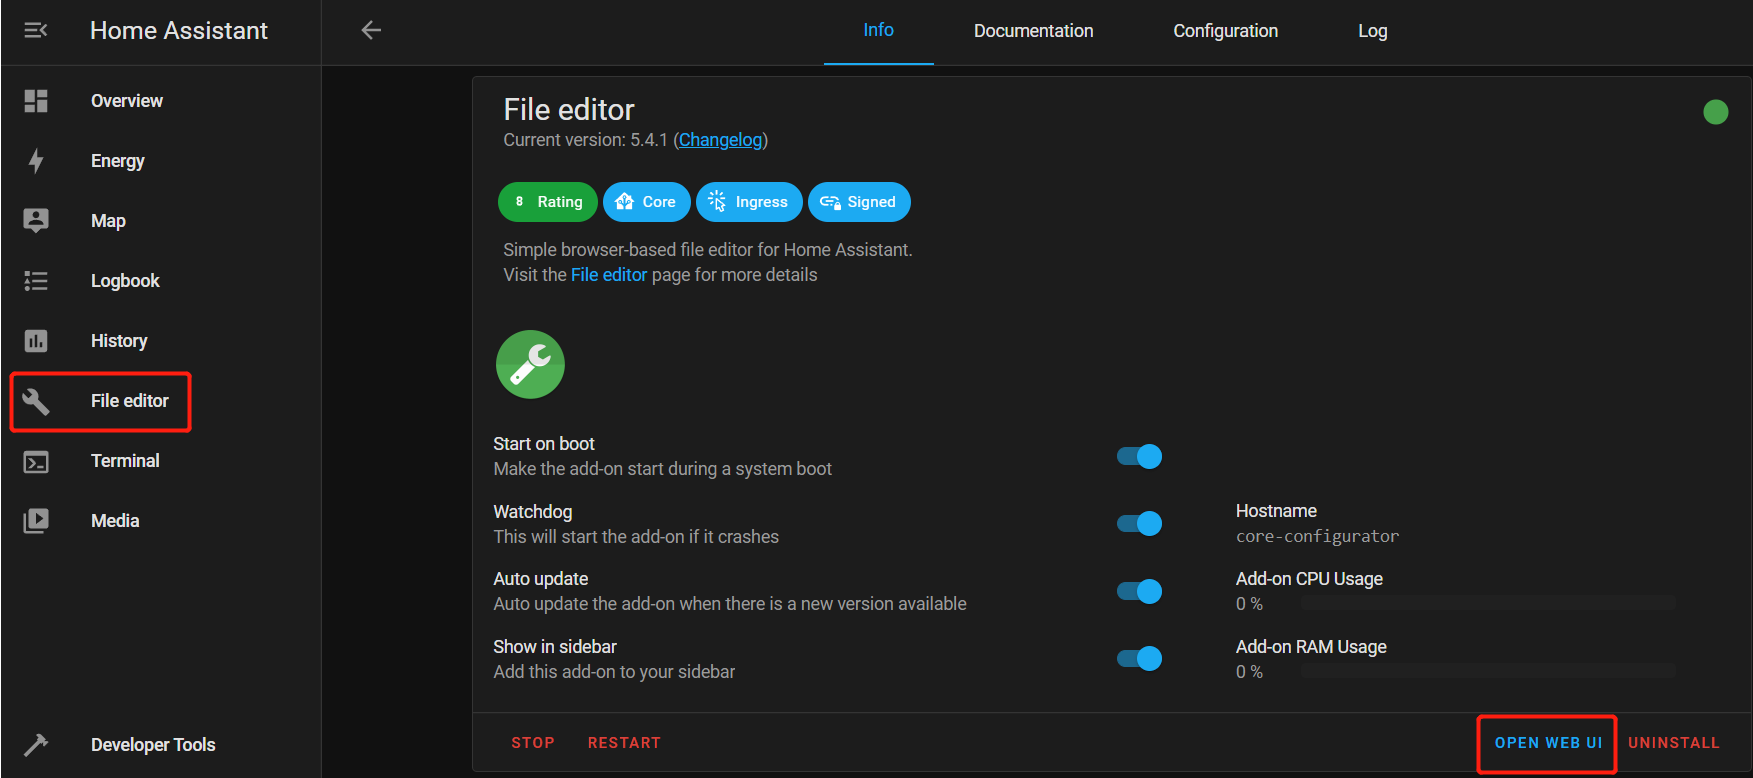
Step 2. You can either click OPEN WEB UI or File editor on the left navigation pane to access it
Glances add-on
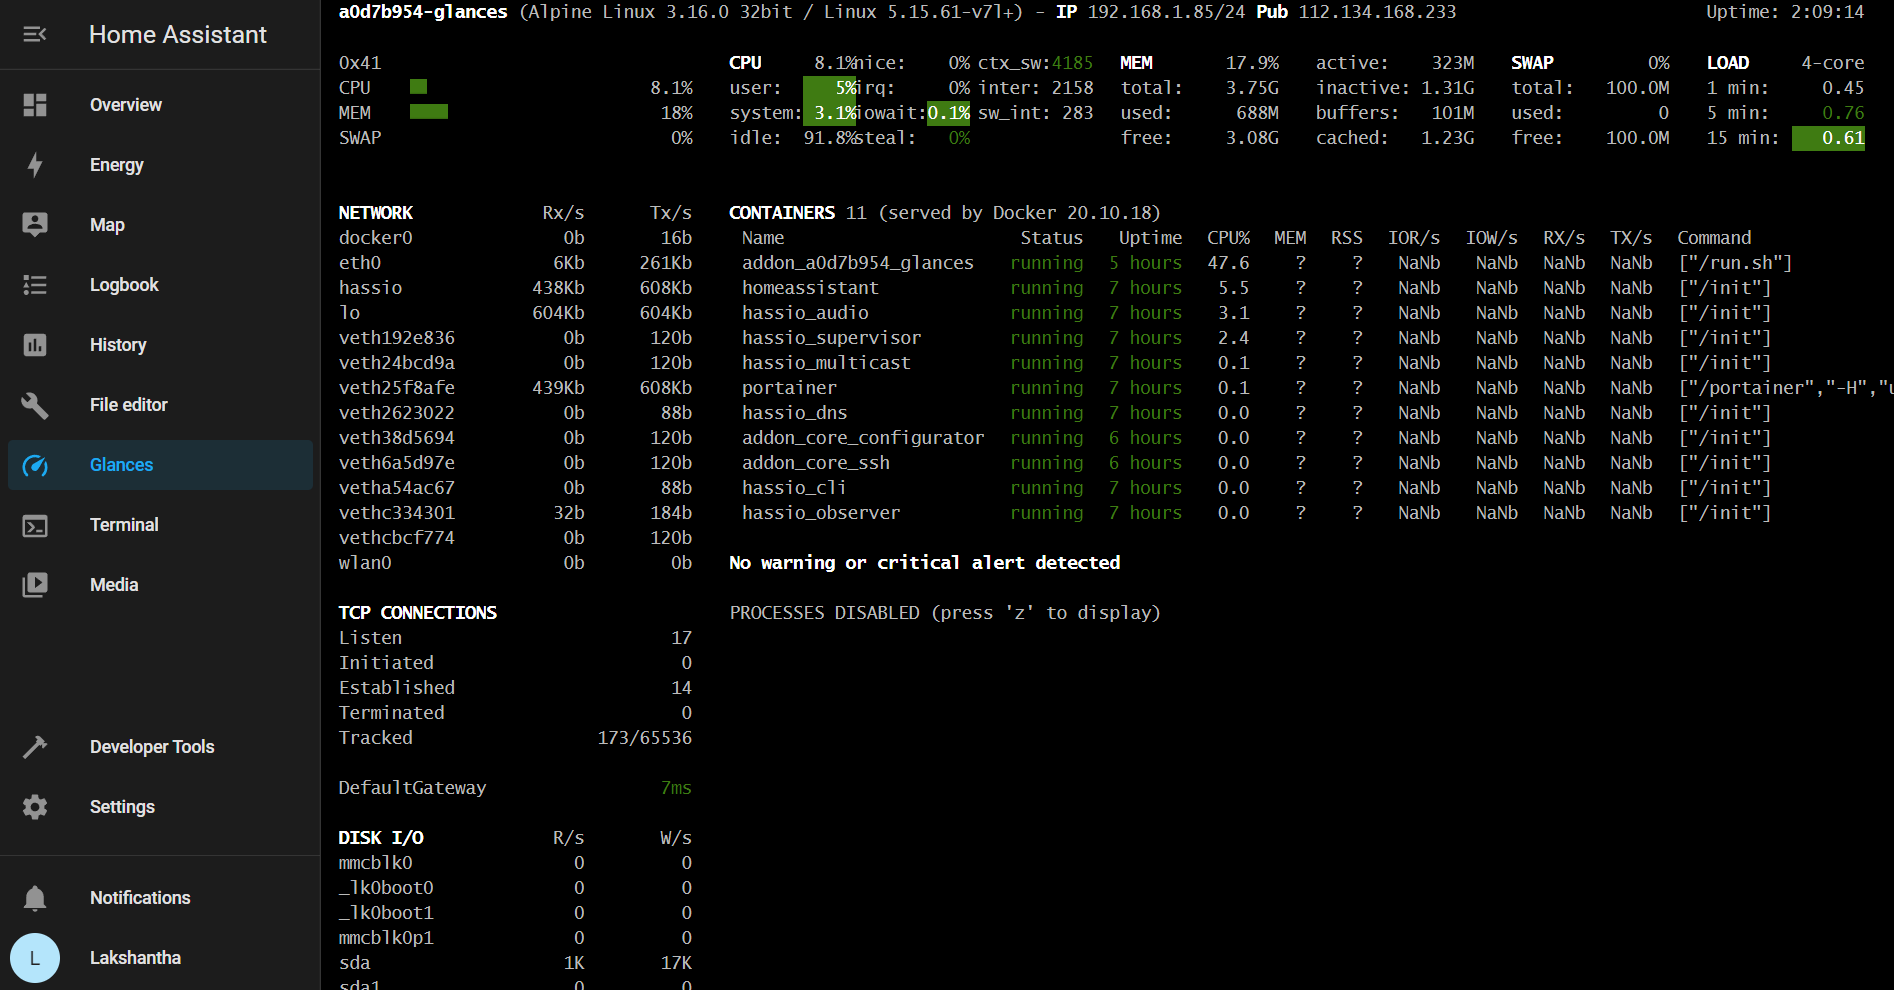
After installing Home Assistant, you might want to check the hardware resource usage on the host device. Glances add-on gives an overview of all the hardware resources being used.
-
Step 1. Look for Glances add-on inside Add-on Store, INSTALL and START it.
-
Step 2. You can either click OPEN WEB UI or Glances on the left navigation pane to access it

Note: Make sure Protection mode is disabled, or otherwise Glances will not start
Google Drive Backup add-on
As mentioned earlier, you can install 3rd party add-ons to Home Asssitant and Google Drive Backup is one such add-on. After investing a lot of time and effort in setting up Home Assistant to suit your needs, if the system breaks, everything will be in vain. This is where Backups can save you.
By default, Home Assistant has the ability to do backups and save offline on the host device running Home Assistant. However, if the host device is unreponsive and you cannot even access it, how are you going to restore from a previous backup?
Google Drive Backup add-on allows you to configure automatic backups where it will upload backups to your Google Drive on a daily basis. So if you are unable to access the host device, you can download your saved backup from Google Drive and restore on the device.
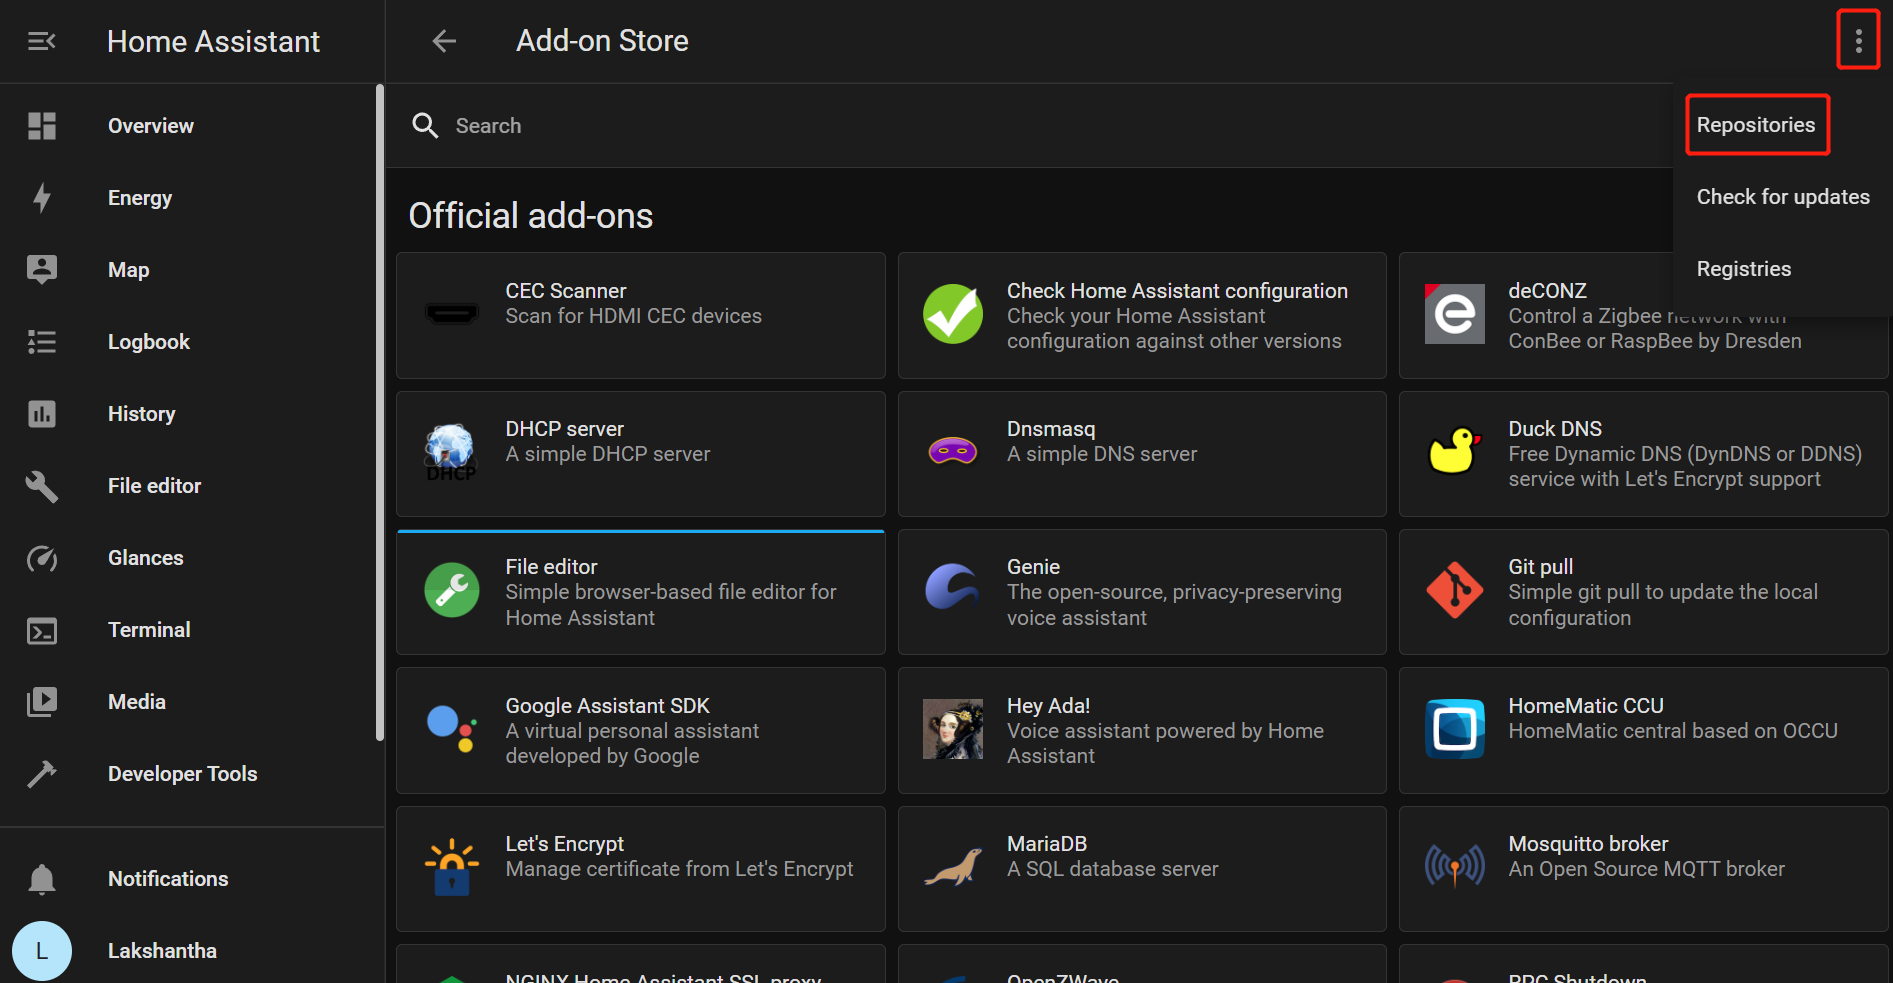
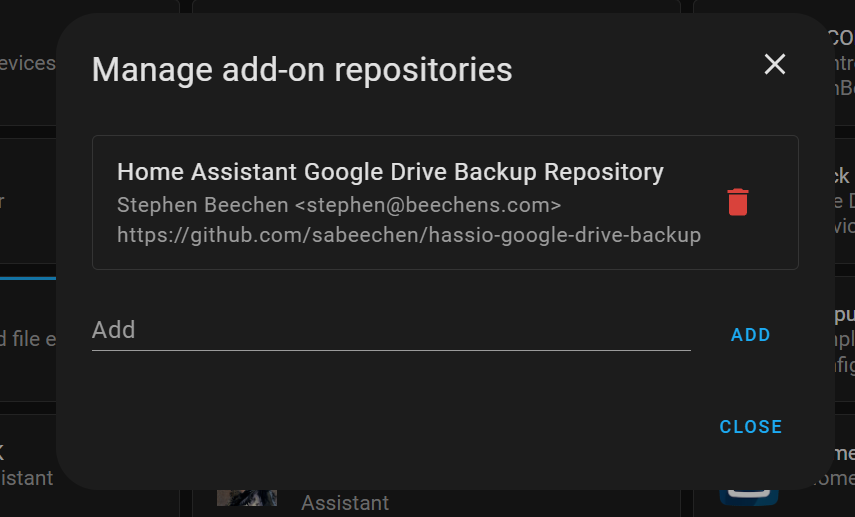
- Step 1. Visit Add-on Store, click the 3 dots on the top right corner and click Repositories
- Step 2. Copy and past https://github.com/sabeechen/hassio-google-drive-backup into the empty column and click ADD

You will see the following if it is successfully added
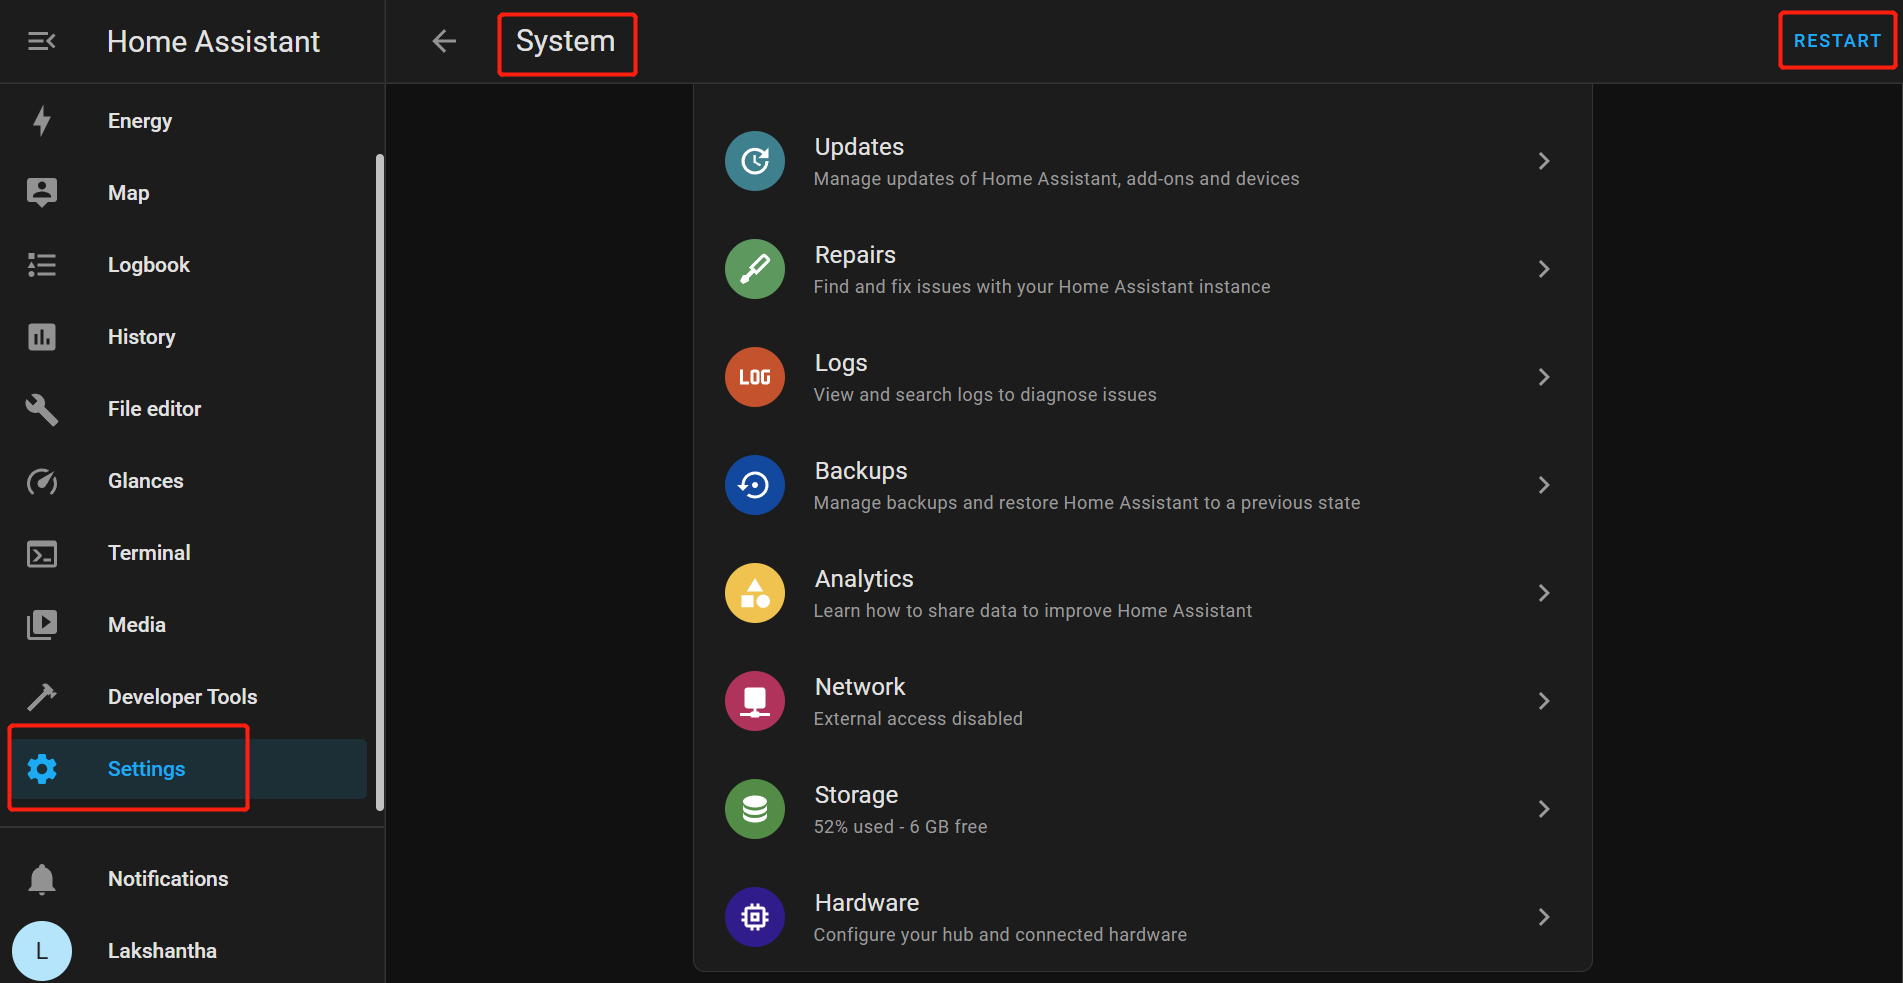
- Step 3. Go to Settings > System and click RESTART to restart Home Assistant
-
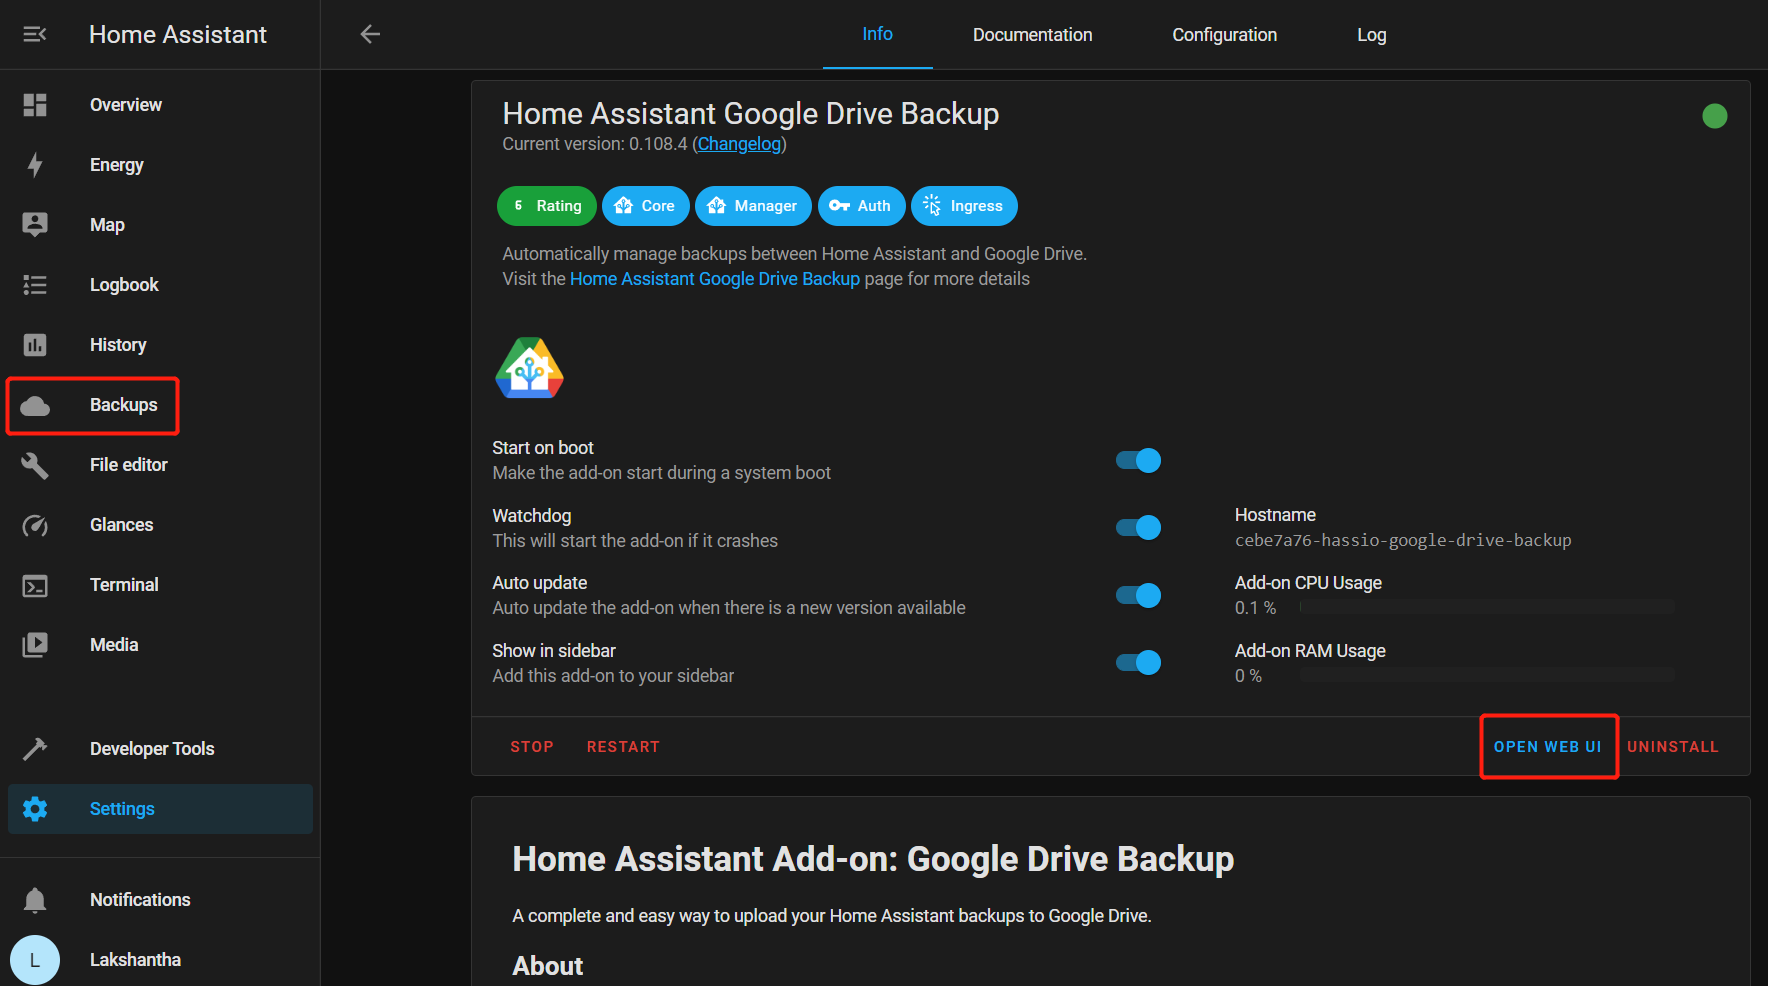
Step 4. Visit Add-on Store, look for Home Assistant Google Drive Backup add-on, INSTALL and START it.
-
Step 5. You can either click OPEN WEB UI or Backups on the left navigation pane to access it
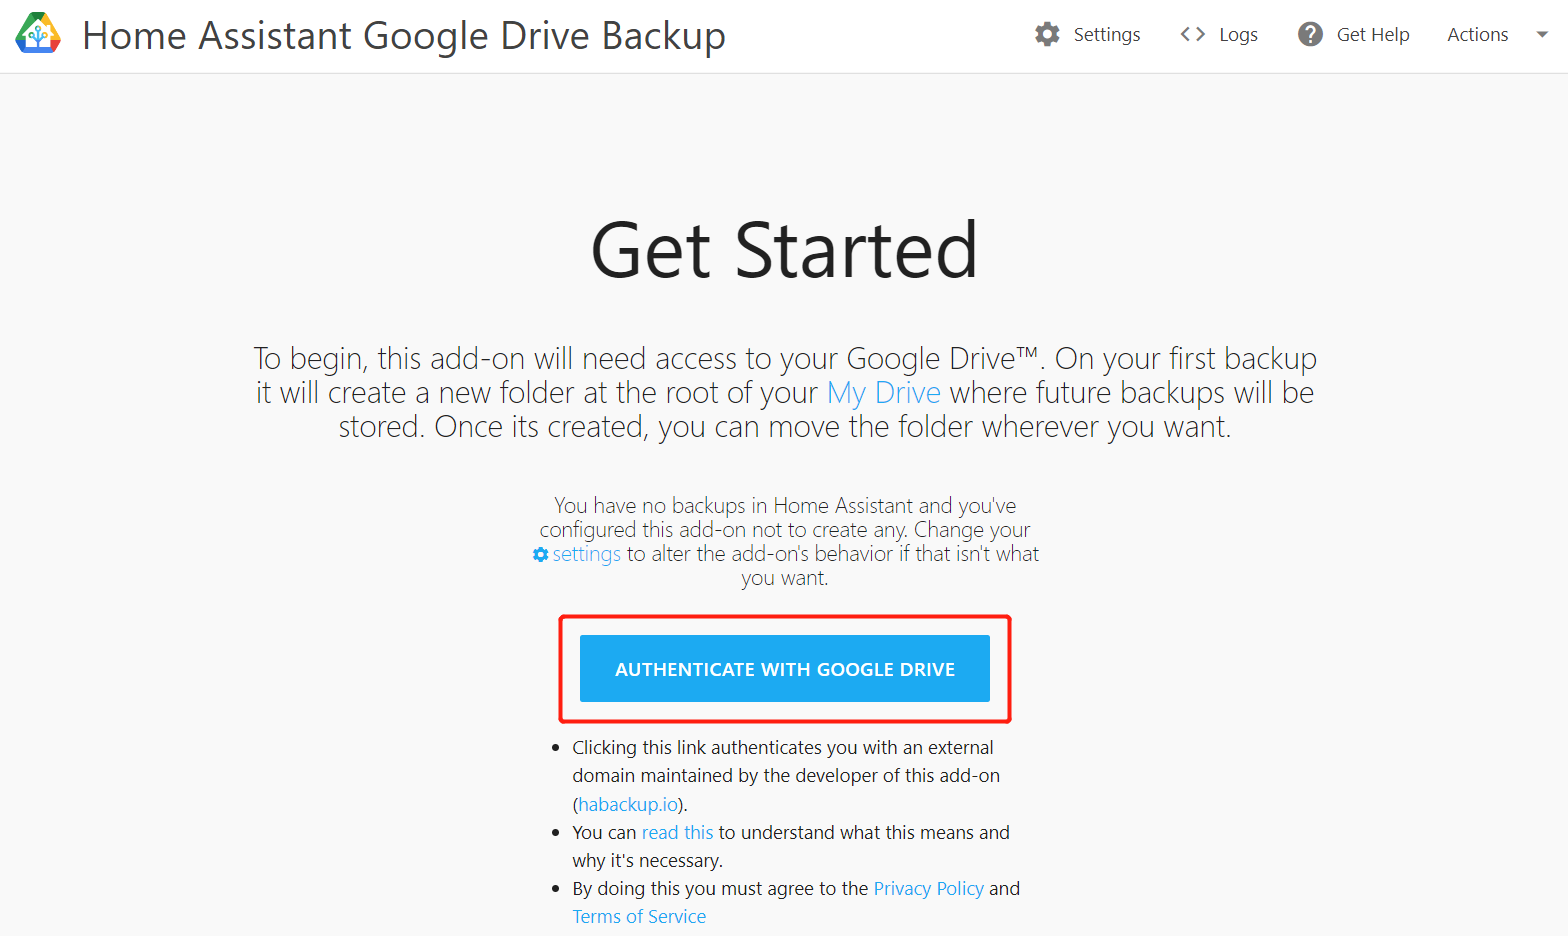
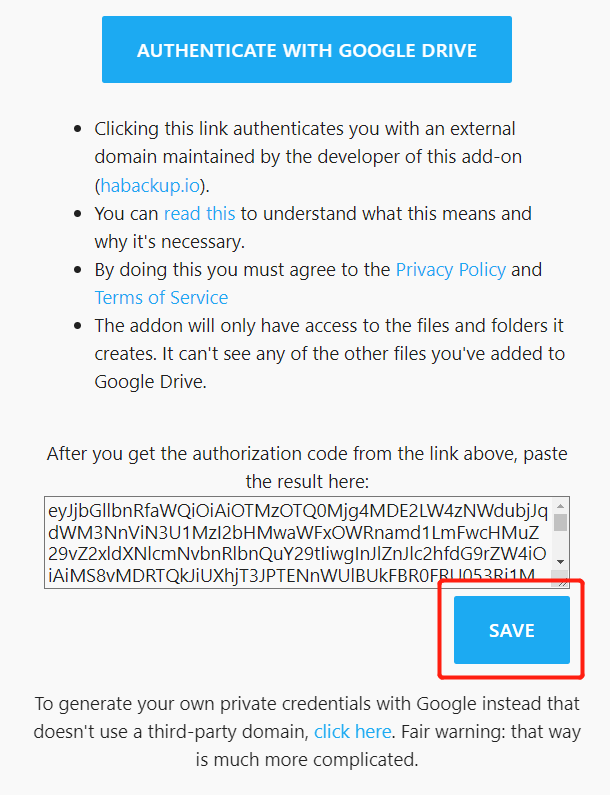
- Step 6. Click AUTHENTICATE WITH GOOGLE DRIVE and it will open a new window. Sign in with your google account and allow access to it
- Step 7. Click COPY to copy the Authorization String
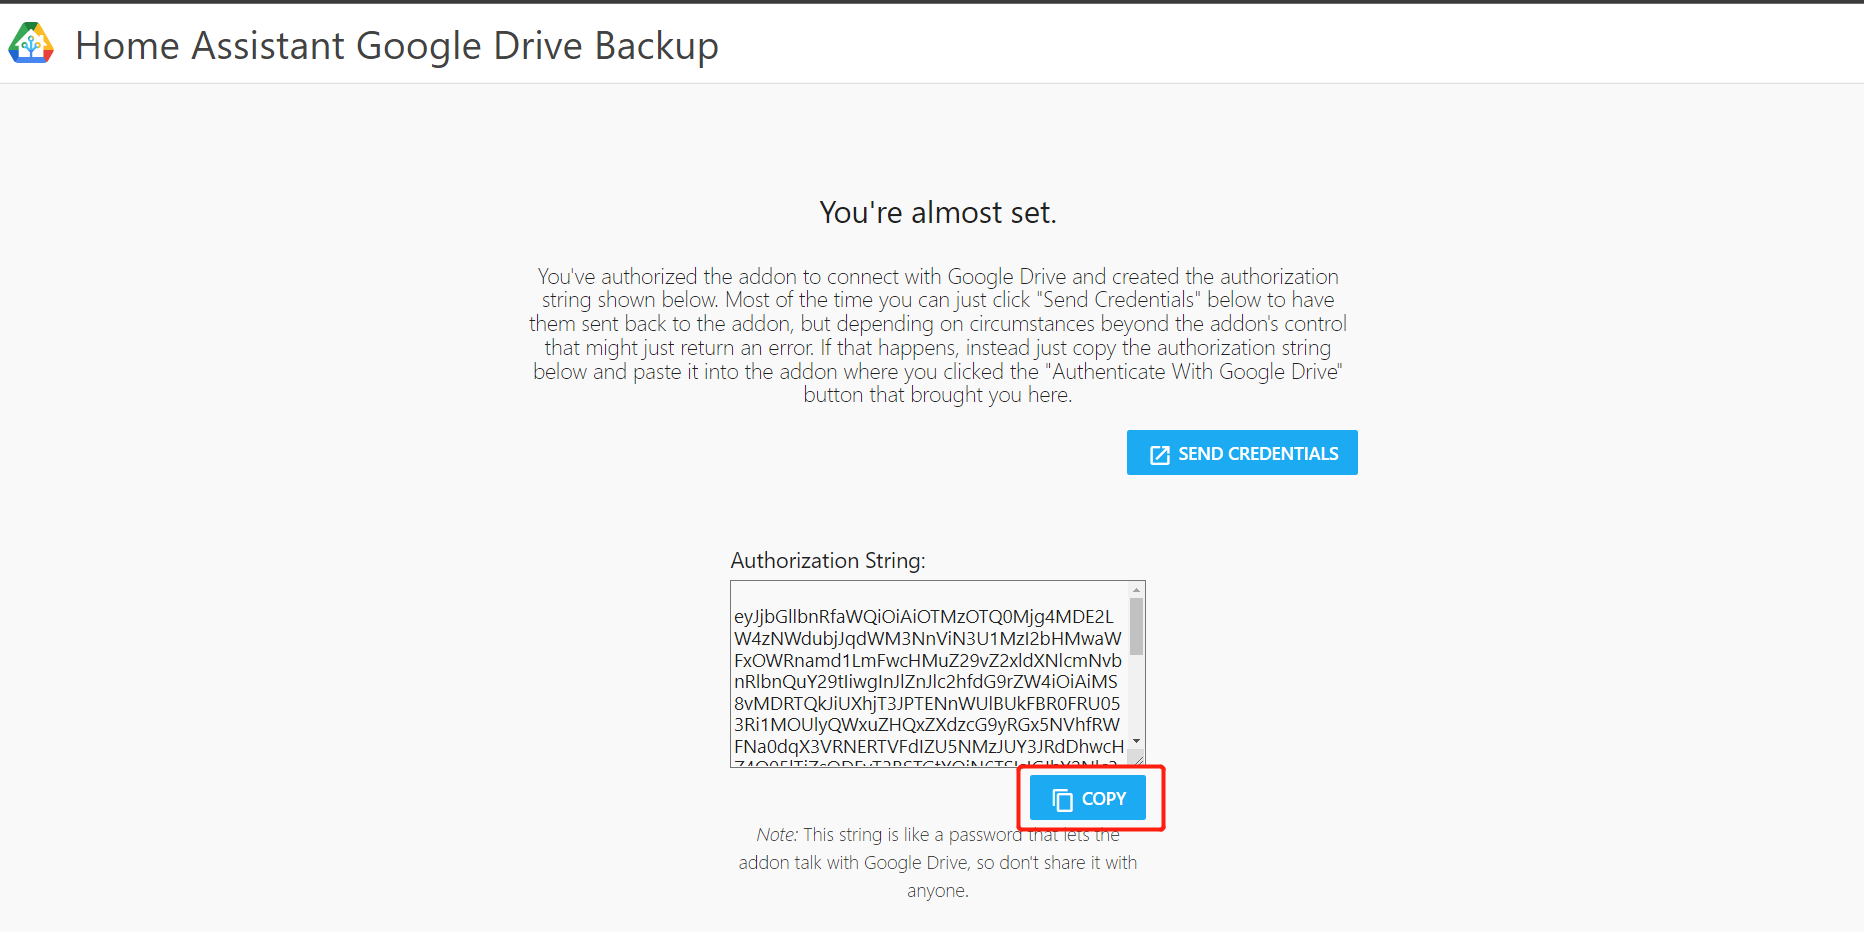
- Step 8. Come back to Home Assistant UI and paste the copied string and click SAVE
Now we have successfully set up Google Drive Backups.
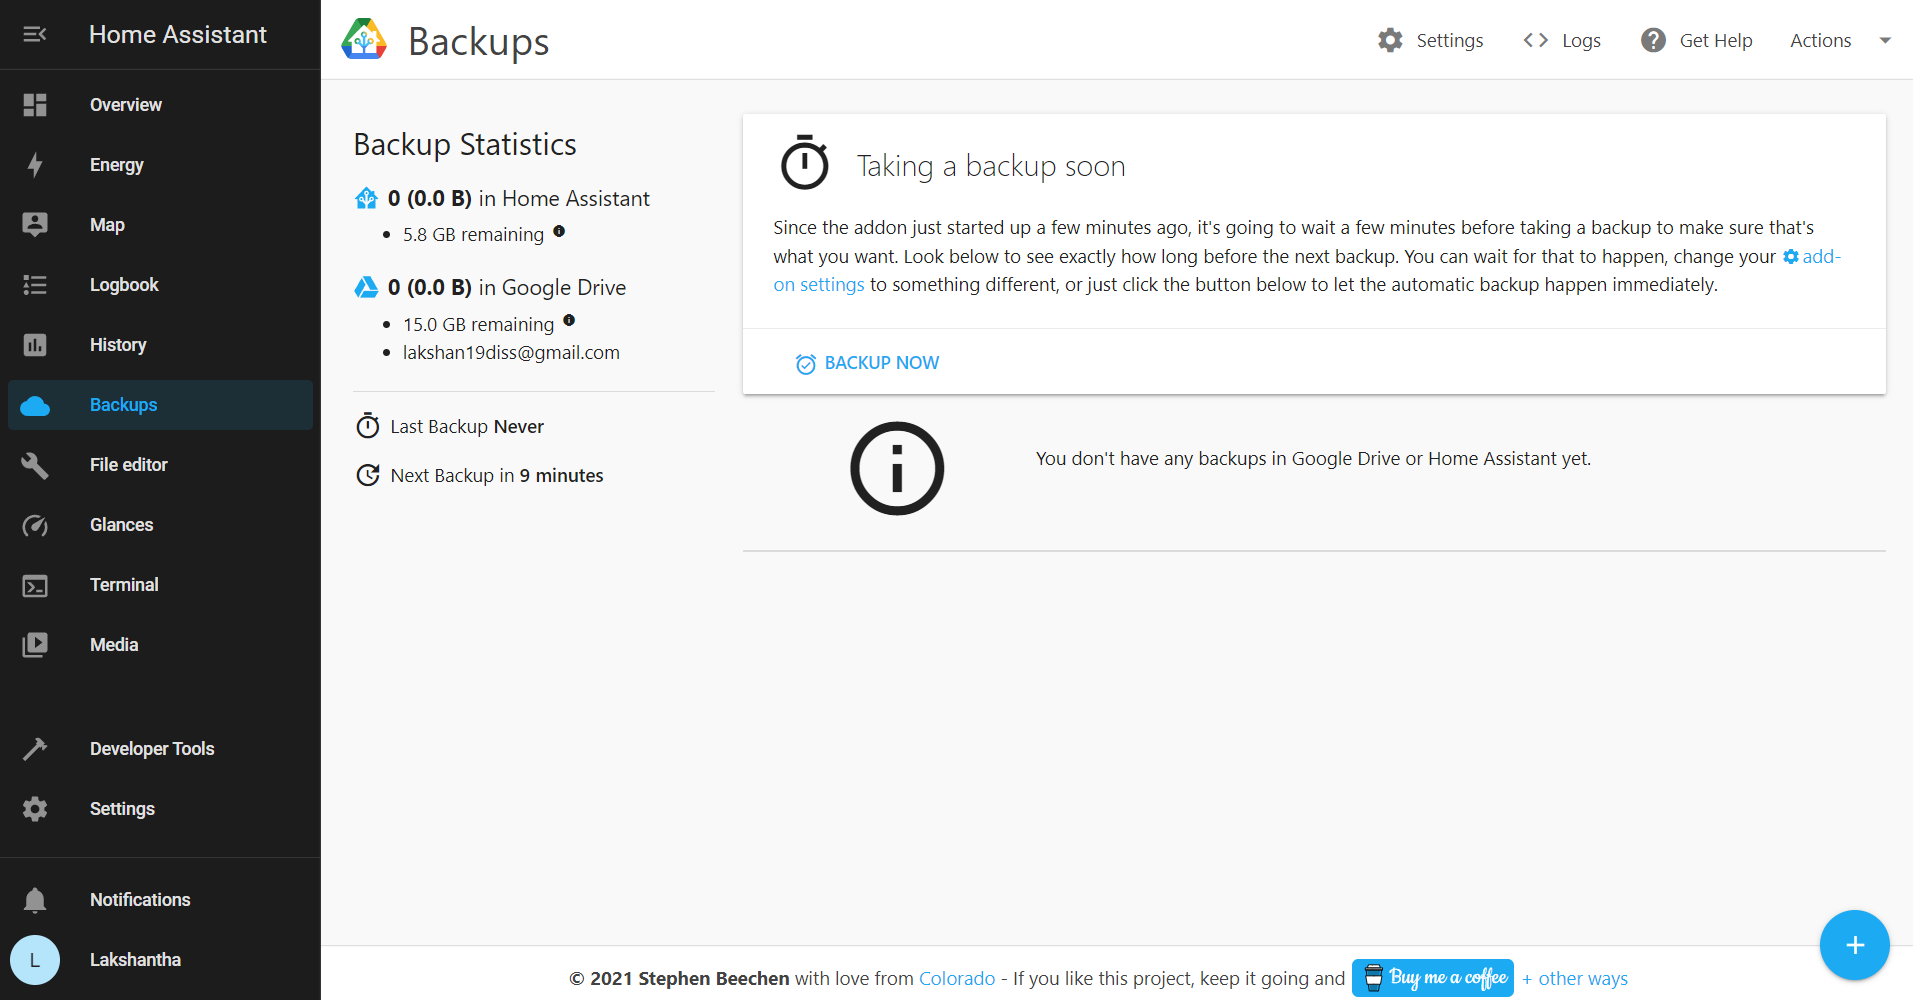
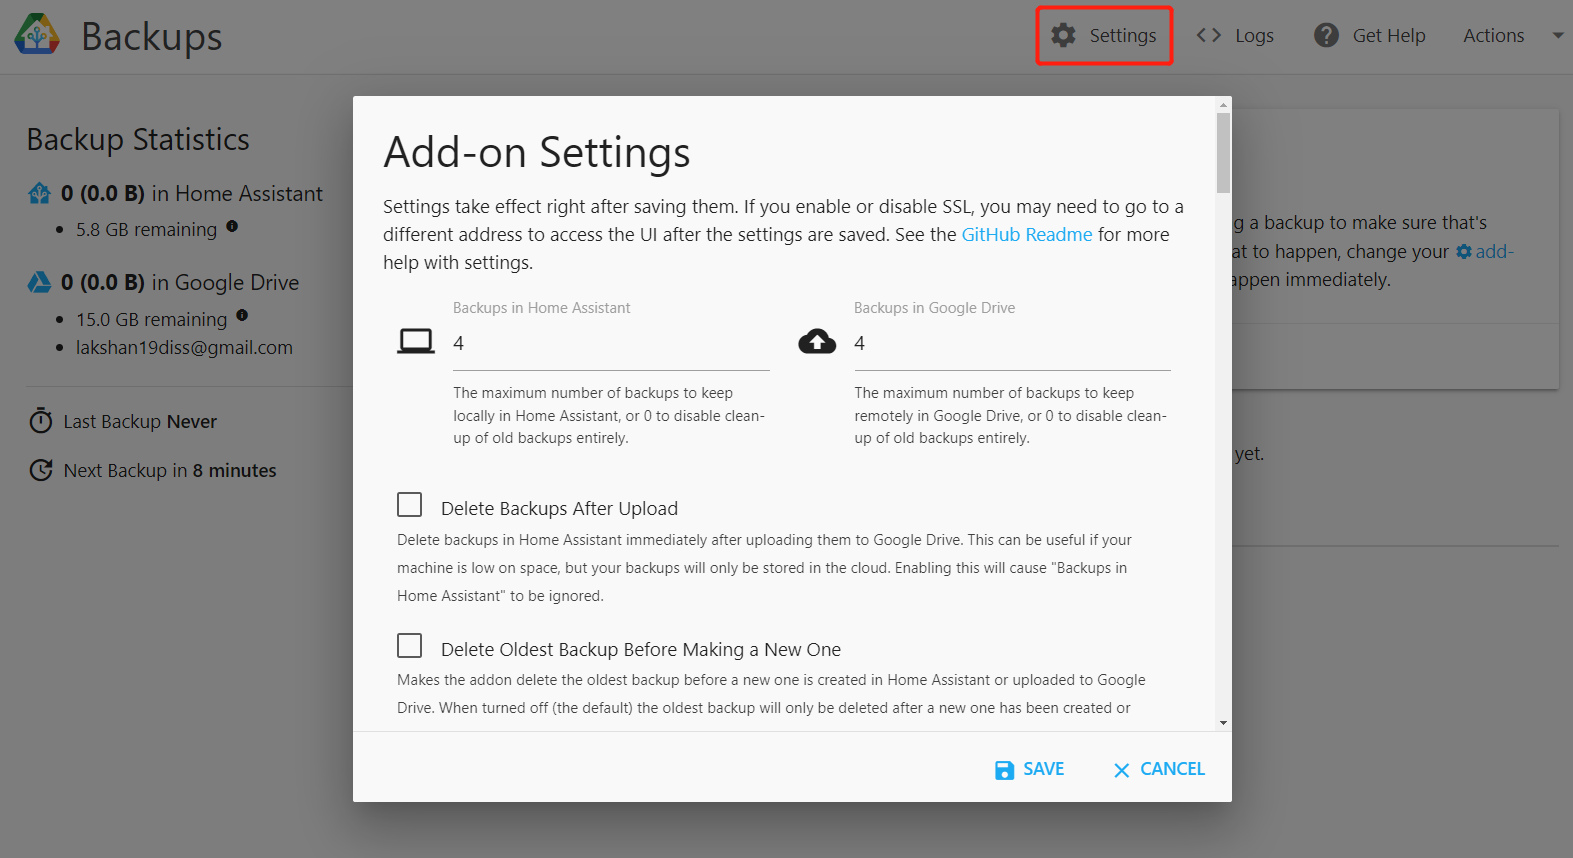
If you want to configure additional settings such as backup fequency, number of backups to keep, you can click Settings to enter the configuration page
Integrations
Now let's explore integrations on Home Assistant! Here we will show you how to setup the following integrations.
- Smart Light Control
- CCTV Camera Stream
You can also set up integrations such as Philips Hue, Shelly, Tuya, Sonos, Z-Wave, HomeKit, WLED and more.
- Step 1. Navigate to Settings > Devices & Services

- Step 2. Click + ADD INTEGRATION
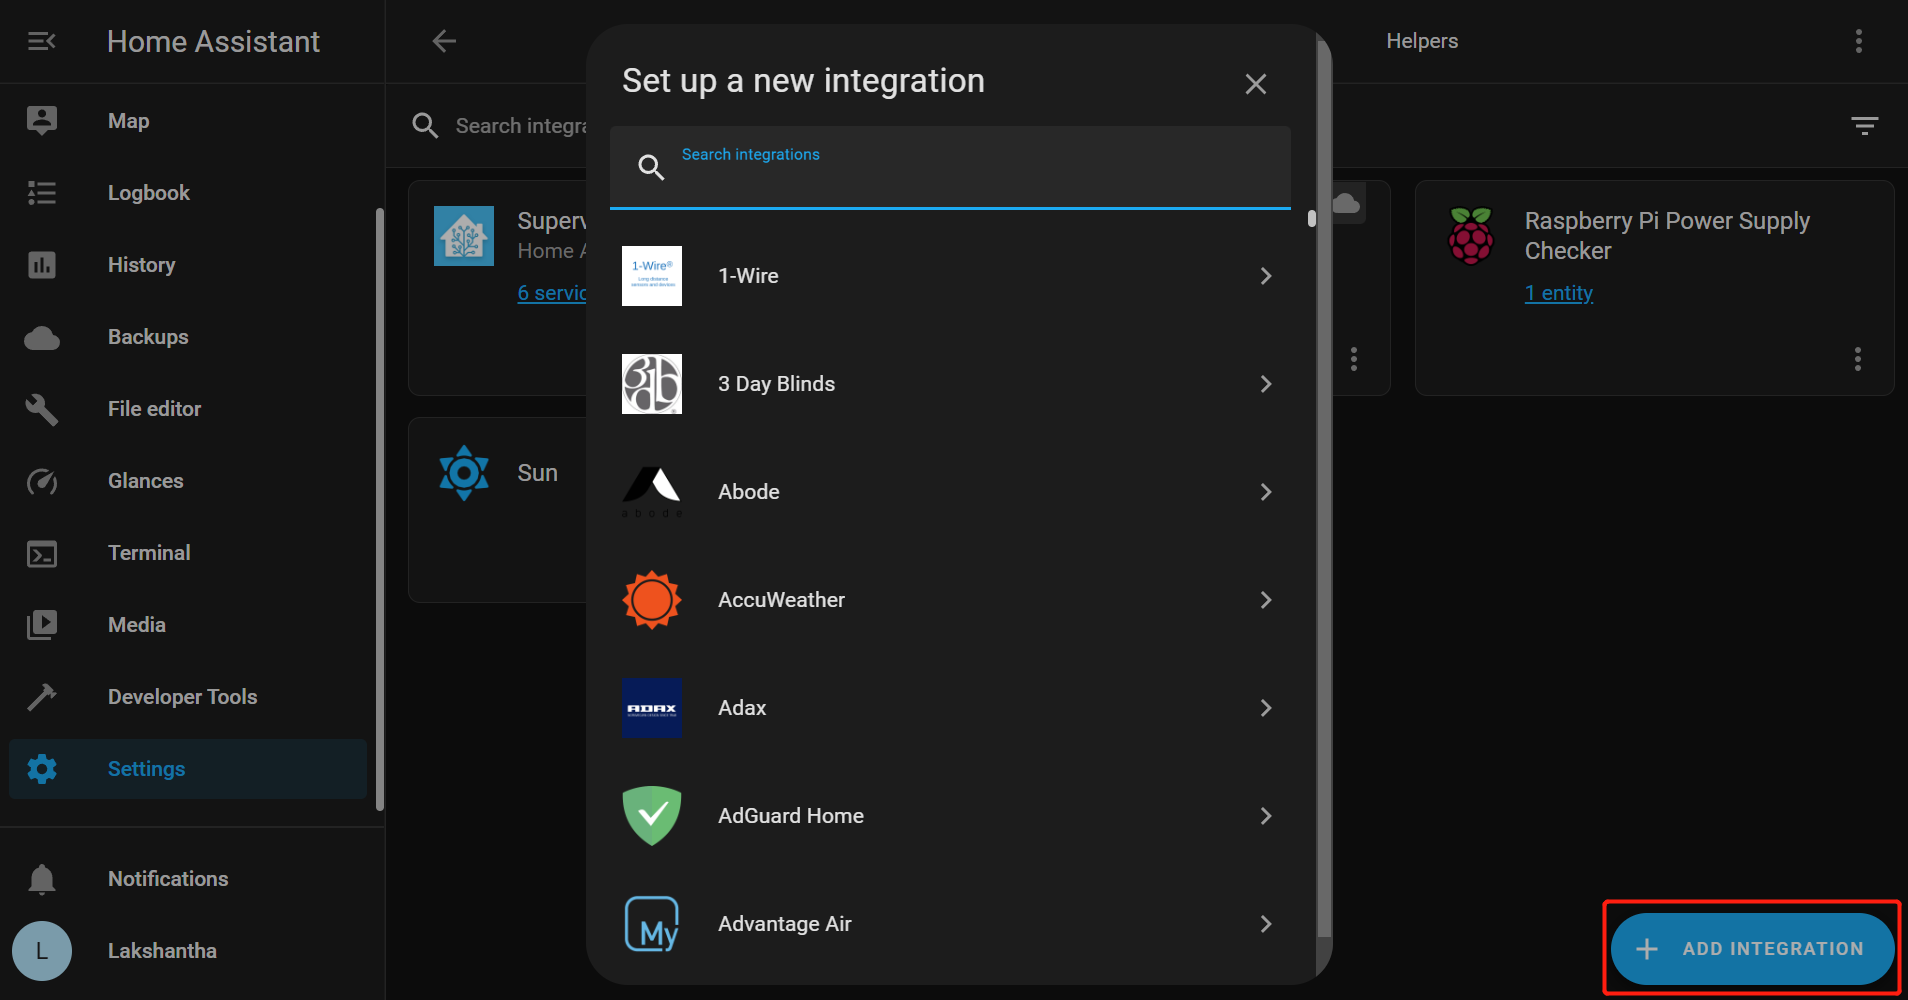
Here you will find a lot of integrations!
Smart light integration
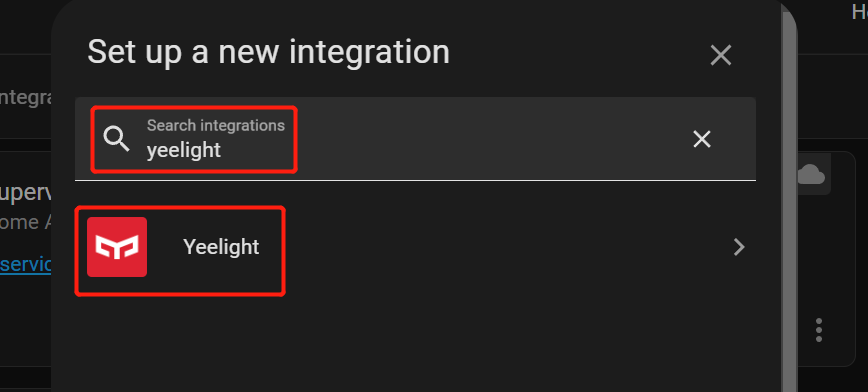
Let's add Xiaomi Smart Light integration so that we can turn ON/ OFF smart lights. Before proceeding, make sure you have access to a Xiaomi Smart Light. If you have a different smart light such as Philips Hue, you can add the Philips Hue integration and the steps will be almost similar.
- Step 1. Search Yeelight and select it
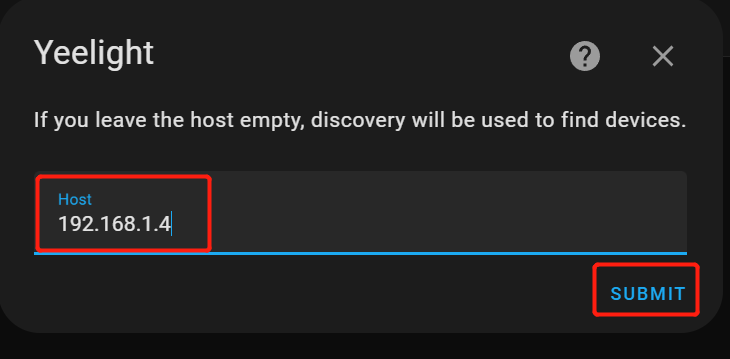
- Step 2. Type the IP address of the smart light and click SUBMIT
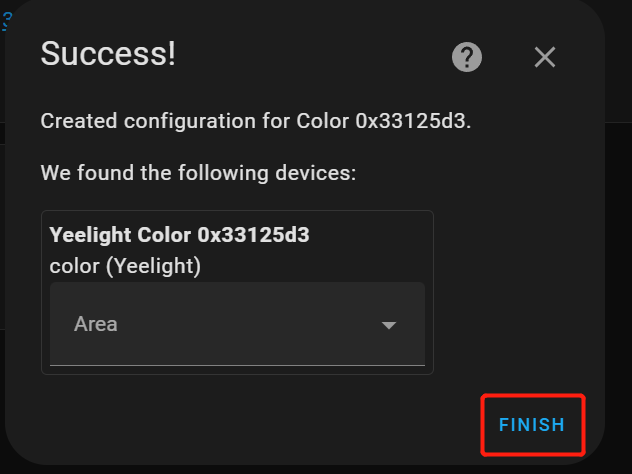
- Step 3. Click FINISH
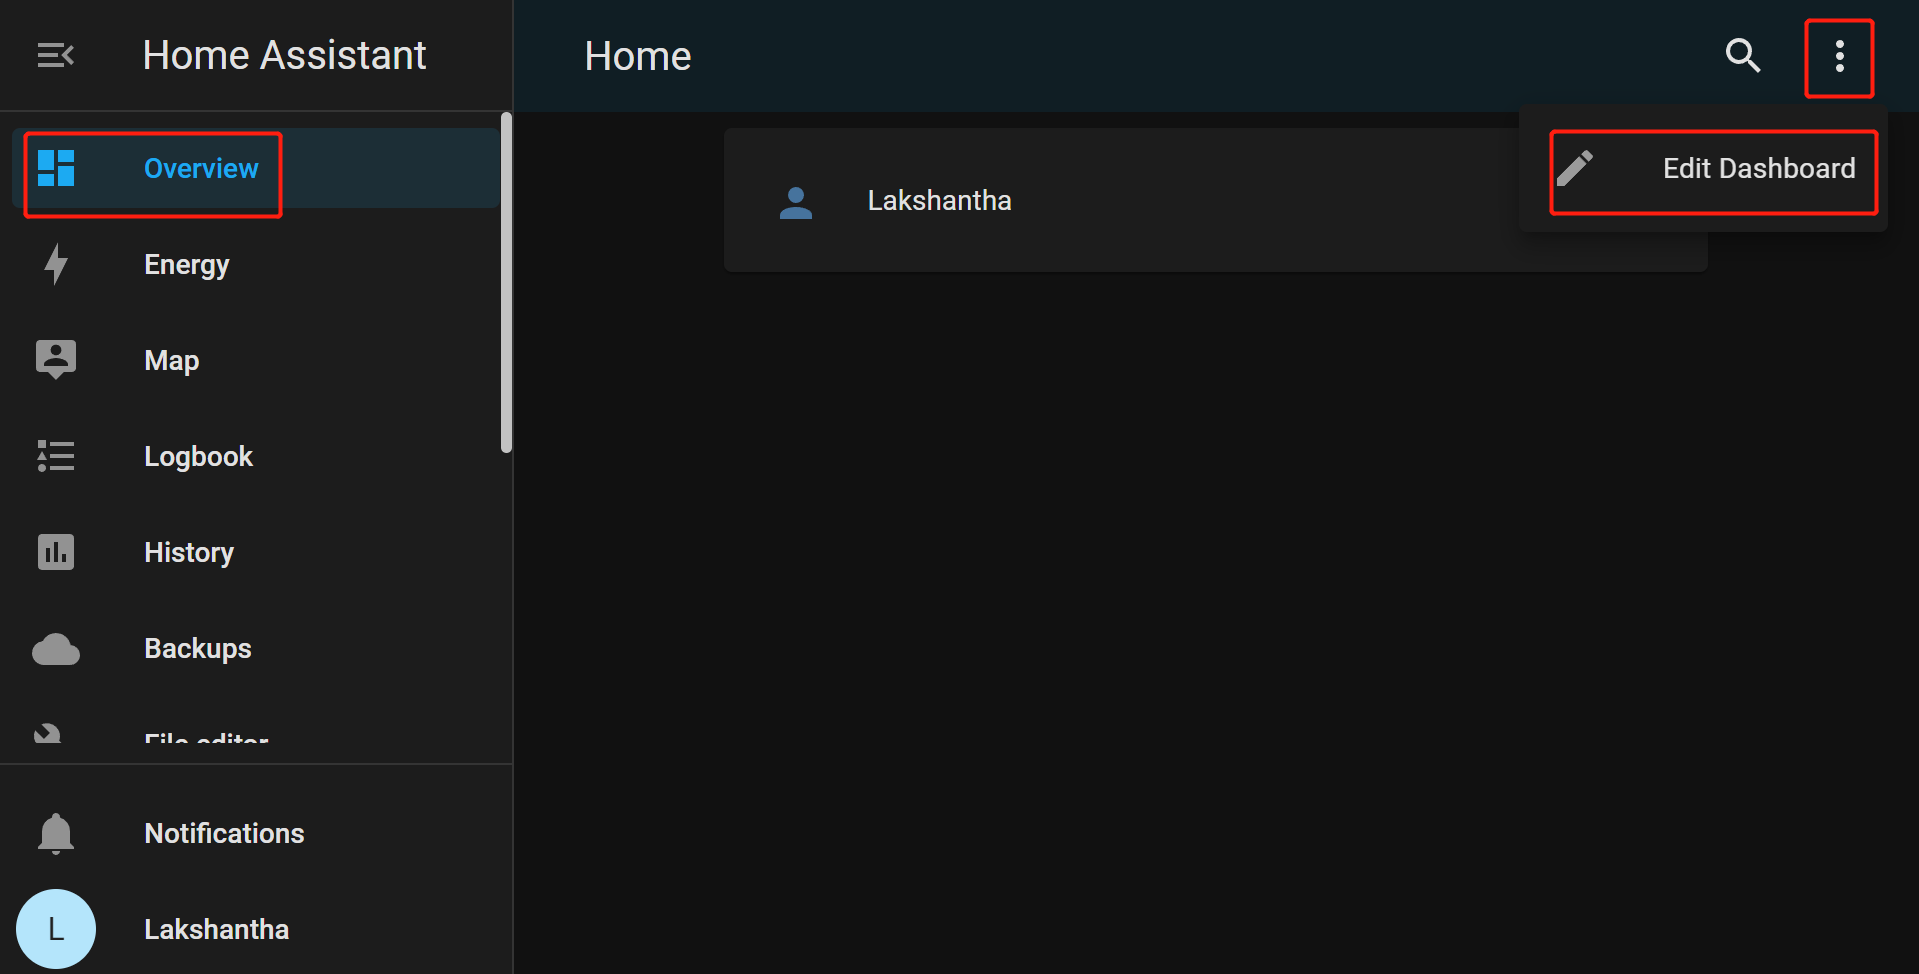
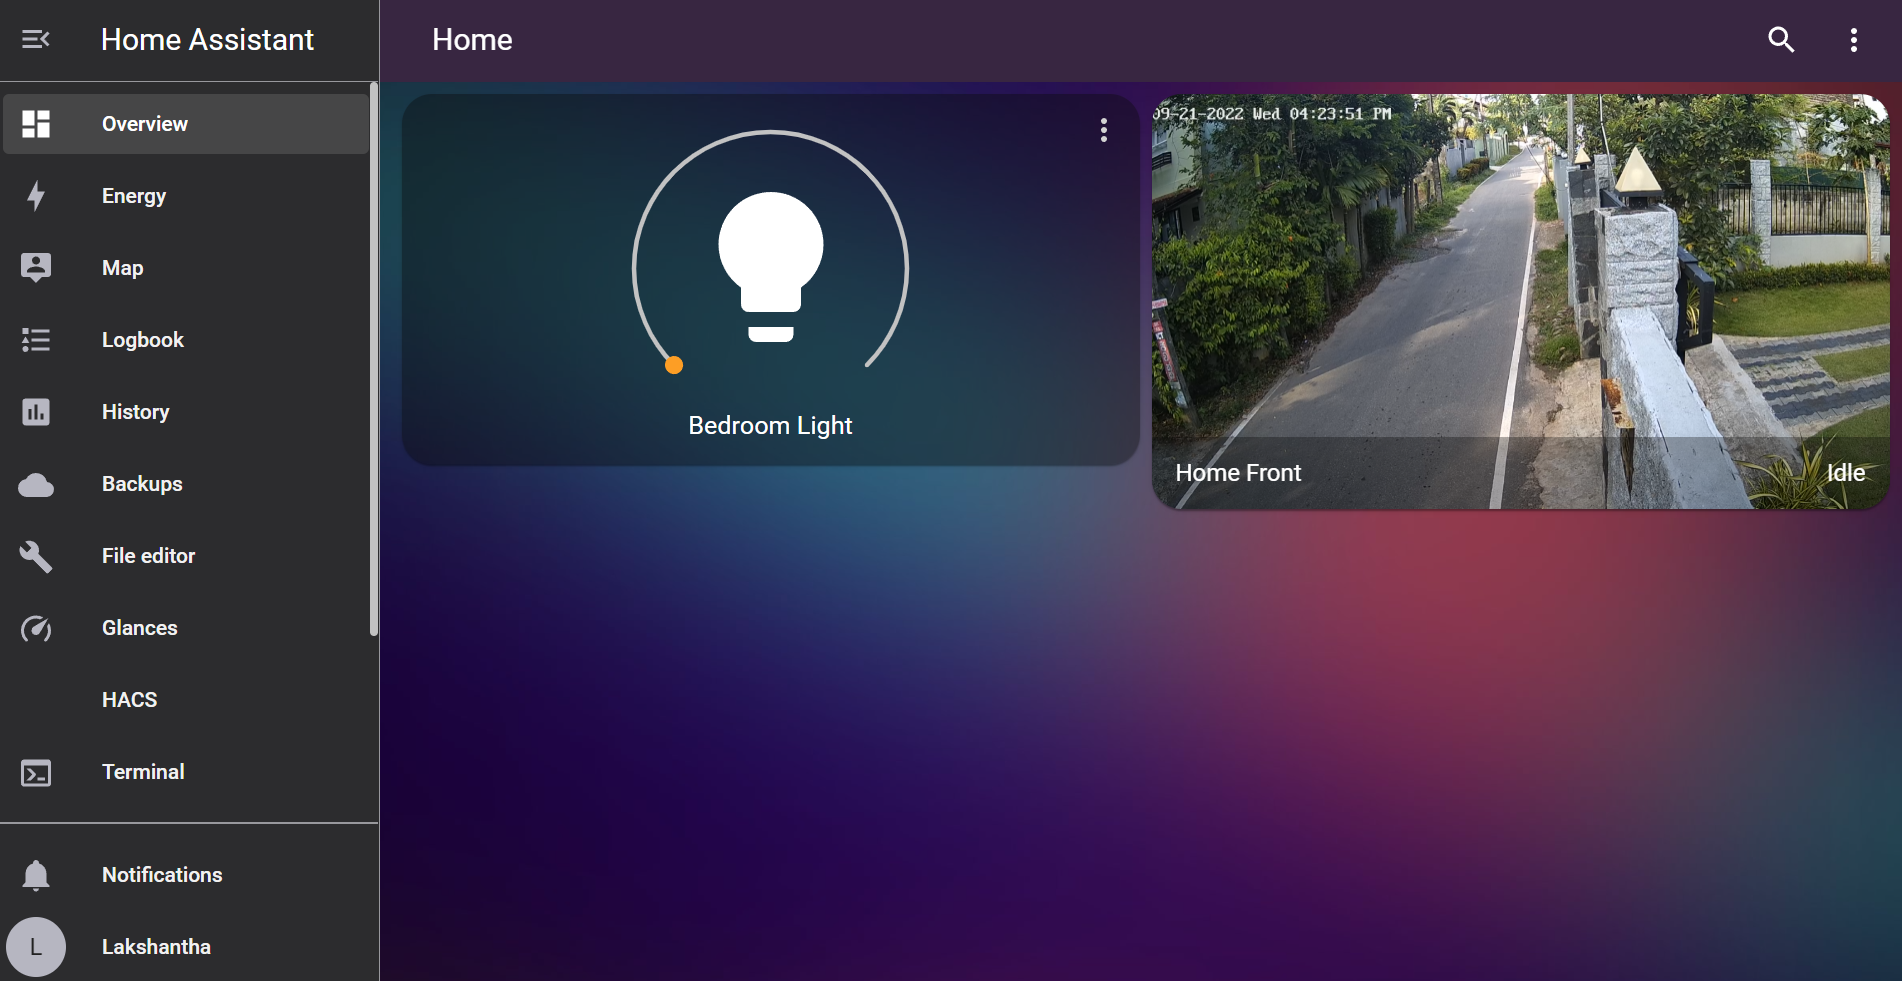
- Step 4. On the Overview page. click the 3-dots on the top left corner and click Edit Dashboard
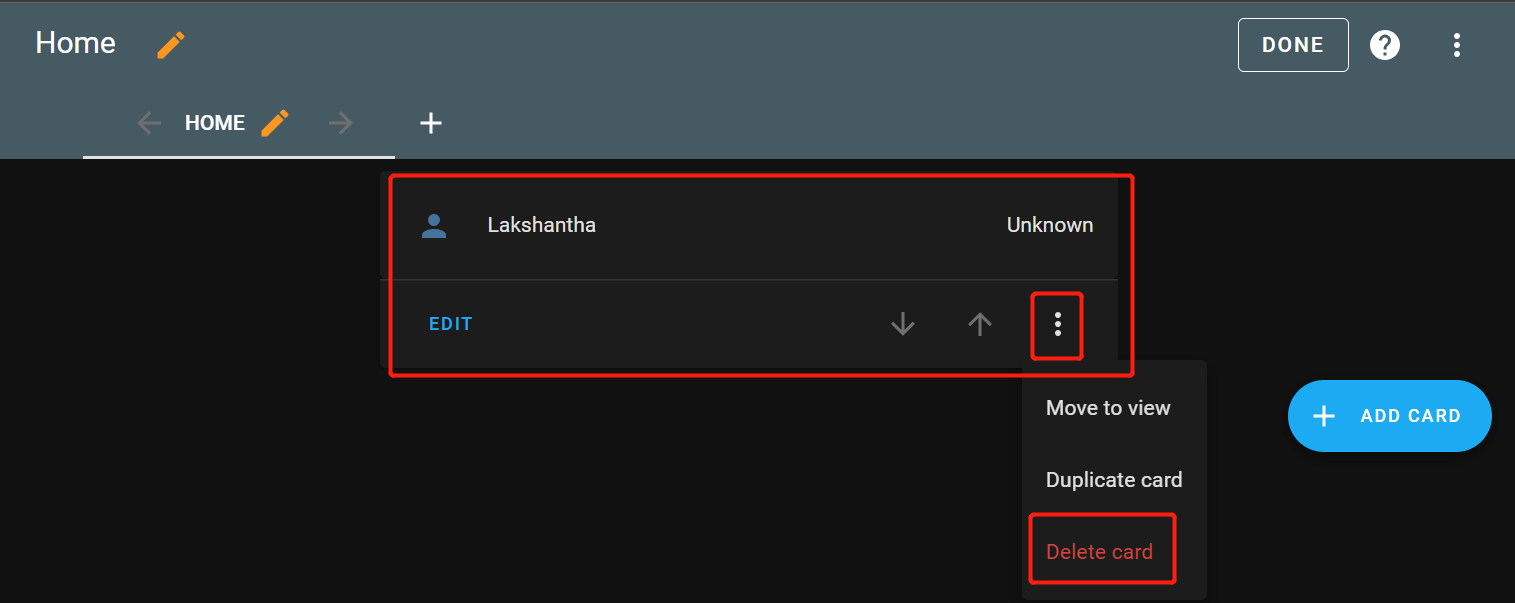
- Step 5. Here we do not need the card with the username. So delete it by clicking on the 3-dots and clicking Delete card
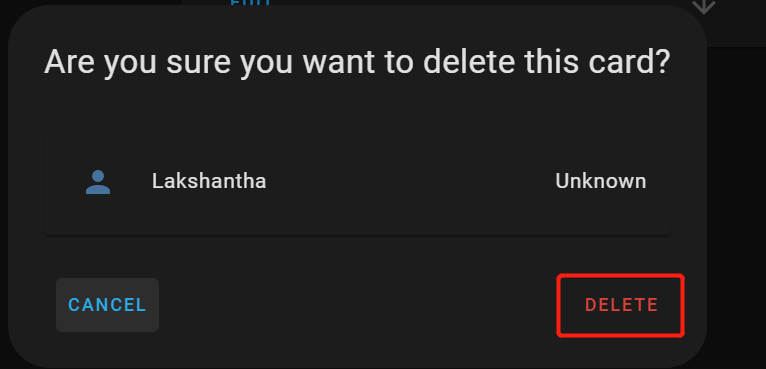
- Step 6. Confirm deletion
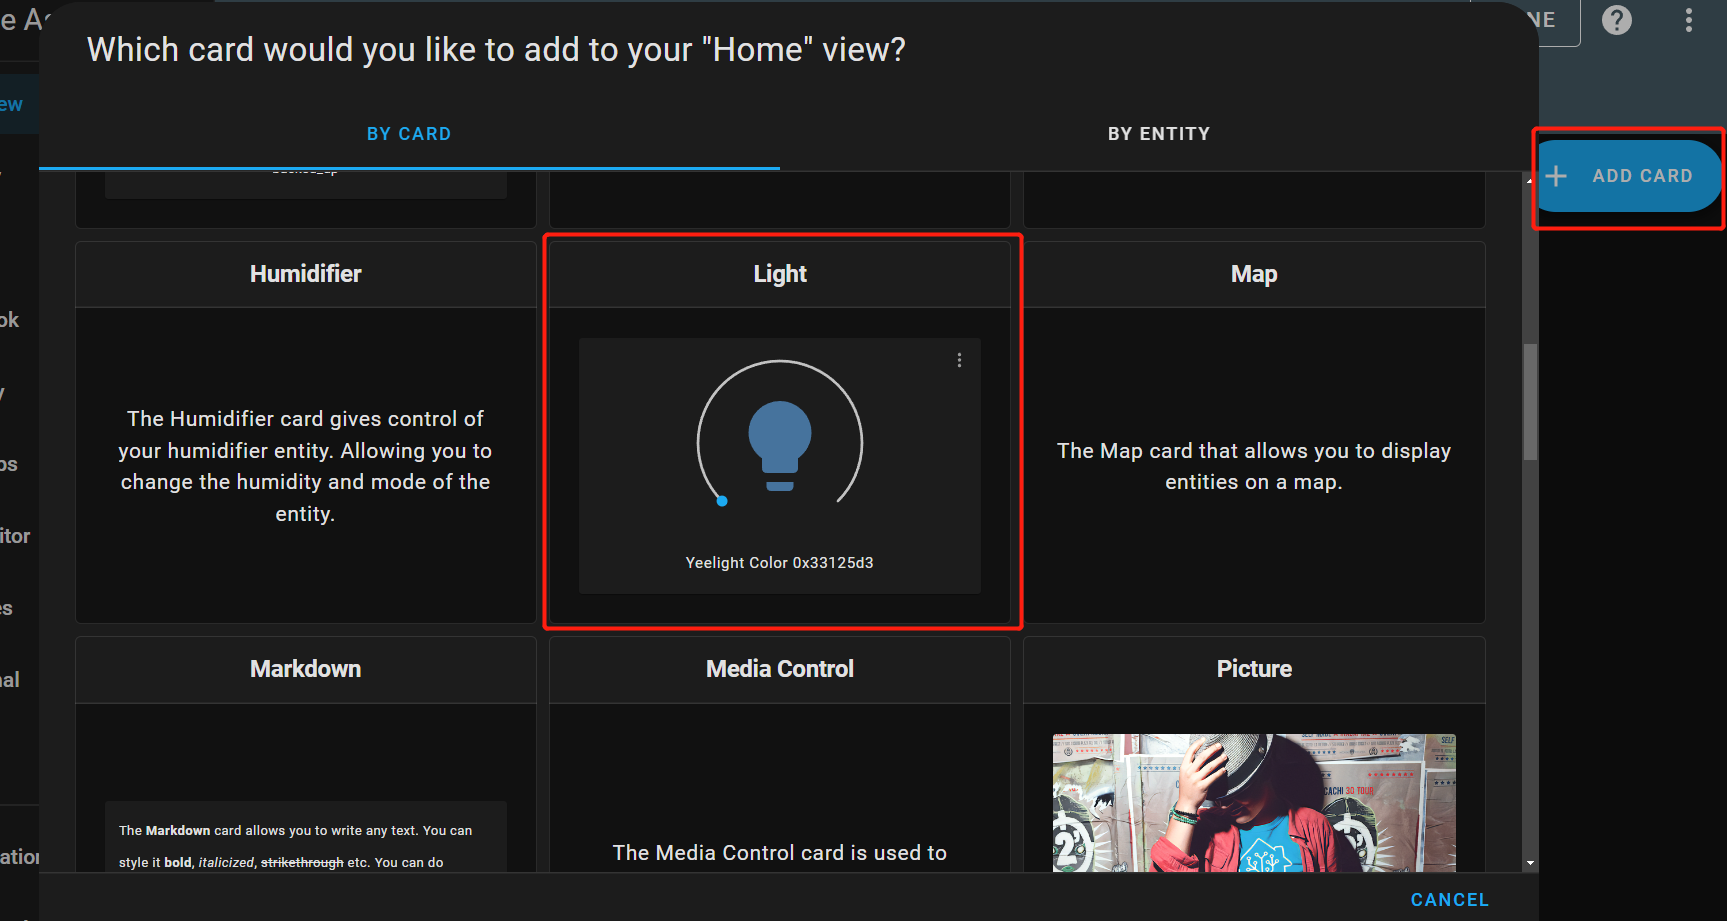
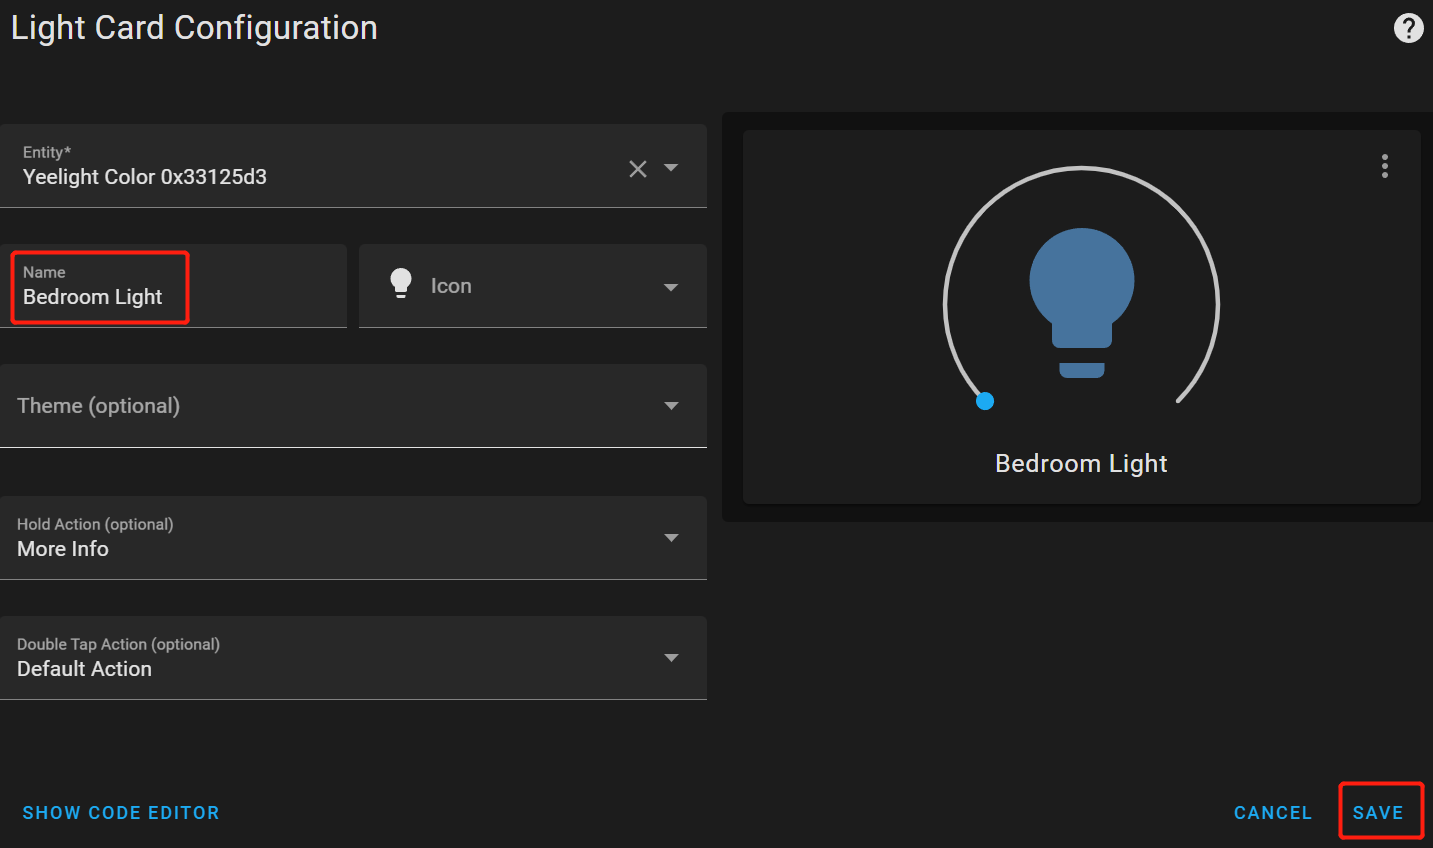
- Step 7. Click + ADD CARD and click on the Light card
- Step 8. Change the Name and click SAVE
- Step 9. Click DONE
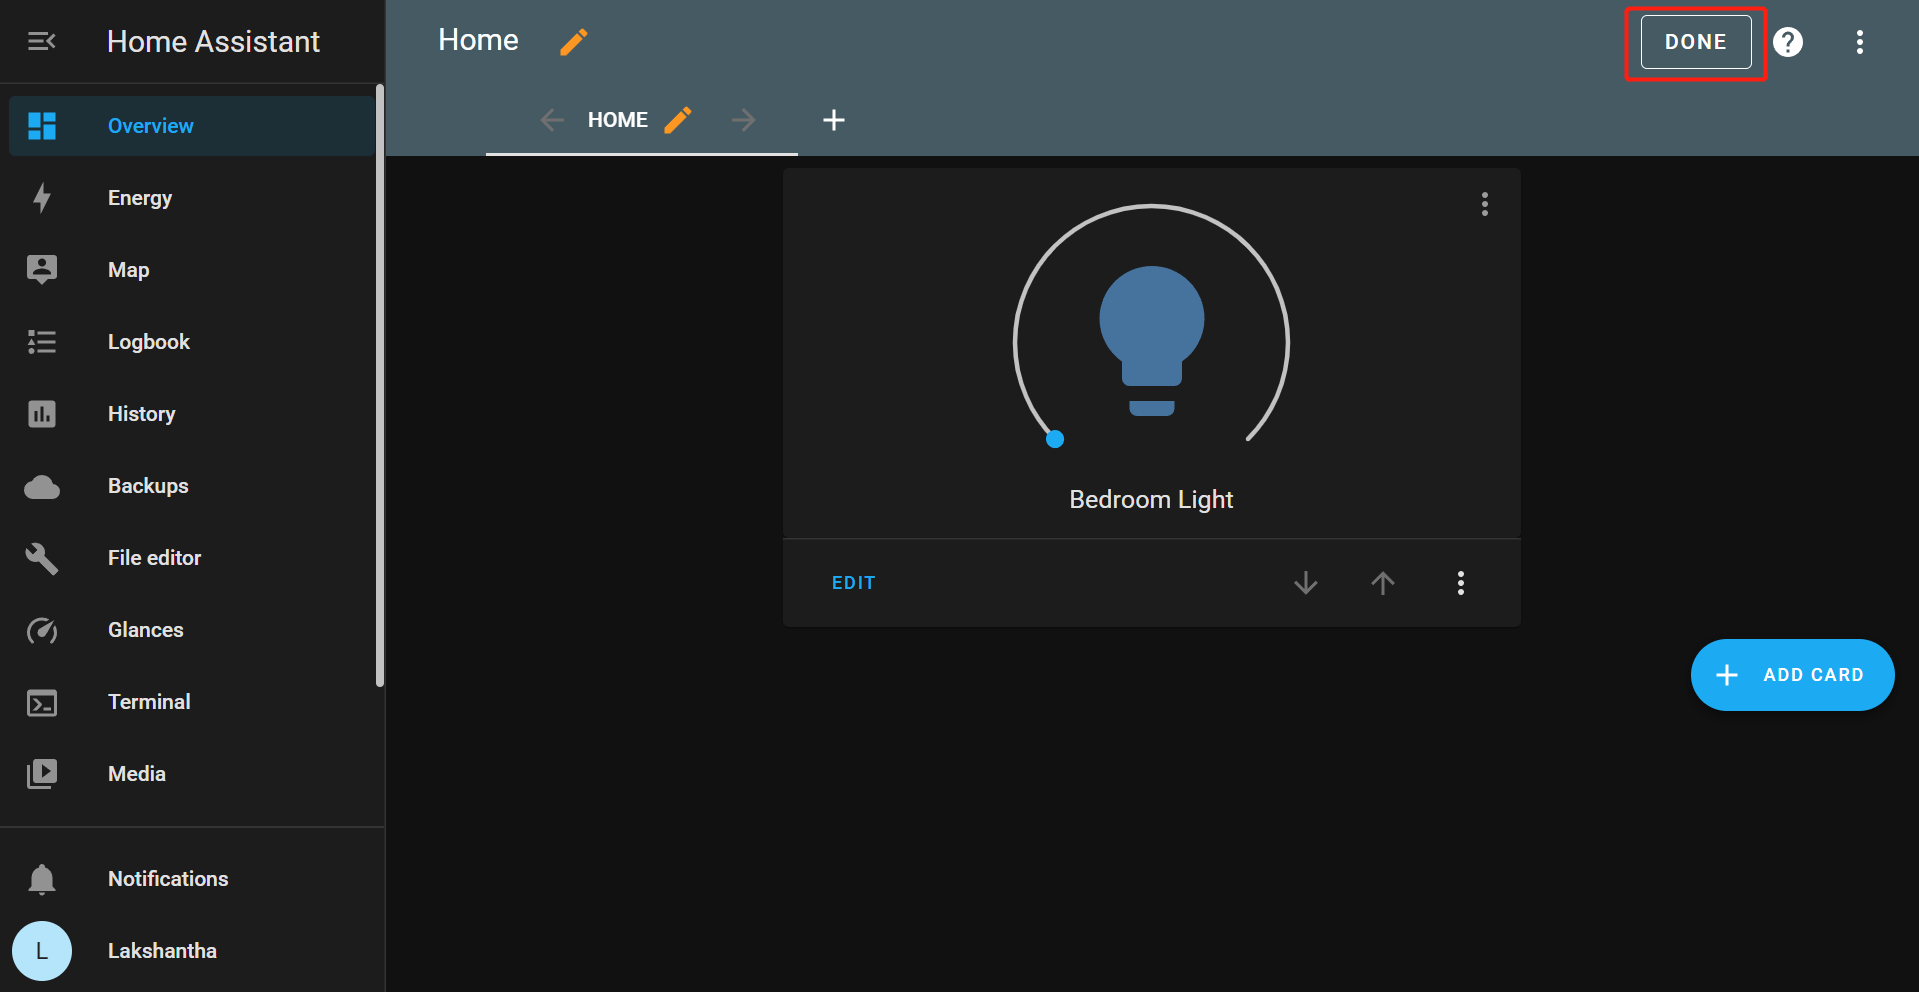
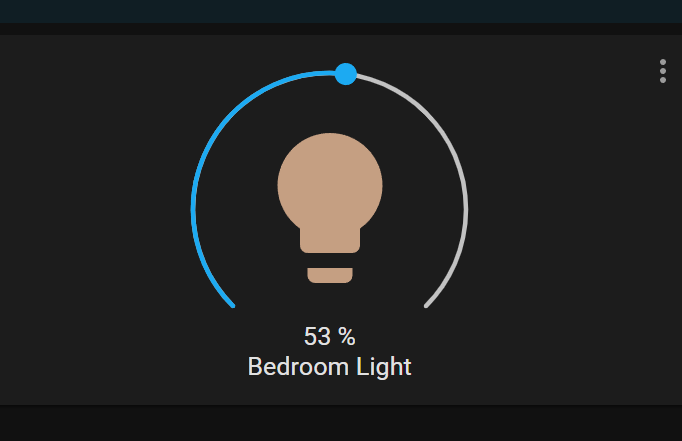
- Step 9. Now you can turn ON the light and control the brightness as well
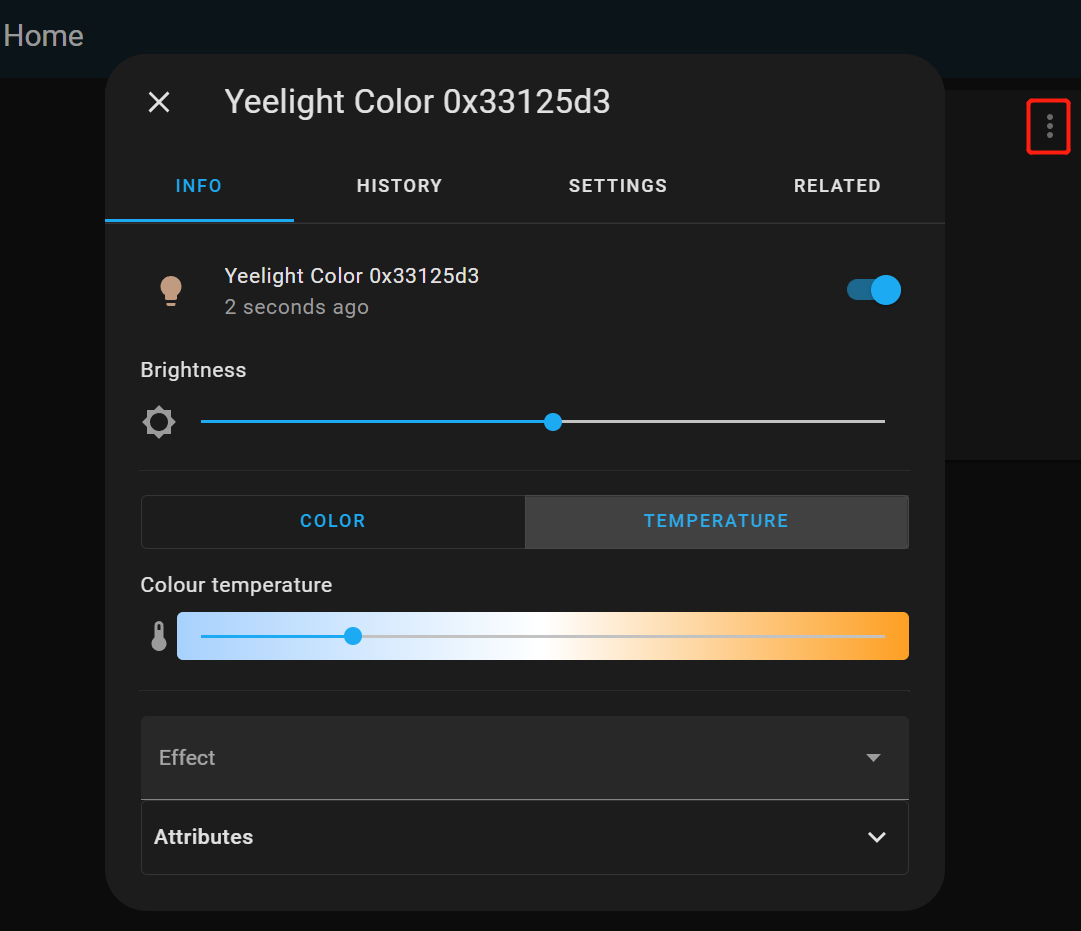
- Step 10. If you click on the 3-dots, you can have more control of the light such as the ability to change color and color temperature.
CCTV IP camera integration
Here we will add a camera integration so that we will be able to view the real-time video stream from a CCTV caemra via RTSP protocol! Before proceeding, make sure you have access to a CCTV camera with the IP function and the ability to stream via RTSP.
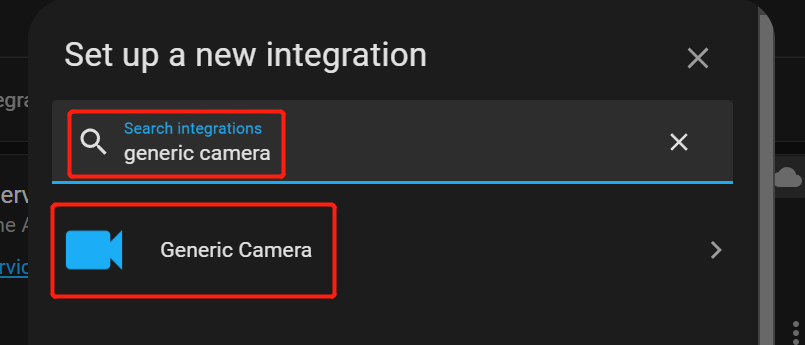
- Step 1. On the Integrations page, under Set up a new integration, search generic camera and select it.
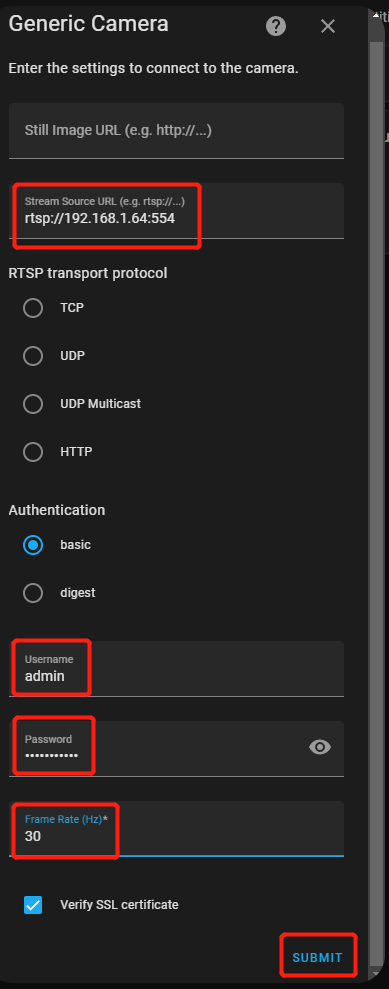
- Step 2. Add the RTSP stream URL, enter username, password if required, change the framerate and click SUBMIT
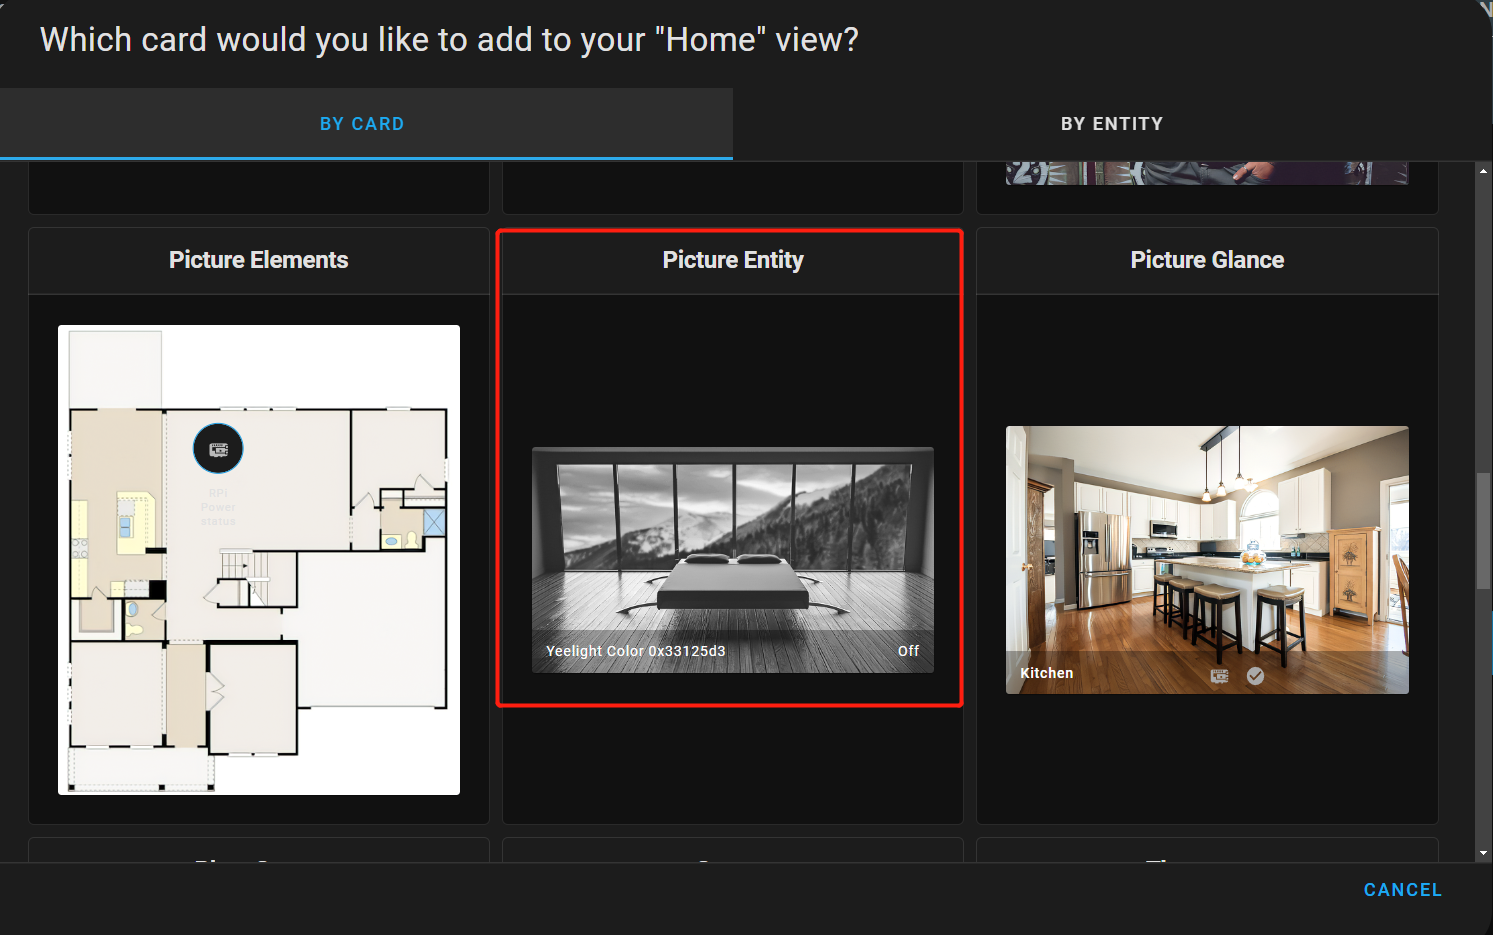
- Step 3. On the Overview page, go into + ADD CARD page as before and click on Picture Entity card
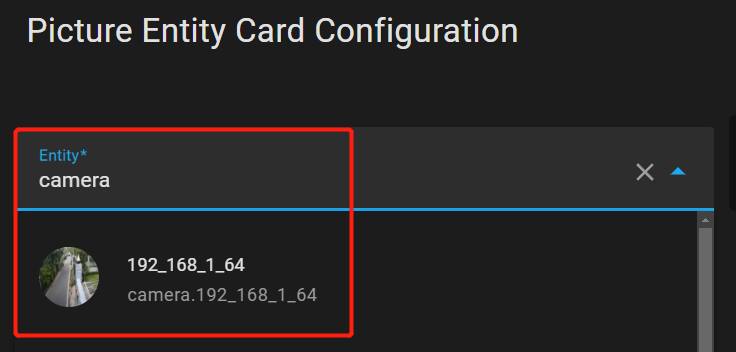
- Step 4. Type camera under Entity and you will see the camera that we set up before. Click on it.
- Step 5. Change Name, change Camera View to live and click SAVE
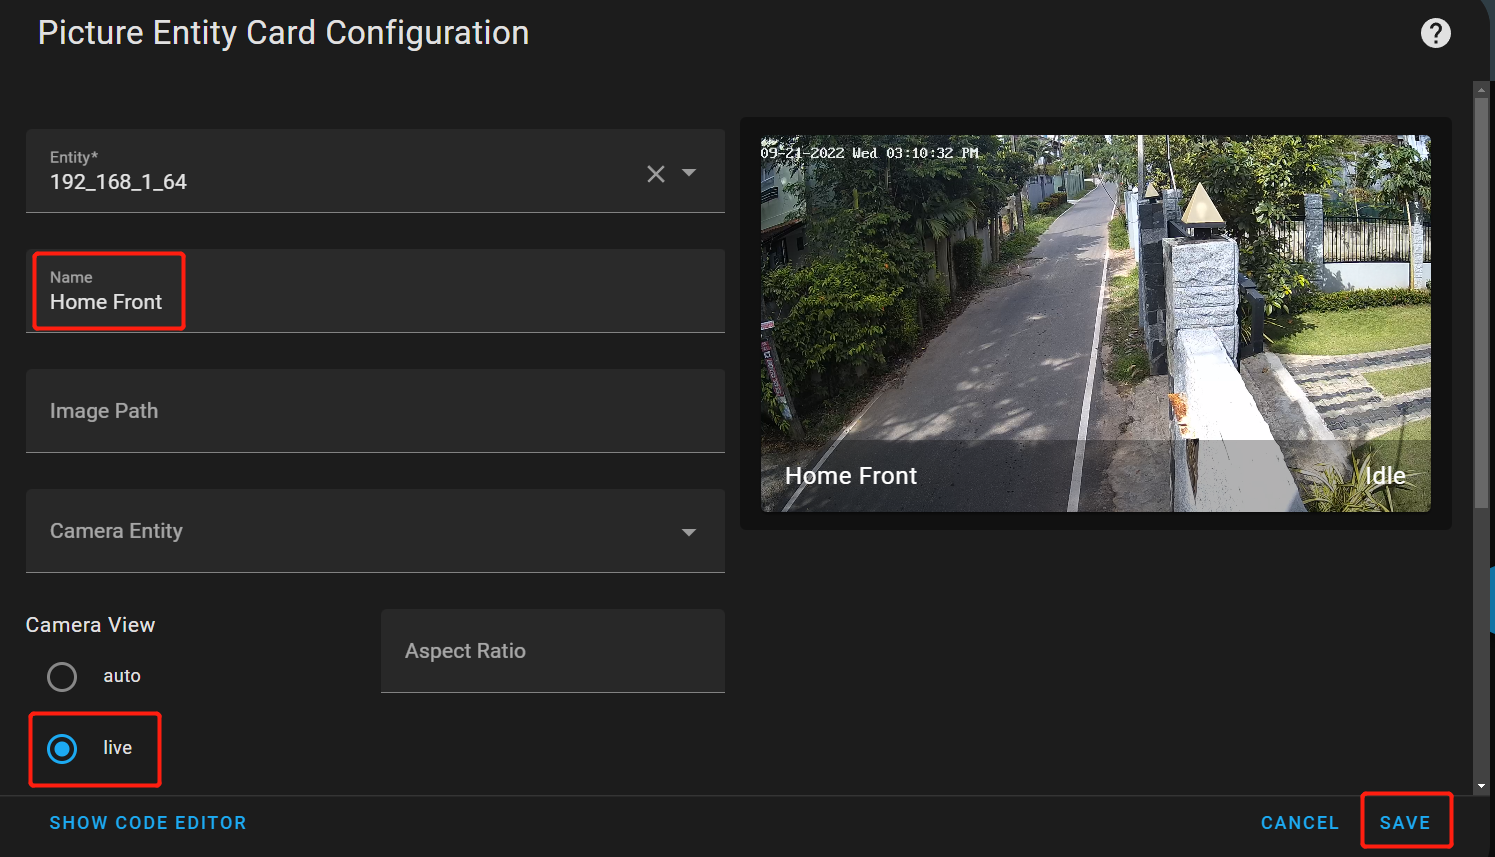
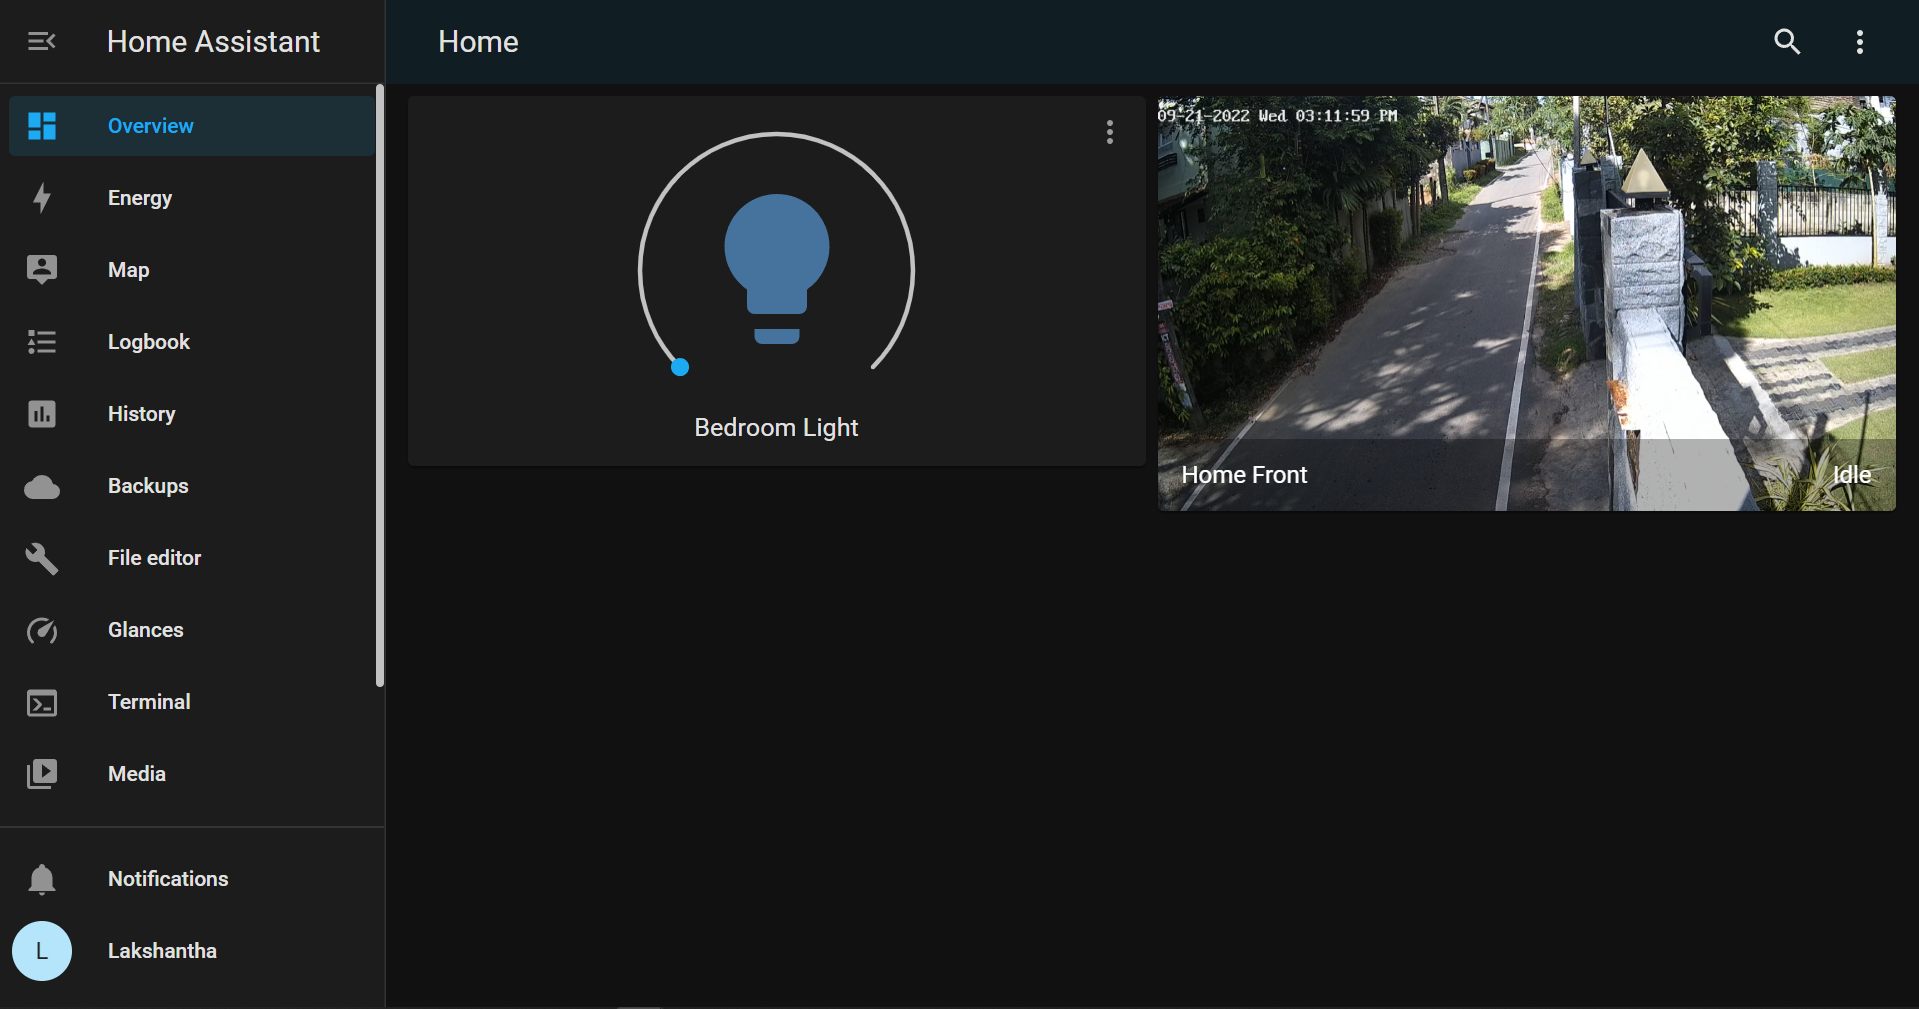
Now you will see the live video stream on the dashboard!
HACS (Home Assistant Community Store)
Now let's explore HACS on Home Assistant! HACS provides a number of integrations and front-end customization options. Here we will show you how to setup the following
- Change Home Assistant theme
- Add Weather card to dashboard
Installing HACS
- Step 1. Open Terminal & SSH add-on that we installed before
- Step 2. Type the following command inside the terminal window to install HACS
wget -O - https://get.hacs.xyz | bash -
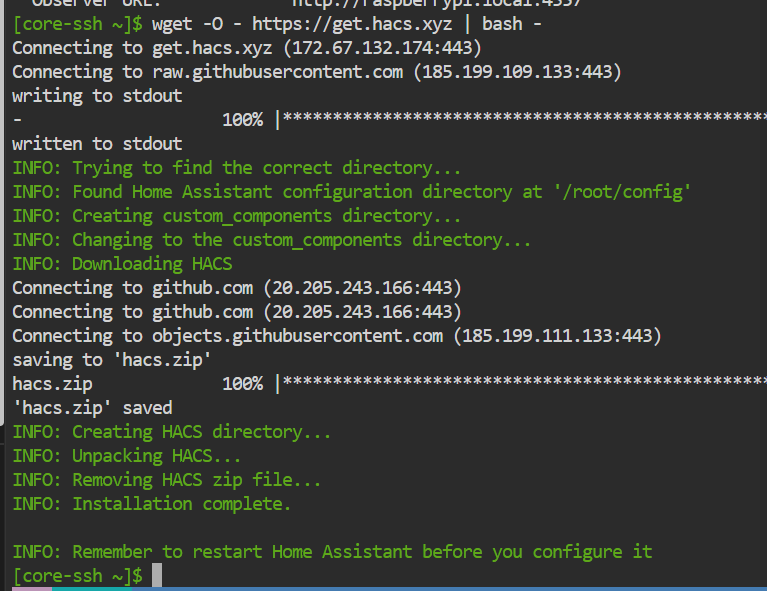
- Step 3. Once HACS installation is finished, reatart Home Assistant with the following command
ha ha restart
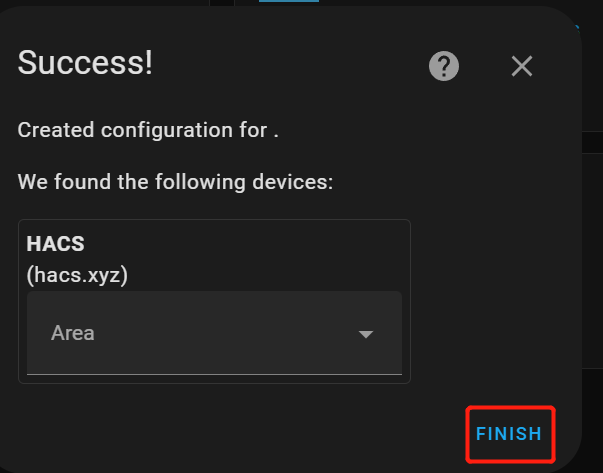
- Step 4. On the Integrations page, under Set up a new integration, search HACS and select it.

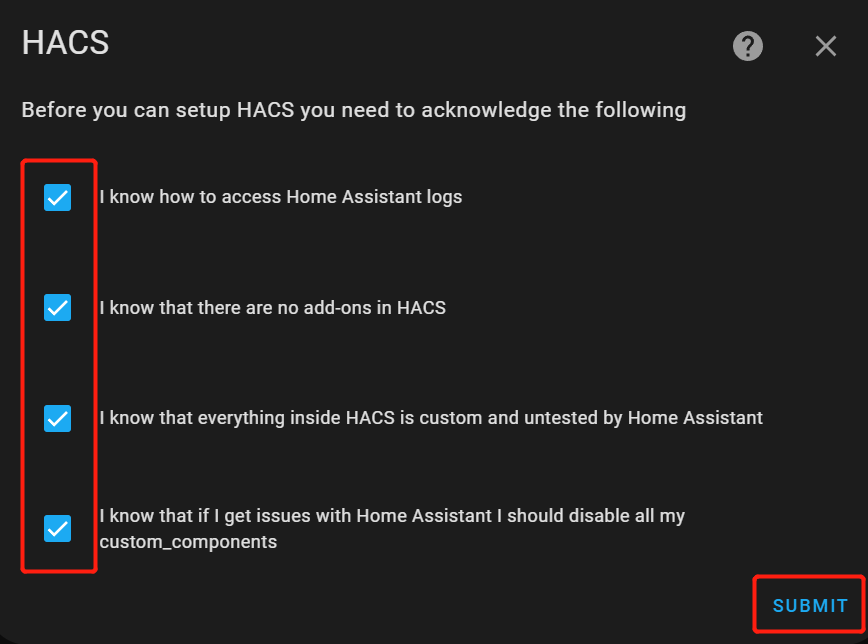
- Step 5. Select all options to agree with everything and click SUBMIT
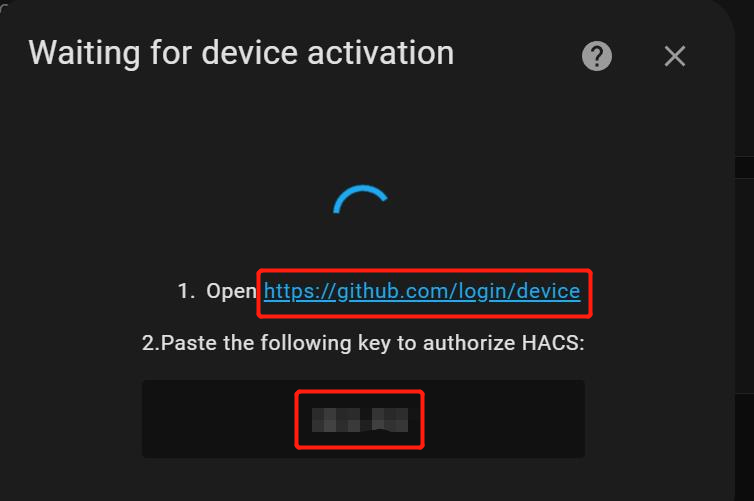
- Step 6. Copy the authorization code and then click the link to sign into GitHub.
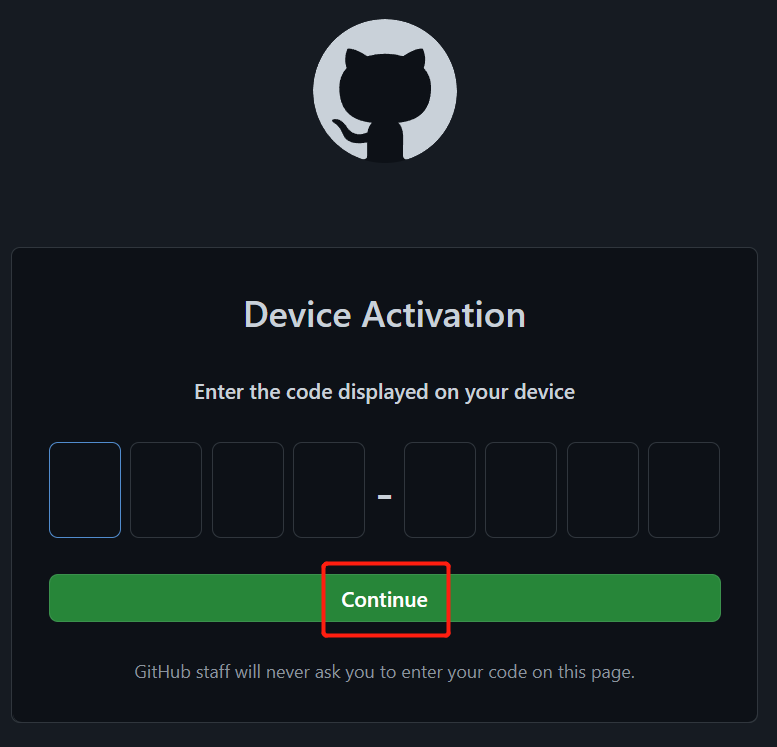
- Step 7. Sign in to GitHub, paste the copied code and click Continue
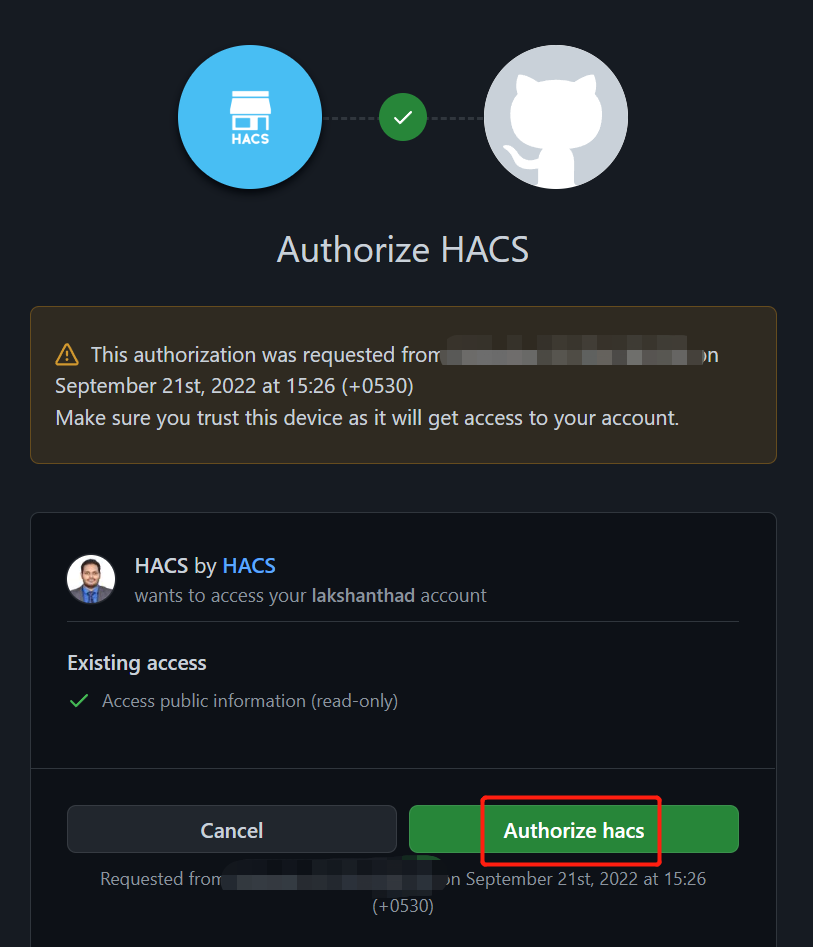
- Step 8. Click Authorize HACS
- Step 9. Click FINISH
HACS is now installed!
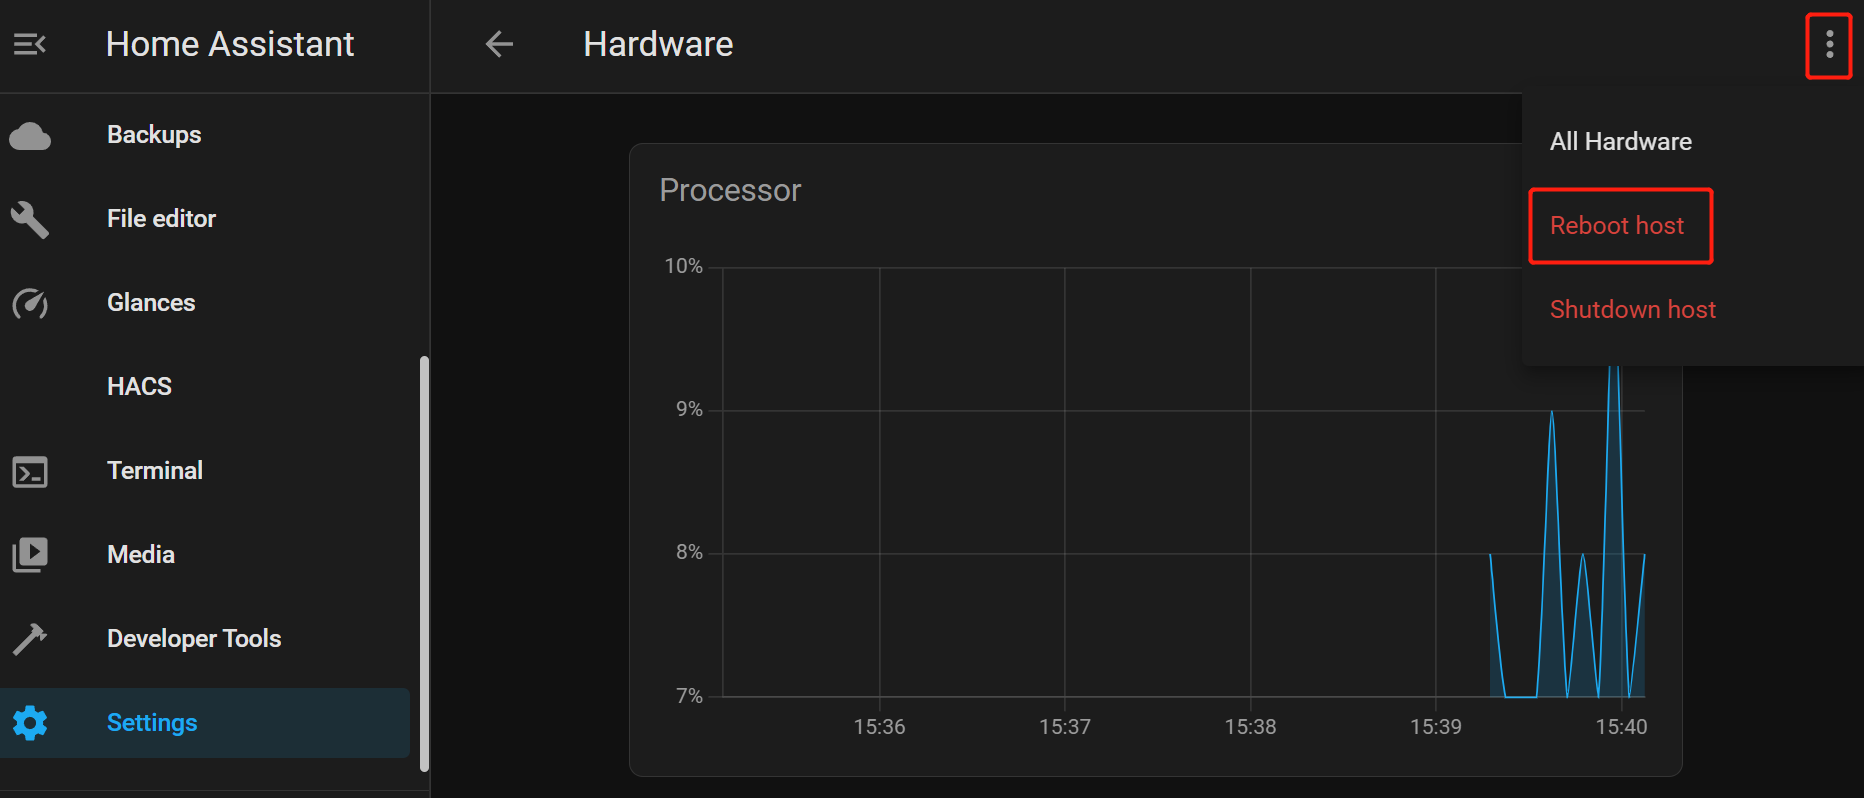
- Step 10. It's better to reboot the system now by navigating to Settings > System > Hardware, click the 3-dots on top right corner and click Reboot Host
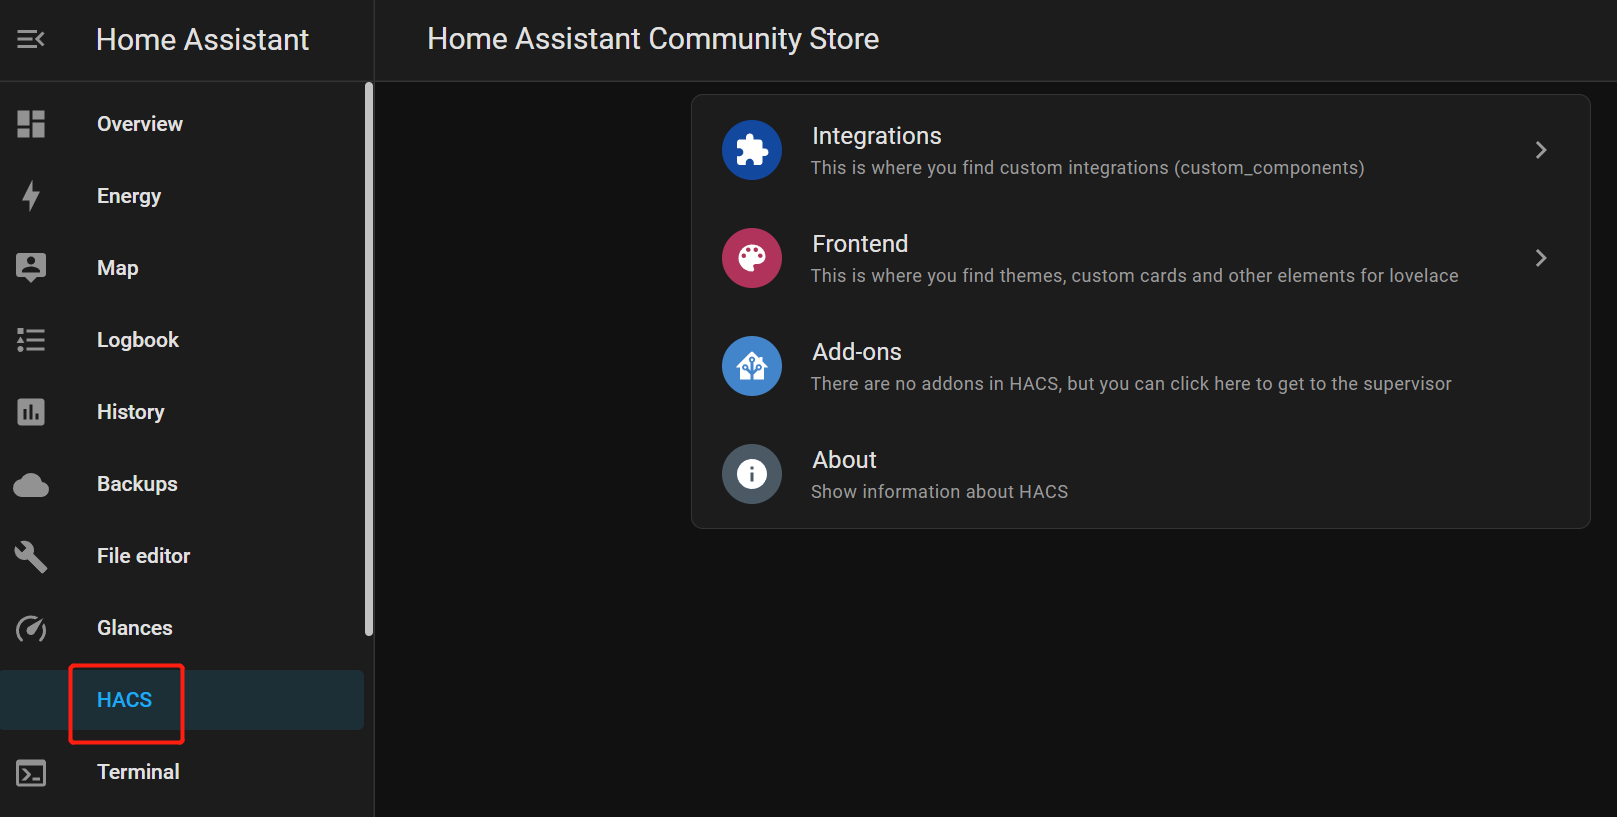
- Step 11. After the system is rebooted, you will see HACS on the left navigation pane
Change Home Assistant theme
Now let's change the default theme using HACS! Out-of-the-box, Home Assistant will only come with a single Dark-mode theme. However, if you want to customize this, you need to follow the steps below
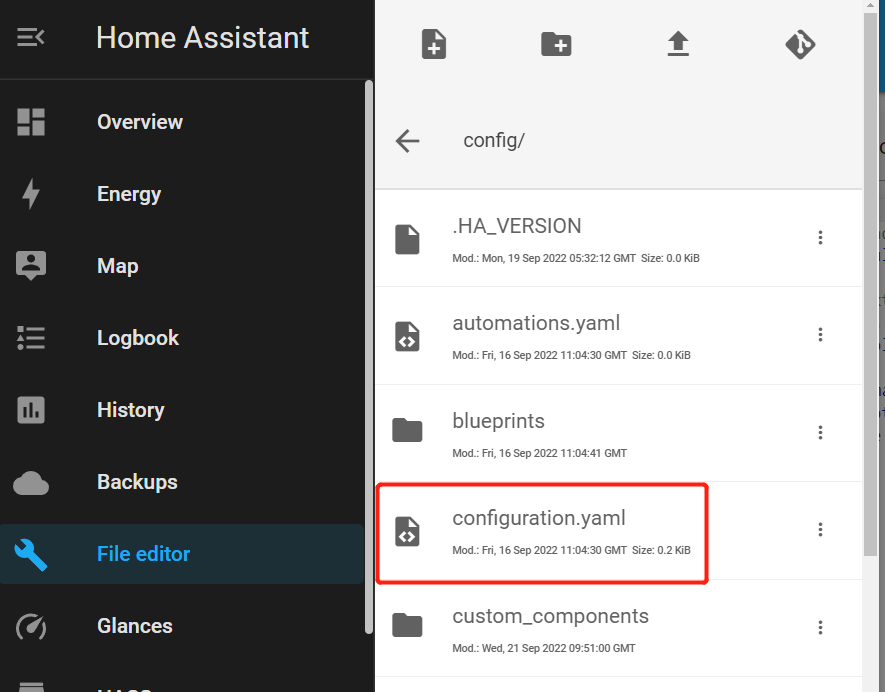
- Step 1. Before installing a custom theme, we need to add some codes into configuration.yaml file. Open File editor and click on the Folder icon to browse the file system
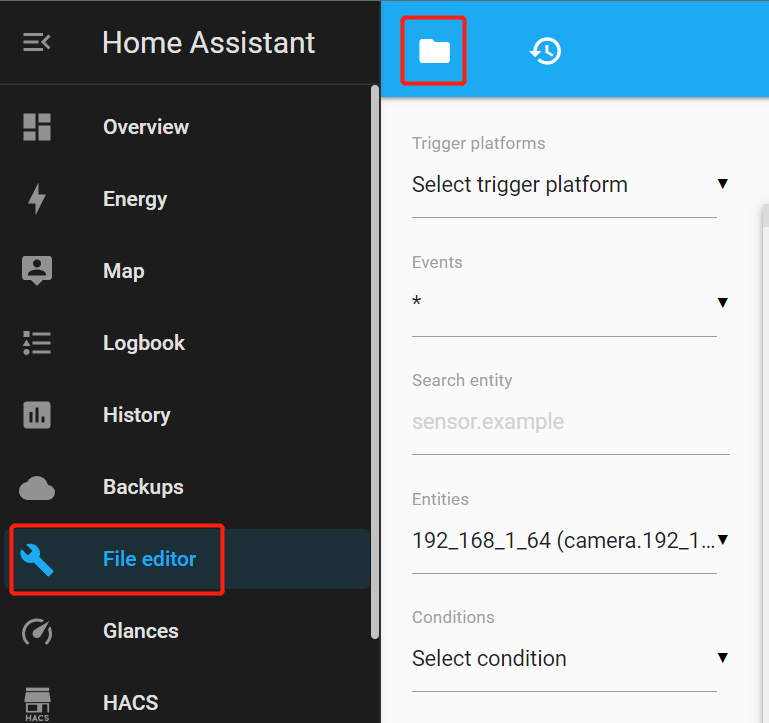
- Step 2. Click on configuration.yaml
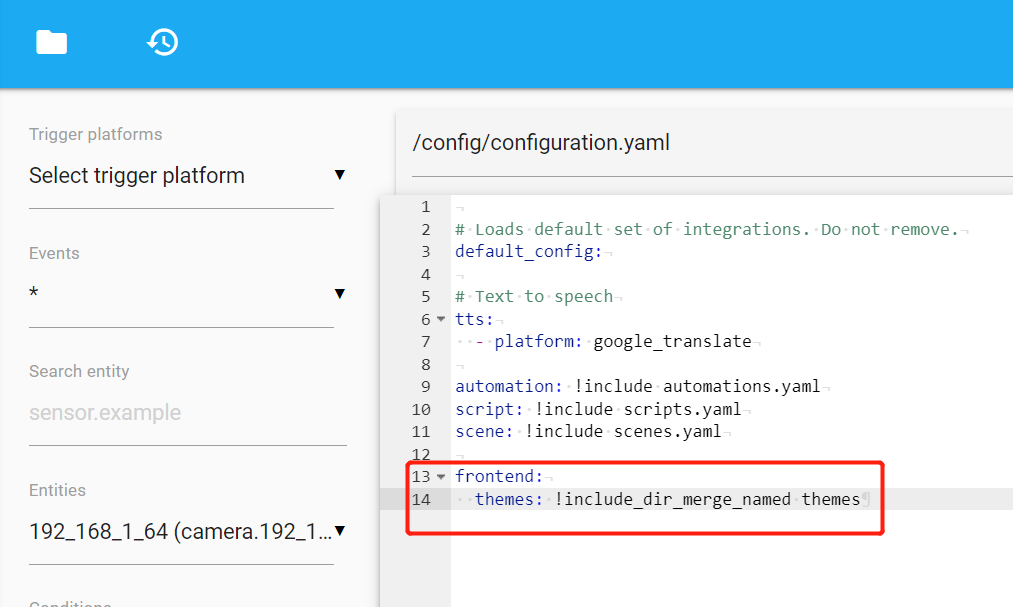
- Step 3. Add the following at the end of this file
frontend:
  themes: !include_dir_merge_named themes
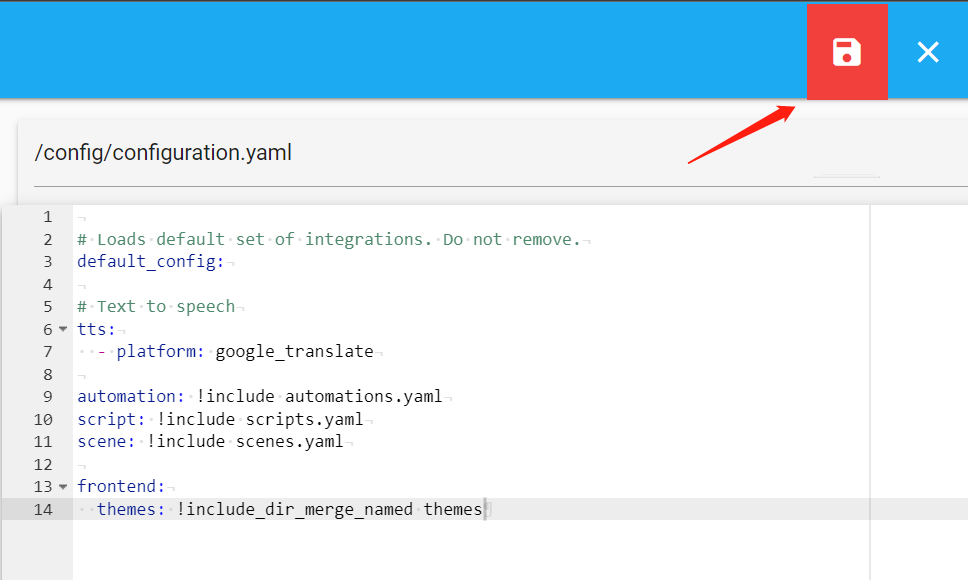
- Step 4. Click the save button
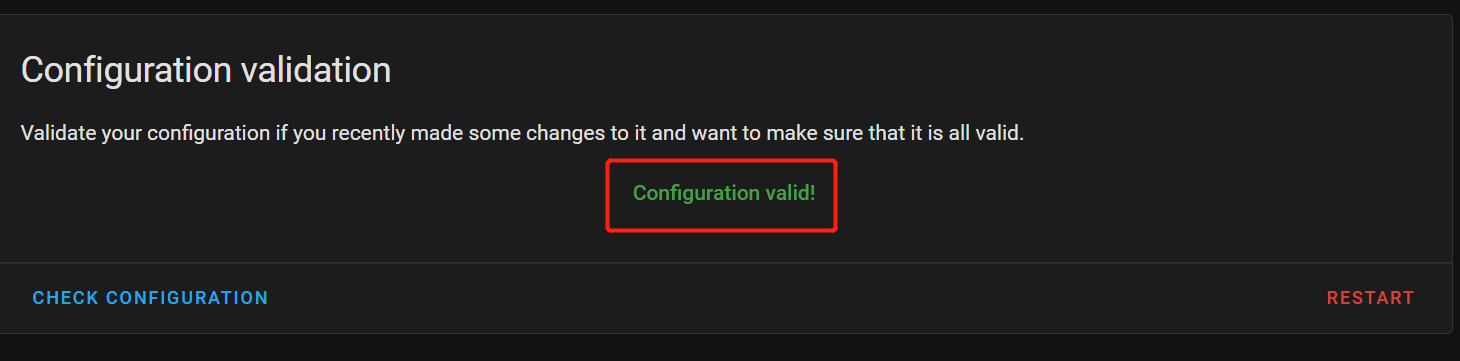
- Step 5. It is best practice to check whether the configuration we made is valid. Otherwise, Home Assistant will fail to boot next time. Go to Developer Tools and click CHECK CONFIGURATION
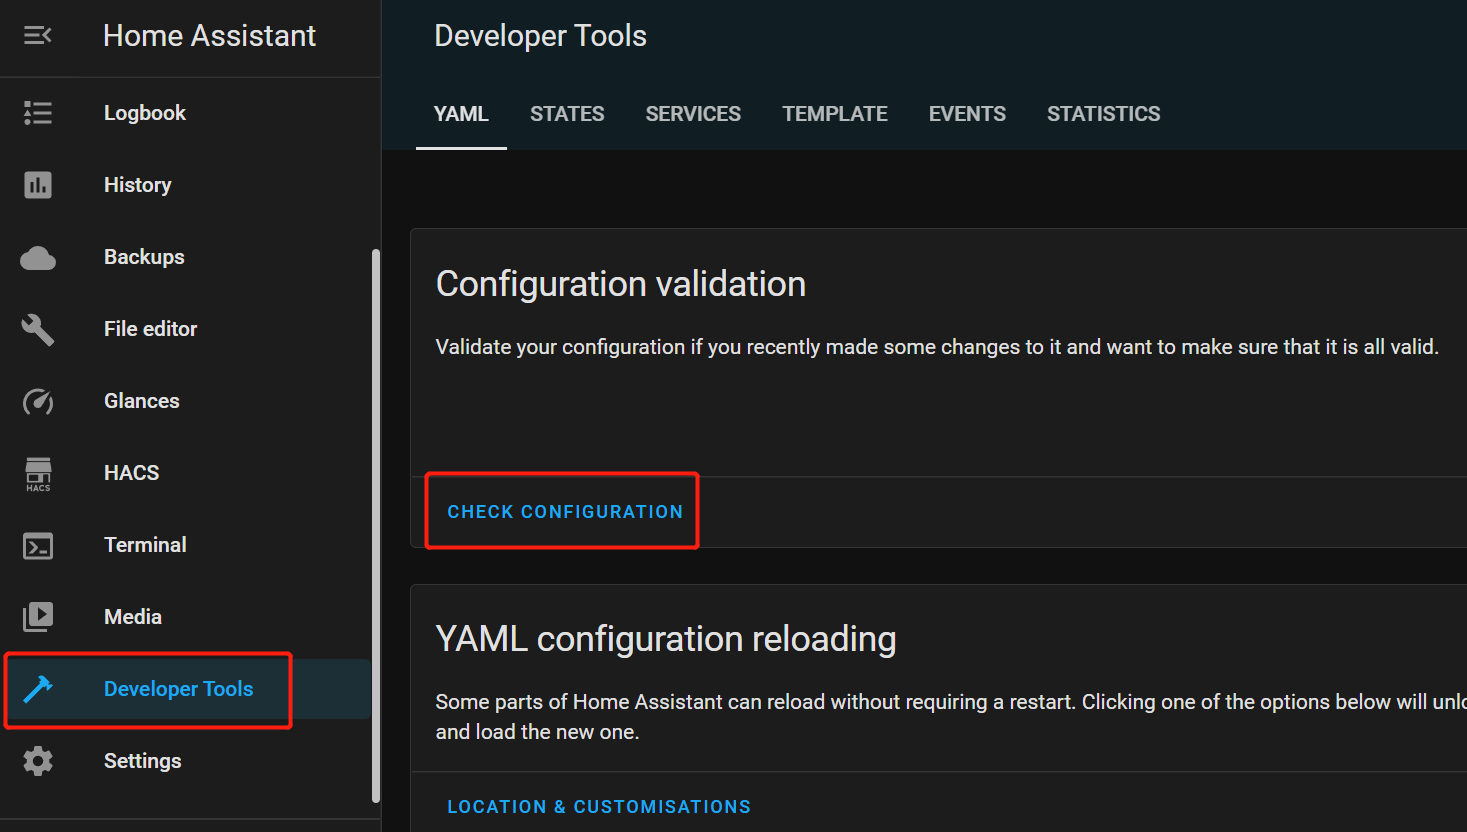
If you see the message Configuration valid!, then eveything is good!
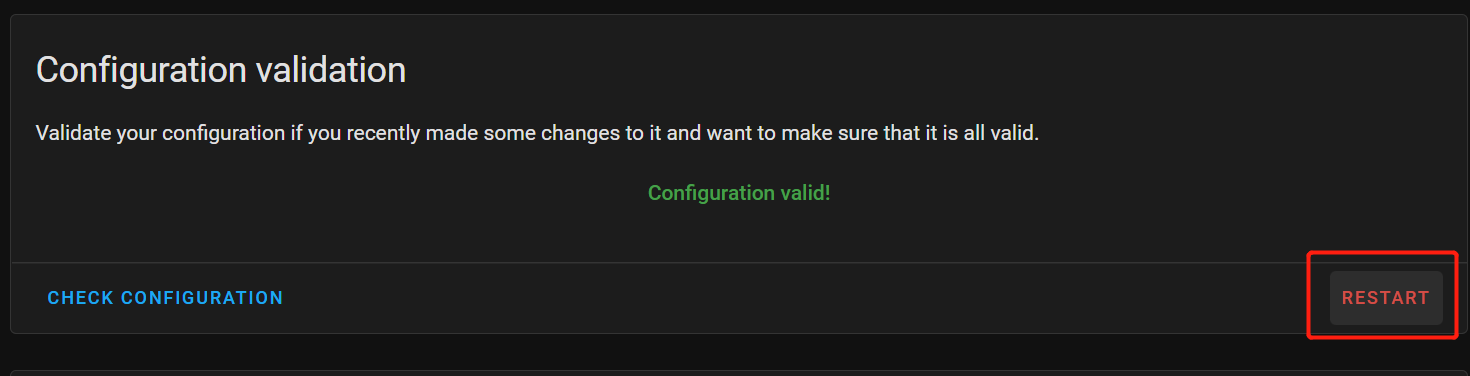
- Step 6. Click RESTART to reboot Home Assistant
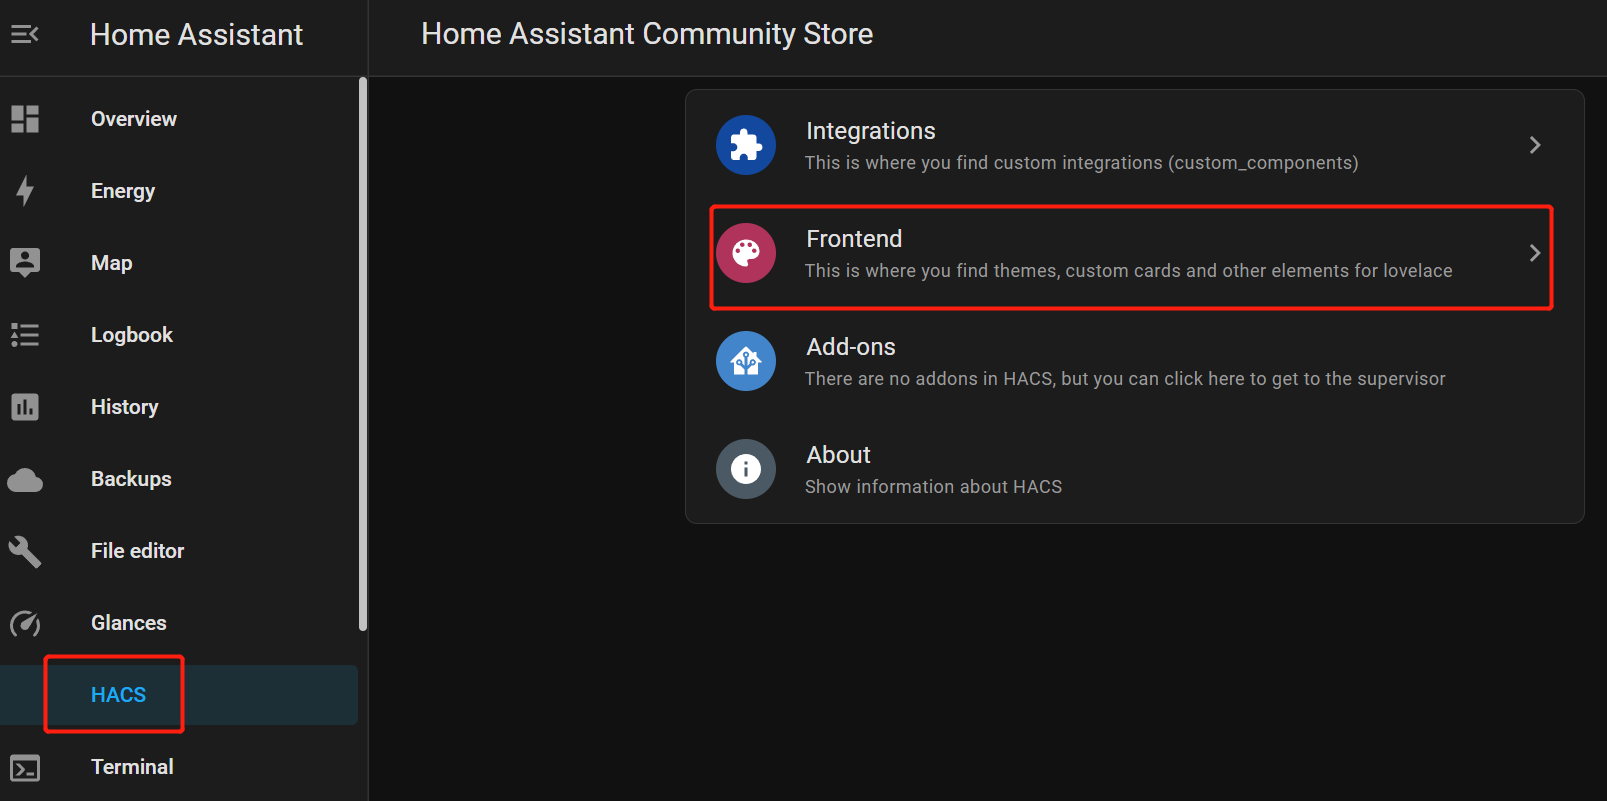
- Step 7. Inside HACS window, click Frontend
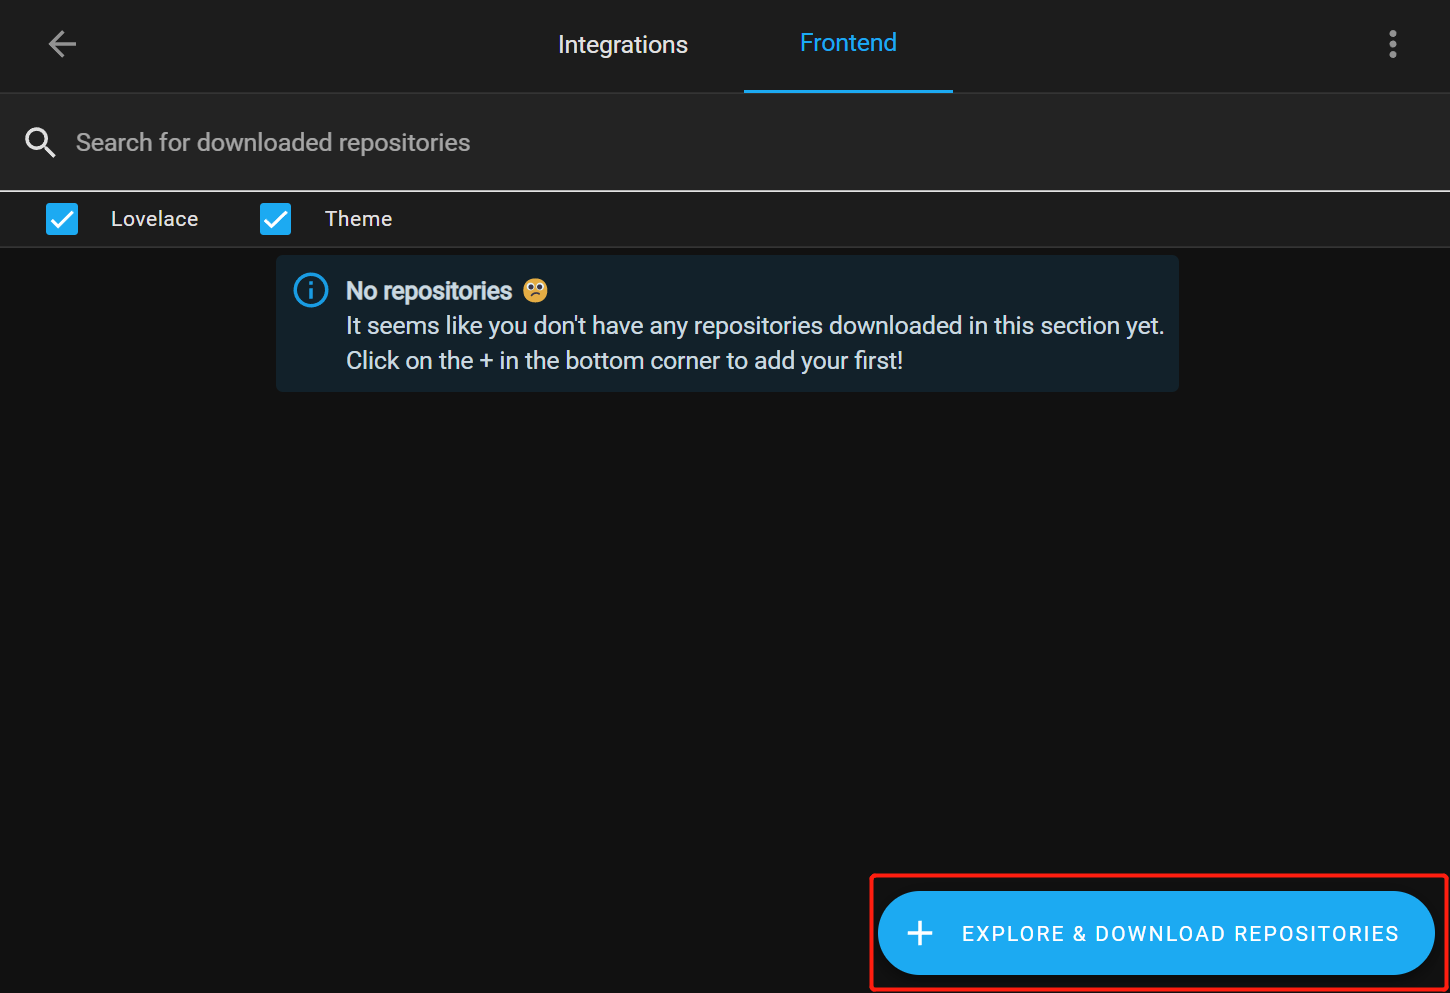
- Step 8. Click + EXPLORE & DOWNLOAD REPOSITORIES
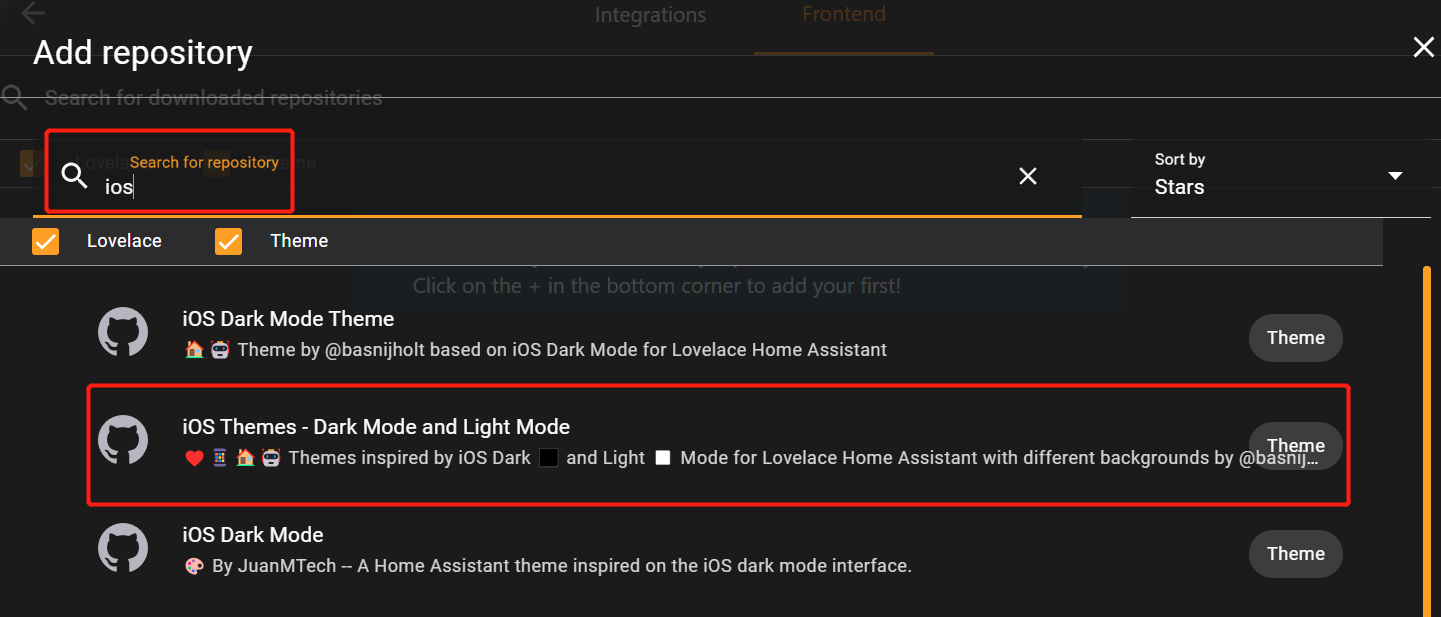
- Step 9. Here you will see a lot of themes. For example, we will install an iOS theme. Search for iOS and select iOS Themes - Dark Mode and Light Mode
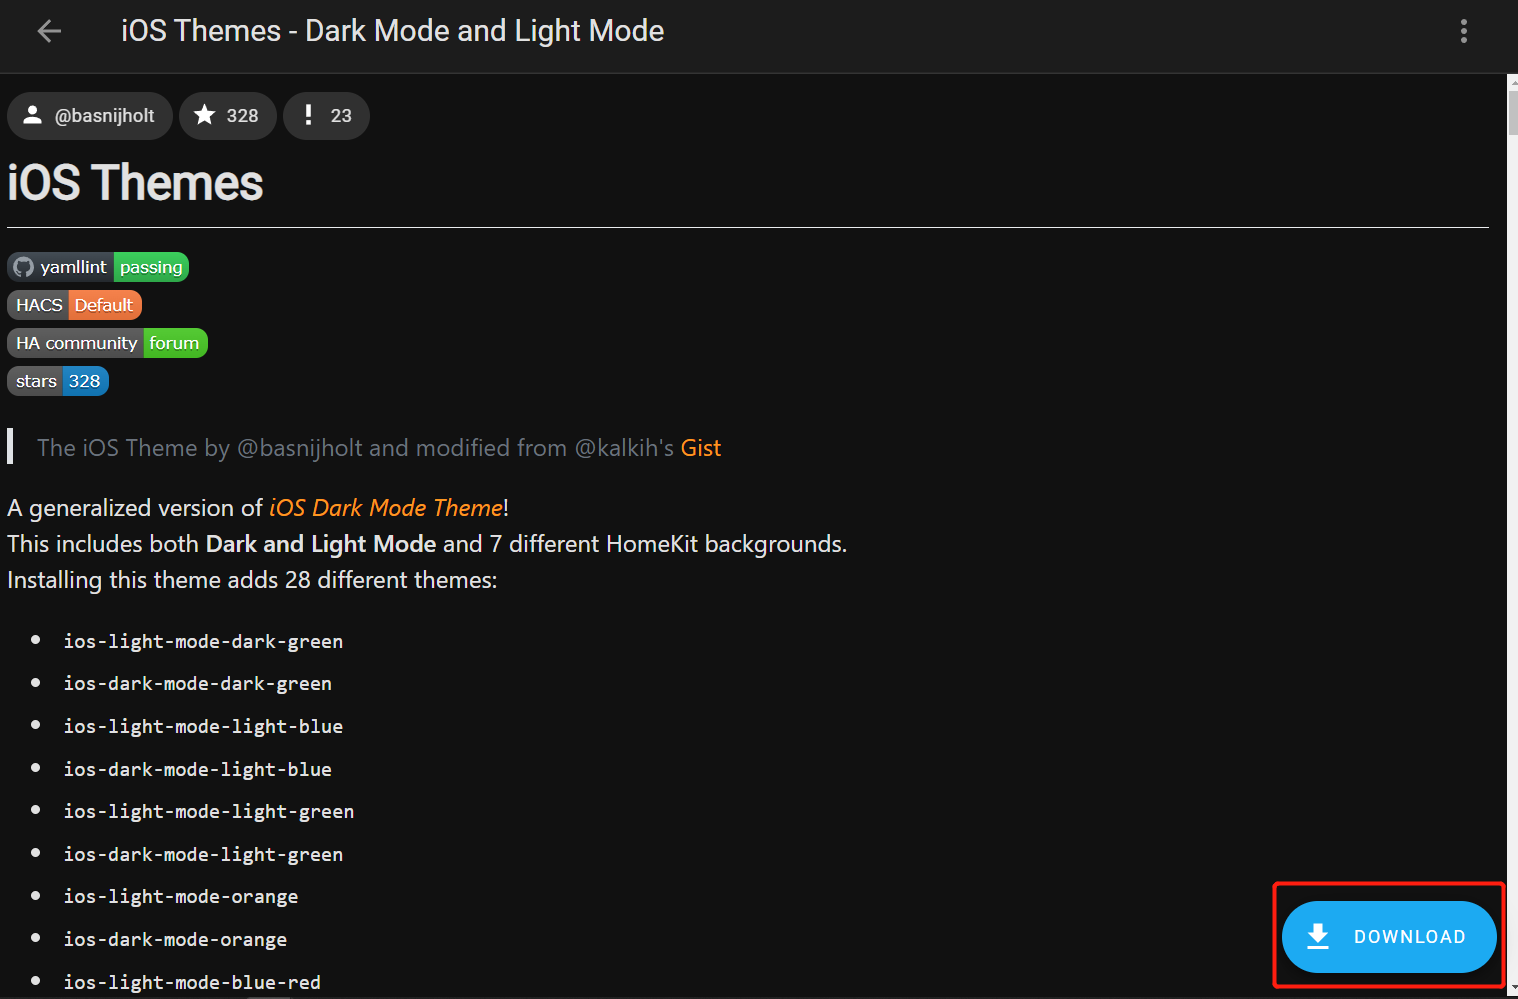
- Step 10. Click DOWNLOAD
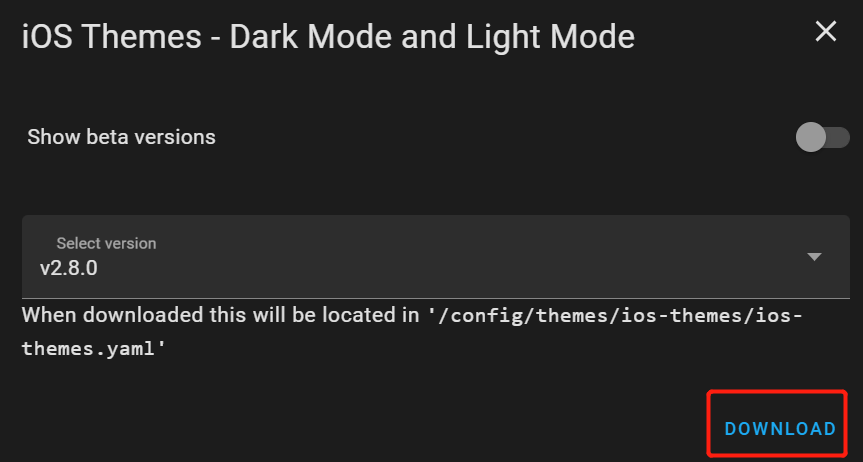
- Step 11. Click DOWNLOAD again for the prompt
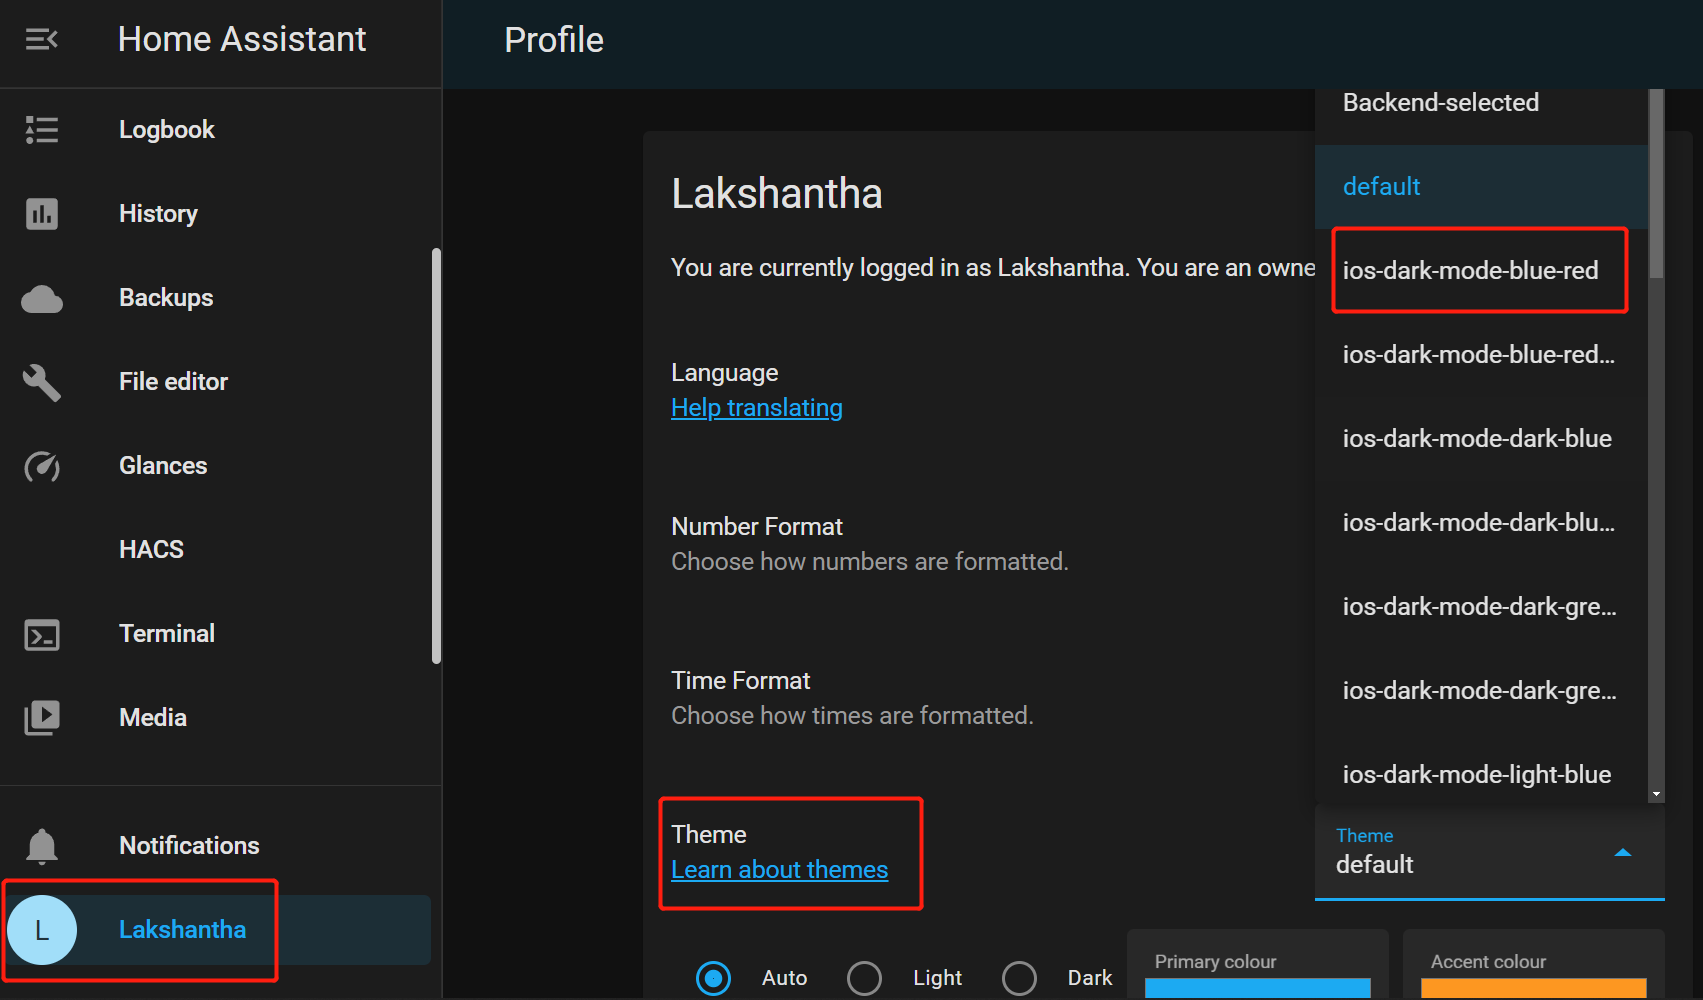
- Step 12. Once finished downloading, click on your username and under Theme, select ios-dark-mode-blue-red. You can select all the other colors of this theme as well if you prefer
Now the Overview page will look like this with the new theme loaded!
Note: If you cannot see the theme loaded properly, please reboot Home Assistant.
Add Weather card to dashboard
Now we will install a weather card using HACS and add into the dashboard!
Before installing this weather card, we need to connect with openweathermap to grab the weather information. And before connecting with openweathermap, we need to obtain an api key from openweathermap.
-
Step 1. Visit this link to sign up for an openweathermap account
-
Step 2. Visit this link to sign in to the newly created account
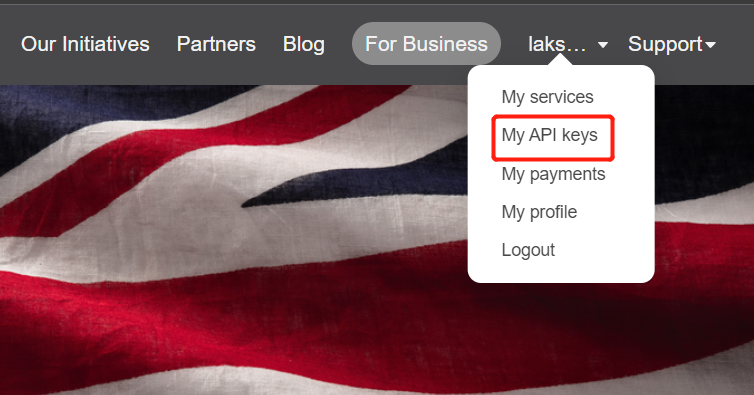
-
Step 3. Under account name, click My API keys
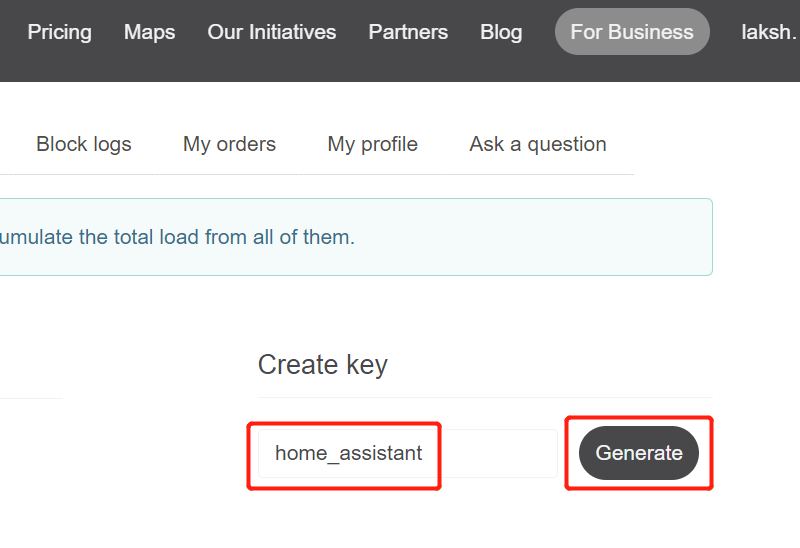
- Step 4. Type an API key name and click Generate
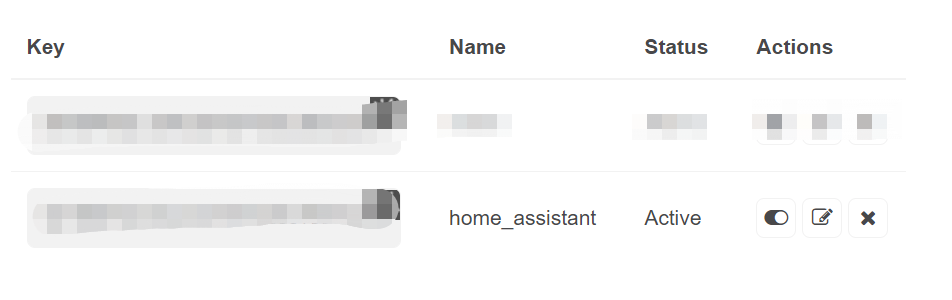
- Step 5. Copy the generated API key
Now we will add this API key
- Step 6. On Home Assistant, navigate to Settings > Devices & Services > Integrations > + ADD INTEGRATION, search for OpenWeathermap and click it
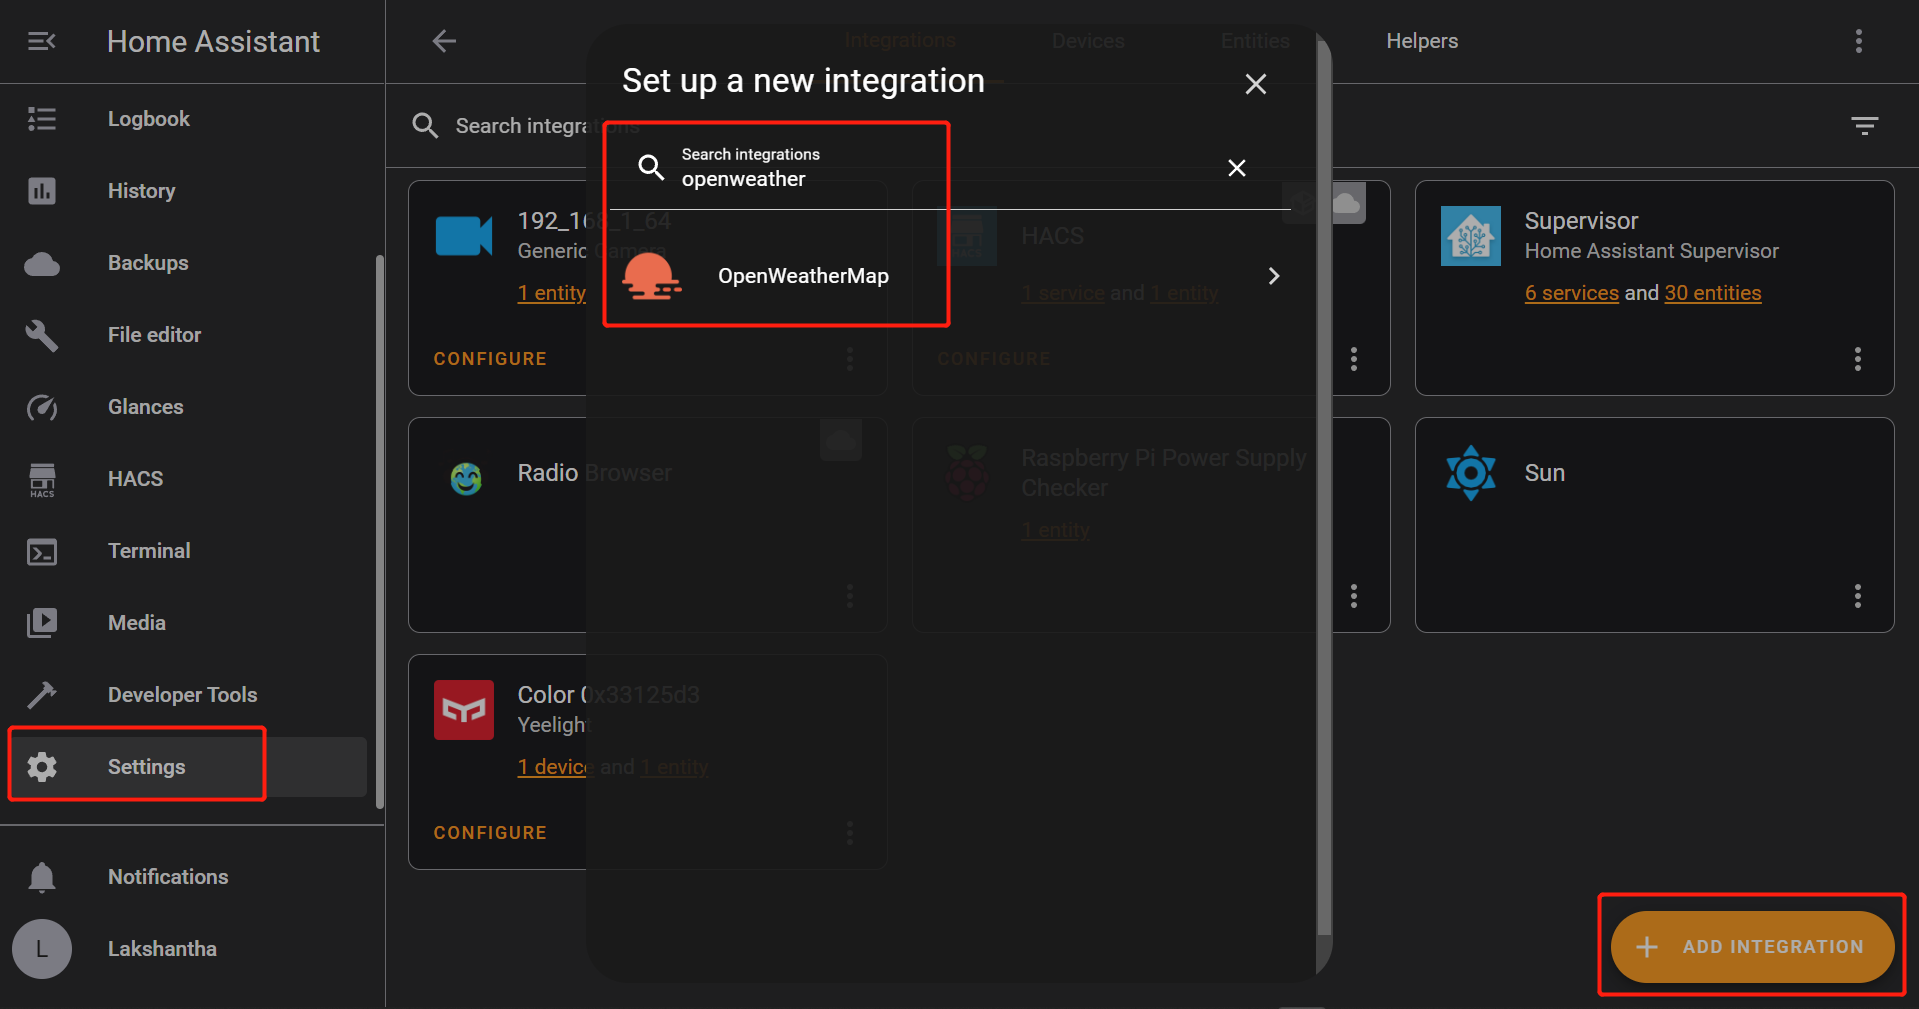
- Step 7. Paste the copied API key, change the Latitude and Logitude according to your location (this can be found by a simple google search), change Mode to hourly and click SUBMIT

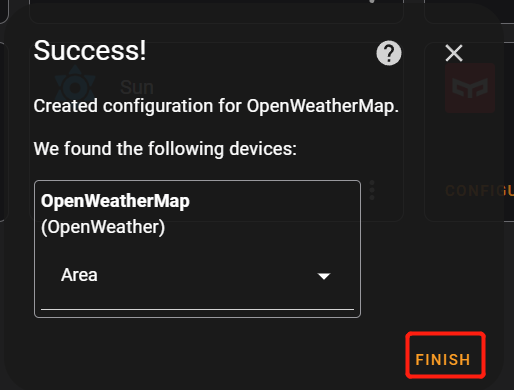
- Step 8. Click Finish
Now we will install the weather card from HACS
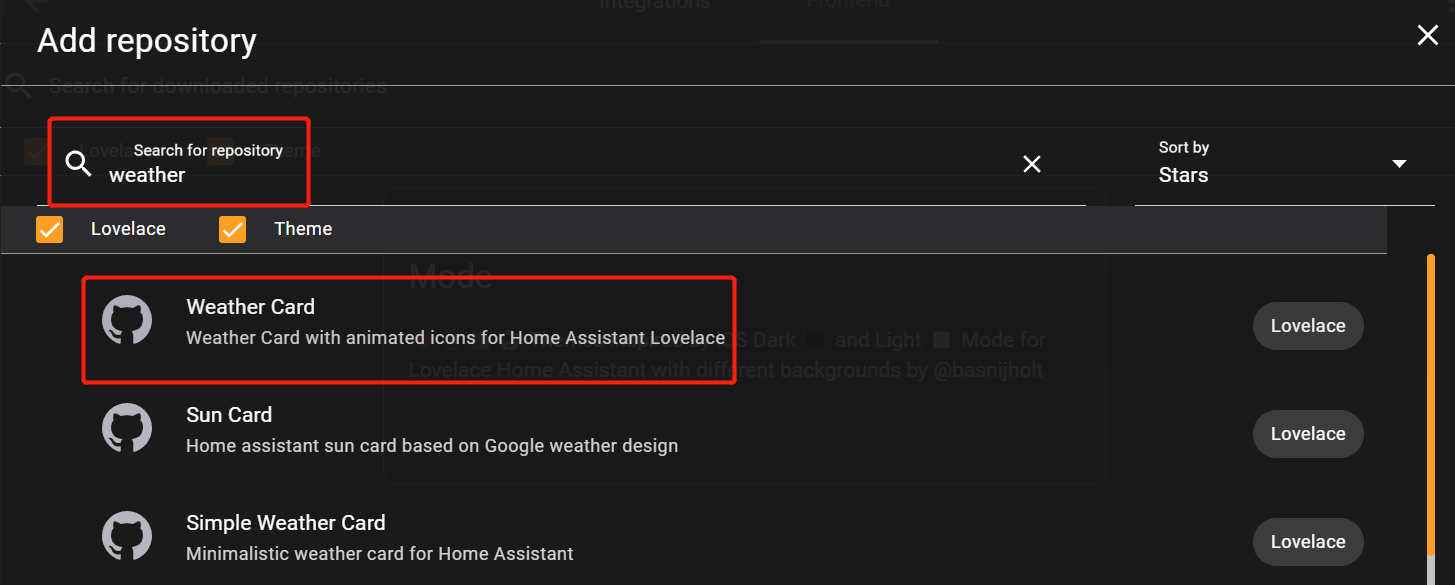
- Step 9. Navigate to HACS > Frontend > + EXPLORE & DOWNLOAD REPOSITORIES

- Step 10. Type weather and click on Weather Card
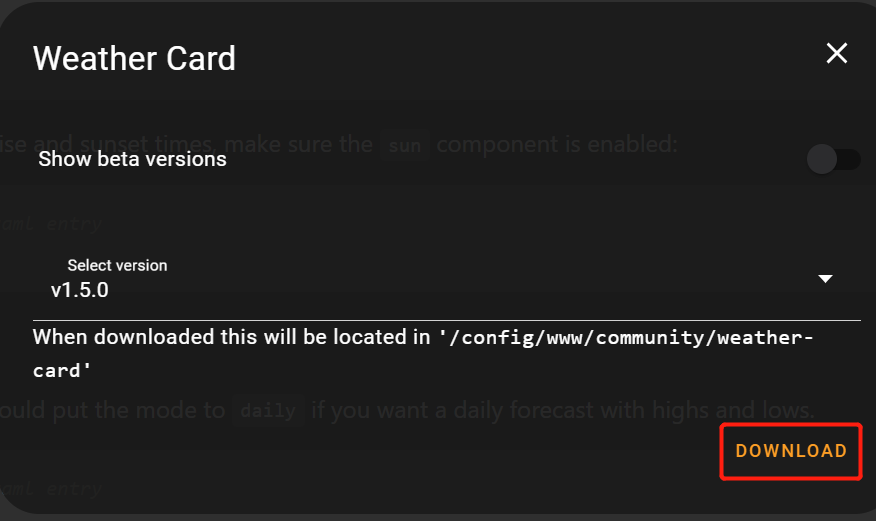
- Step 11. Click DOWNLOAD
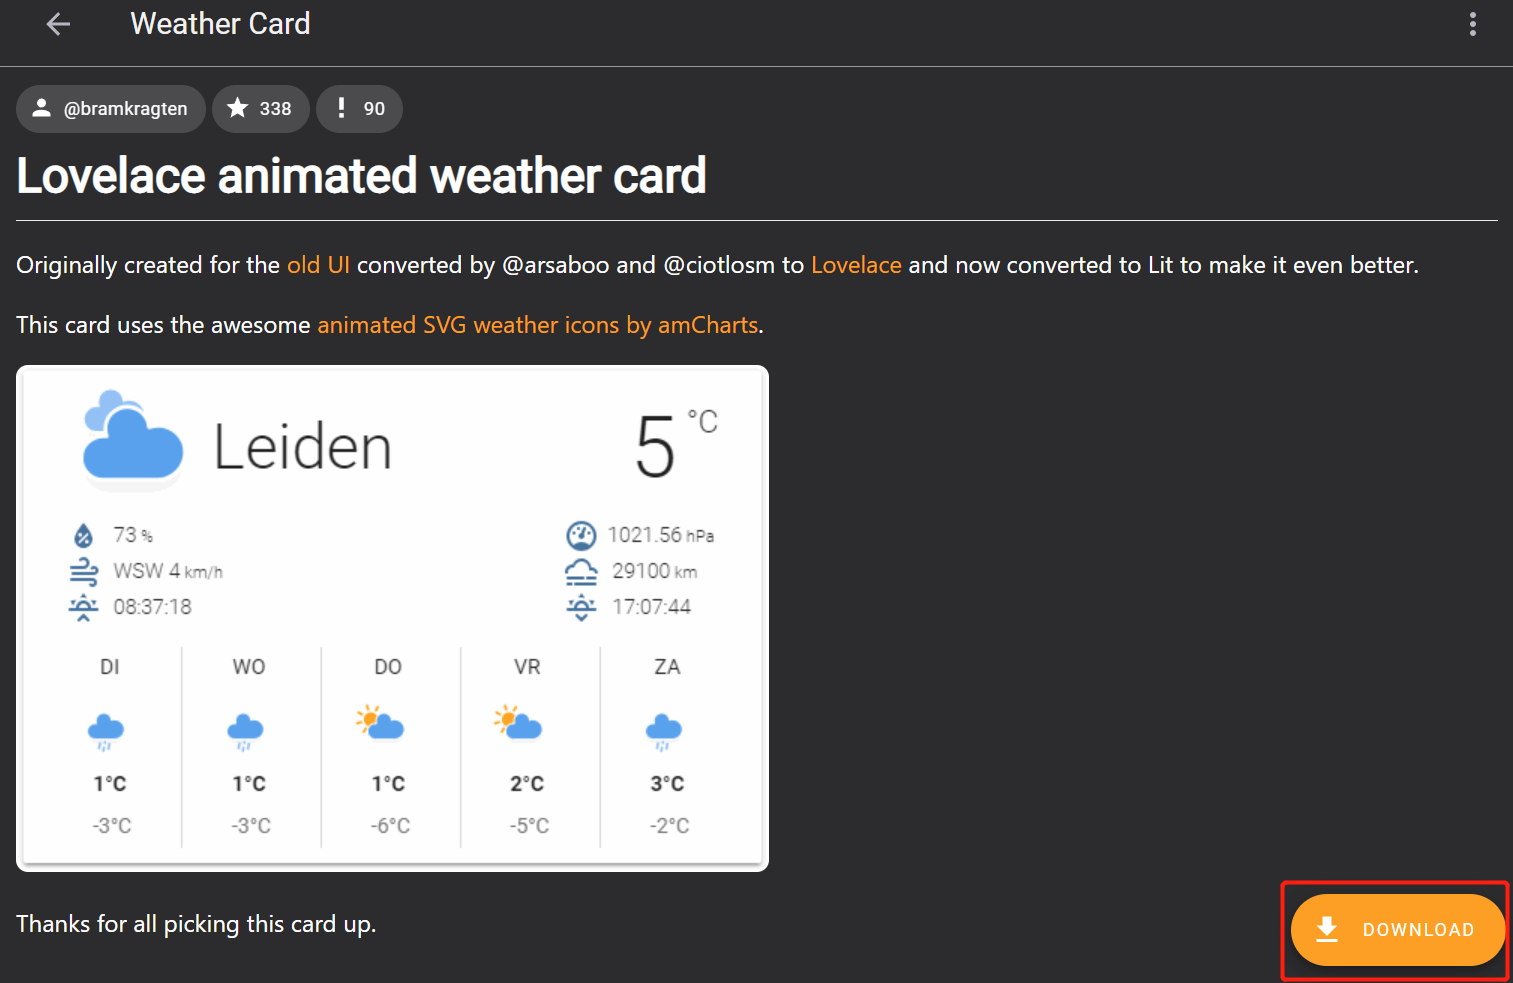
- Step 12. Click DOWNLOAD again for the prompt
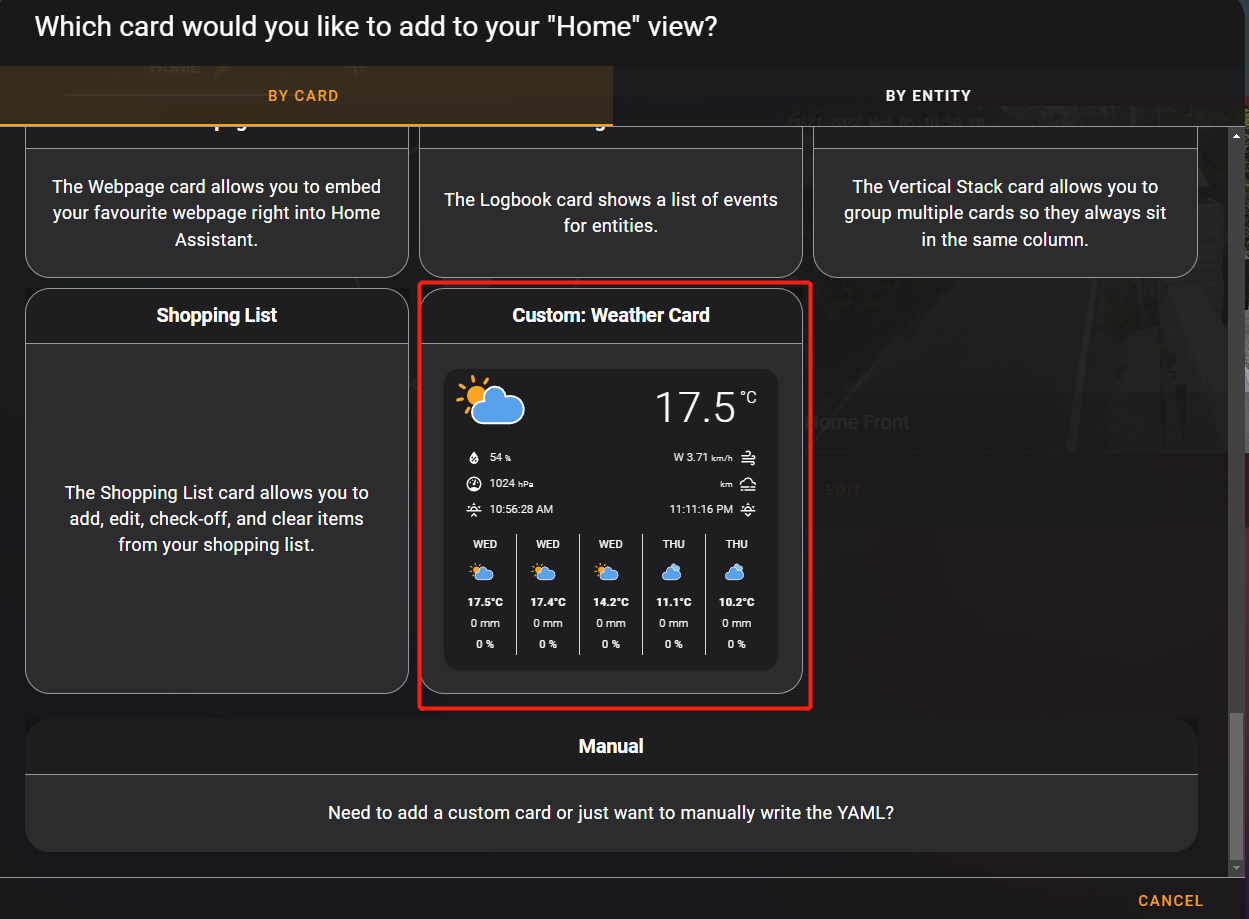
- Step 13. On the Overview page, go into + ADD CARD page as before and click on Custom: Weather Card
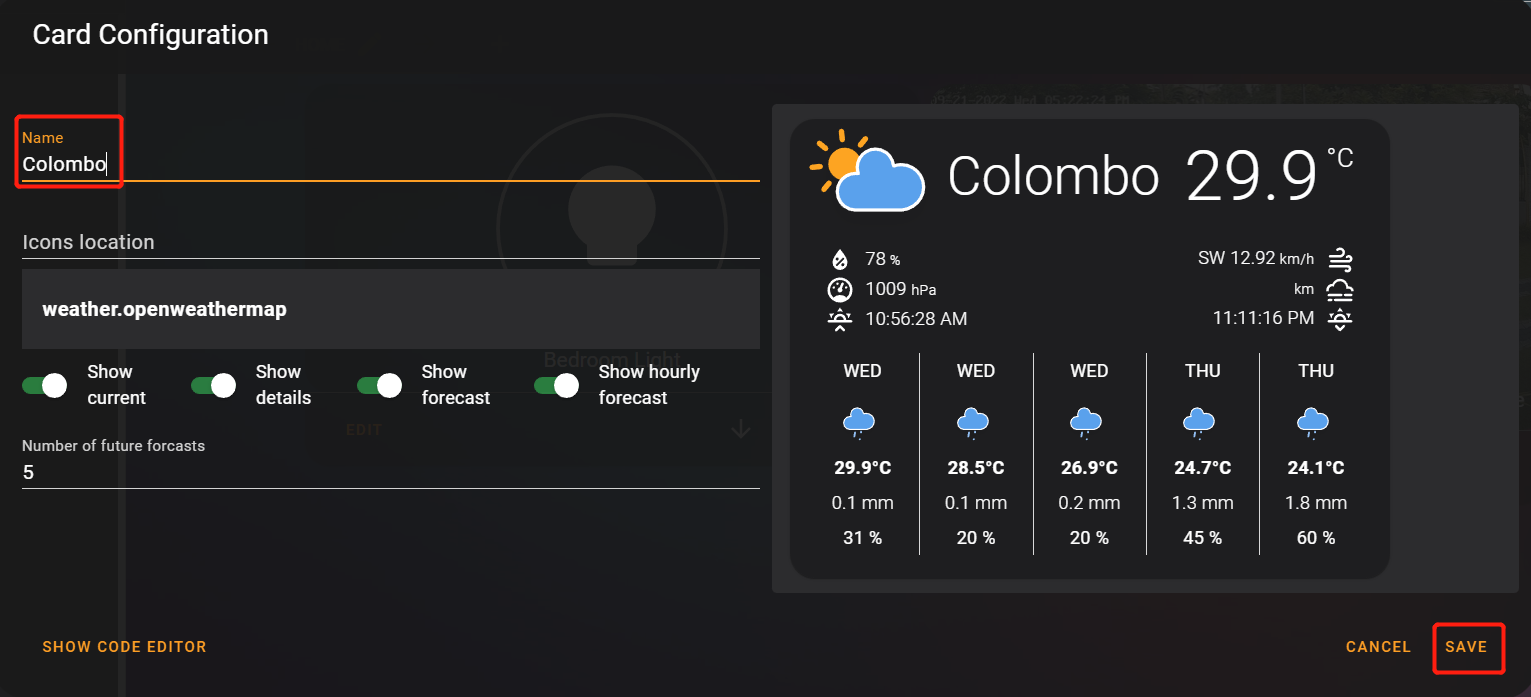
- Step 14. Enter City Name according to Latitude and Logitude that you entered before and click SAVE
Now the finished dashboard will look like below