Home Assistant Integration

Integrate the Wio Tracker 1110 Dev Board into Home Assistant for real-time tracking and live environmental analysis. Wio Tracker 1110 Dev Board is a user-friendly, LoRa-based tracking development platform, you can use the dev board to develop more custom features, making your home environment more intelligent and responsive.
Get Started
In this tutorial we use Home Assistant Green as the Home Assistant host, you can use any Home Assistant host with a Supervisor. Check the Installation for more details.
Device Configuration
Before we begin, make sure you have read the User Guide of the Wio Tracker 1110 Dev Board, and select the platform to SenseCAP.

Home Assistant Configuration
Navigate to your Home Assistant web interface.
To unlock the full potential of Home Assistant and gain access to advanced features, it's recomended to enable the Advanced mode in the user interface.
Click on your profile, and enable the Advanced mode.

Install Add-ons
Go to Settings > Add-ons.

Under the Official add-ons section, you will find the File editor and Advanced SSH & Web Terminal add-on.

It's recommended to enable Show in sidebar so you can find it more easily.

Install HACS
Home Assistant Community Store gives you a powerful UI to handle downloads of all your custom needs.
Open your terminal and navigate to the config directory:
cd /config
Download and run the HACS installation script:
wget -q -O - https://install.hacs.xyz | bash -

After the installation script has finished, restart Home Assistant to apply the changes.
Go to Settings > System > Restart.

Navigate to Settings -> Devices & Services.

Click on ADD INTEGRATION to add a new integration.

Search HACS and click on it.

Only the last item (experimental features) are optional, you need to accept everything above that before you can setup HACS.

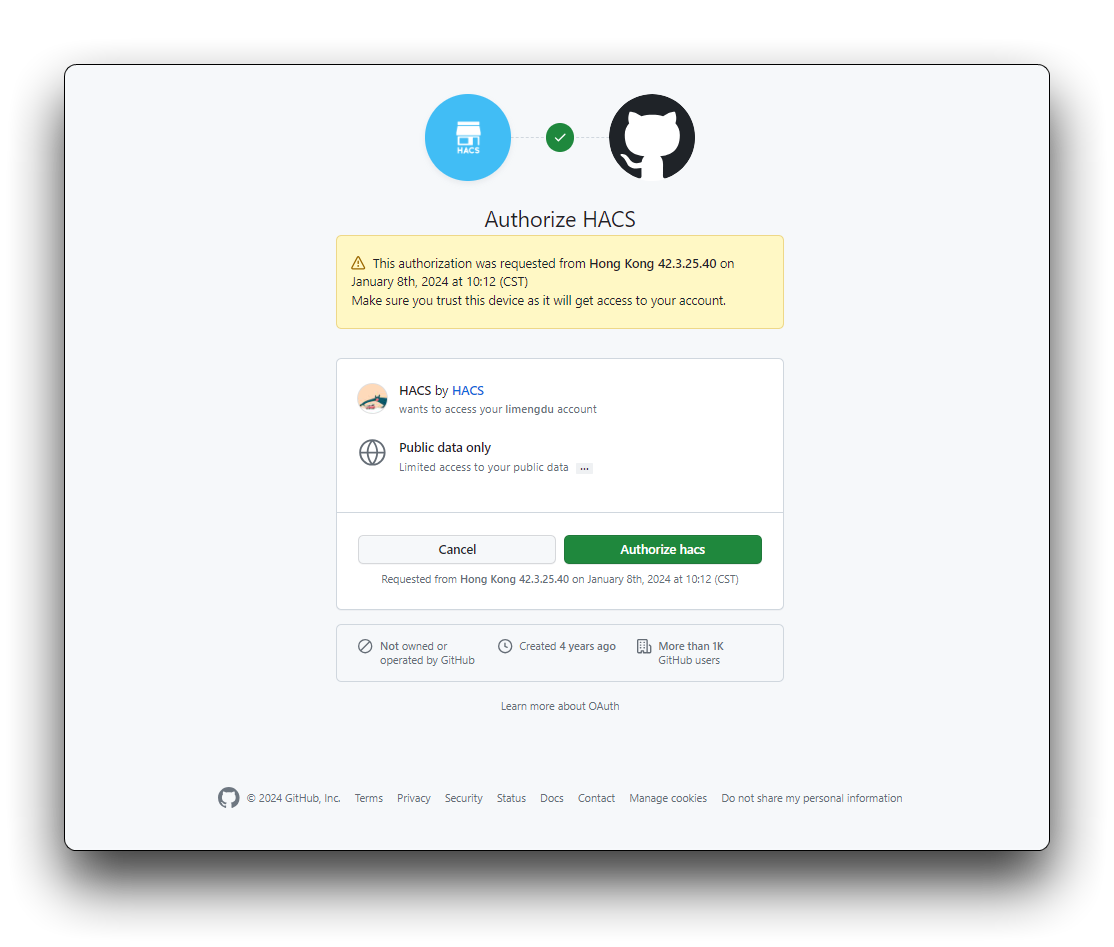
Follow the instructions to authorize Home Assistant to access your GitHub account. This will typically involve entering a verification code provided by GitHub to confirm your identity.
HACS uses a device OAuth flow for authentication against the GitHub API.
Install SenseCraft plugin
Navigate to HACS, click on the icon in the upper right corner, and choose Custom repositories.
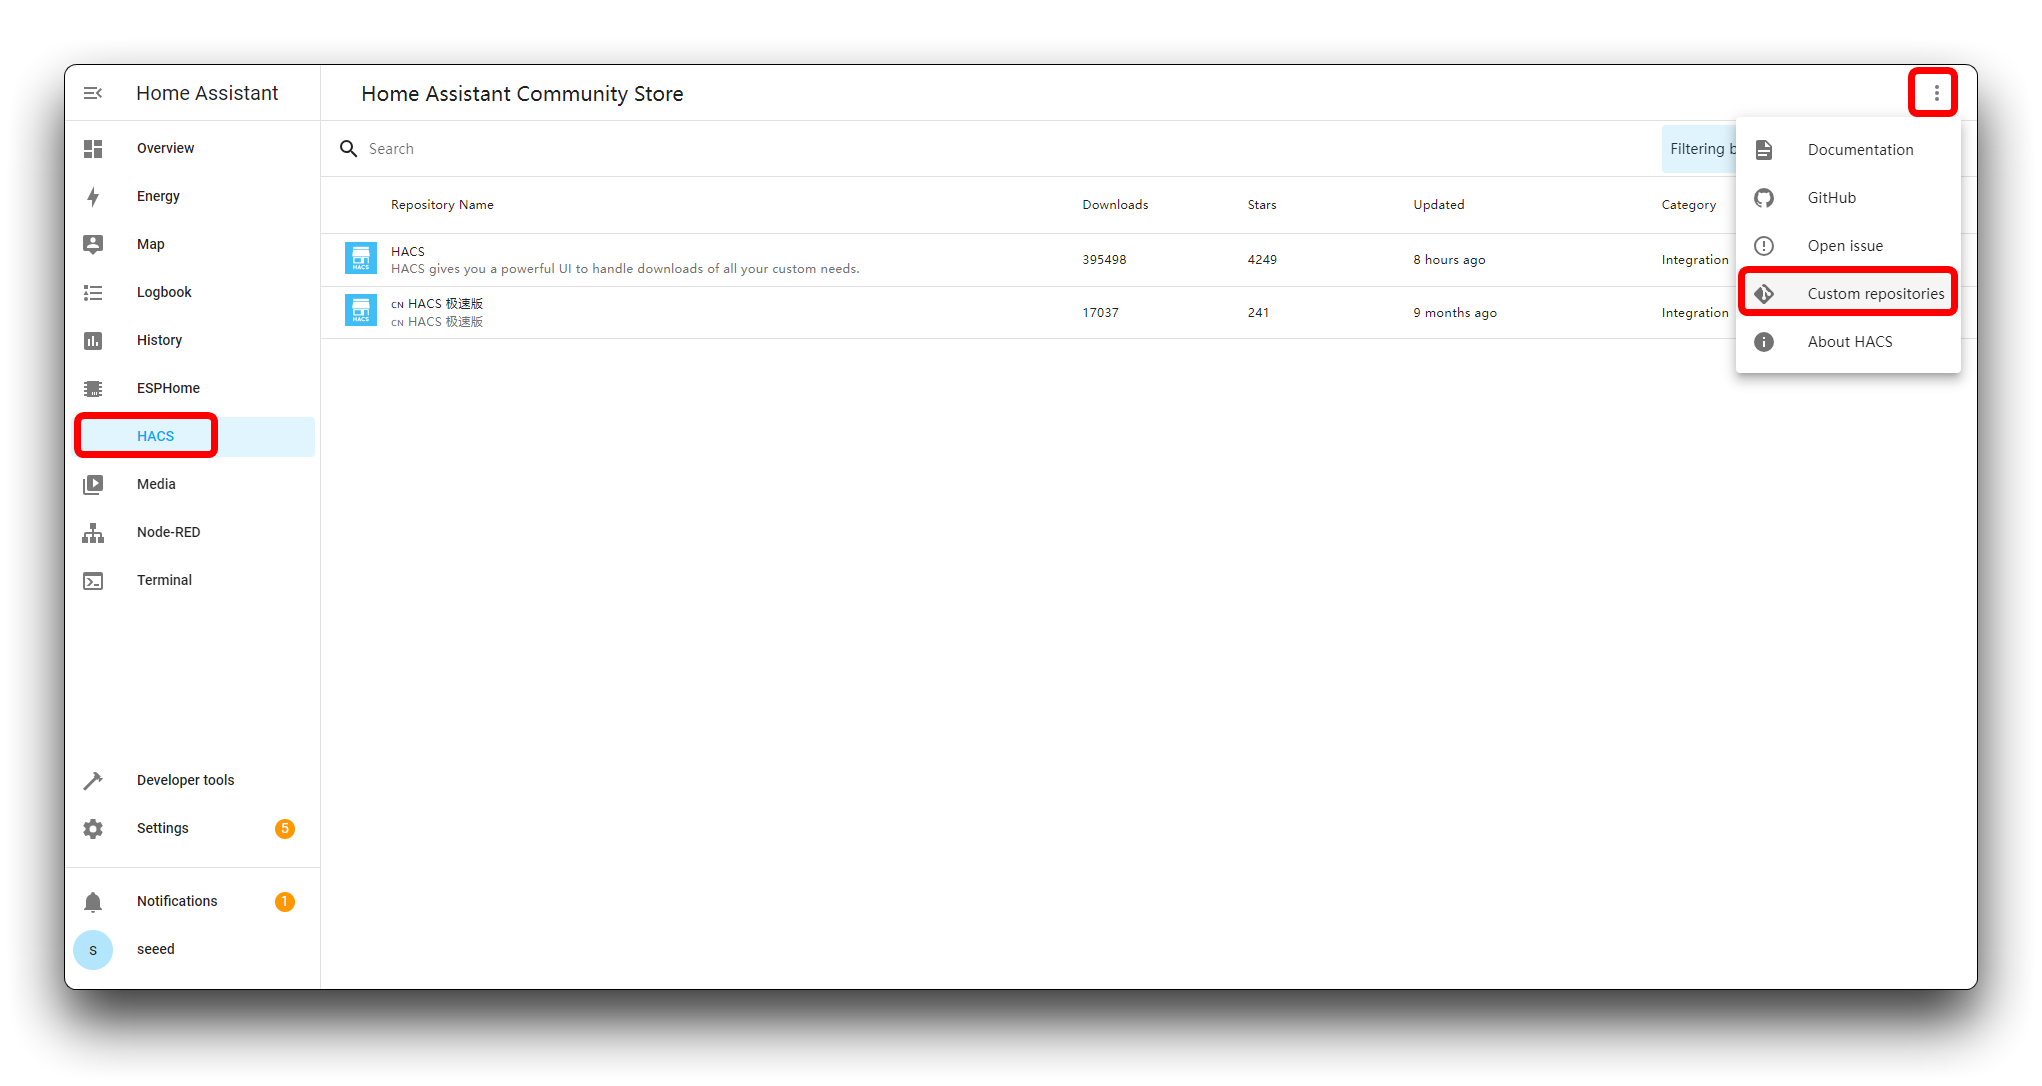
Copy the Repositorie:
Repository:
https://github.com/Seeed-Solution/SenseCraft-HomeAssistant.git
Category: Integration
Click on Add. The repository is now added to your HACS, and you can also find the SenseCraft integration in the list under Integrations.

Navigate to the SenseCraft integration and click DOWNLOAD.
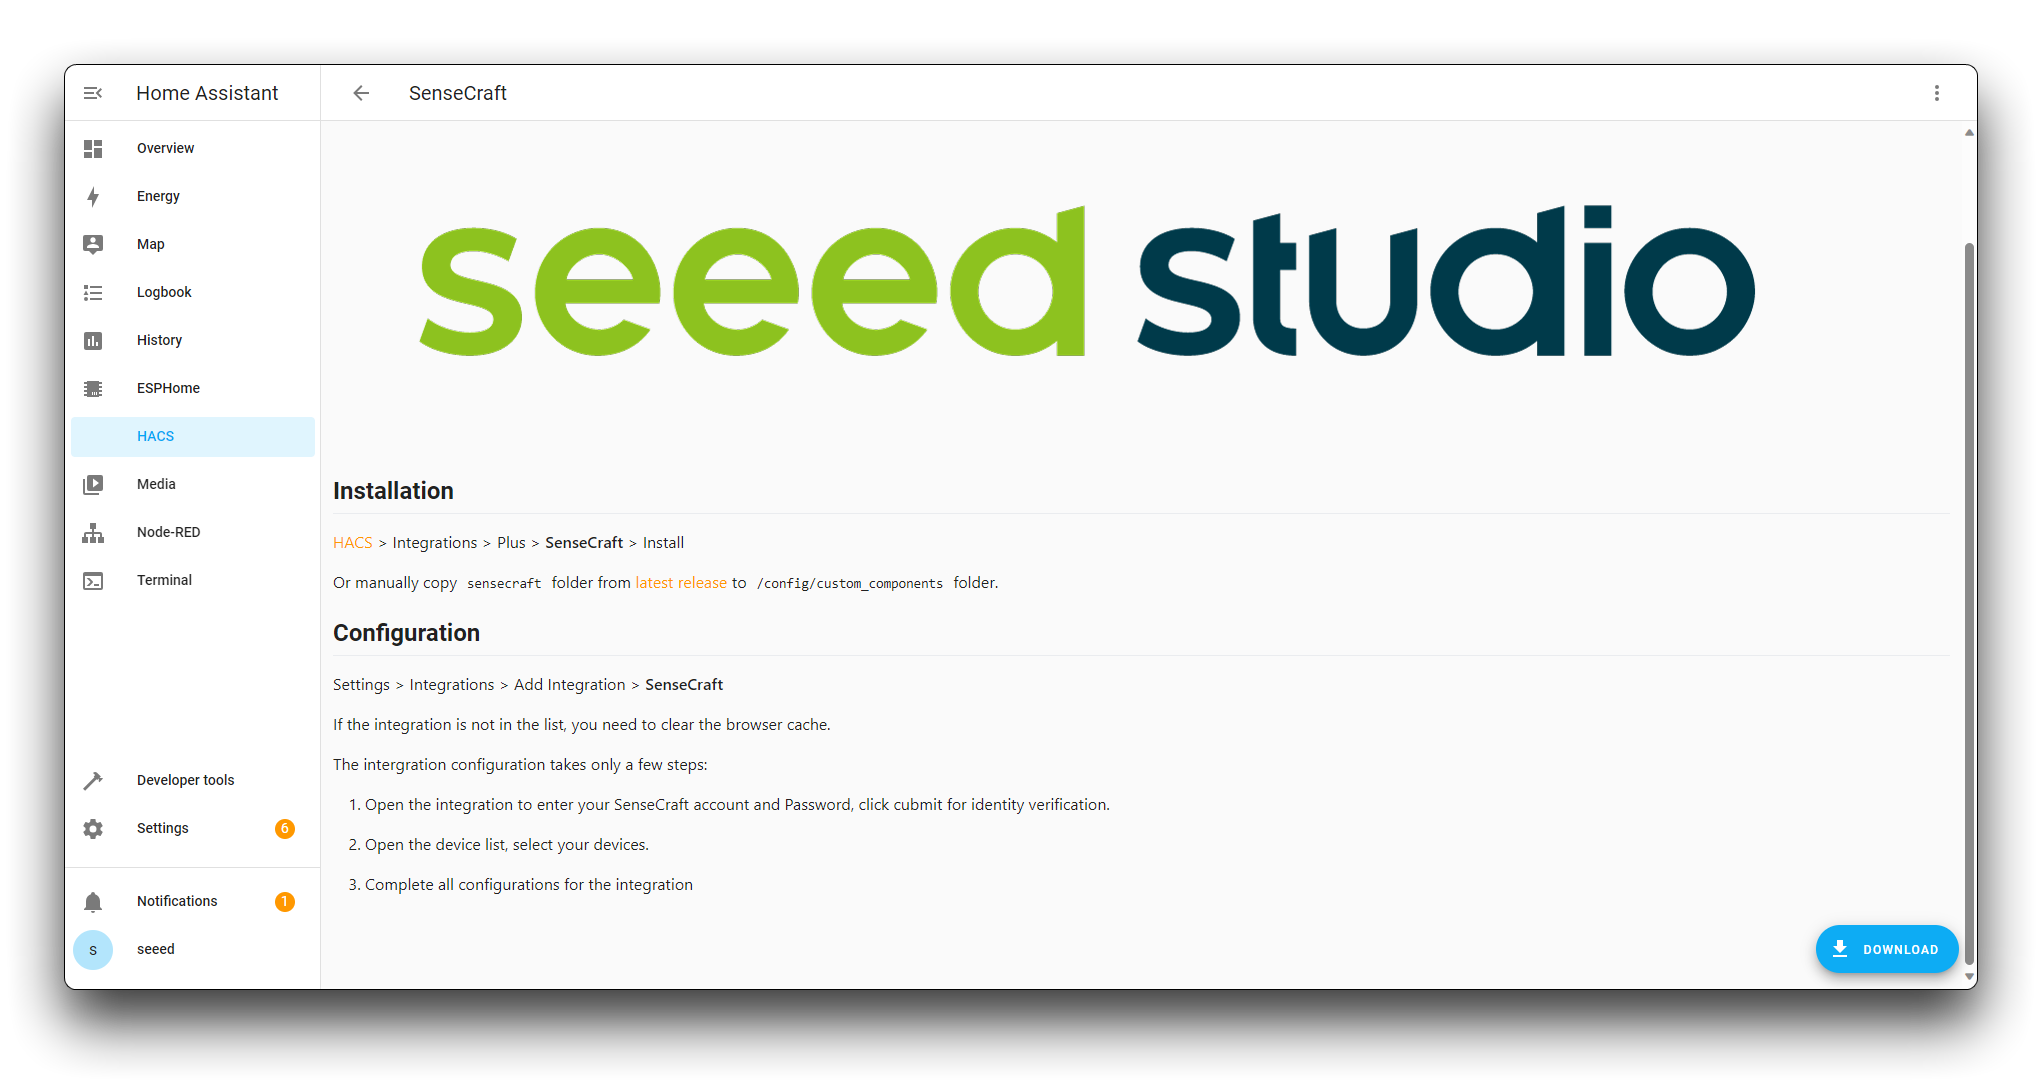
We have successfully completed the installation of the SenseCraft plugin now.
Add Devices
Navigate to Settings -> Devices & Services -> SenseCraft, click on ADD DEVICE.

Select Add devices using SenseCraft Account(账号集成).

Log in with your SenseCAP Mate APP account, and select global version.

Then all your devices in your account will be listed, select the one that you want to connect, and then click SUBMIT.

Once the connection is successful, you will see the device and entity displayed.

Click on the device, you will see all the data uploarded, click ADD TO DASHBOARD

Add Map Card
Before we add the map card, we need to add a location entity first.
Open the File Editor and navigate to configuration.yaml file, add the following code:
template:
  - sensor:
      - name: "Device Location"
        state: >
          {{ states('sensor.latitude') }},{{ states('sensor.longitude') }}
        attributes:
          latitude: "{{ states('sensor.latitude') }}"
          longitude: "{{ states('sensor.longitude') }}"

name can be customized, and the states should be same with the entity id of your device.
You can check the entity id on Settings -> Devices and Services -> Entities

Click ADD CARD on the dashboard.

Choose the Map card.

Copy the code into the CODE EDITOR and click SAVE.
type: map
entities:
  - entity: sensor.device_location

The Entity should be same with your entity id, You can check the entity id on Settings -> Devices and Services -> Entities

You can check the live location on the map now.

All data of the Dev Board can be viewed in the dashboard.