Train Water Meter Digits Recognition Model with SenseCAP A1101
Overview
In this wiki, we will teach you how to train your own meter model for your specific application and then deploy it easily to the SenseCAP A1101. Let's get started!
Hardware preparation
- SenseCAP A1101 - LoRaWAN Vision AI Sensor
- USB Type-C cable
- Windows/ Linux/ Mac with internet access
Software preparation
We will be using the following software technologies in this wiki
- Roboflow - for annotating
- SenseCraft Model Assistant - for training
- TensorFlow Lite - for inferencing

Now let's setup the software. The software setup for Windows, Linux and Intel Mac will be same whereas for M1/M2 Mac will be different.
**What is SenseCraft Model Assistant?**Seeed Studio SenseCraft Model Assistant is an open-source project focused on embedded AI. We have optimized excellent algorithms from OpenMMLab for real-world scenarios and made implementation more user-friendly, achieving faster and more accurate inference on embedded devices.
Windows, Linux, Intel Mac
-
Step 1. Make sure Python is already installed on the computer. If not, visit this page to download and install latest version of Python
-
Step 2. Install the following dependency
pip3 install libusb1
M1/ M2 Mac
- Step 1. Install Homebrew
/bin/bash -c "$(curl -fsSL https://raw.githubusercontent.com/Homebrew/install/HEAD/install.sh)"
- Step 2. Install conda
brew install conda
- Step 3. Download libusb
wget https://conda.anaconda.org/conda-forge/osx-arm64/libusb-1.0.26-h1c322ee_100.tar.bz2
- Step 4. Install libusb
conda install libusb-1.0.26-h1c322ee_100.tar.bz2
You need to make sure your BootLoader version is greater than 2.0.0 before you can change the firmware to do the following. If you are not sure, please check the BootLoader version by following the steps mentioned in this section, and if the version is less than 2.0.0, please update the BootLoader by following the steps mentioned in this section
1. Collect Image Data
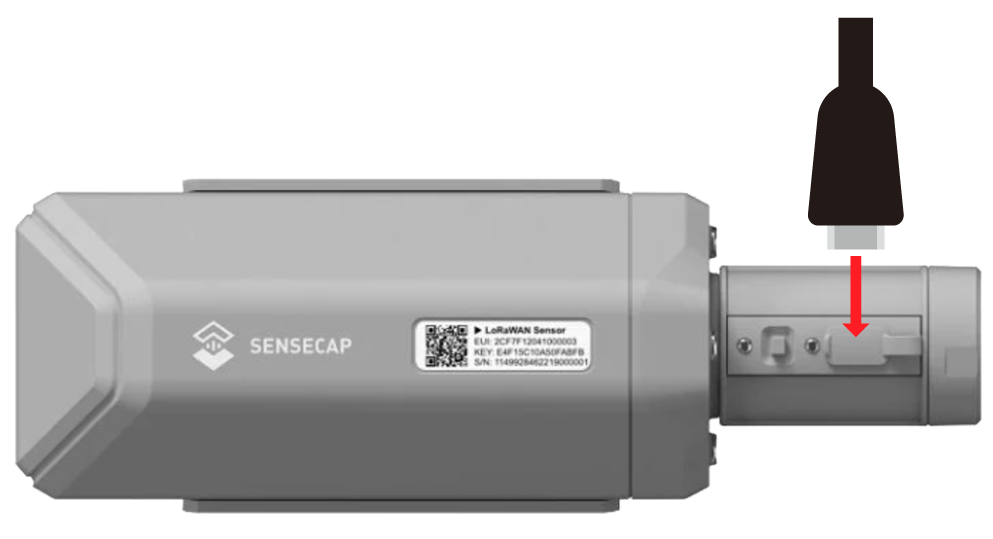
- Step 1. Connect SenseCAP A1101 to PC by using USB Type-C cable
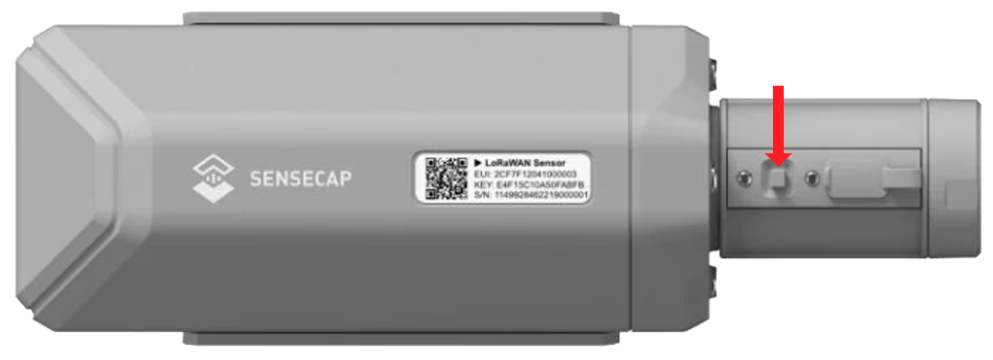
- Step 2. Double click the boot button to enter boot mode
After this you will see a new storage drive shown on your file explorer as SENSECAP

- Step 3. Drag and drop this .uf2 file to SENSECAP drive
As soon as the uf2 finishes copying into the drive, the drive will disappear. This means the uf2 has been successfully uploaded to the module.
-
Step 4. Copy and paste this Python script inside a newly-created file named capture_images_script.py on your PC
-
Step 5. Execute the Python script to start capturing images
python3 capture_images_script.py
By default, it will capture an image every 300ms. If you want to change this, you can run the script in this format
python3 capture_images_script.py --interval <time_in_ms>
For example, to capture an image every second
python3 capture_images_script.py --interval 1000
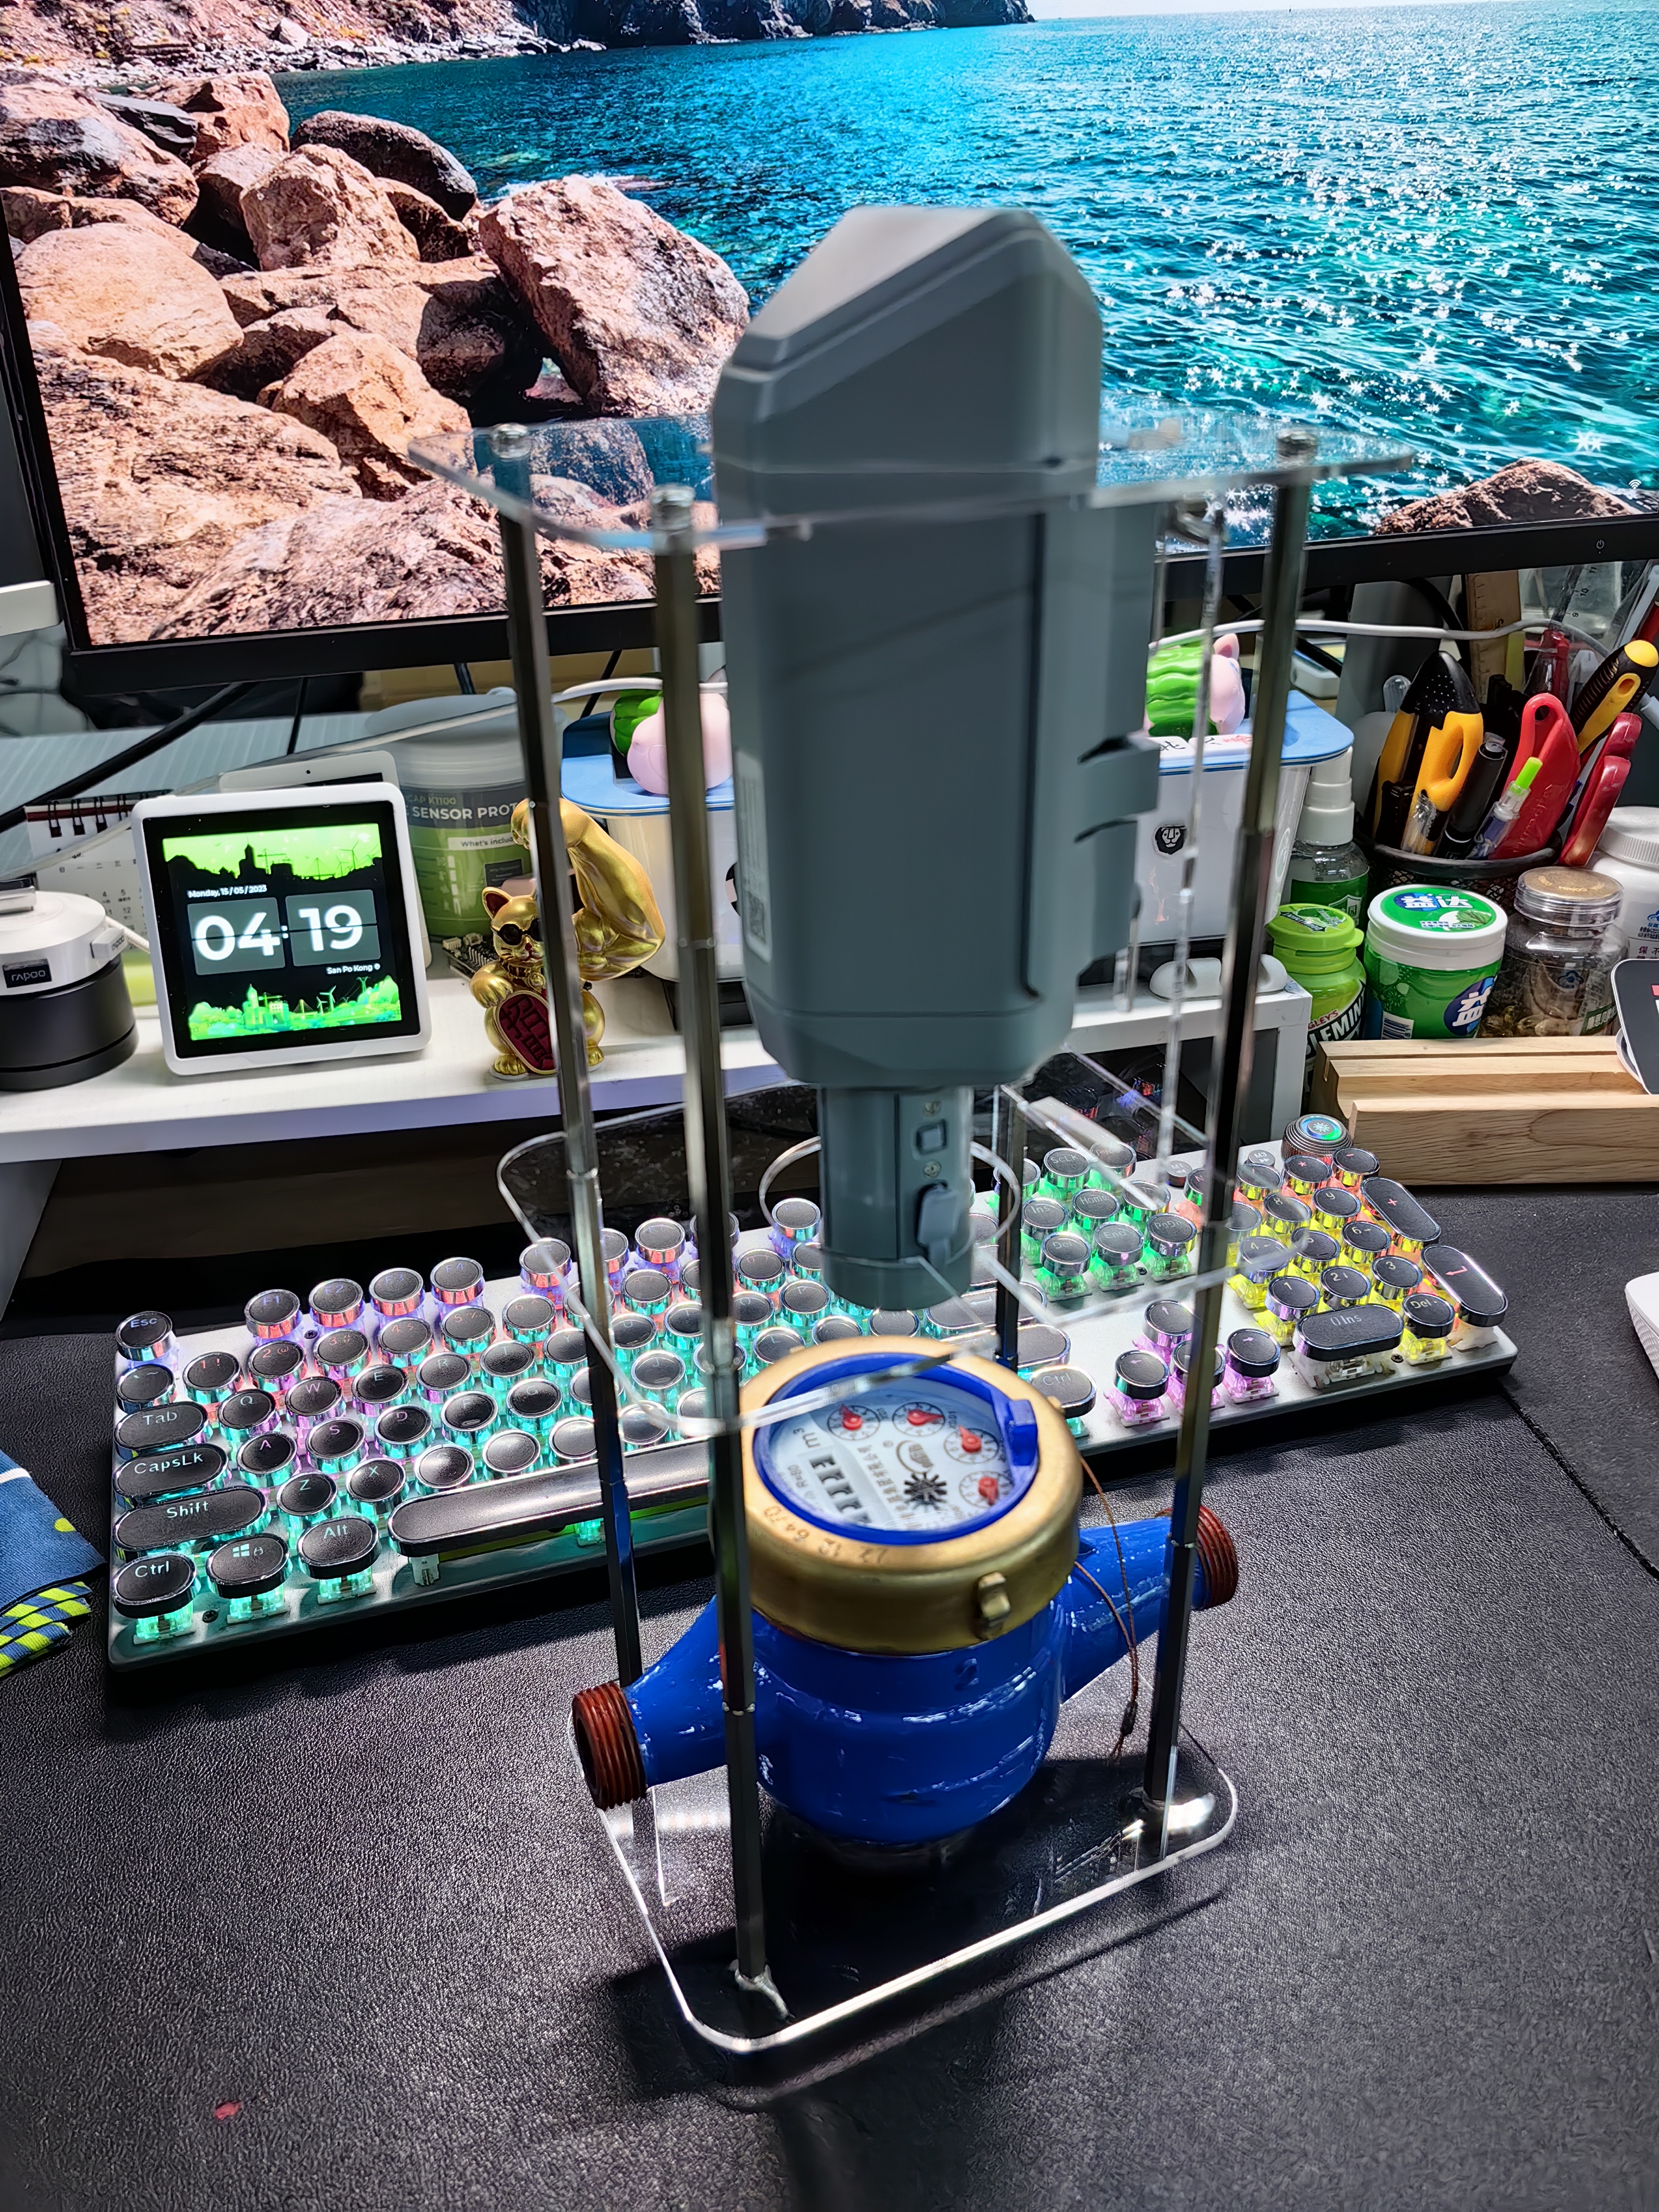
After the above script is executed, SenseCAP A1101 will start to capture images from the in-built cameras continuosly and save all of them inside a folder named save_img
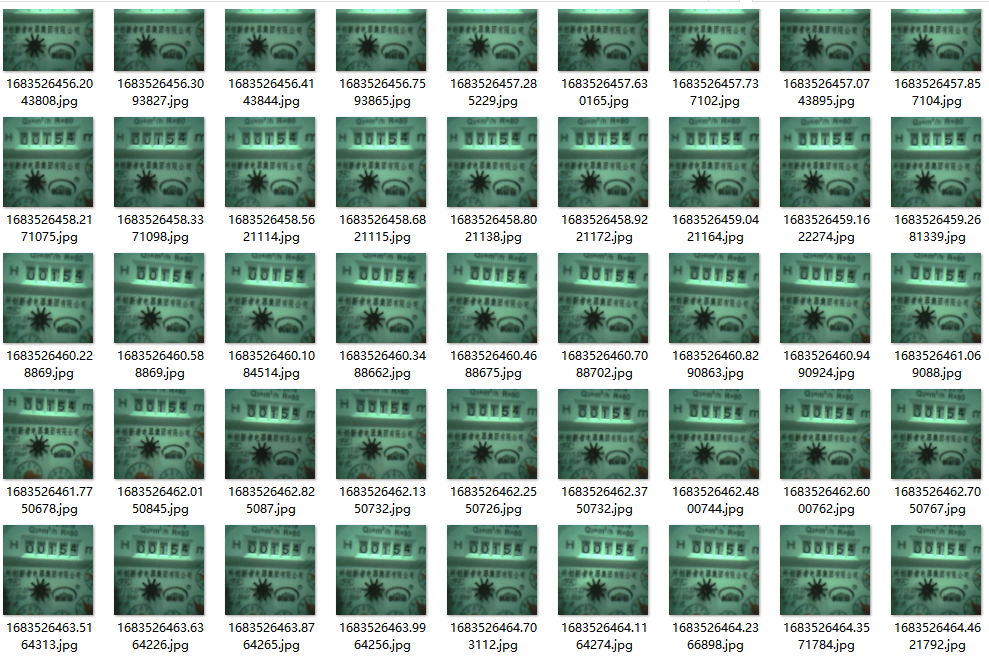
Also, it will open a preview window while it is recording.
After you have enough images captured, click on the terminal window and press the following key combinations to stop the capturing process
- Windows: Ctrl + Break
- Linux: Ctrl + Shift + \
- Mac: CMD + Shift + \
Change device firmware after image collection
After you have finished recording images for the dataset, you need to make sure to change the firmware inside the SenseCAP A1101 back to original, so that you can again load object detection models for detection. Let's go through the steps now.
-
Step 1. Enter Boot mode on SenseCAP A1101 as explained before
-
Step 2. Drag and drop this .uf2 file to SENSECAP drive according to your device
As soon as the uf2 finishes copying into the drive, the drive will disappear. This means the uf2 has been successfully uploaded to the module.
2. Generate Dataset with RoboFlow
Roboflow is an annotation tool based online. Here we can directly import the video footage that we have recorded into Roboflow and it will be exported into a series of images. This tool is very convenient because it will let us help distribute the dataset into "training, validation and testing". Also this tool will allow us to add further processing to these images after labelling them. Furthermore, it can easily export the labelled dataset into COCO format which is what we exactly need!
-
Step 1. Click here to sign up for a Roboflow account
-
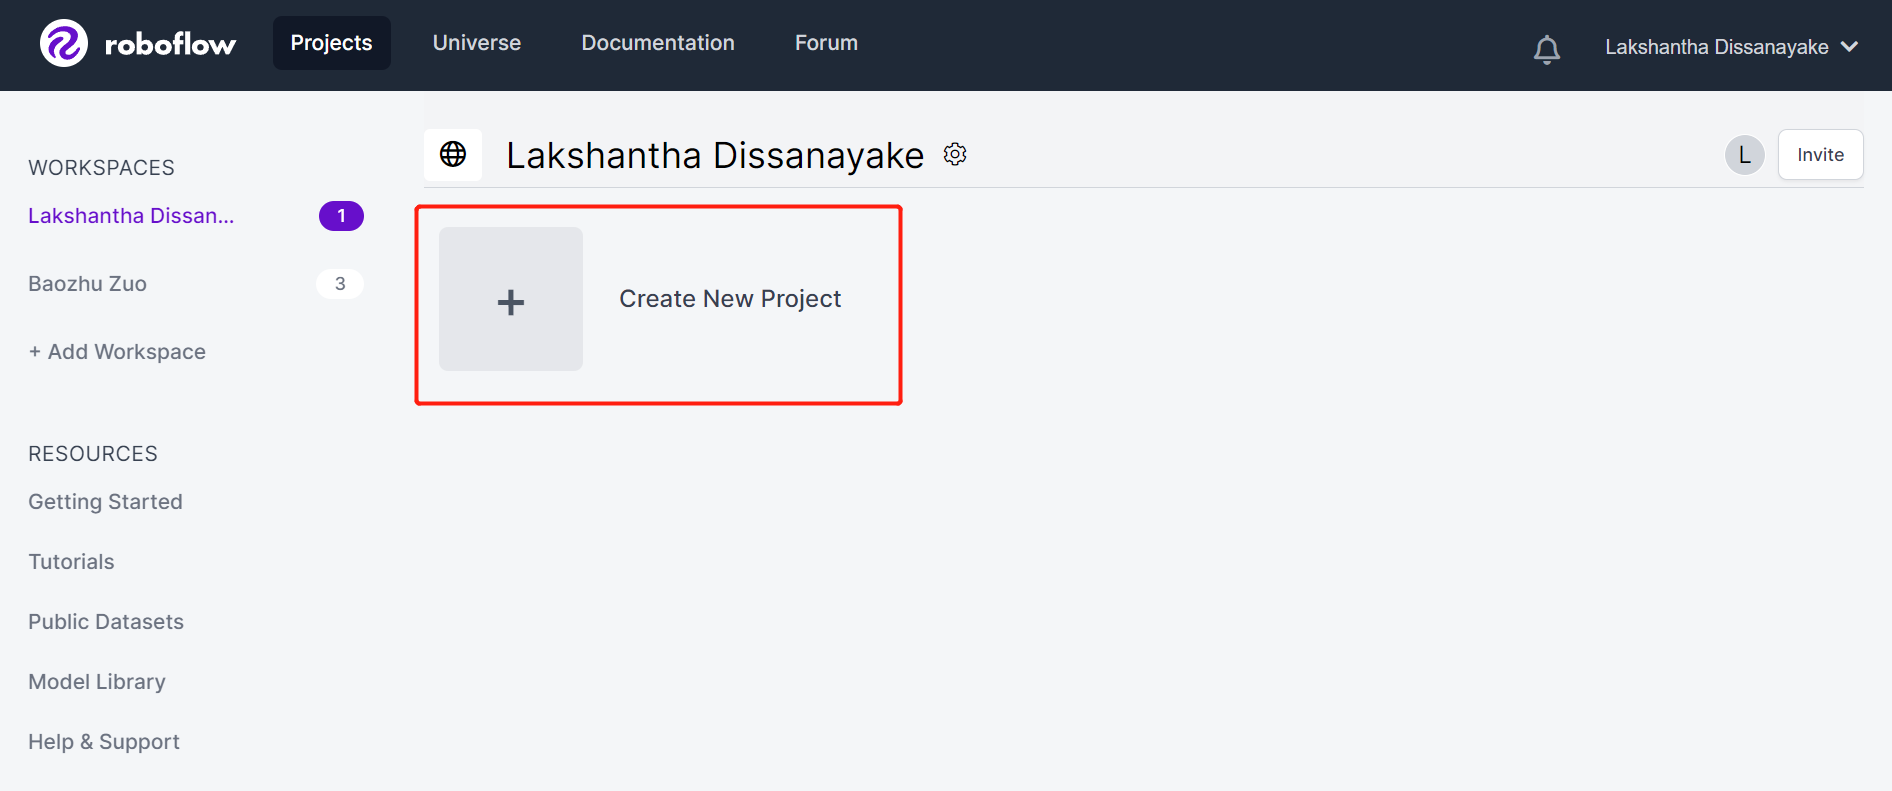
Step 2. Click Create New Project to start our project
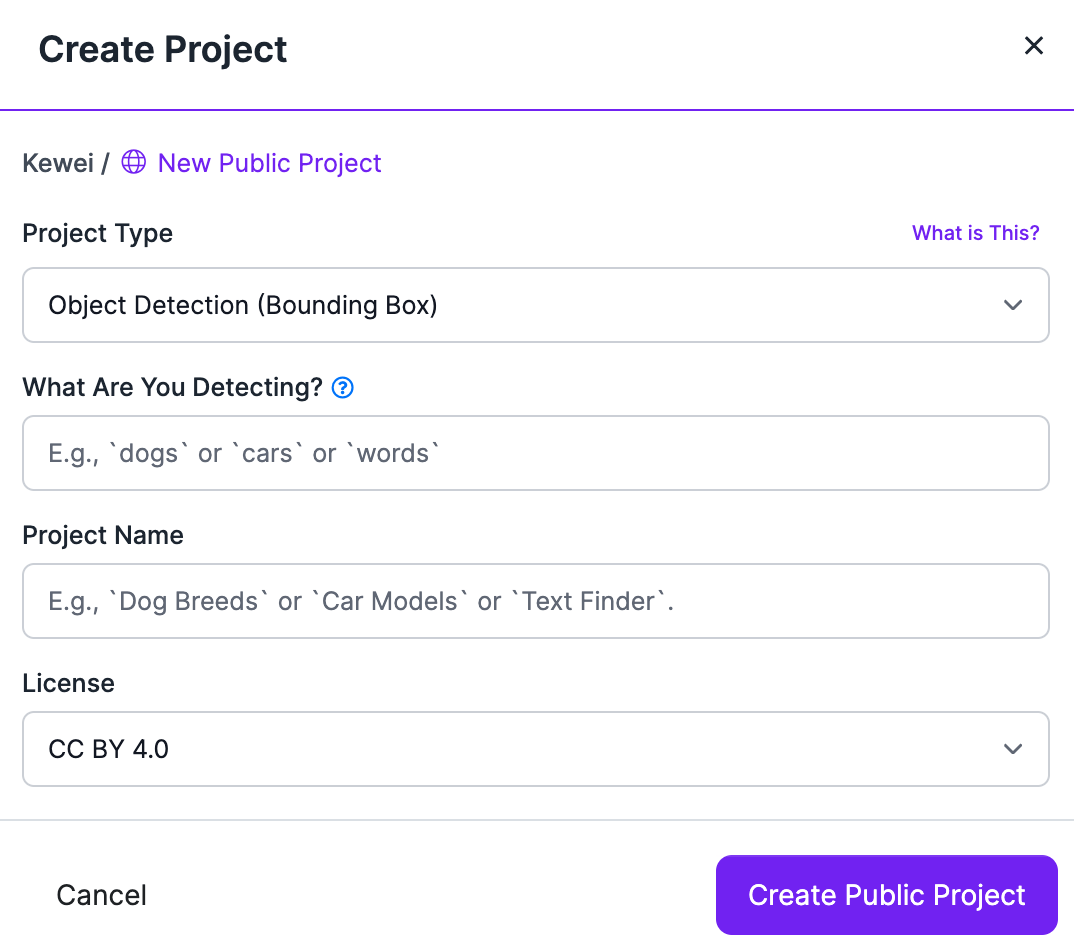
- Step 3. Fill in Project Name, keep the License (CC BY 4.0) and Project type (Object Detection (Bounding Box)) as default. Under What will your model predict? column, fill in an annotation group name.
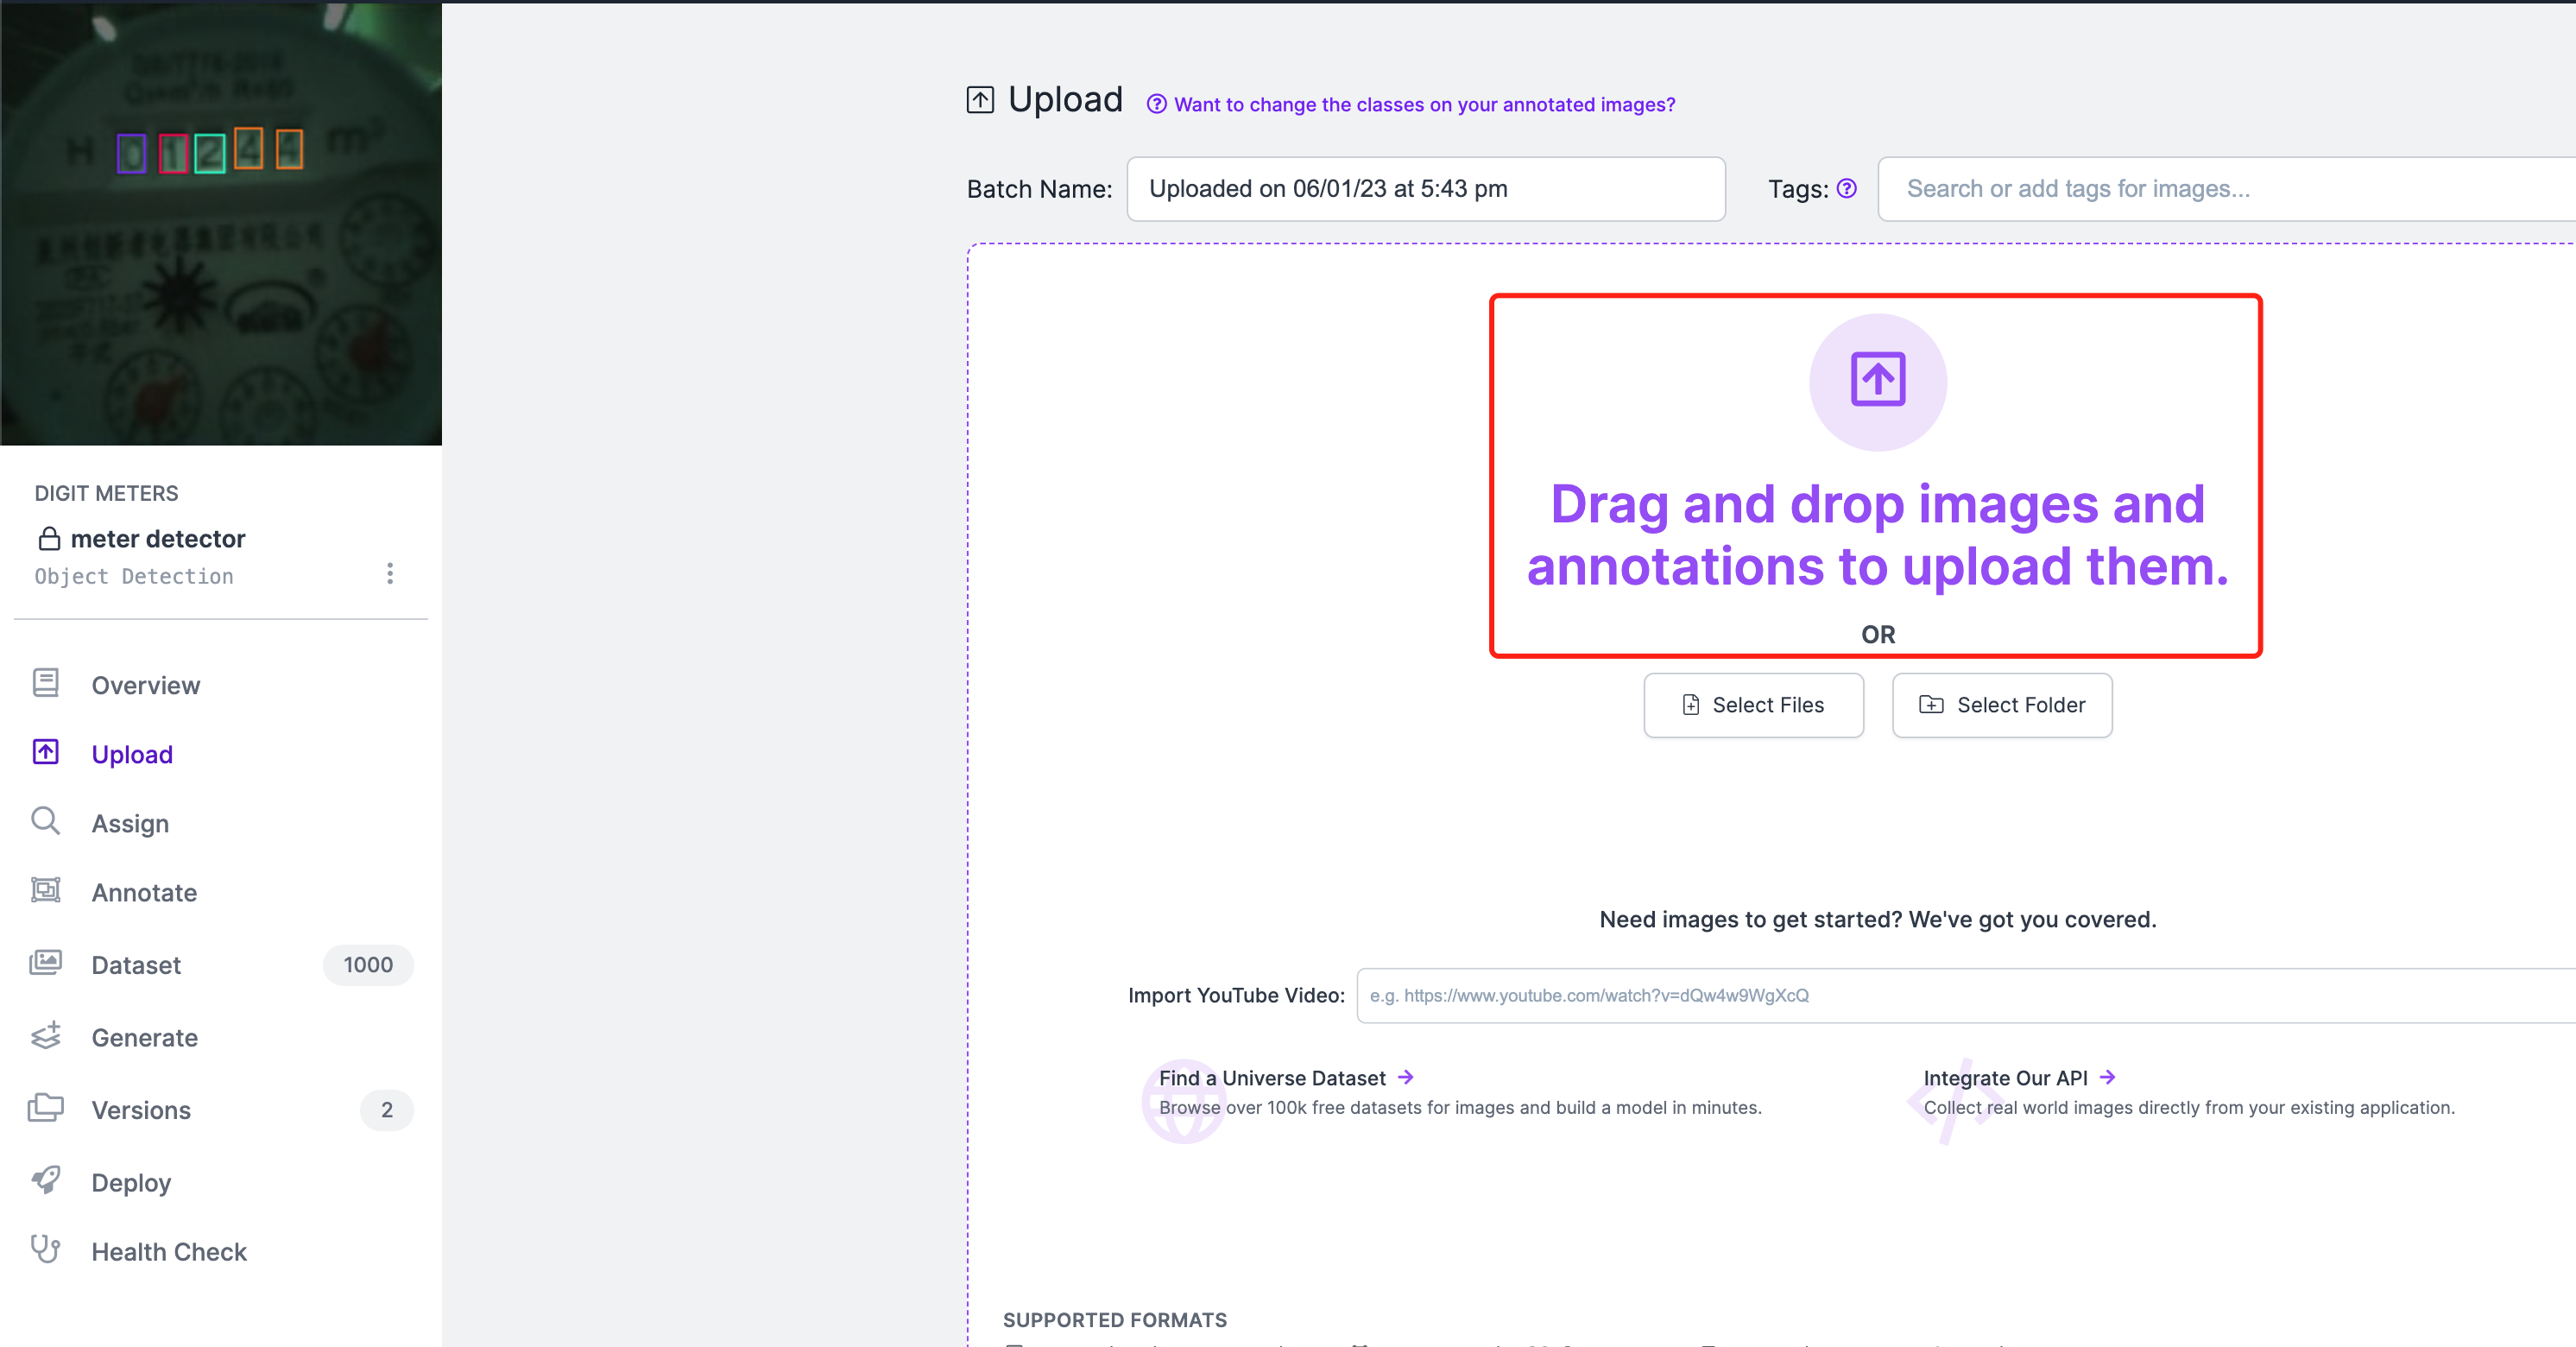
- Step 4. Drag and drop the images that you have captured using SenseCAP A1101
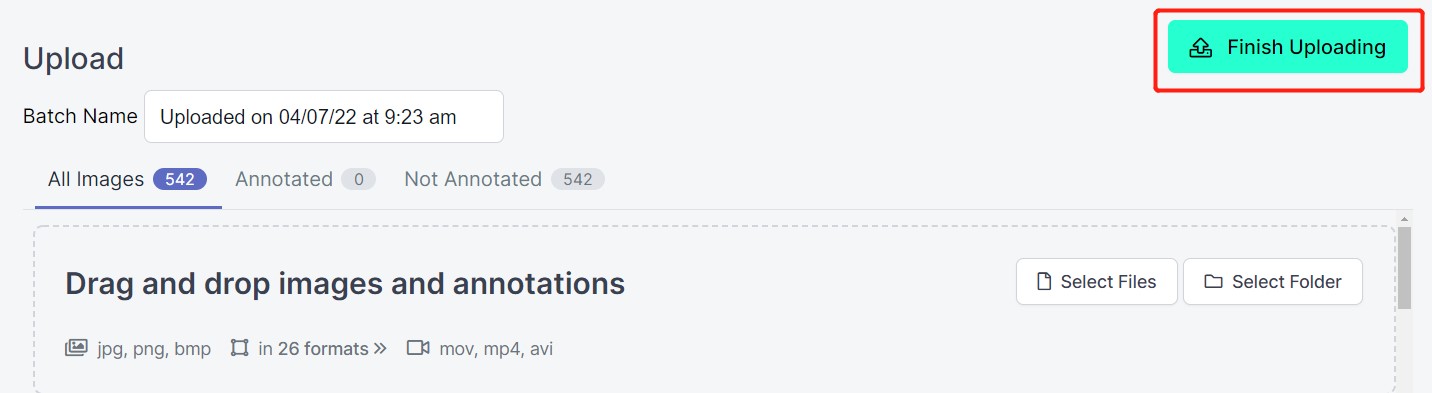
- Step 5. After the images are processed, click Finish Uploading. Wait patiently until the images are uploaded.
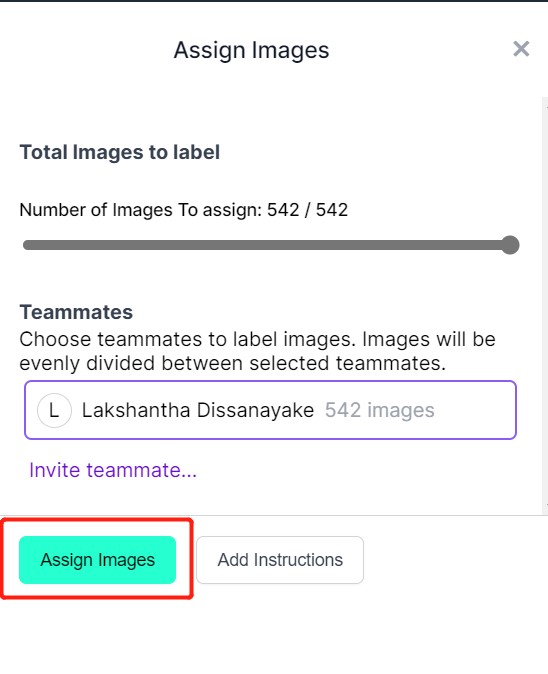
- Step 6. After the images are uploaded, click Assign Images
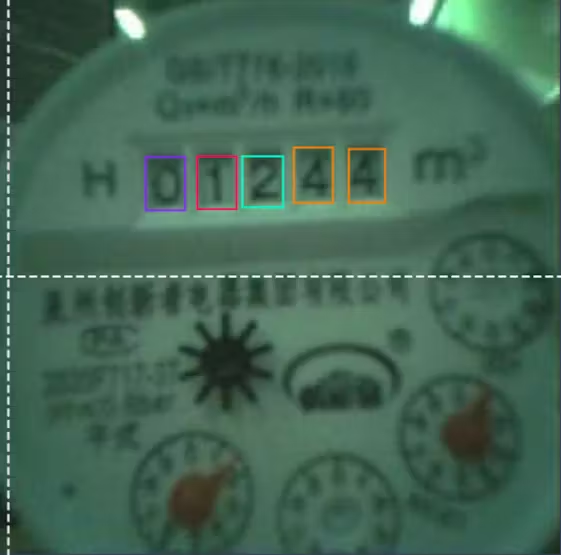
- Step 7. Select an image, draw a rectangular box around digits, choose the label as digits and press ENTER
- Step 8. Repeat the same for the remaining images
-
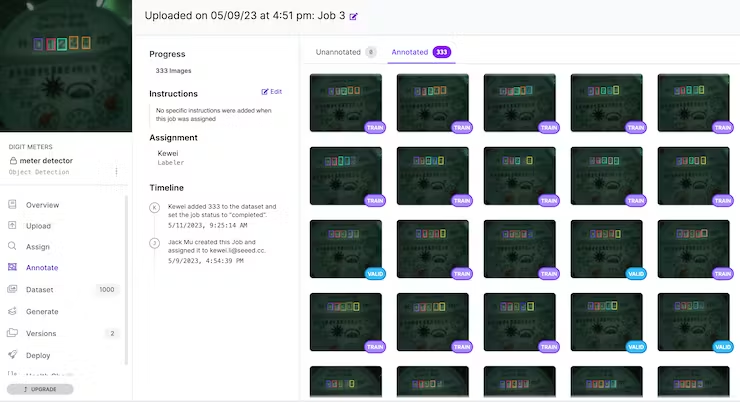
Step 9. Continue to annotate all the images in the dataset
-
Step 10. Once labelling is done, click Add images to Dataset

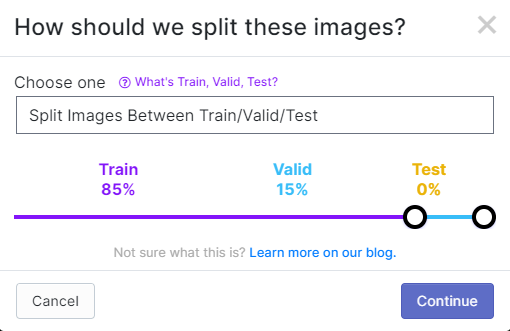
- Step 11. Next we will split the images between "Train, Valid and Test". If there are more datasets, it can be 80/20. if datasets are less, it can be 85/15. Please note the 'Train' should not be less than 80.
- Step 12. Click Generate New Version

- Step 13. Now you can add Preprocessing and Augmentation if you prefer. Here we will change the Resize option to 192x192
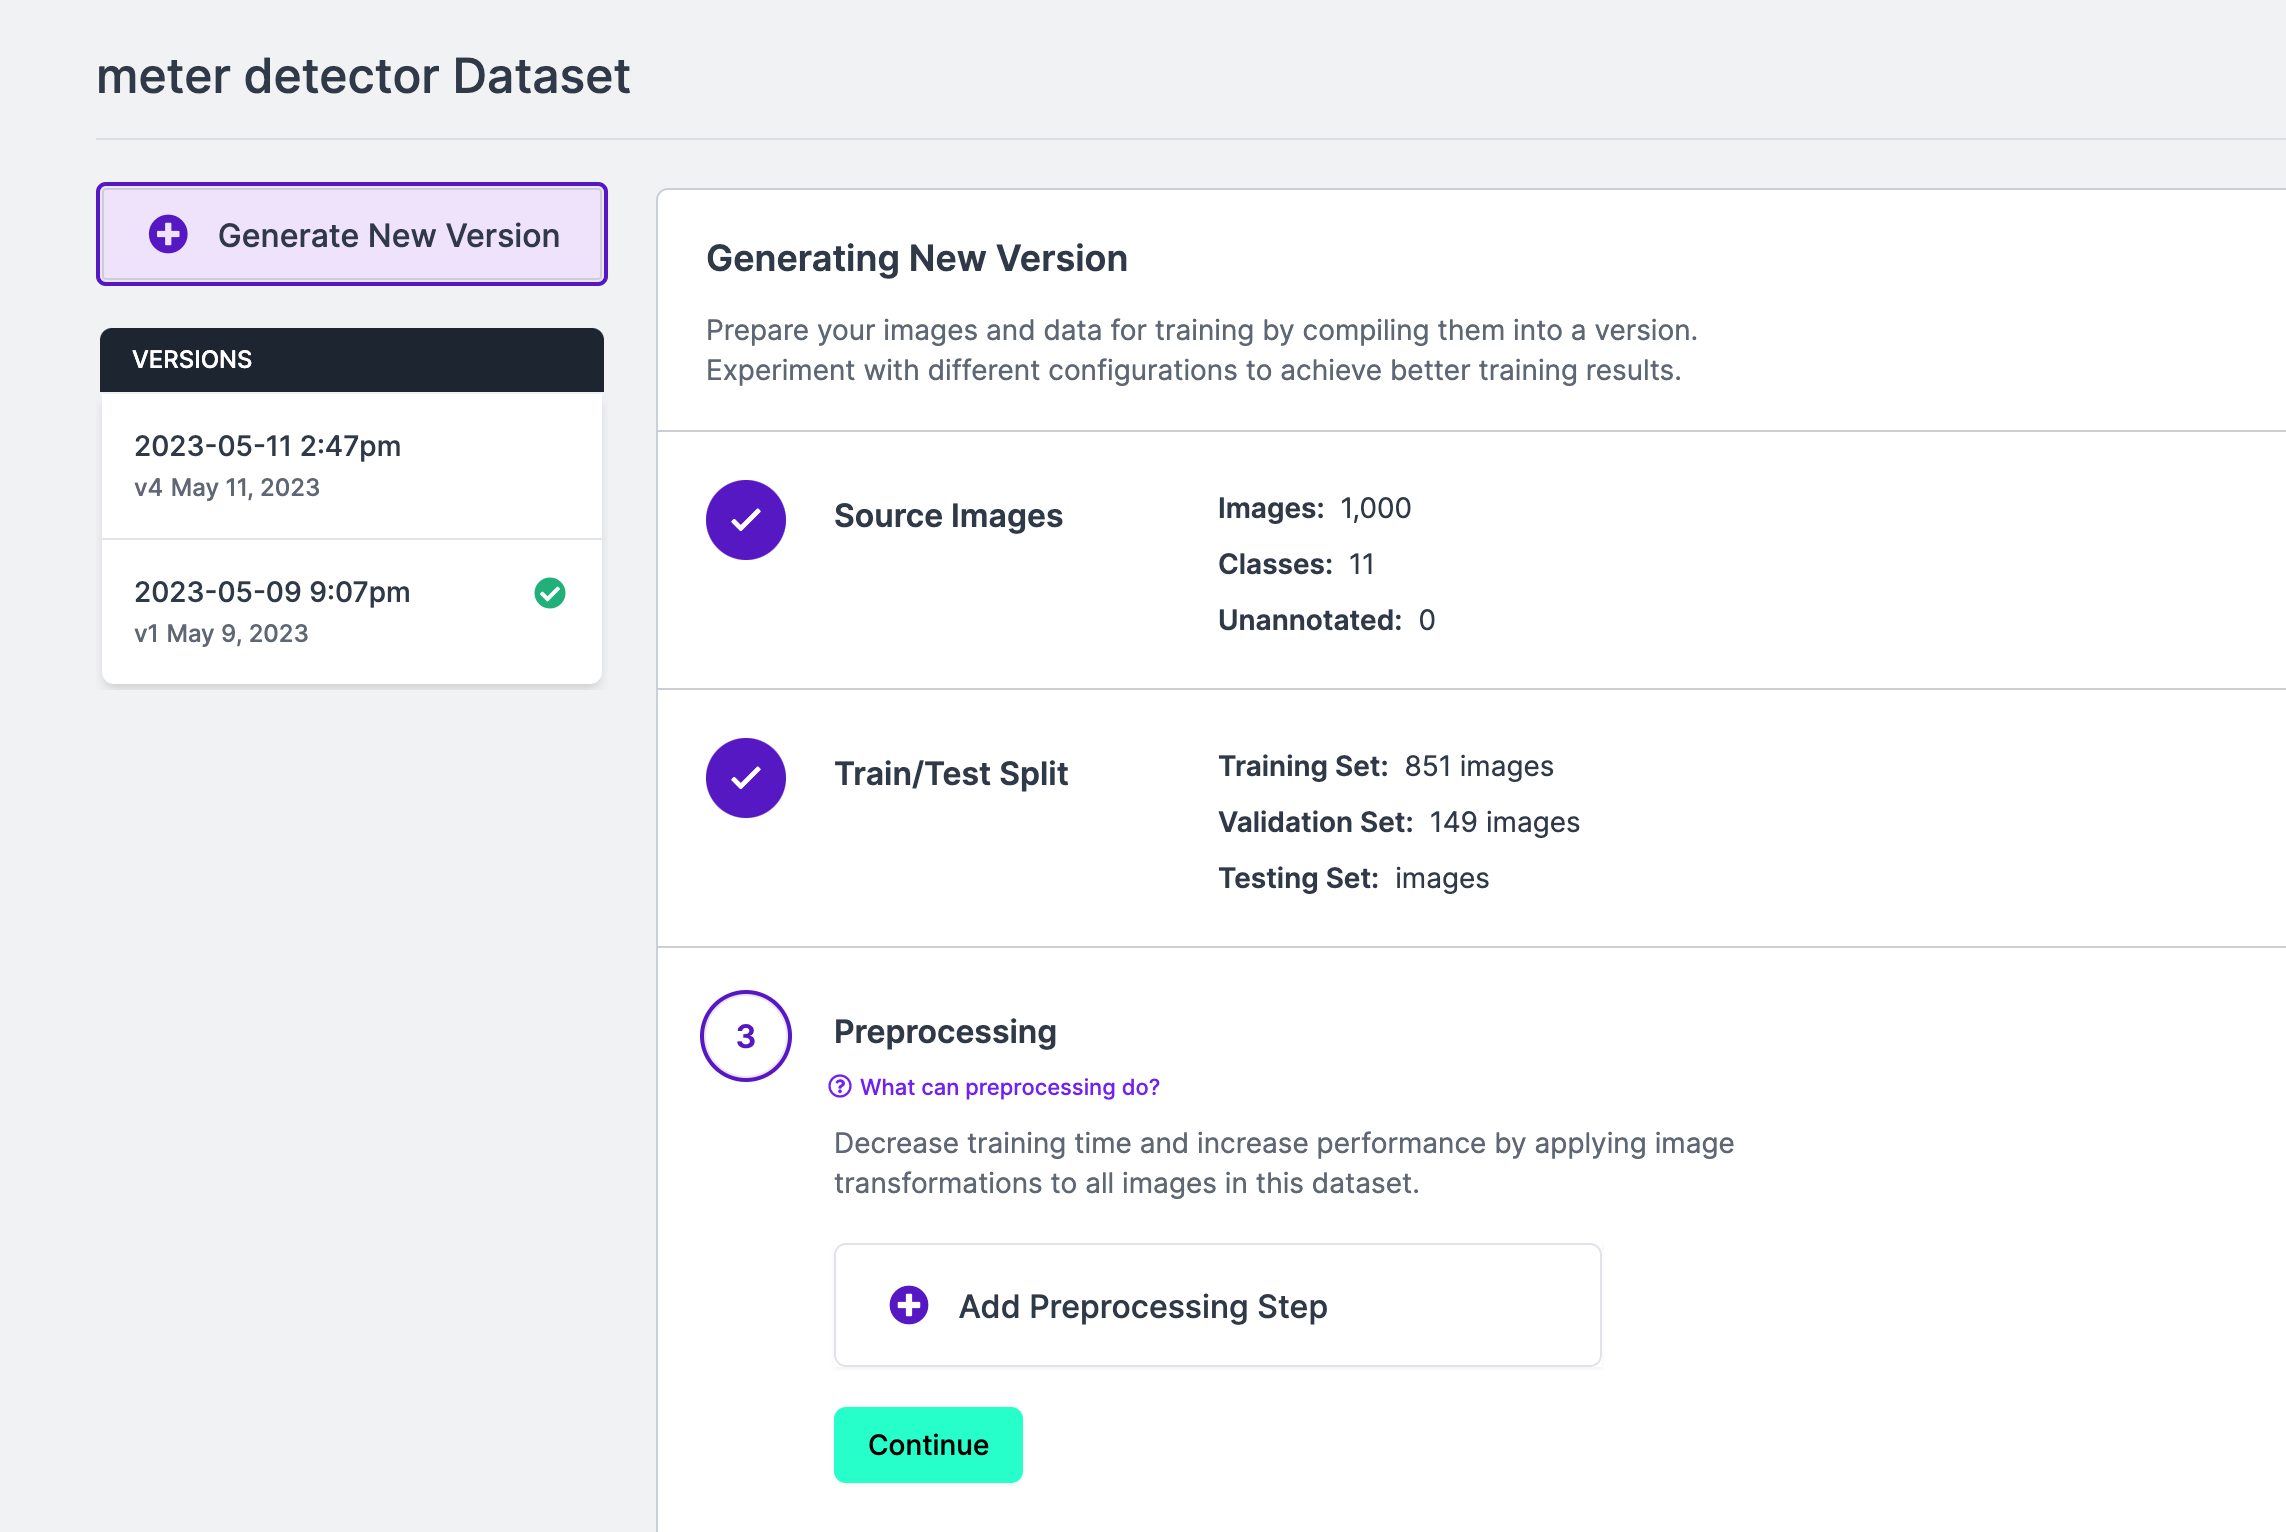
Here we change the image size to 192x192 because we will use that size for training and the training will be faster. Otherwise, it will have to convert all images to 192x192 during the training process which consumes more CPU resources and makes the training process slower.
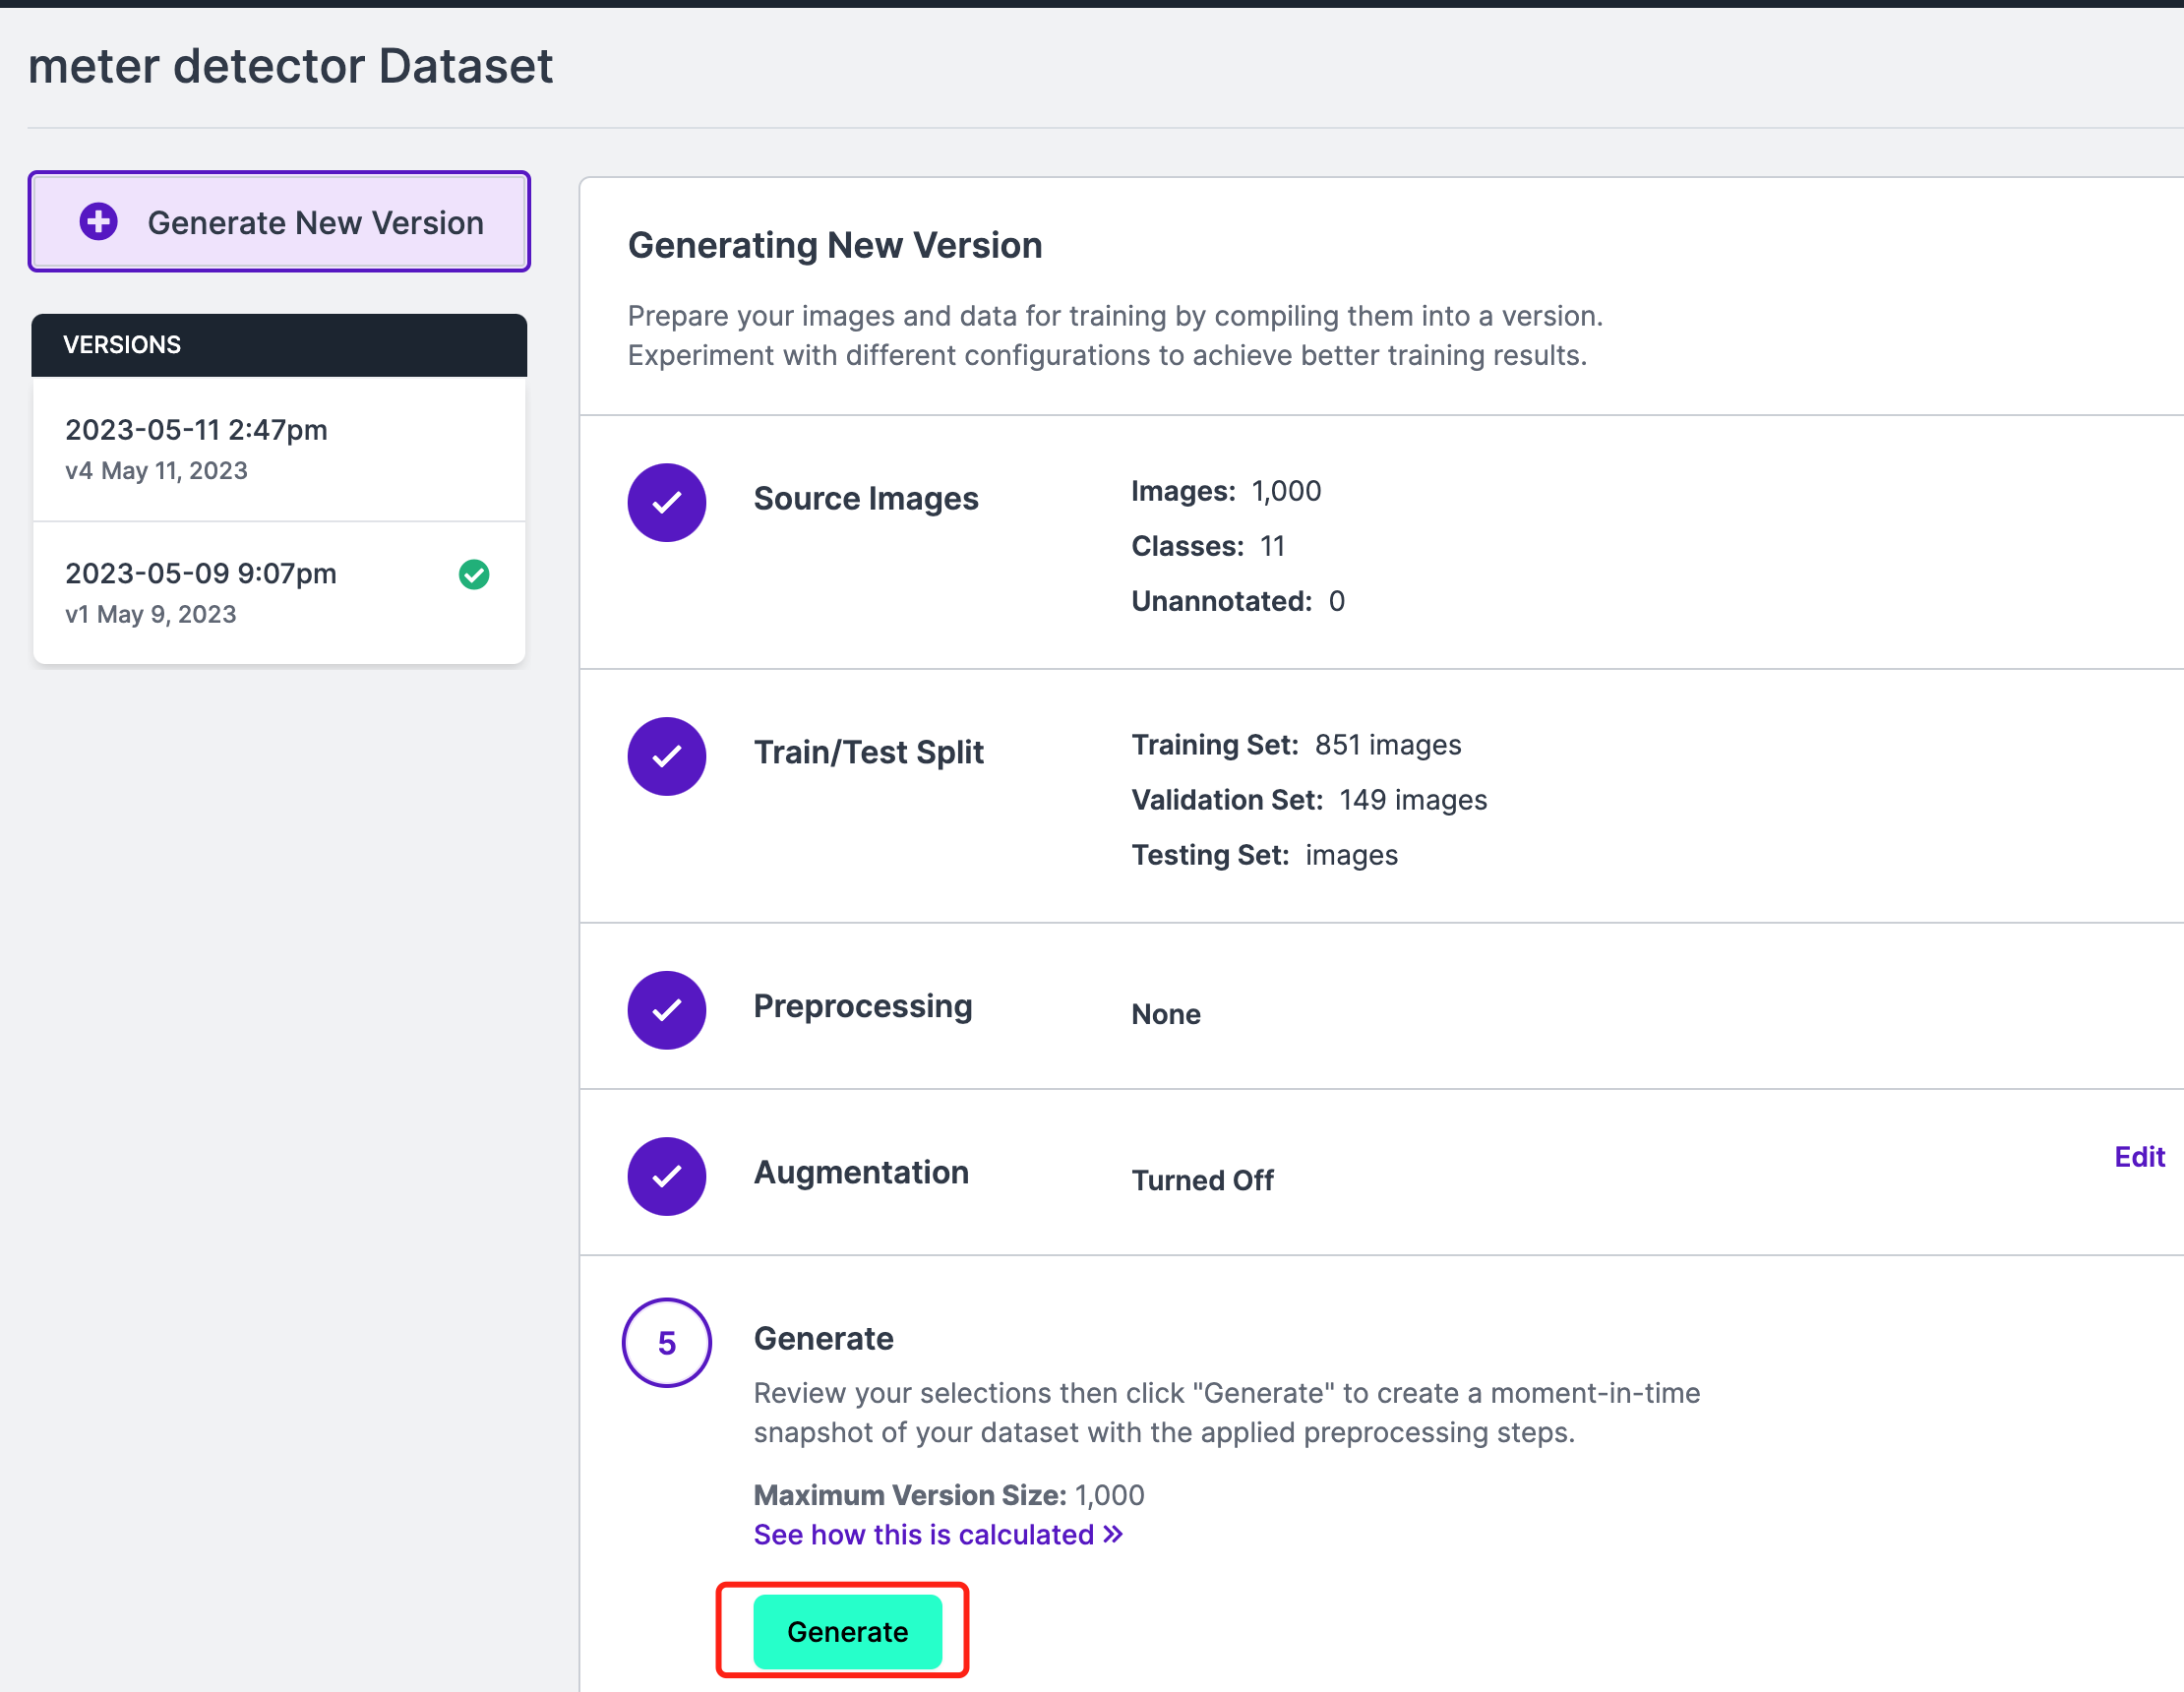
- Step 14. Next, proceed with the remaining defaults and click Generate
- Step 15. Click Export, select Format as COCO, select show download code and click Continue
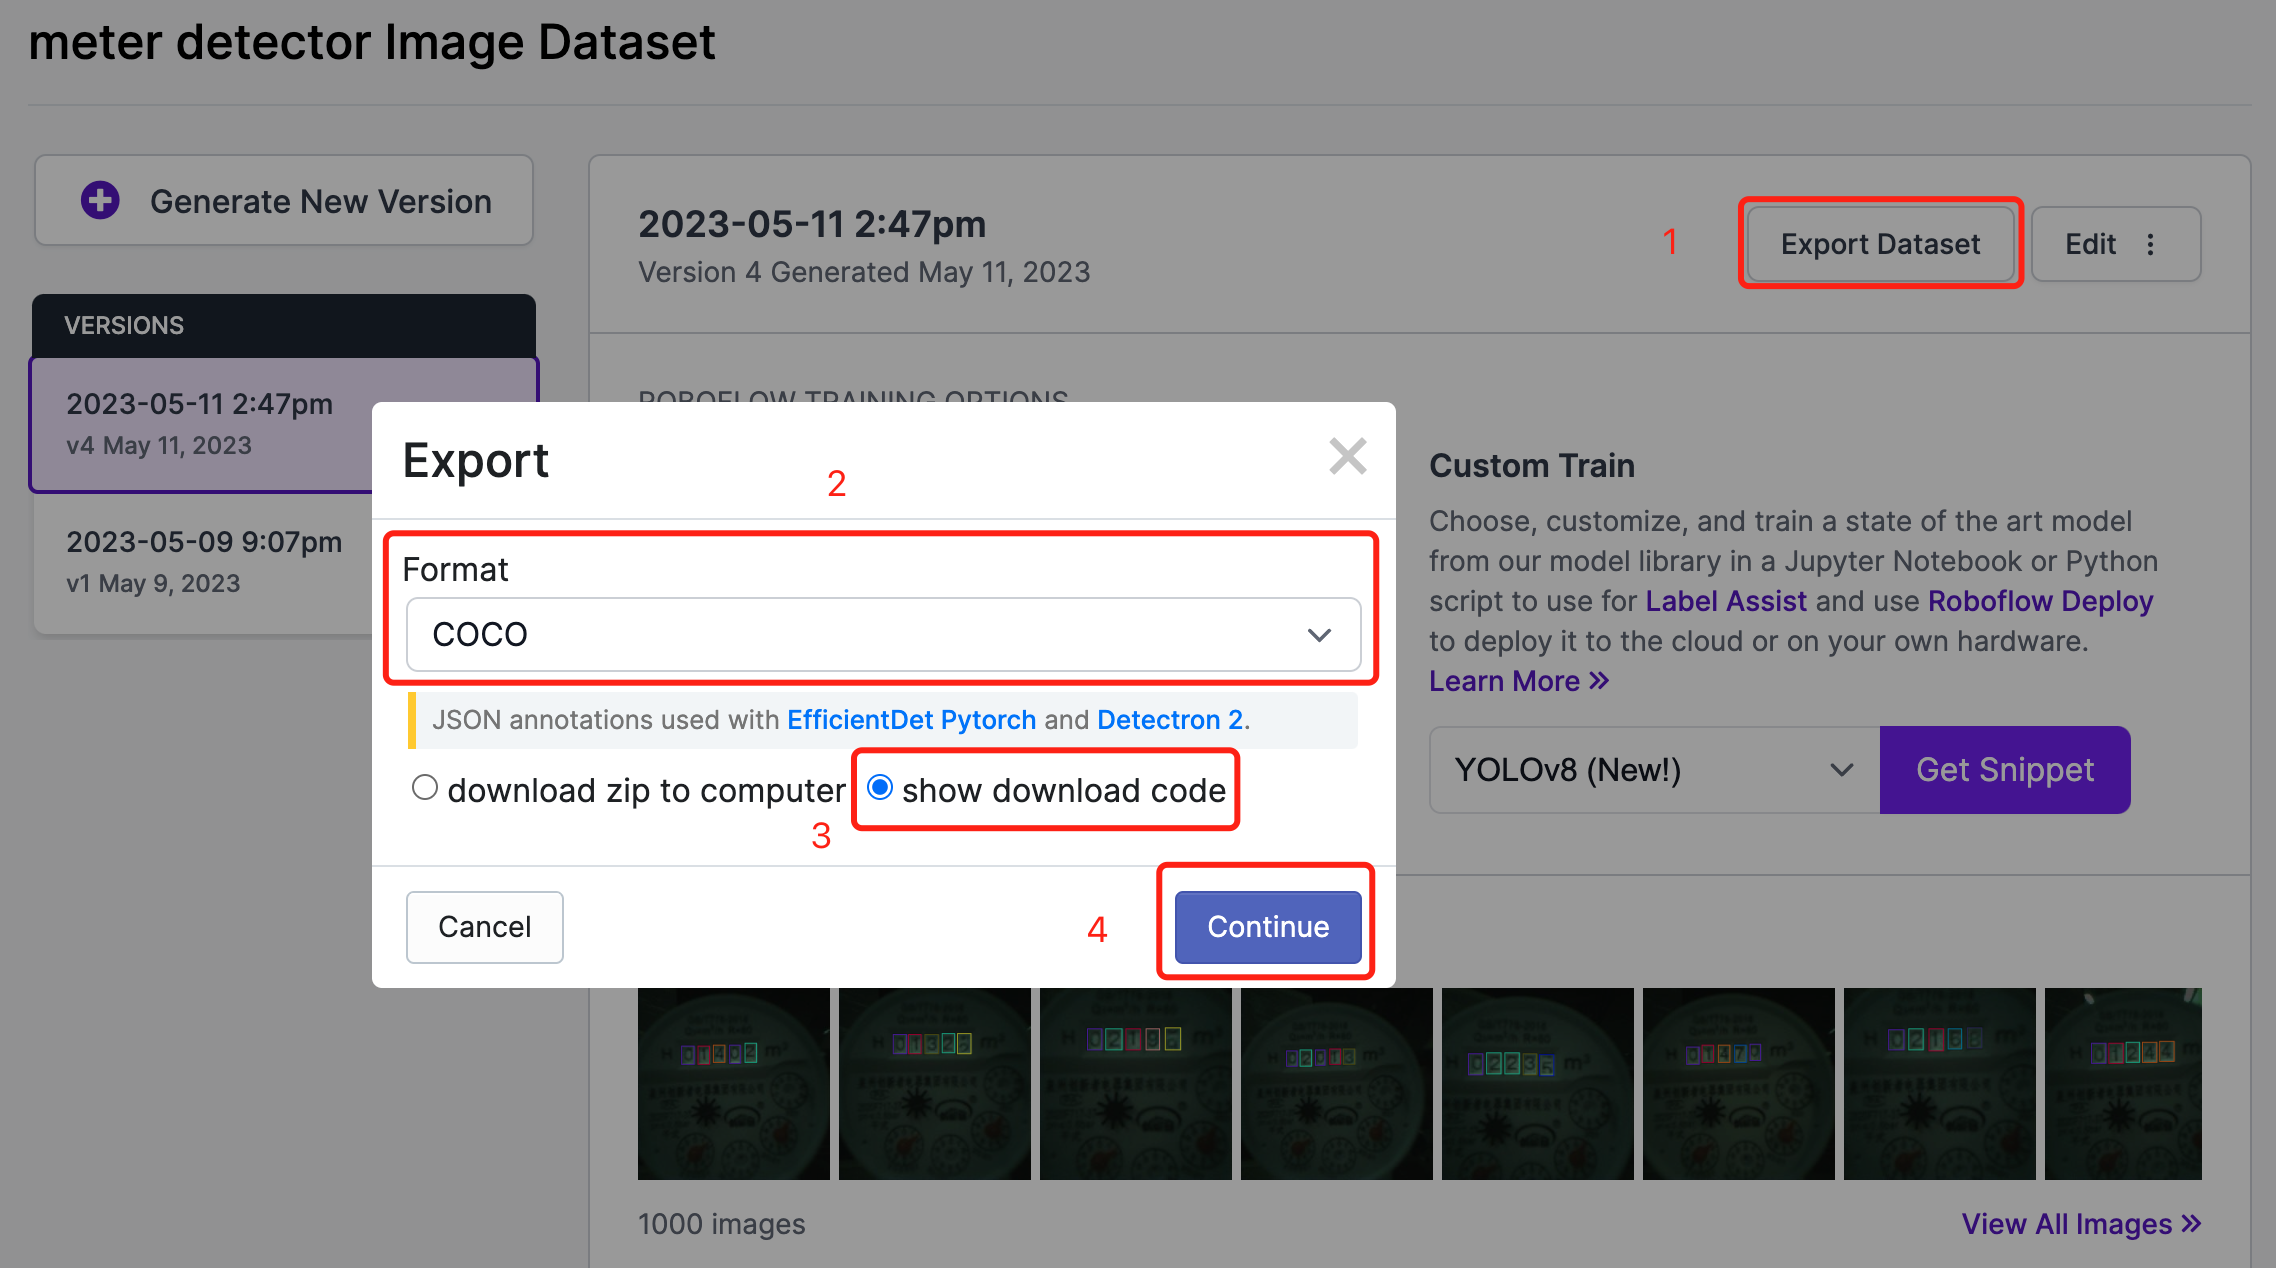
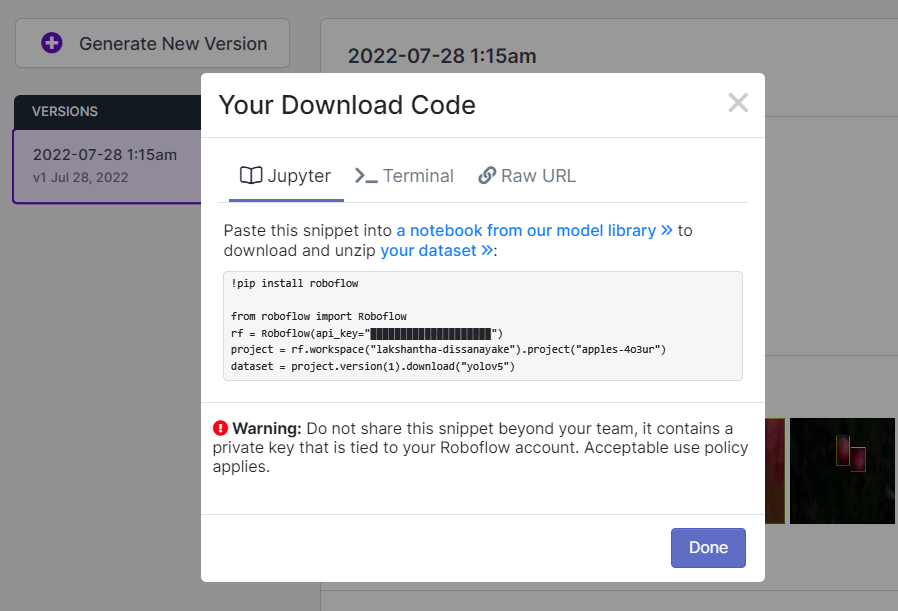
This will generate a code snippet that we will use later inside Google Colab training. So please keep this window open in the background.
Train using SenseCraft Model Assistant on Google Colab
After we have chosen a public dataset, we need to train the dataset. Here we use a Google Colaboratory environment to perform training on the cloud. Furthermore, we use Roboflow api within Colab to easily download our dataset.
Click here to open an already prepared Google Colab workspace, go through the steps mentioned in the workspace and run the code cells one by one.
Note: On Google Colab, in the code cell under Step 4, you can directly copy the code snippet from Roboflow as mentioned above
It will walkthrough the following:
- Setup an environment for training
- Download a dataset
- Perform the training
- Download the trained model

3. Deploy the trained model and perform inference
Now we will move the model-1.uf2 that we obtained at the end of the training into SenseCAP A1101.
-
Step 1. Install the latest version of Google Chrome or Microsoft Edge browser and open it
-
Step 2. Connect SenseCAP A1101 into your PC via a USB Type-C cable
- Step 3. Double-click the boot button on SenseCAP A1101 to enter mass storage mode
After this, you will see a new storage drive shown on your file explorer as SENSECAP
- Step 4. Drag and drop the model-1.uf2 file to SENSECAP drive
As soon as the uf2 finishes copying into the drive, the drive will disappear. This means the uf2 has been successfully uploaded to the module.
Note: If you have 4 model files ready, you can drag and drop each model one-by-one. Drop first model, wait until it finishes copying, enter boot mode again, drop second model and so on. If you have only loaded one model (with index 1) into SenseCAP A1101, it will load that model.
- Step 5. Click here to open a preview window of the camera stream
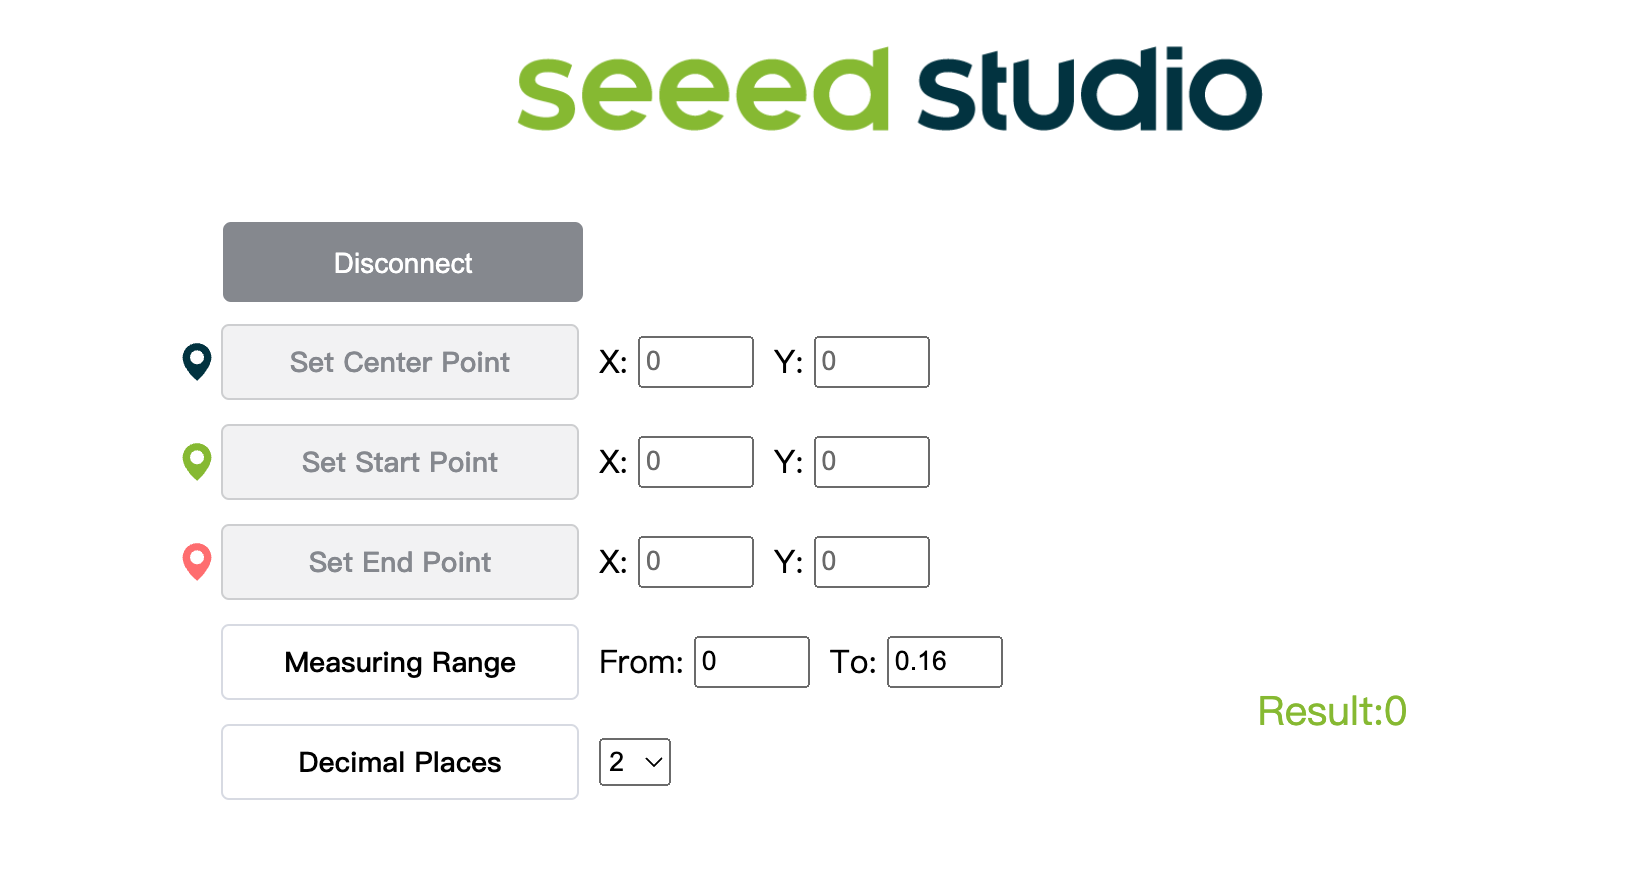
- Step 6. Click Connect button. Then you will see a pop up on the browser. Select SenseCAP Vision AI - Paired and click Connect
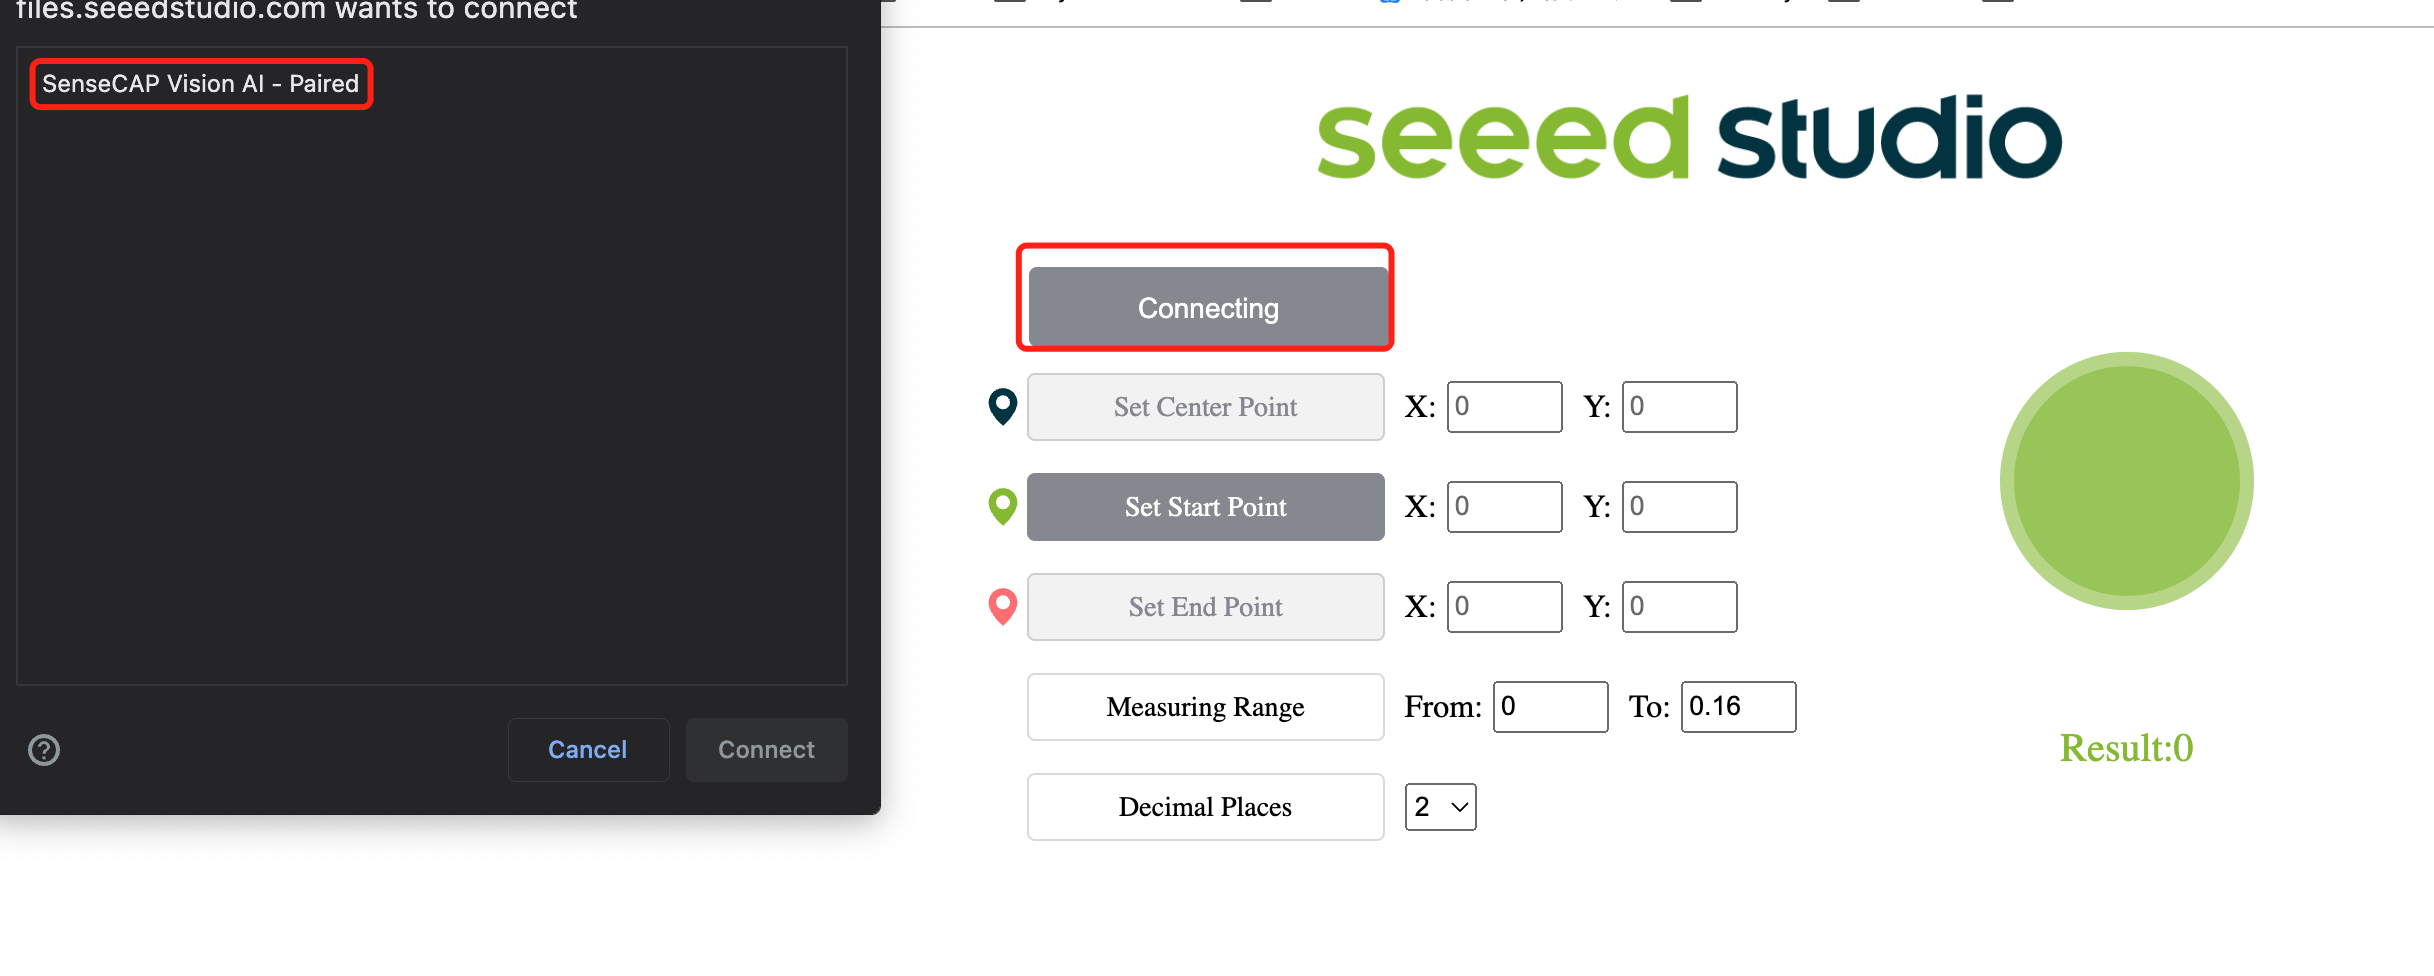
- Step 7. View real-time inference results using the preview window!
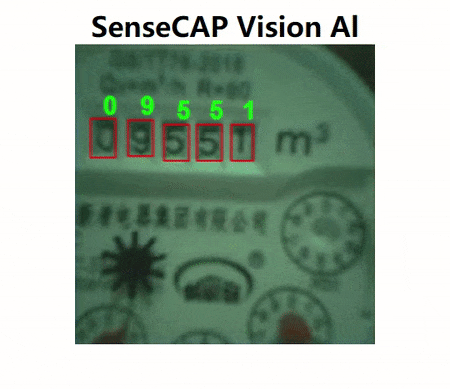
As you can see above, the numbers are being detected with bounding boxes around them.
4. Perform inference with SenseCAP A1101 on SenseCAP Mate
In addition to perform inference on the browser, we can also use the SenseCAP Mate to implement model inference, which we will implement it step by step.
-
Step 1. First, we need to erase the firmware of A1101, which can be achieved by using erase_model.uf2. Then upgrade the A1101 firmware to the latest version and drop the water meter digits recognition model into A1101
Firmware: erase_model.uf2、SenseCAP-A1101_v02-00.uf2
Model: water_meter.uf2、pfld_meter.uf2、digital_meter.uf2
Note: water_meter and digital_meter both identify the model name as user-define6 on the desktop and display digital_meter on the APP side. The model name identified by pfld_meter is user-define5, and Point_meter is displayed on the APP side. Users need to upload models according to their actual usage requirements during the deployment process
-
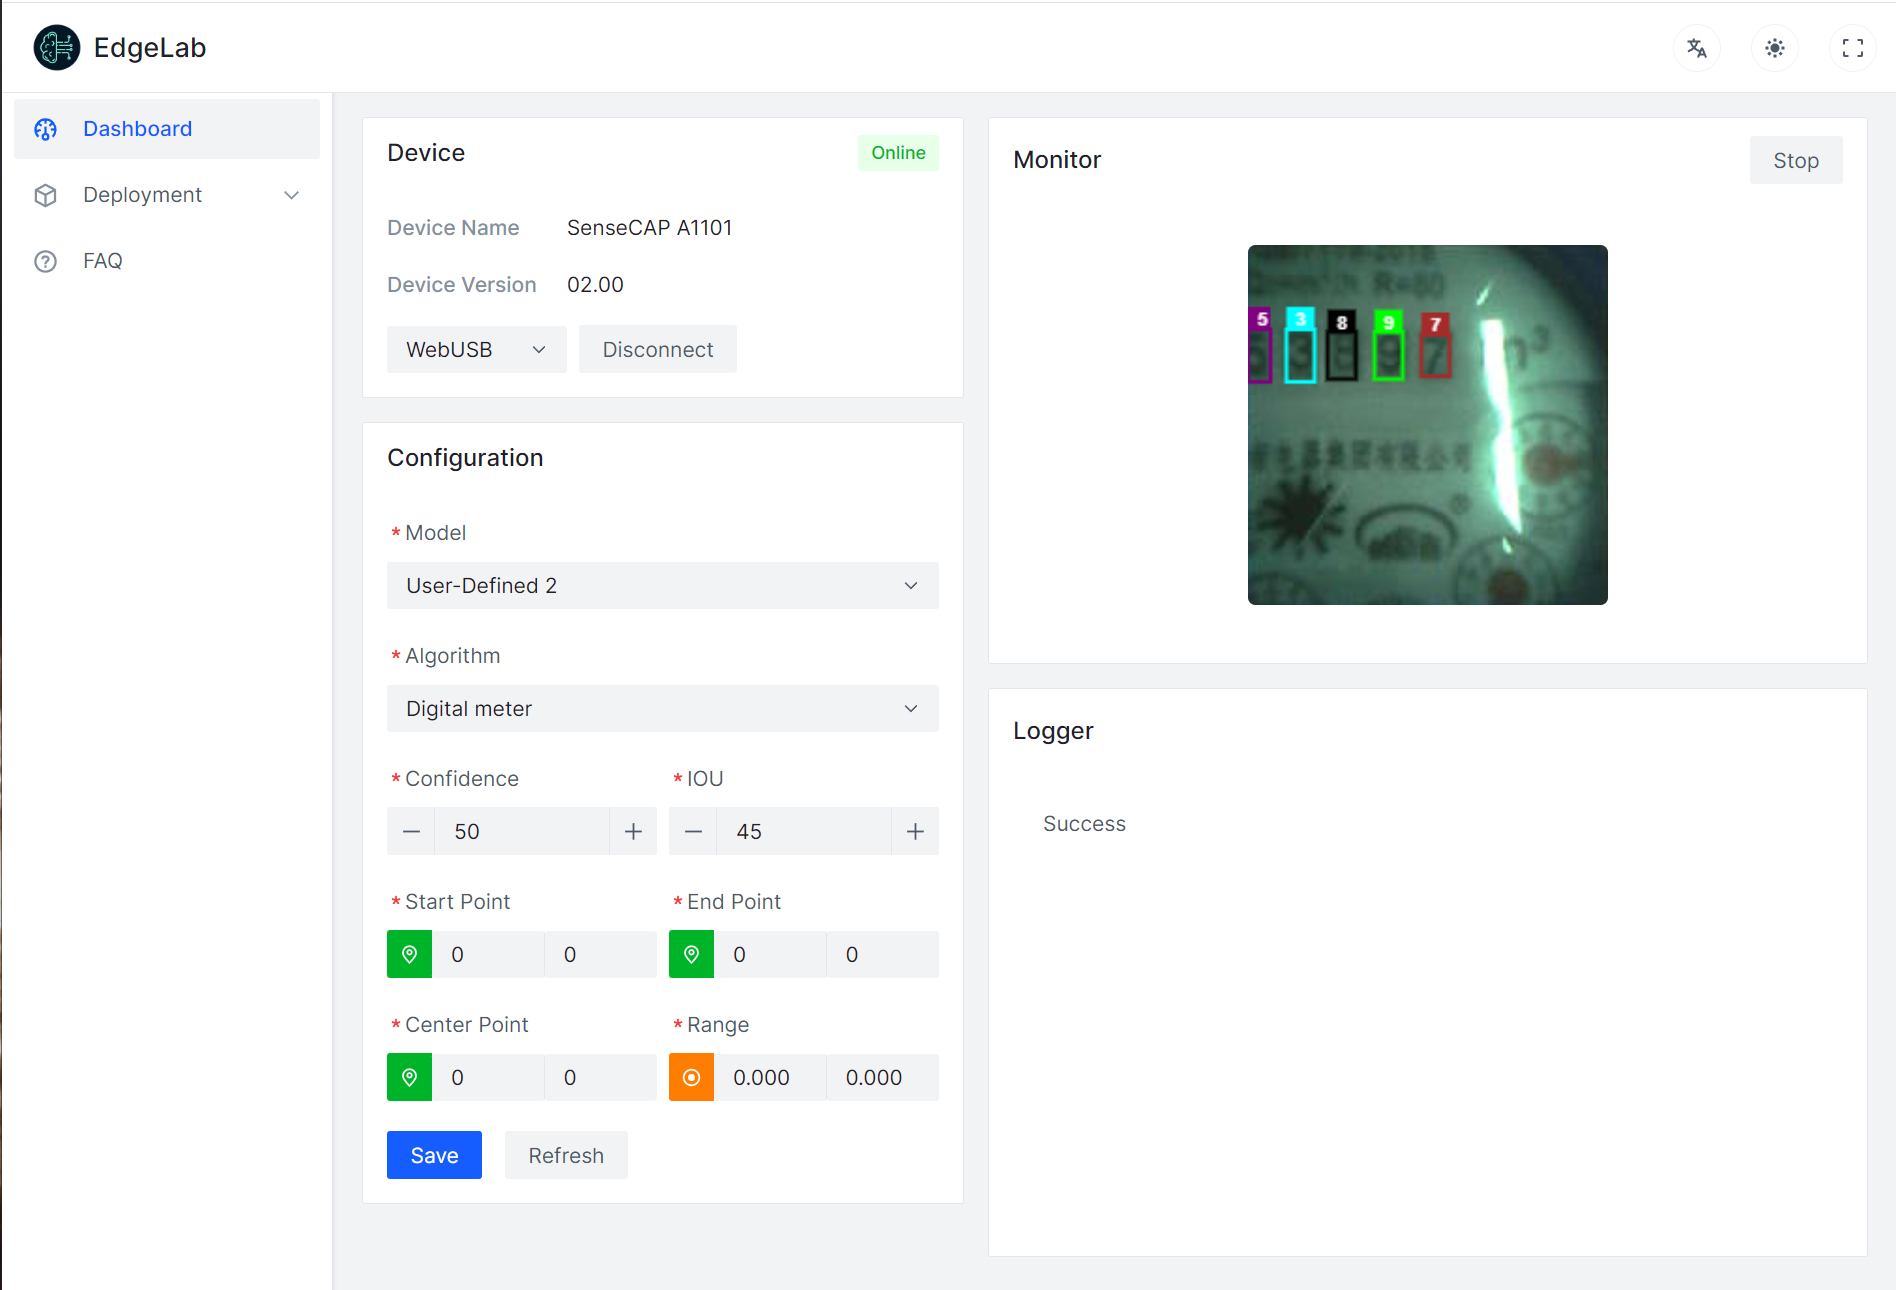
Step 2. Click here to open a preview window of the camera stream
-
Step 3. Click Connect button. Then you will see a pop up on the browser. Select SenseCAP A1101 - Paired and click Connect
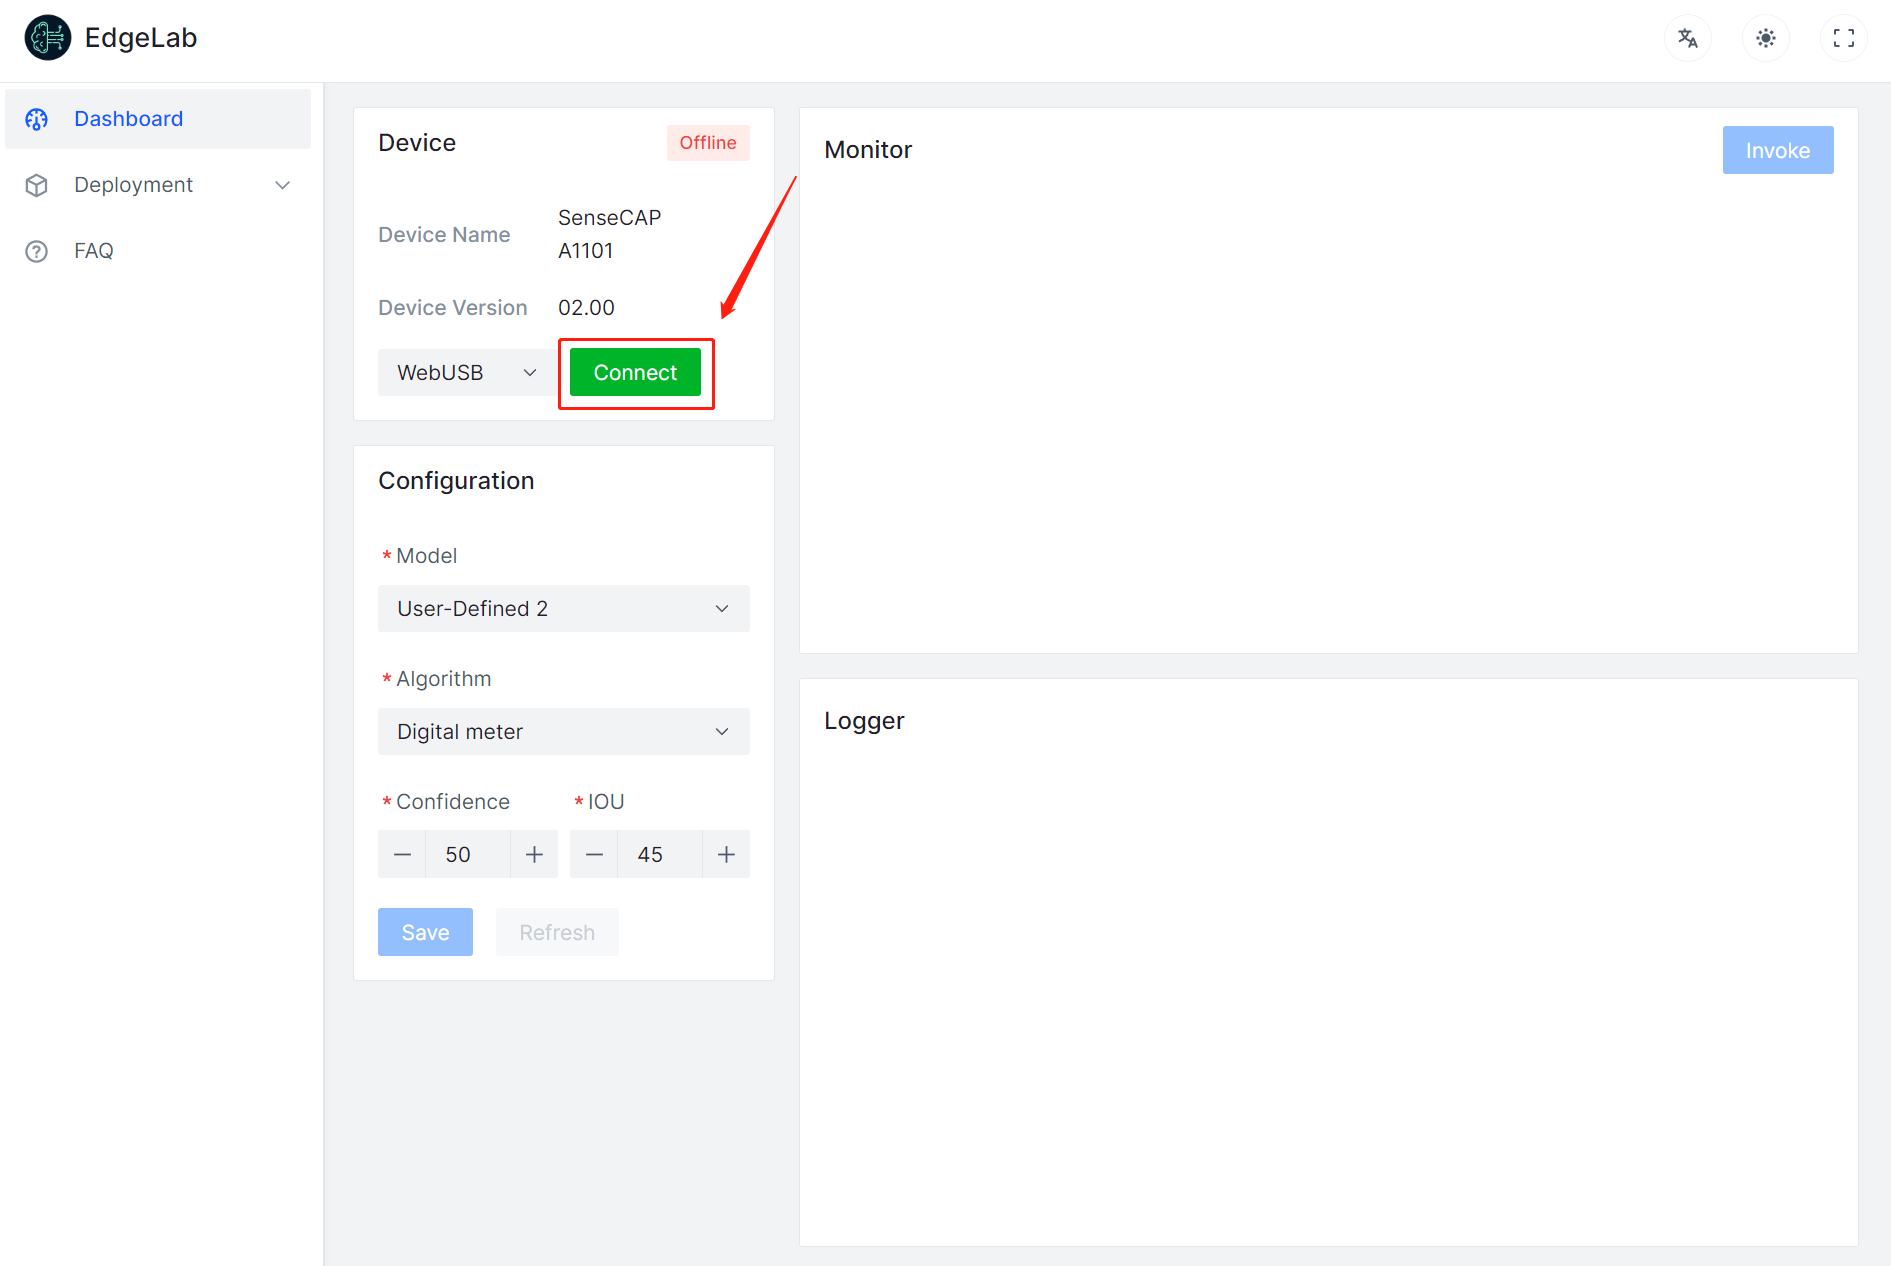
- Step 4(Optional). Select Digital Meter in Model and Digital Meter in Algorithm, click Save and then click Invoke. And now we can view real-time inference results using the preview window.
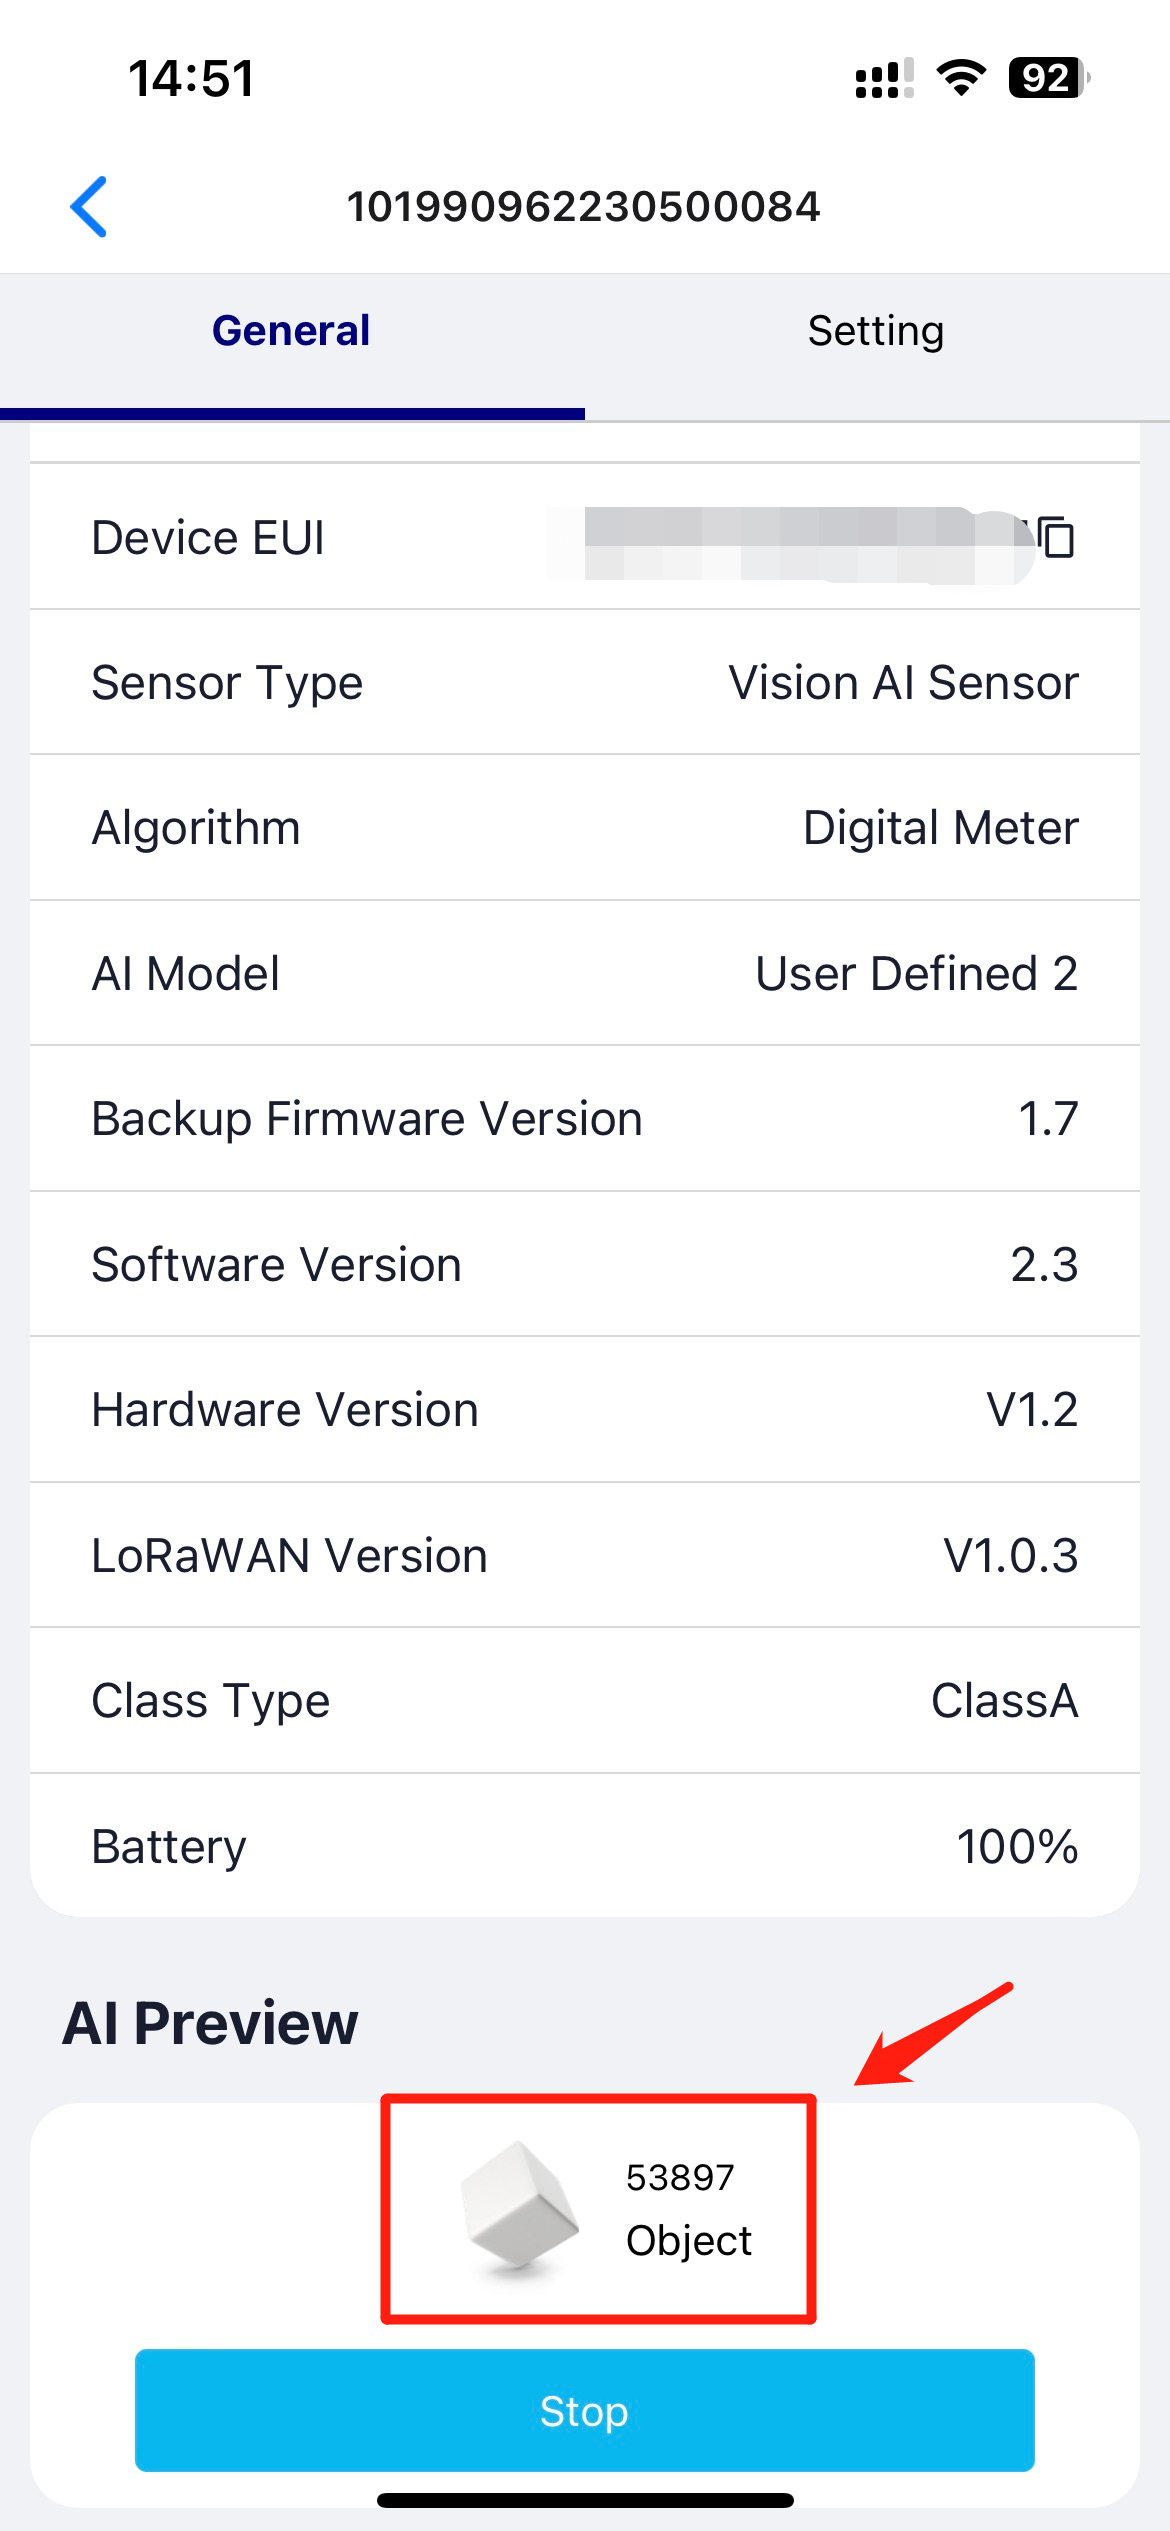
- Step 5. Open SenseCAP Mate and get paired with your own A1101, select the same Model and Algorithm as above. Then click General and click Detect on the bottom.
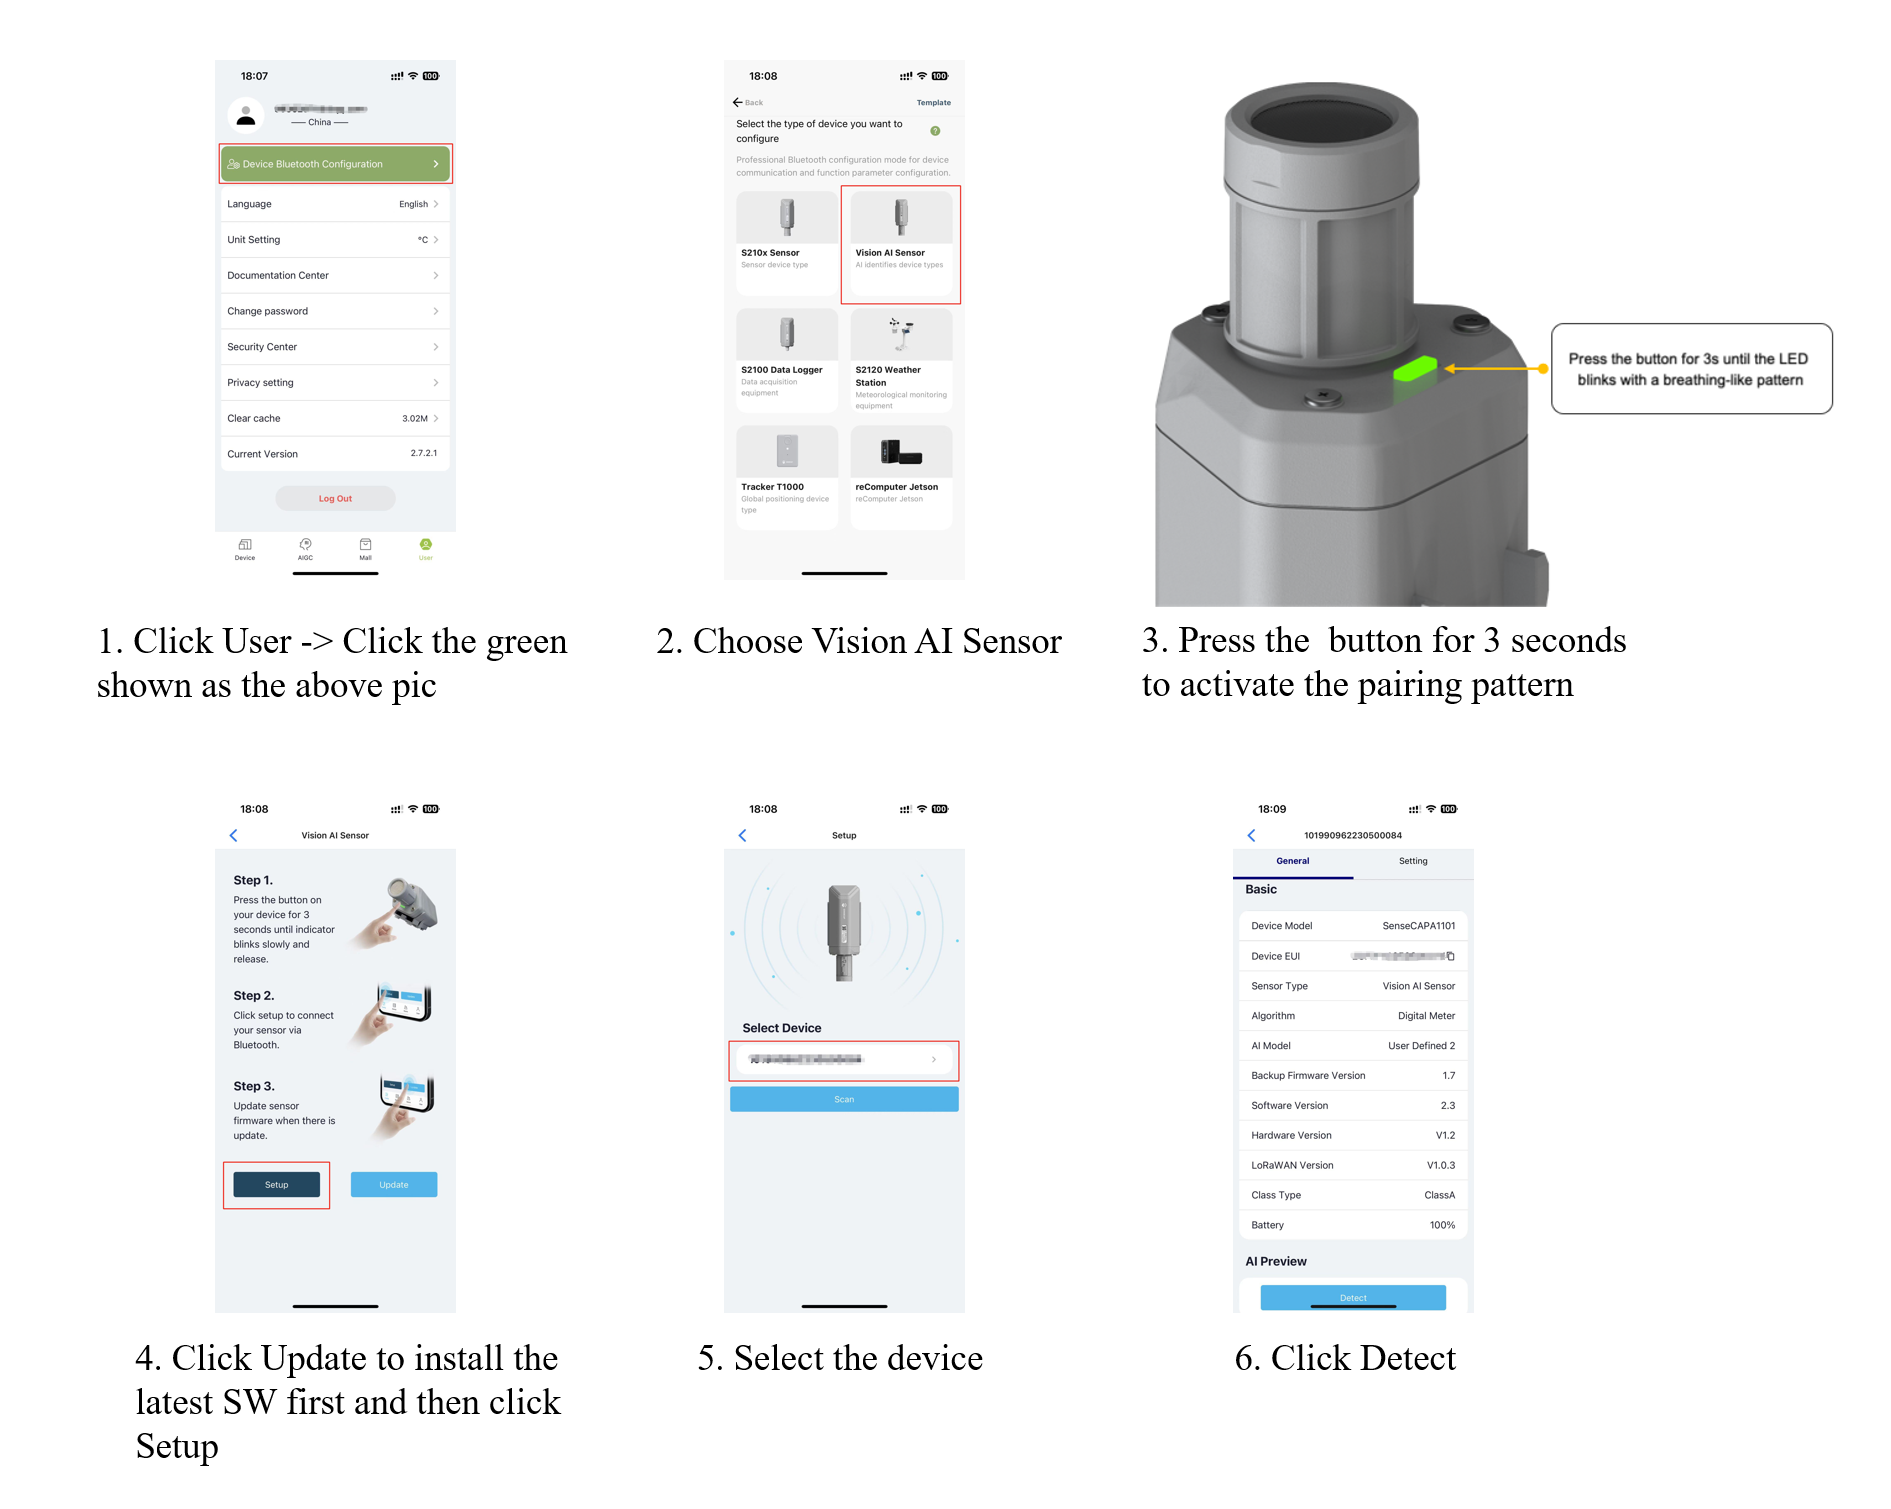
- Step 6. As you can see below, the AI Preview shows the digital meter recognition results.
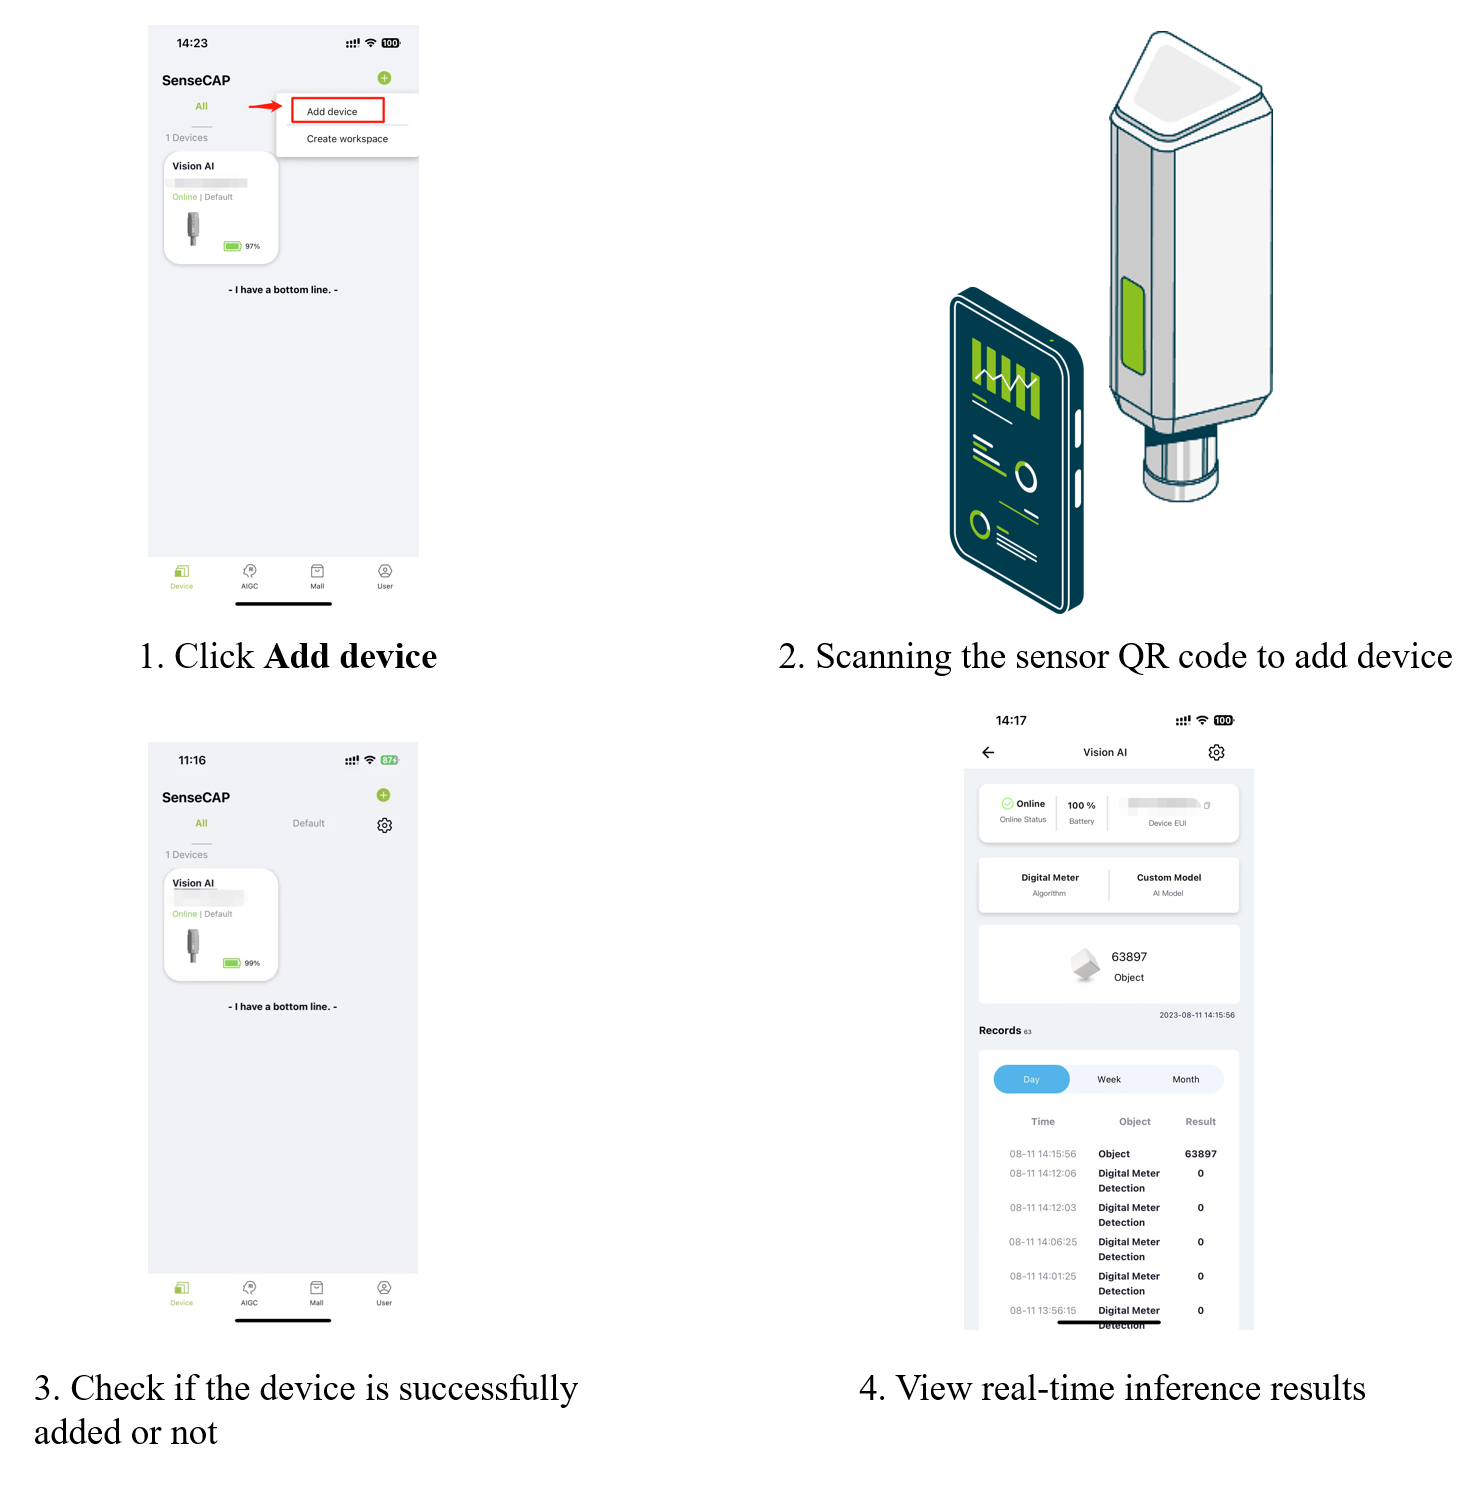
After completing the above steps, we will try to add our own A1101 to the device. Through the following 4 steps, we can view the result data of device identification anytime and anywhere through the cloud platform like SenseCAP Mate.
Resources
-
[Web Page] SenseCraft Model Assistant Documentation
-
[Web Page] Ultralytics HUB
-
[Web Page] Roboflow Documentation
-
[Web Page] TensorFlow Lite Documentation
Tech Support & Product Discussion
Thank you for choosing our products! We are here to provide you with different support to ensure that your experience with our products is as smooth as possible. We offer several communication channels to cater to different preferences and needs.