Connecting Wio Terminal to Blynk
This wiki introduces how to use the Wio Terminal with the Blynk software to interact with Wi-Fi or Bluetooth. This allows you to use Wio Terminal as the core of an IoT device and able to control hardware from phones very easily!
- What is Blynk
Blynk is a new platform that allows you to quickly build interfaces for controlling and monitoring your hardware projects from your iOS and Android device. After downloading the Blynk app, you can create a project dashboard and arrange buttons, sliders, graphs, and other widgets onto the screen
Hardware Required
-
Mobile Phone
- Download Blynk App from App Store
Getting Started
Installing the blynk-library
-
Visit the blynk-library repositories and download the entire repo to your local drive.
-
Now, the library can be installed to the Arduino IDE. Open the Arduino IDE, and click
sketch->Include Library->Add .ZIP Library, and choose theblynk-libraryfile that you've have just downloaded.

Wi-Fi Dependencies
For now, the Wi-Fi and Bluetooth are two separate firmware for Wio Terminal and therefore they CANNOT be used at the same time.
Note: The new firmware of Wi-Fi and Bluetooth working together is under development and will be released very soon.
-
Please follow the Wi-Fi Overview Wiki to upload the Wi-Fi firmware to Wio Terminal.
-
Please also download and install all the dependent Wi-Fi Libraries.
Bluetooth Dependencies
-
Please follow the Bluetooth Overview Wiki to upload the Bluetooth firmware to Wio Terminal.
-
Please also download and install all the dependent Bluetooth Libraries.
Blynk Mobile App Set-up
Once you have downloaded the Blynk App.
-
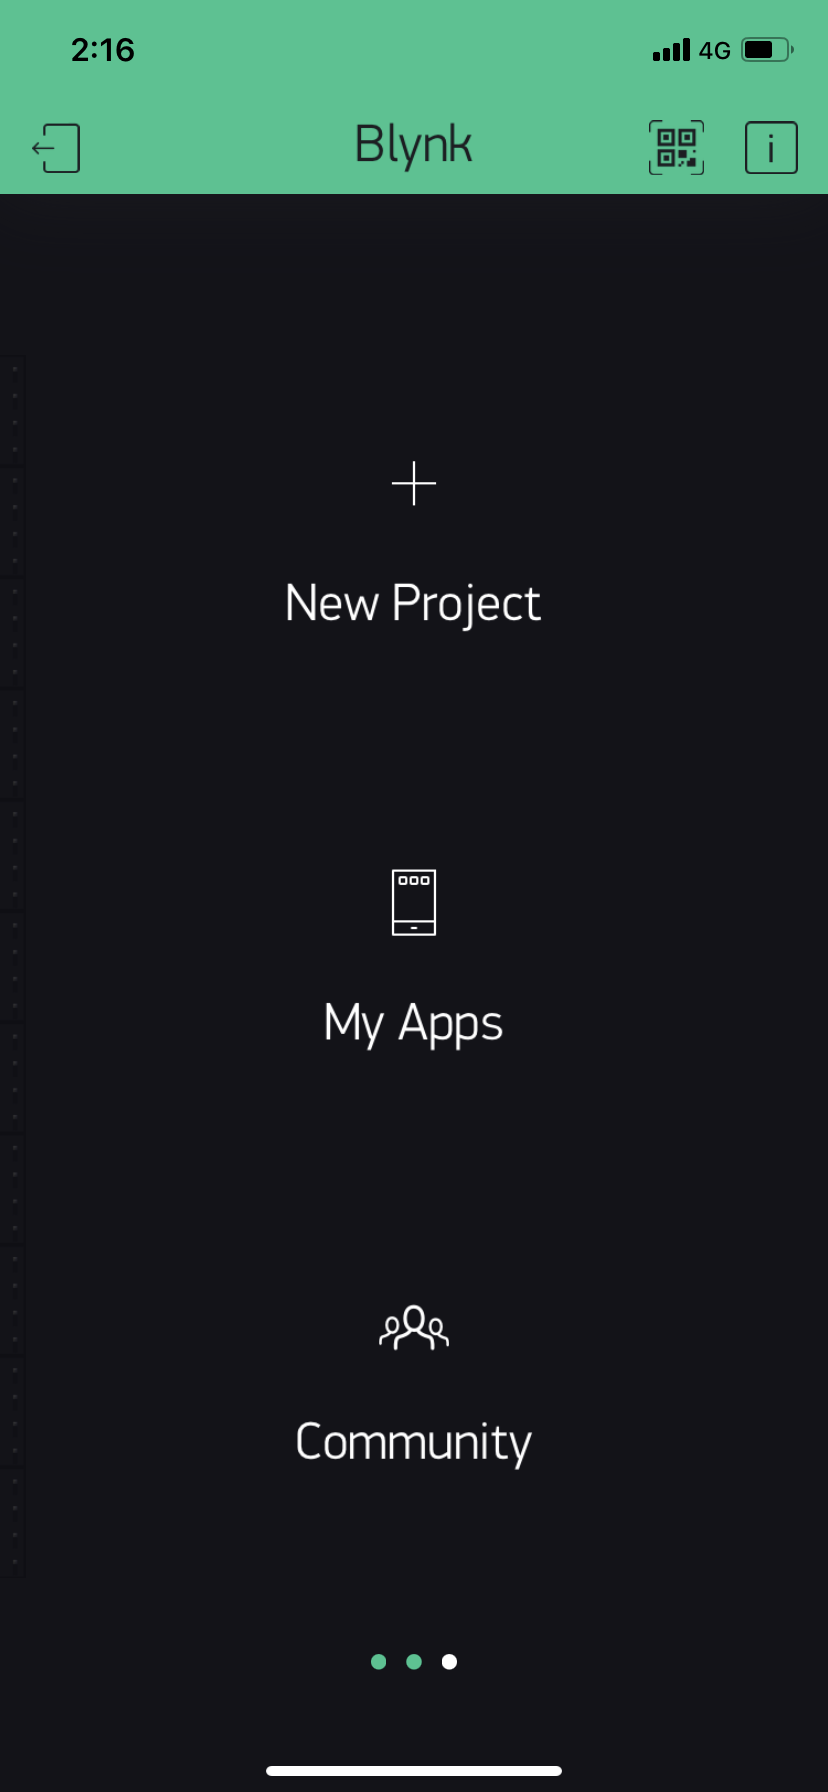
Open the App.
-
Click on the New Project:
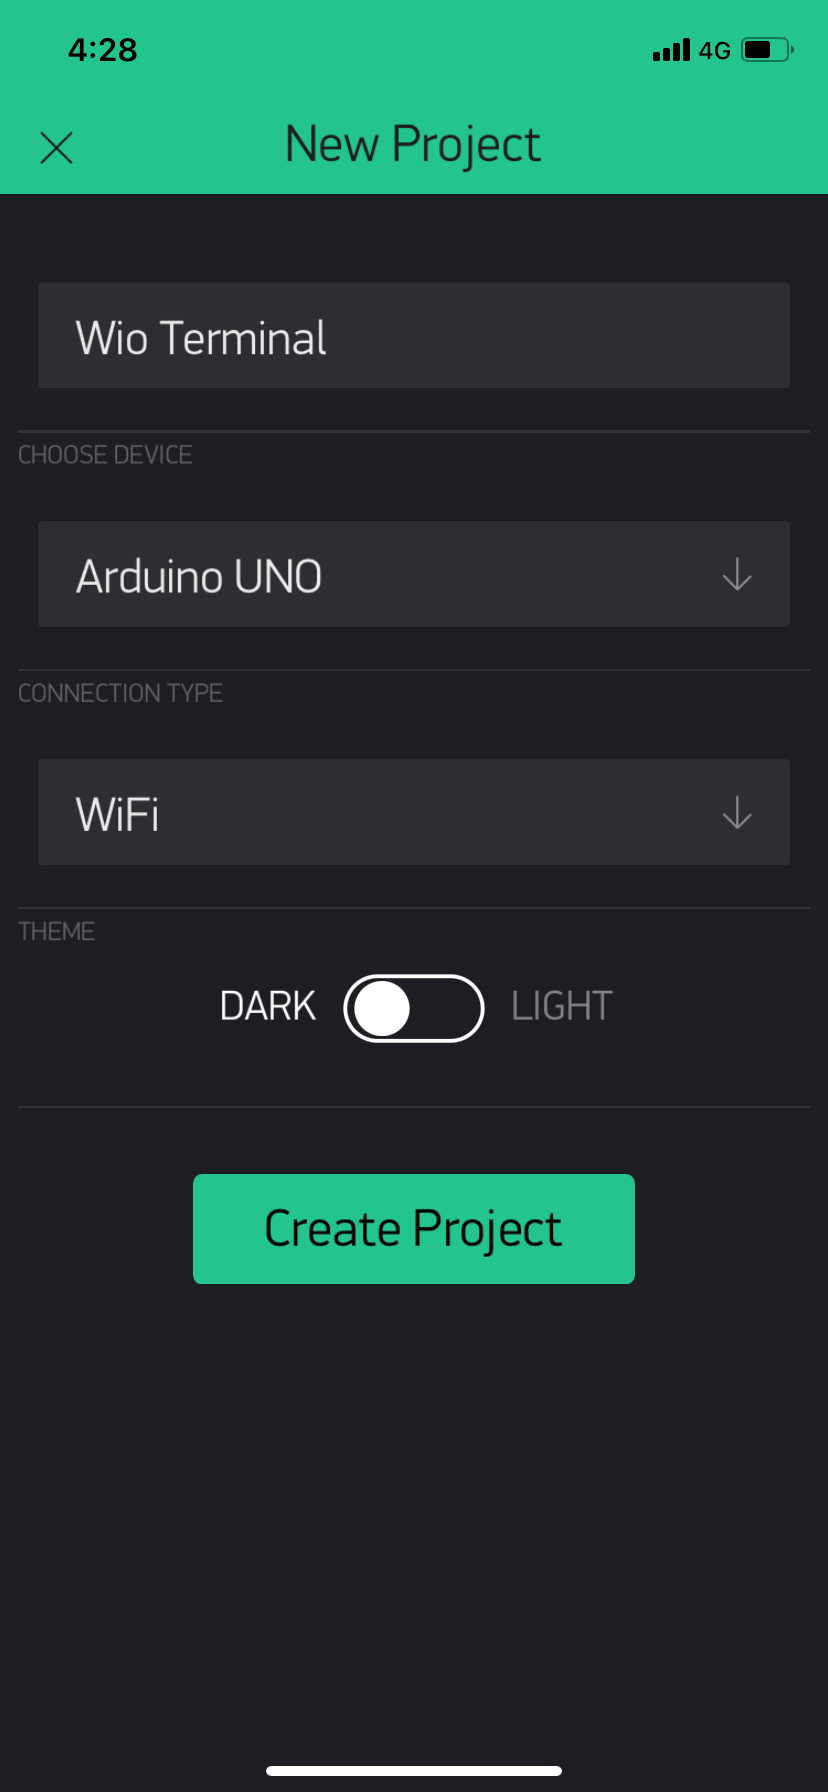
- Fill in your Project Name, choose Arduino UNO as device, and select WiFi or Bluetooth as your Connection Type. Then click on Create Project:
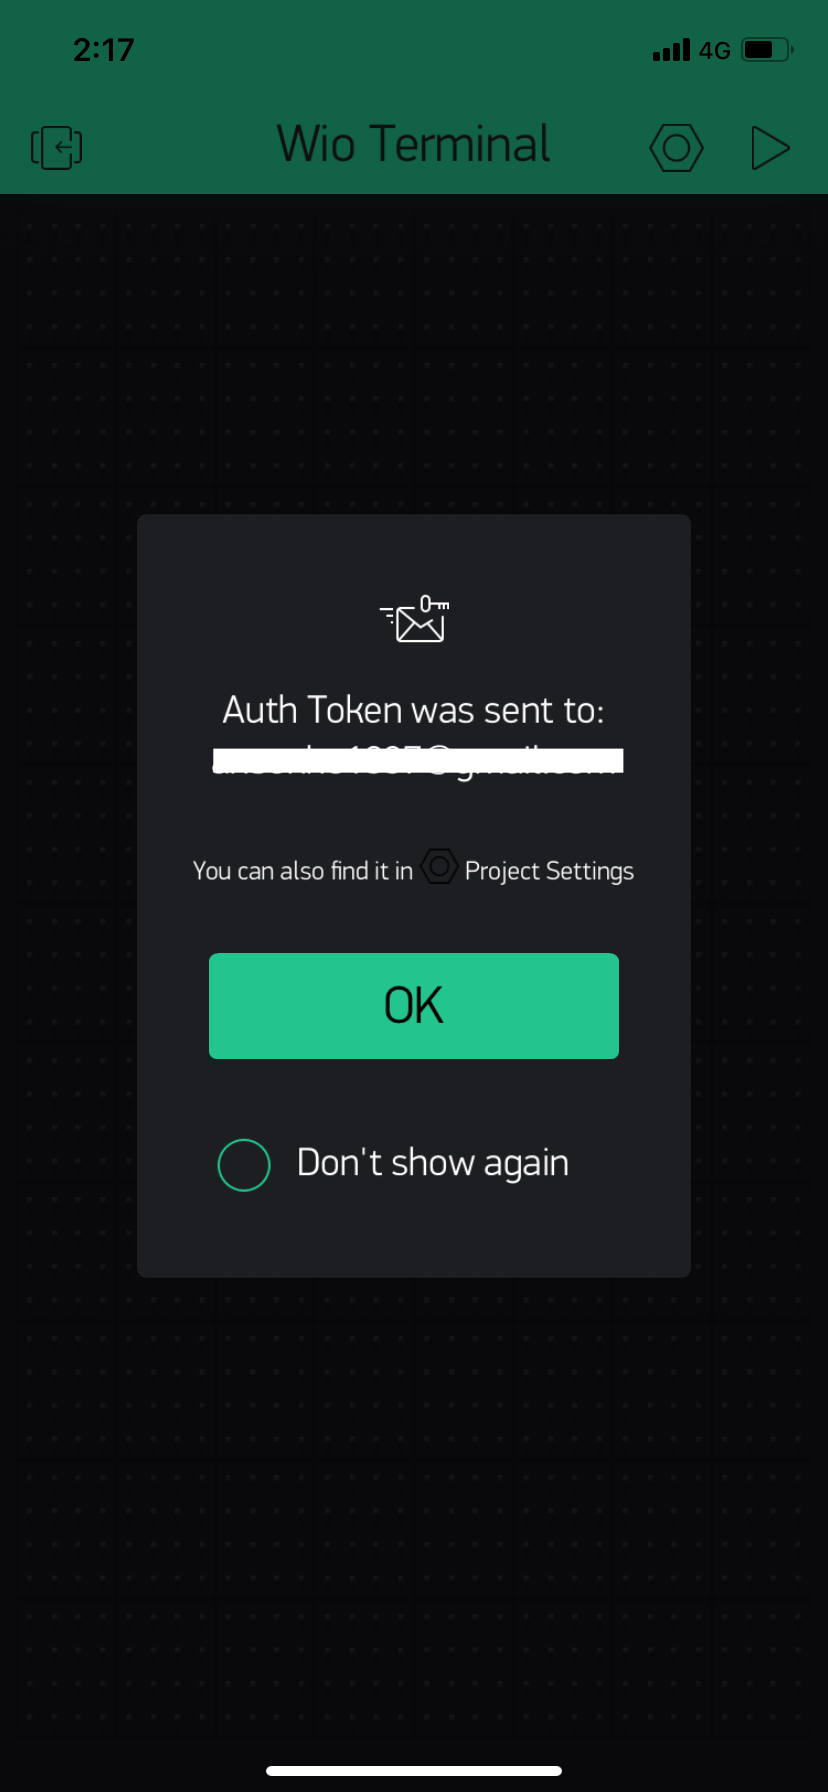
- Now, you will have a token sent to the email you registered with Blynk. This is needed in the Arduino Sketches later.
Wi-Fi Examples
These examples are using Wi-Fi to communicate between Wio Terminal and the Blynk App:
Simple Wi-Fi Connection
This example simply connects to a specific Wi-Fi then connects to the Blynk Server:
-
Replace the token that sent to your emails to
auth. -
Replace your network's
SSIDandPassword. -
Upload the sketch to Wio Terminal.
#define BLYNK_PRINT Serial

#include <rpcWiFi.h>
#include <WiFiClient.h>
#include <BlynkSimpleWioTerminal.h>

// You should get Auth Token in the Blynk App.
// Go to the Project Settings (nut icon).
char auth[] = "YourToken";

// Your WiFi credentials.
// Set password to "" for open networks.
char ssid[] = "SSID";
char pass[] = "Password";

void setup()
{
  // Debug console
  Serial.begin(9600);

  Blynk.begin(auth, ssid, pass);
}

void loop()
{
  Blynk.run();
}
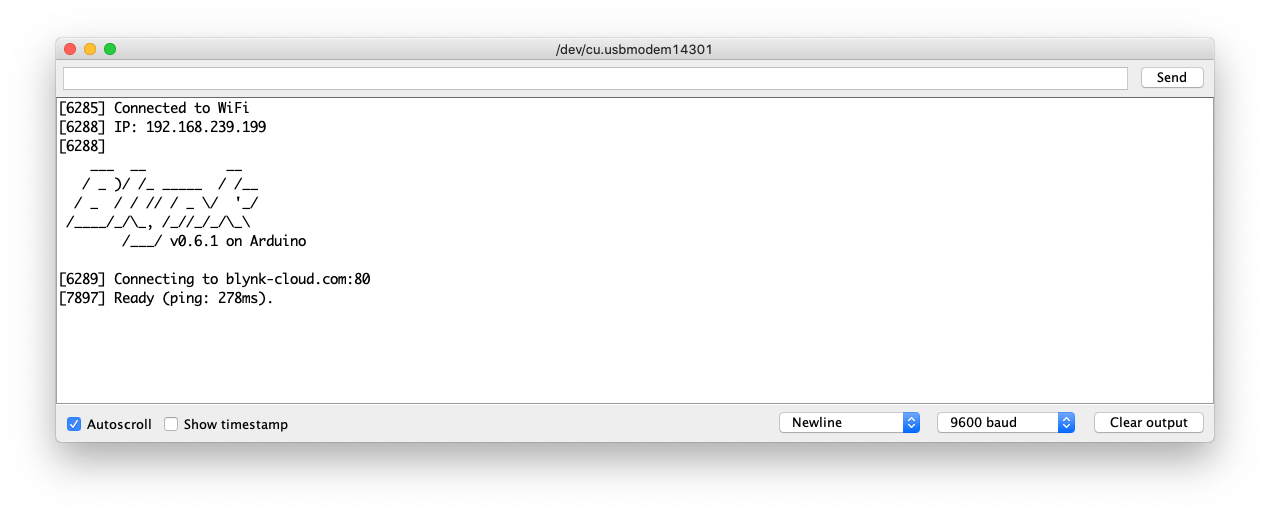
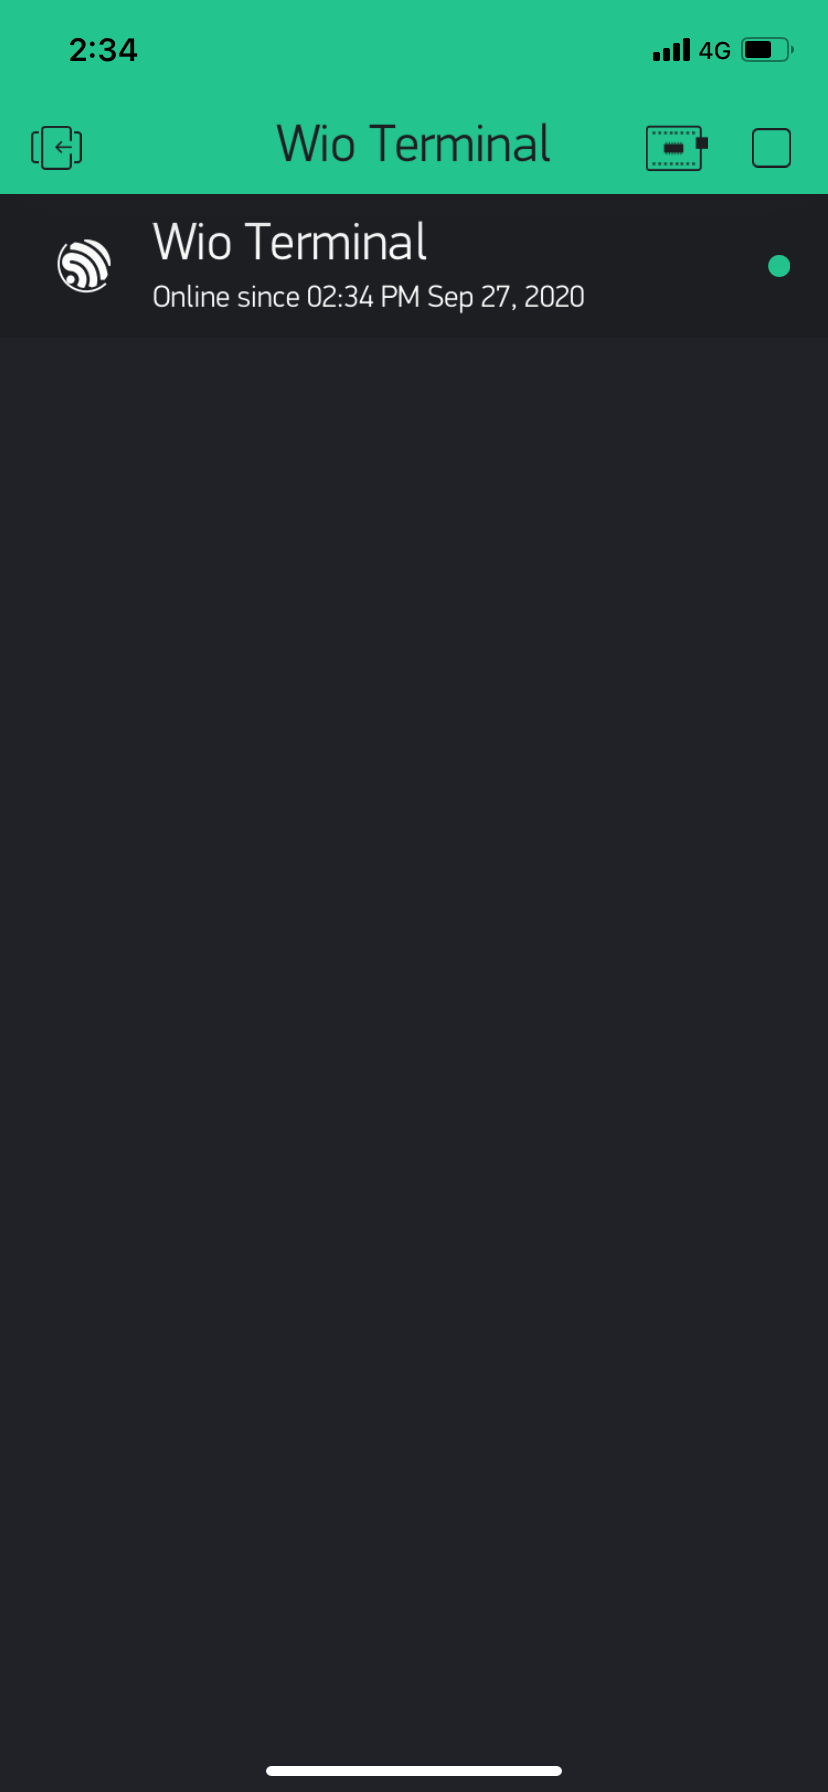
Once uploaded, open the Blynk app from your phone and click the top right play button to go live. You should be able to see that it is connected!
Sending Temperature to Blynk
This example is an demonstrations of sending data from Wio Terminal to the Blynk server of which can then be viewed on the mobile app.
-
Replace WiFi credentials and token.
-
Temperature data are sent to Virtual Pin 0 (
V0). -
Upload to Wio Terminal.
In this example, temperature values are randomly generated.
#define BLYNK_PRINT Serial

#include <rpcWiFi.h>
#include <WiFiClient.h>
#include <BlynkSimpleWioTerminal.h>

// Your WiFi credentials.
const char* ssid = "SSID";
const char* pass = "Password";

// You should get Auth Token in the Blynk App.
// Go to the Project Settings (nut icon).
char auth[] = "YourToken";

BlynkTimer timer;

void sendTemperature() {
  // Generate random temperature value 10.0 to 30.0 (for example)
  float t = float(random(100, 300)) / 10;
  // Format: 1 decimal place, add ℃
  String str = String(t, 1) + "℃";
  // Send it to the server
  Blynk.virtualWrite(V0, str);
}


void setup() {
  // Debug console
  Serial.begin(9600);

  Blynk.begin(auth, ssid, pass);
  timer.setInterval(1000L, sendTemperature);
}

void loop() {
  Blynk.run();
  timer.run();
}
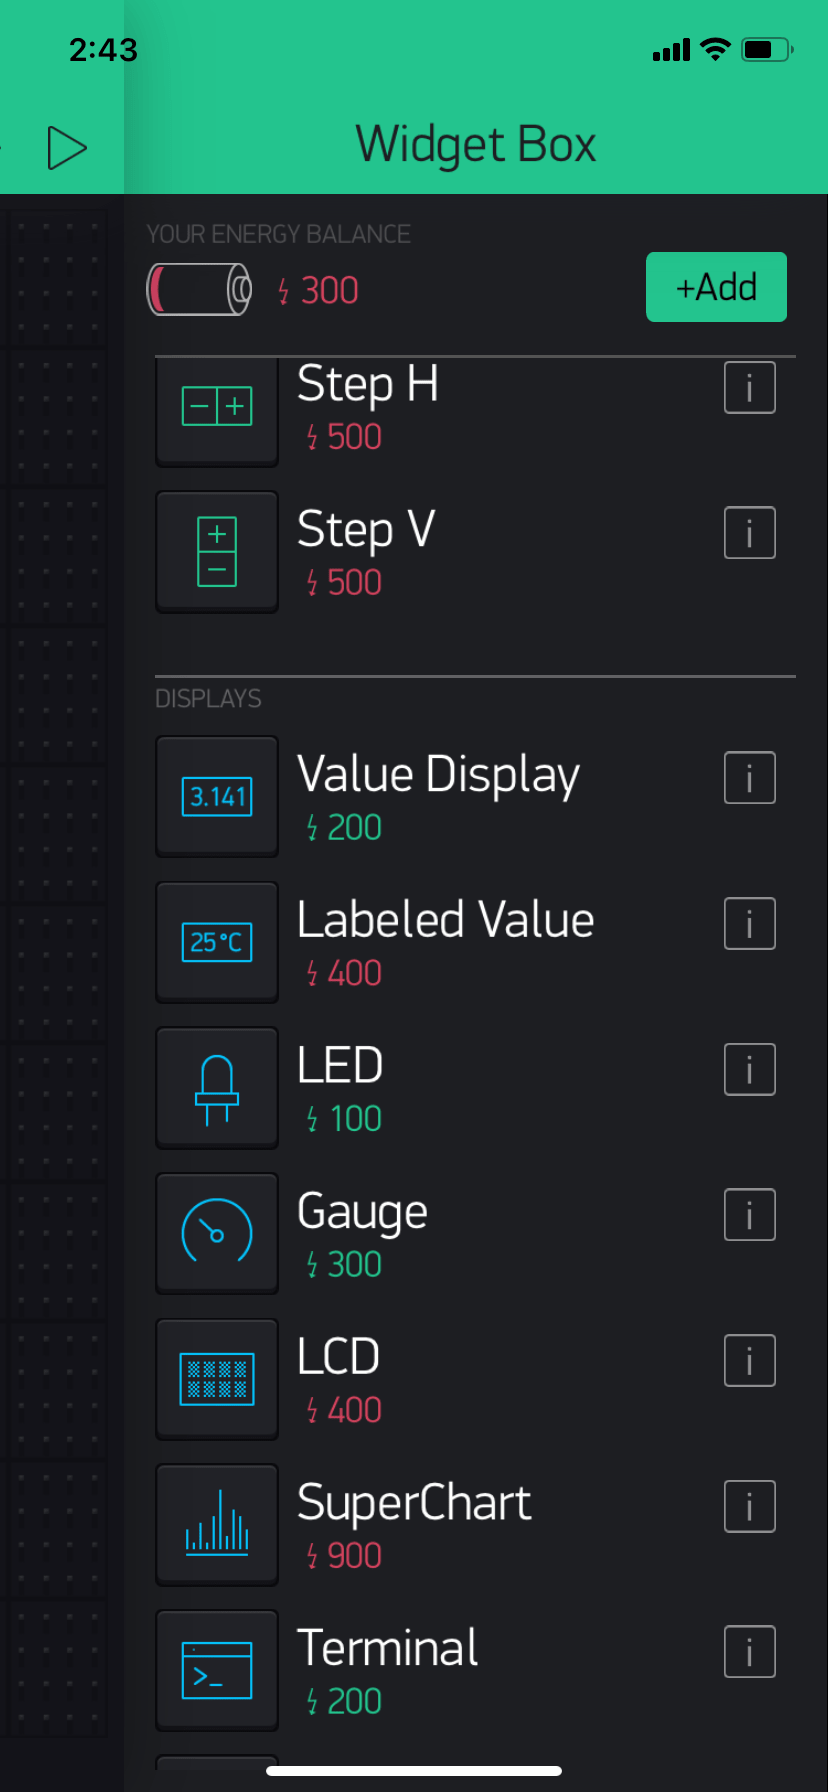
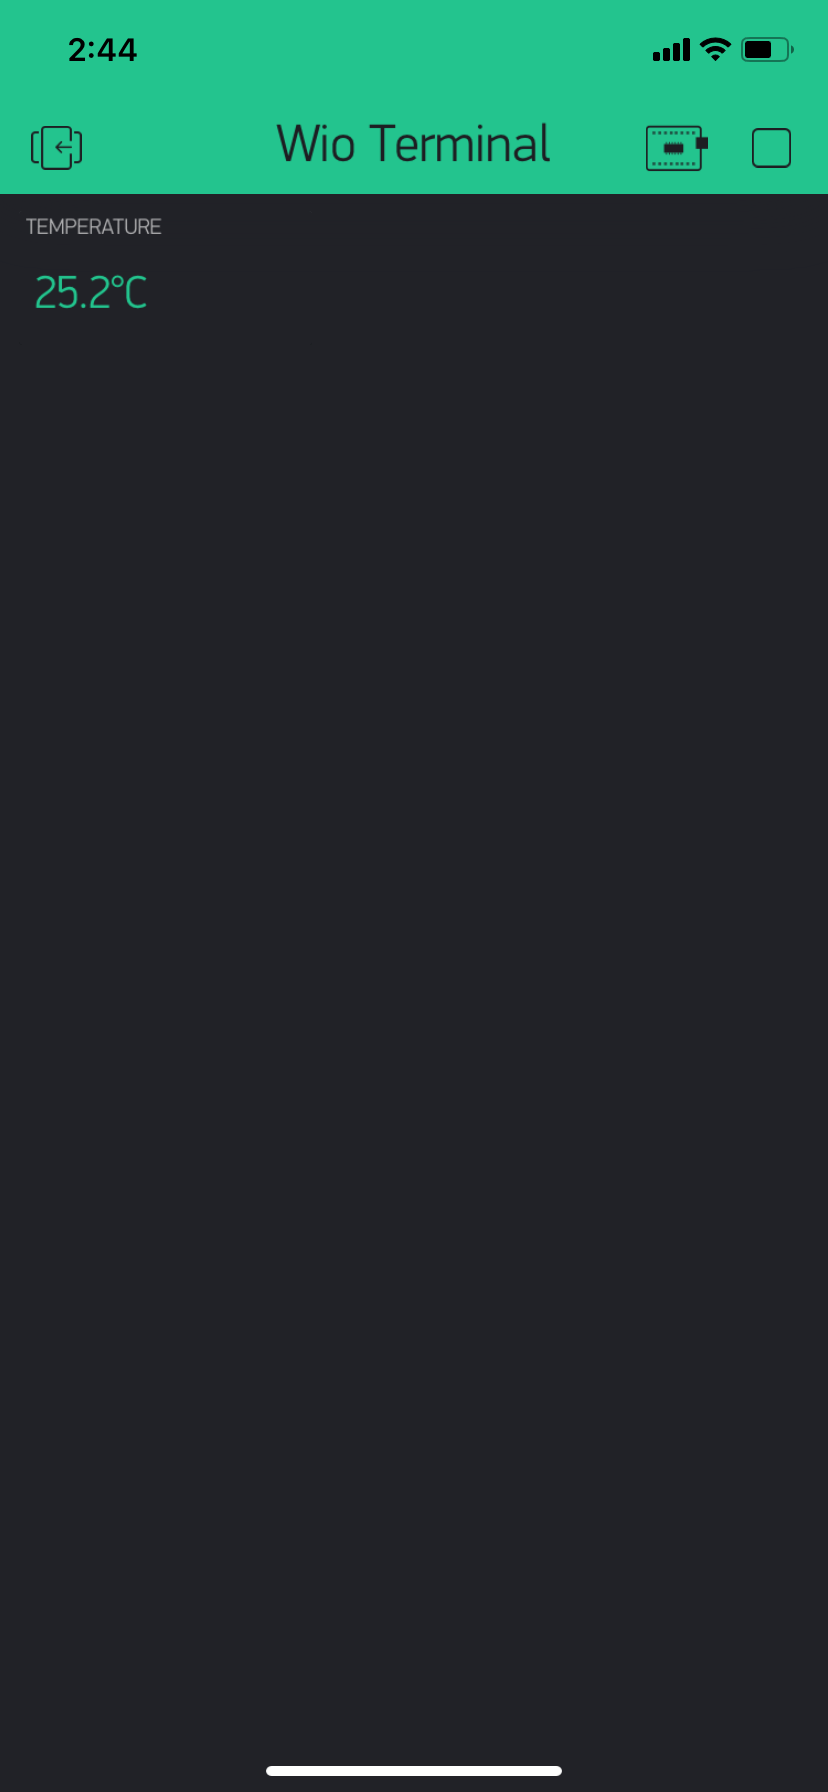
Now open the Blynk App from your mobile phones again.
- Swipe left to get the Widget Box out and select Value Display:
- Click on the button and configure the button to assign to Virtual Pin 0:
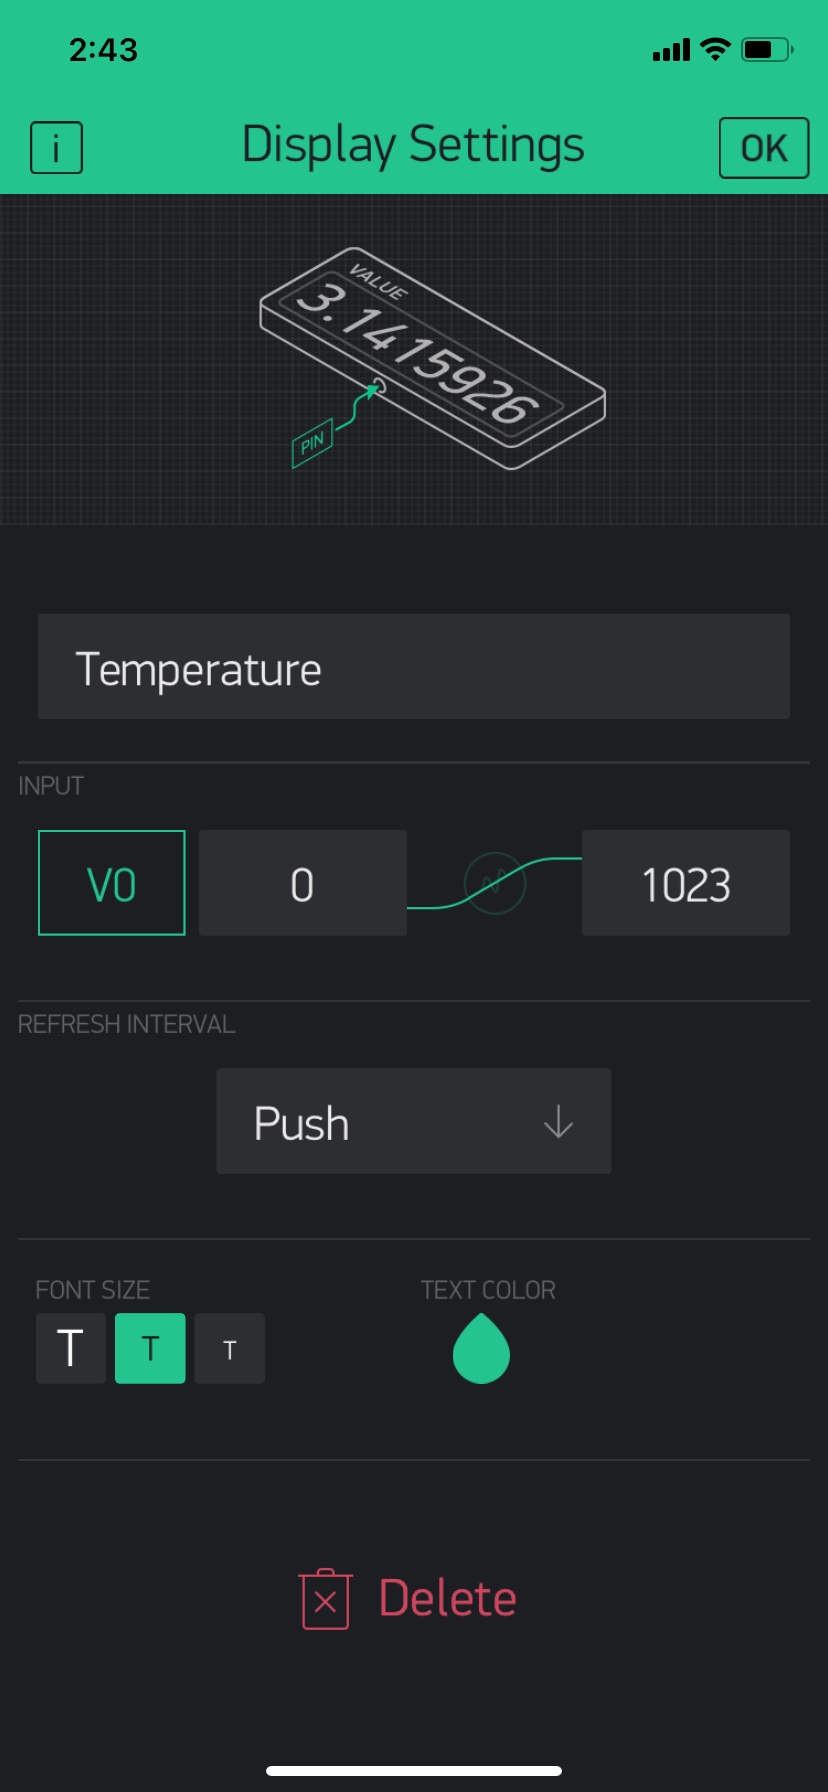
- Save the configurations and click top right play button to go live! And you can see the temperature values on your phone.
Bluetooth Examples
These examples are using Bluetooth to communicate between Wio Terminal and the Blynk App:
Simple Bluetooth Connection
This is the simple example of using Wio Terminal's Bluetooth to connect with Mobile Phone Bluetooth:
-
Replace your token for
auth. -
Upload to Wio Terminal.
#define BLYNK_PRINT Serial
#define BLYNK_USE_DIRECT_CONNECT

#include <BlynkSimpleWioTerminal_BLE.h>
#include <BLEDevice.h>
#include <BLEServer.h>

// You should get Auth Token in the Blynk App.
// Go to the Project Settings (nut icon).
char auth[] = "YourToken";

void setup()
{
  // Debug console
  Serial.begin(9600);
  Serial.println("Waiting for connections...");
  Blynk.setDeviceName("Blynk");
  Blynk.begin(auth);
}

void loop()
{
  Blynk.run();
}
Now open the Blynk app and configure as follow:
- Swipe left to have the Widget Box and scroll down to find BLE widget:
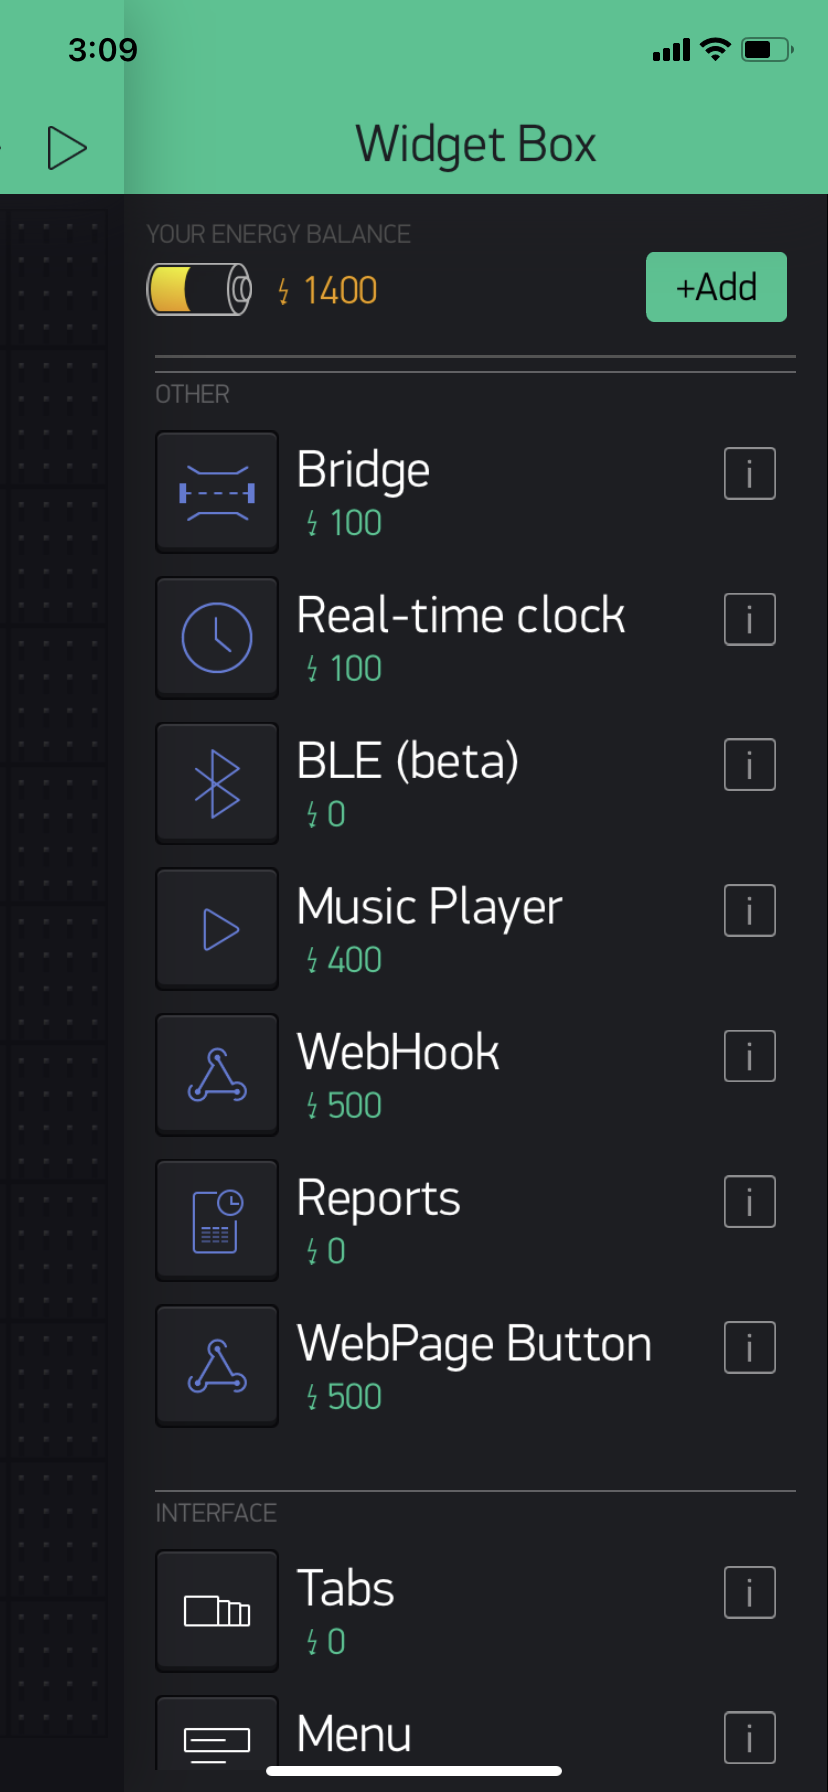
- Click on the BLE widget and select connect with a BLE device named
Blynk:
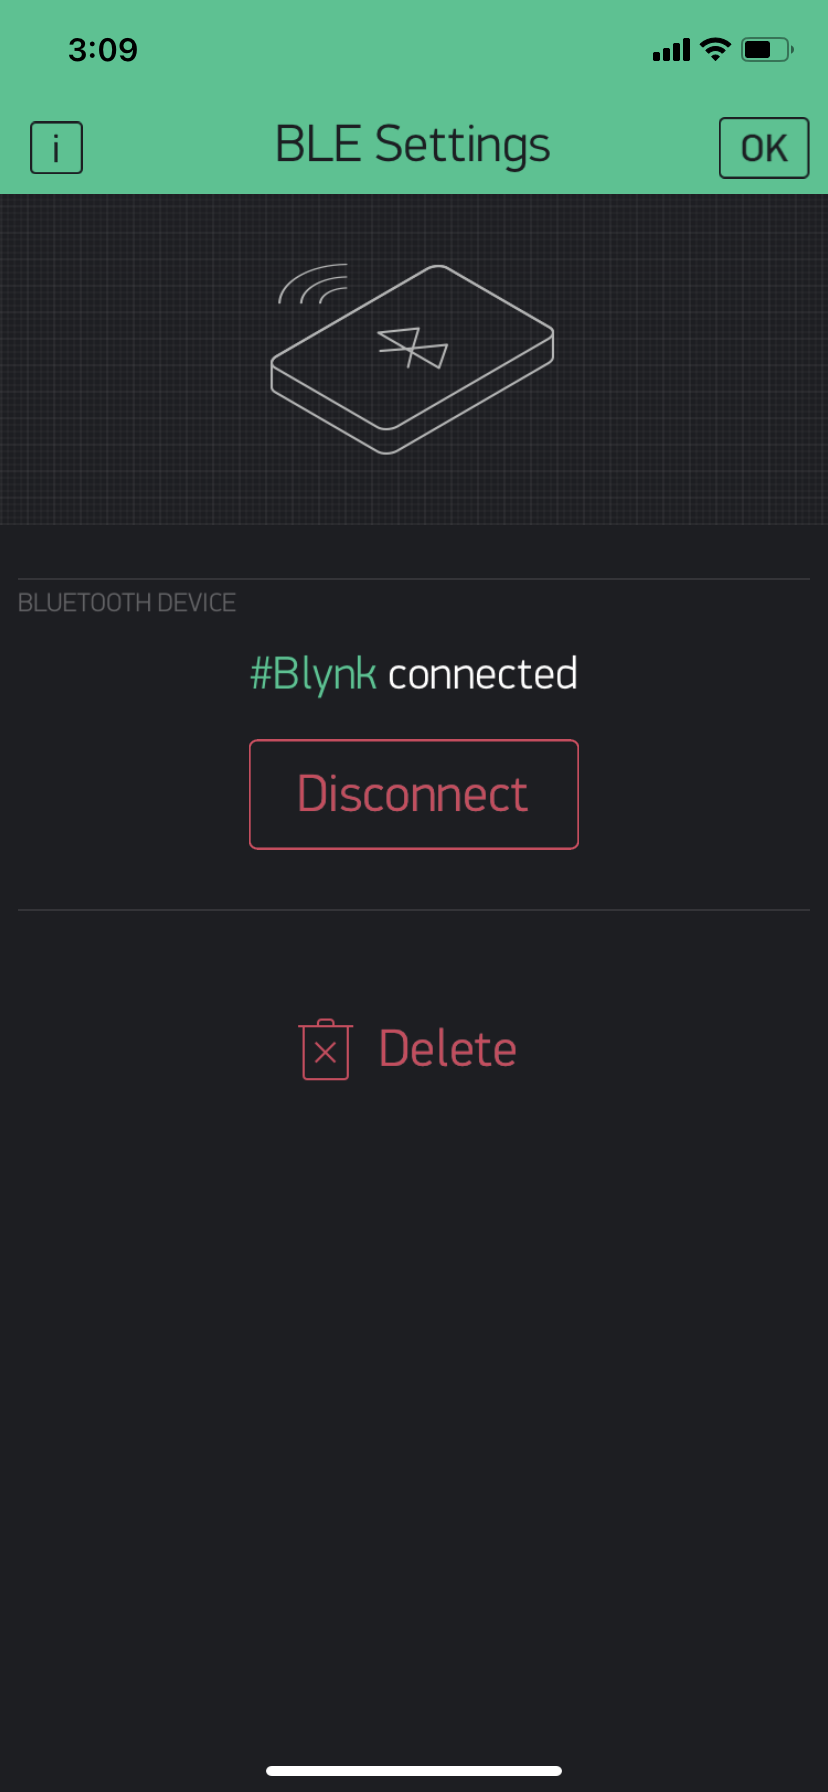
- Once BLE is connected, click the play button to go live!
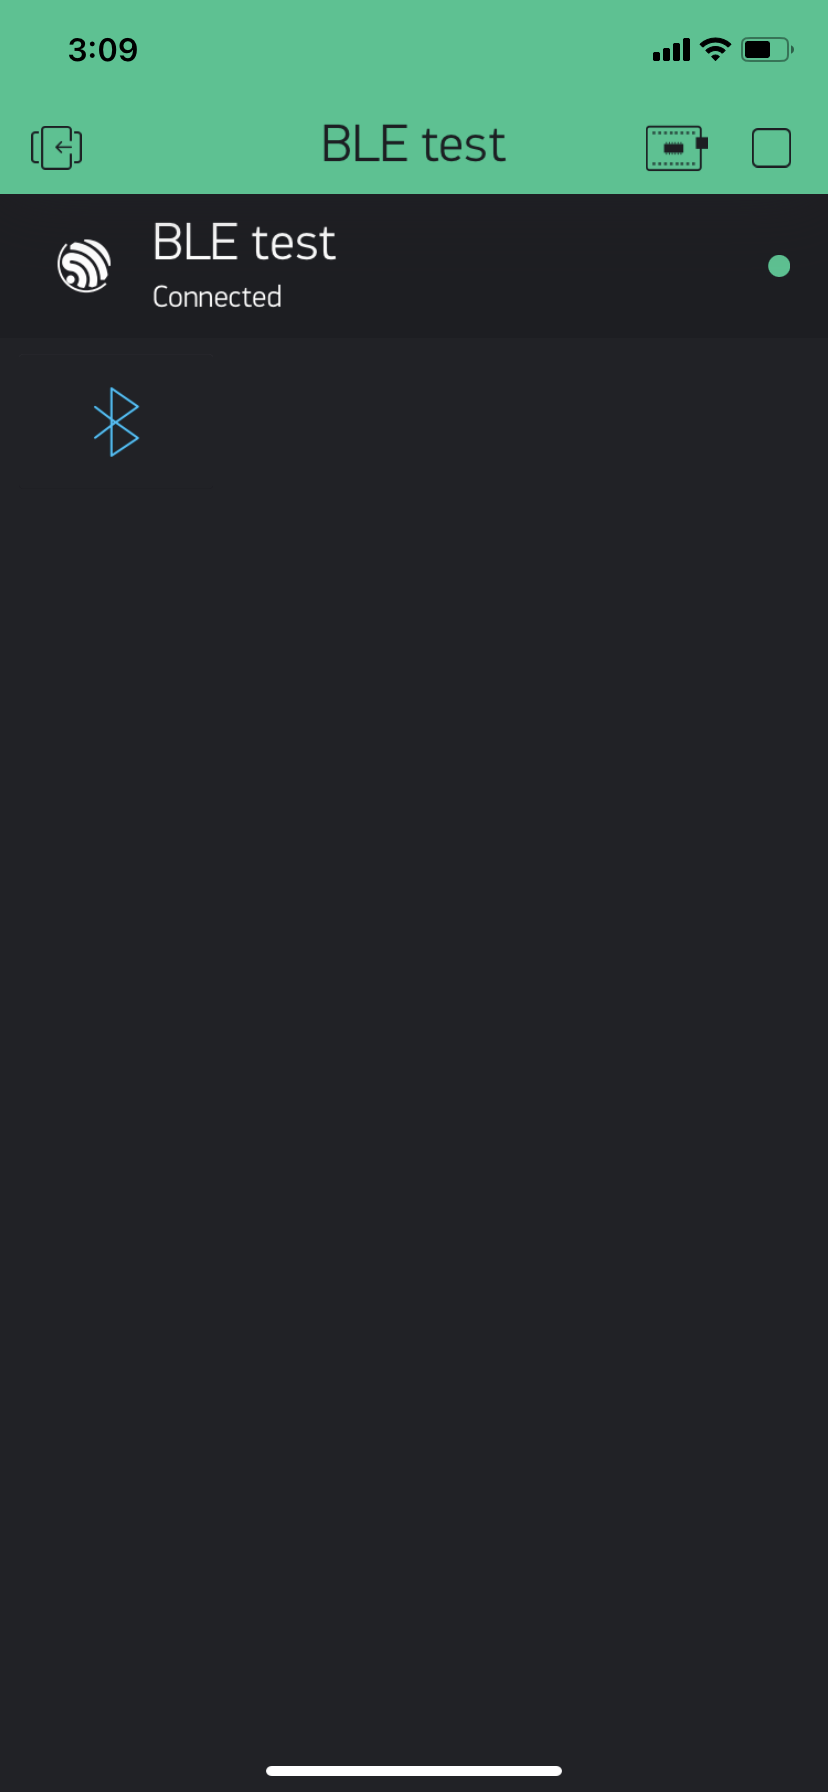
Now, Wio Terminal is connected with Blynk using Bluetooth!
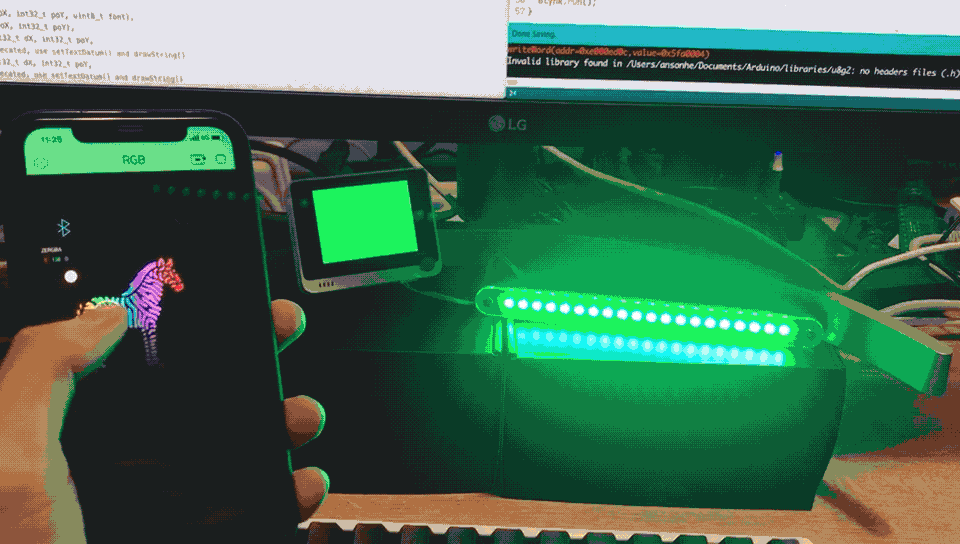
Controlling RGB Strips Using Blynk
This example connects a RGB strip to Wio Terminal and uses the Blynk to control the color to display!
Install the Adafruit_NeoPixel Library
-
Visit the Adafruit_NeoPixel repositories and download the entire repo to your local drive.
-
Now, the library can be installed to the Arduino IDE. Open the Arduino IDE, and click
sketch->Include Library->Add .ZIP Library, and choose theAdafruit_NeoPixelfile that you've have just downloaded.
- Configure the
PINandNUMPIXELSaccording to your environment. - The RGB values are read from the Blynk App and assign to Virtual Pin 2(V2).
- Upload to Wio Terminal.
#define BLYNK_PRINT Serial
#define BLYNK_USE_DIRECT_CONNECT

#include <BlynkSimpleWioTerminal_BLE.h>
#include <BLEDevice.h>
#include <BLEServer.h>
#include <Adafruit_NeoPixel.h>

#include <TFT_eSPI.h> // Hardware-specific library
TFT_eSPI tft = TFT_eSPI();       // Invoke custom library

#define PIN 0
#define NUMPIXELS 20
#define BLYNK_PRINT Serial
Adafruit_NeoPixel pixels(NUMPIXELS, PIN, NEO_GRB + NEO_KHZ800);

// You should get Auth Token in the Blynk App.
// Go to the Project Settings (nut icon).
char auth[] = "YourToken";

BLYNK_WRITE(V2)
{
  int R = param[0].asInt();
  int G = param[1].asInt();
  int B = param[2].asInt();
  tft.fillScreen(tft.color565(R, G, B));
  for (int i = 0; i < NUMPIXELS; i++) {
    pixels.setPixelColor(i, pixels.Color(R, G, B));
    pixels.show();
  }
}

void setup() {
  // Debug console
  Serial.begin(9600);
  Serial.println("Waiting for connections...");
  Blynk.setDeviceName("Blynk");

  Blynk.begin(auth);

  tft.begin();
  tft.fillScreen(TFT_BLACK);
  pixels.begin();
}

void loop() {
  Blynk.run();
}
Open the Blynk App, and configure as follow:
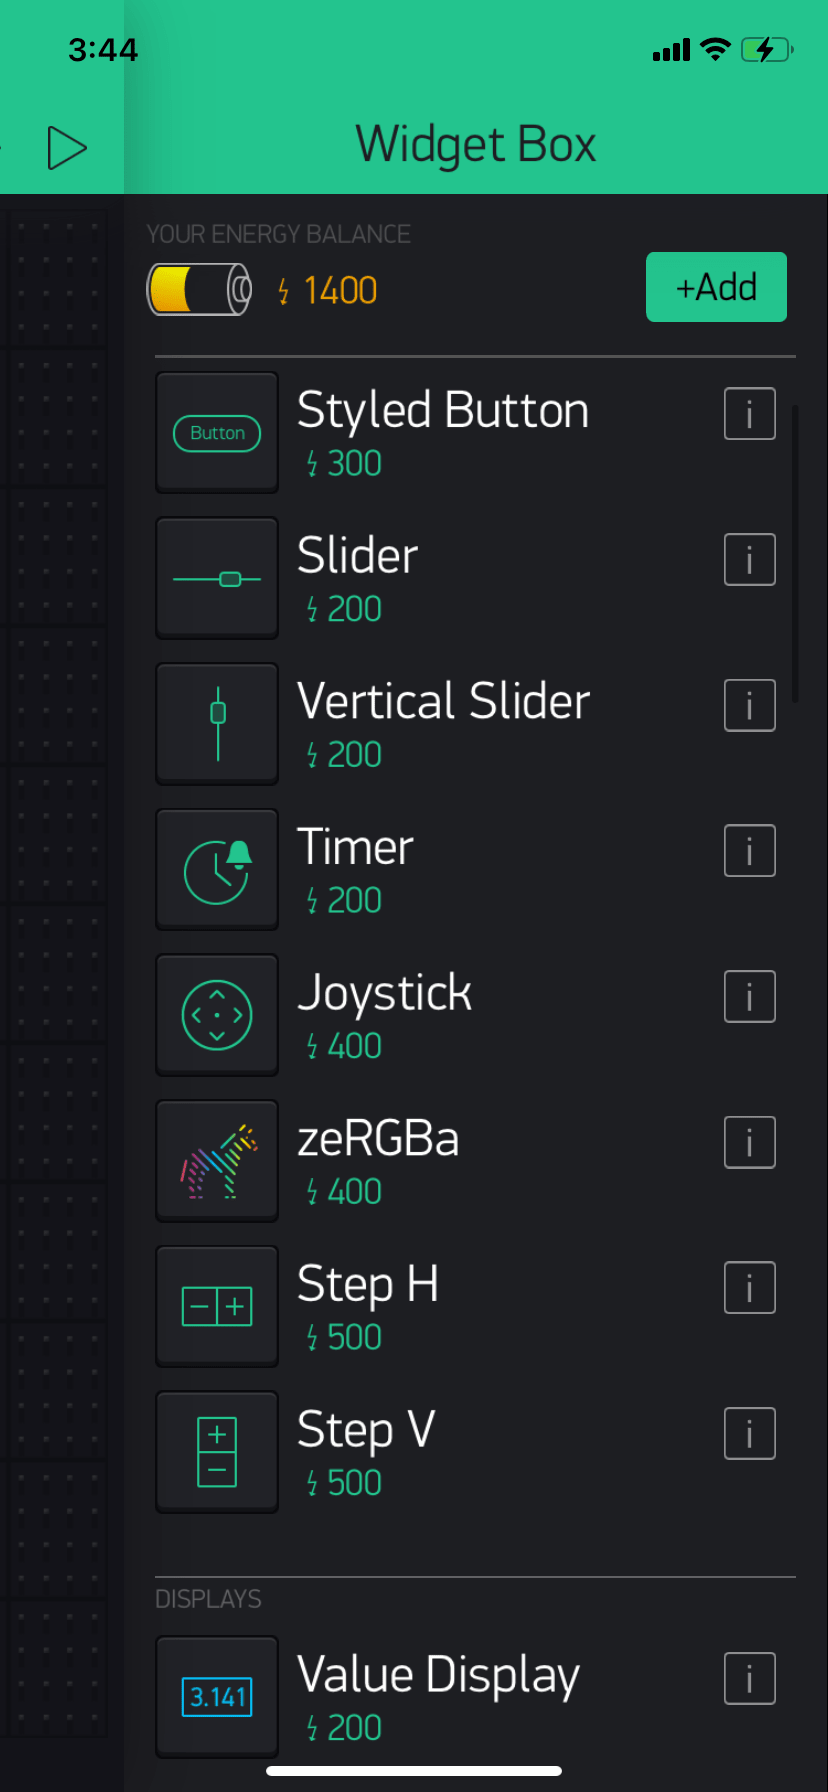
- Swipe left to have the Widget Box and scroll down to find zeRGBa widget:
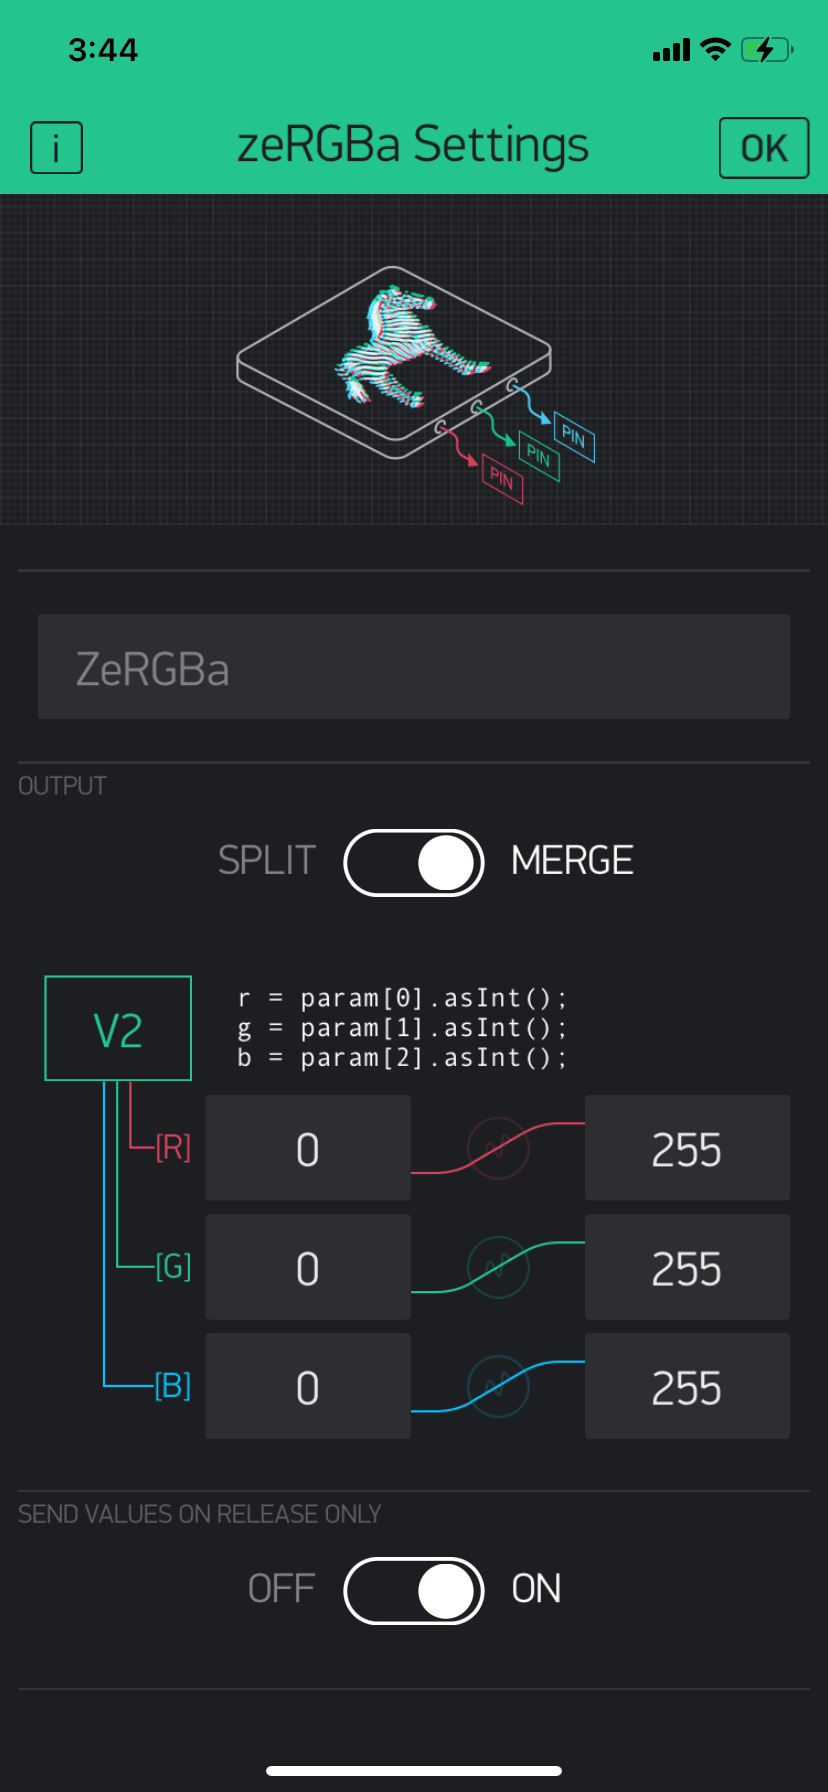
- Click on the zeRGBa widget and configure as follow. Sets to Merge Output and assign to Virtual Pin 2 (V2) and set values goes from 0 to 255.
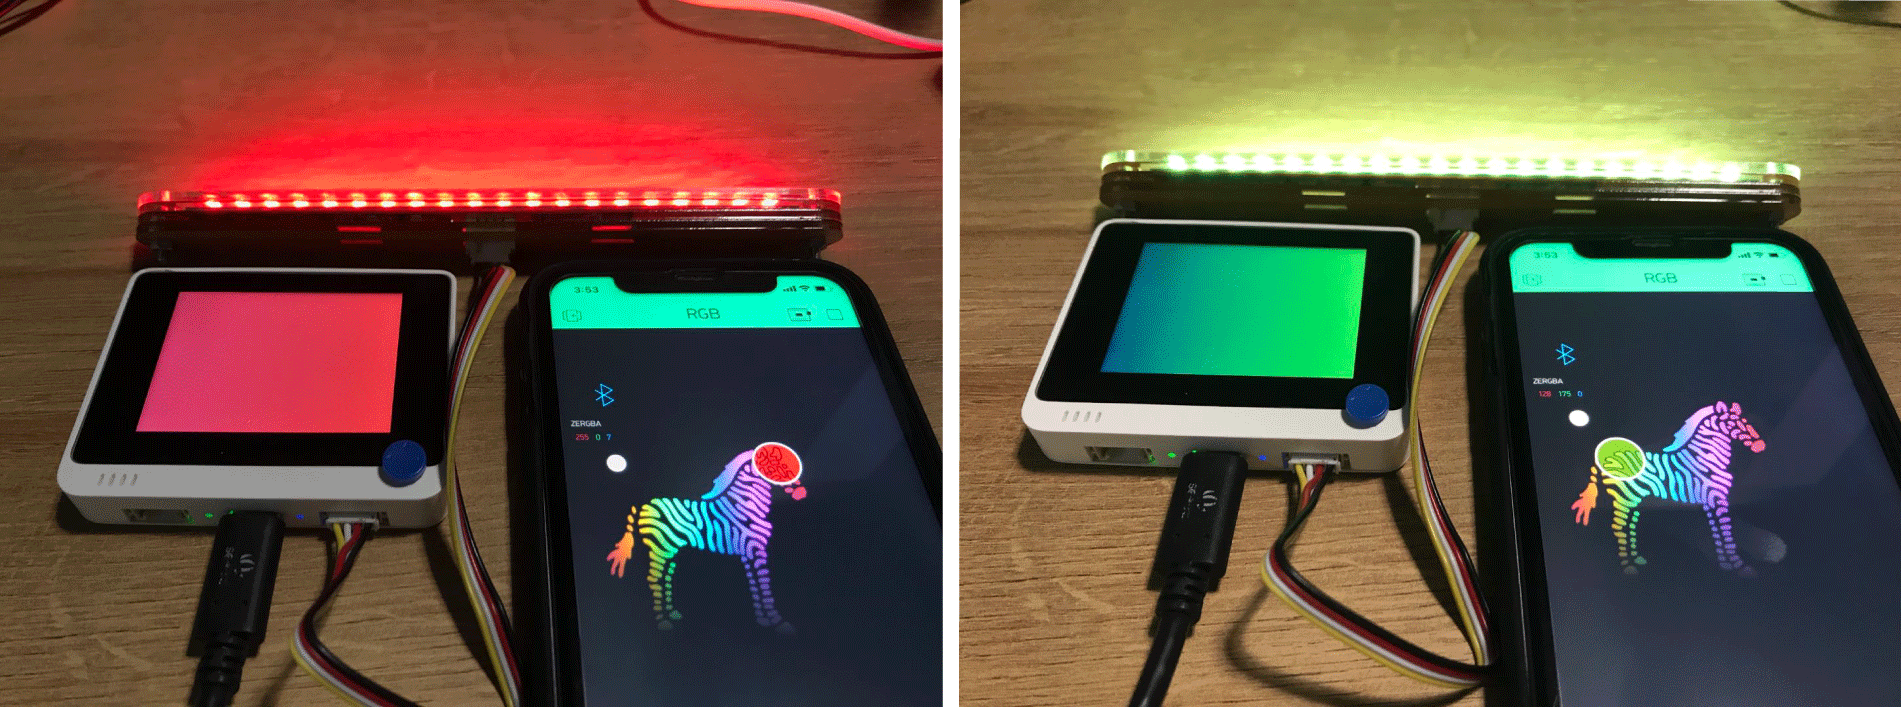
- Make sure that the BLE widget is connected first and click Play button to go live! You can simply change the RGB color of LED strip by dragging the color on the Blynk.
Tech Support & Product Discussion
Thank you for choosing our products! We are here to provide you with different support to ensure that your experience with our products is as smooth as possible. We offer several communication channels to cater to different preferences and needs.