Build a HMI Display for Raspberry Pi using Wio Terminal
In this wiki, we will introduce how to use Wio Terminal as a HMI (Human Machine Interface) USB display for Raspberry Pi, Nvidia Jetson Nano, BeagleBone and even Odyssey X86J4105! This turns Wio Terminal into a HMI USB display which makes it much more powerful and can be used in more industrial scenarios!
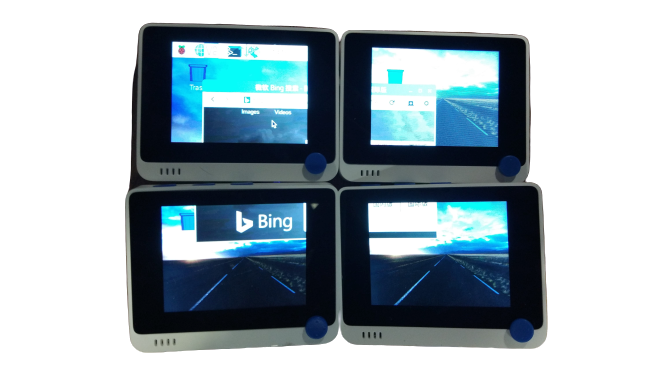
It can support multiple Wio Terminals connected onto the host device. By theory, you can connect as many as you want as long as you have enough USB ports! On Raspberry Pi, it can support up to 4 Wio Terminals (RPI has 4 USB ports) connected to it acting as HMI displays in Extend mode as well as Mirror Mode, check the followings for more info!
Hardware Required
Wio Terminal Firmware
First, you will need to upload an Arduino program to your Wio Terminal via your PC.
- Download the Seeed_Arduino_USBDISP library here.
There are two examples, NullFunctional and USBDisplayAndMouseControl:
- If you want higher screen refresh rate on Wio Terminal, upload
NullFunctionalto Wio Terminal. - If you want Wio Terminal to also act as a USB Mouse, upload
USBDisplayAndMouseControlto Wio Terminal.
uf2 Method
For convenience, we also provide uf2 methods of uploading Wio Terminal's firmware. Simply download the uf2 files from below.
-
Download the NullFunctional
uf2files. -
Download the USBDisplayAndMouseControl
uf2files.
Entering the bootloader mode by sliding the power switch twice quickly. For more reference, please also see here.
An external drive named Arduino should appear in your PC. Drag the the downloaded uf2 files to the Arduino drive.
Host Device Firmware
Now let's set up the display driver on the host device and this can be Raspberry Pi, Jetson Nano or even Odyssey X86J4105:
Raspberry Pi
For Raspberry Pi, you first need to download package information from all configured sources:
sudo apt-get update
- Install the necessary packages such as kernel headers, kernels, build-essential, dkms by running the following command in terminal:
sudo apt-get install raspberrypi-kernel-headers raspberrypi-kernel build-essential dkms
- Reboot the Raspberry Pi:
sudo reboot
- Download the display driver on Raspberry Pi:
cd ~
git clone https://github.com/Seeed-Studio/seeed-linux-usbdisp
- Make and build the driver:
cd ~/seeed-linux-usbdisp/drivers/linux-driver
make & sudo make install
sudo reboot
- Move the config files to the systems location:
sudo cp ~/seeed-linux-usbdisp/drivers/linux-driver/xserver_conf/10-disp.conf /usr/share/X11/xorg.conf.d/
!!!Note There are different screen configurations that you can choose from, the default is one Wio Terminal as one screen.
- Restart the service:
sudo service lightdm restart
- Run the following command in terminal for display configuration:
sudo raspi-config
- Once the Raspberry Pi Software Configuration Tool opens, navigate to the following location:
Display Options > Resolution
- Select a different resolution except "default"
Ex: DMT Mode 82 1920x1080 60Hz 16:9
- Turn off the Raspberry Pi:
sudo poweroff
-
Connect the Wio Terminal to Raspberry Pi's USB port
-
Turn on the Raspberry Pi
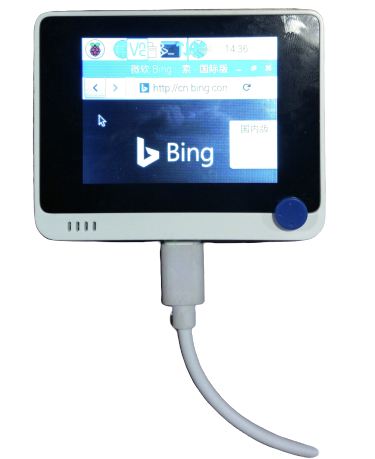
Now you should see you Wio Terminal display the Raspberry Pi's desktop! If you loaded with the USBDisplayAndMouseControl firmware in Wio Terminal, you can even use the buttons and 5-way switches to control the mouse of Raspberry Pi!
!!!Note This version of the USB display driver do not support hot swapping.
Jetson Nano, Beaglebone and Odyssey X86
For Nvidia Jetson Nano and Odyssey X86J4105 (Ubuntu), install the linux driver as followed, run the following in the terminal:
Note: For Odyssey X86J4105, we have only tested for ubuntu and debian OS. Other Linux OS may not work.
sudo apt install --reinstall linux-headers-$(uname -r)
- Download the display driver:
cd ~
git clone https://github.com/Seeed-Studio/seeed-linux-usbdisp
- Make and build the driver:
cd ~/seeed-linux-usbdisp/drivers/linux-driver
make & sudo make install
sudo reboot
- Move the config files to the systems location:
sudo cp ~/seeed-linux-usbdisp/drivers/linux-driver/xserver_conf/10-disp.conf /usr/share/X11/xorg.conf.d/
- Restart the service:
sudo service lightdm restart
- Connect Wio Terminal to device's USB port!
Screen Display Configurations
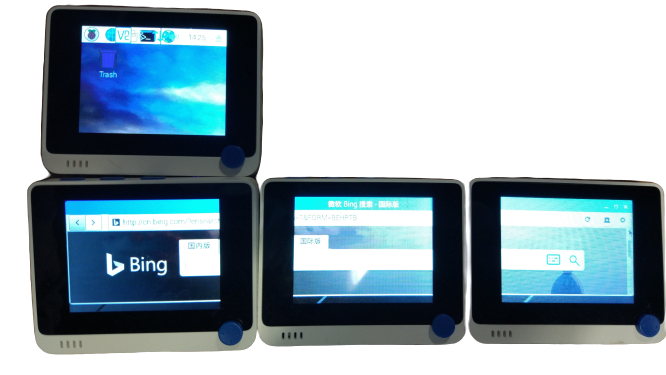
As mentioned, you can have multiple Wio Terminals connected to a Raspberry Pi and therefore you can arrange the screen set-up (locations of screen) by editing the 10-disp.conf file. We have provided 3 other screen expansion set-up as followed.
Screen set-up 1
# Four-screen expansion
# pattern: 1  2
#        : 3  4
This is the 10-disp-1.conf under seeed-linux-usbdisp/drivers/linux-driver/xserver_conf/, simply copy this file to /usr/share/X11/xorg.conf.d/ and name it 10-disp.conf:
sudo cp ~/seeed-linux-usbdisp/drivers/linux-driver/xserver_conf/10-disp-1.conf /usr/share/X11/xorg.conf.d/10-disp.conf
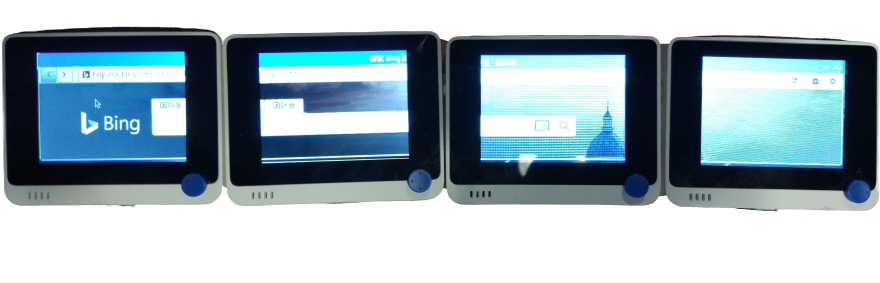
Screen set-up 2
# Four-screen expansion
# pattern: 1
#        : 2  3  4
This is the 10-disp-2.conf under seeed-linux-usbdisp/drivers/linux-driver/xserver_conf/.
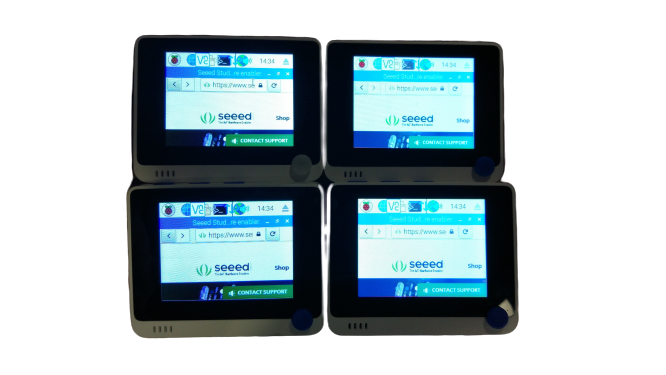
Screen set-up 3
# Four-screen expansion
# pattern: 1  2  3  4
This is the 10-disp-3.conf under seeed-linux-usbdisp/drivers/linux-driver/xserver_conf/.
Screen set-up 4
Mirror Mode:
# Four-screen clone display
This is the 10-disp-4.conf under seeed-linux-usbdisp/drivers/linux-driver/xserver_conf/.
PtQtGraph Example
For more, you can use the PyQtGraph graph to simply draw you GUI with Wio Terminal with ease!
- Let's install dependencies for PyQtGraph first:
sudo apt update
sudo apt install python3 python3-distutils python3-pyqt5 python3-pip python3-numpy -y
sudo pip3 install pyqtgraph
- Export macros for the screen:
export QT_QPA_PLATFORM=linuxfb:fb=/dev/fb1
Note: Where fb1 is the first screen, fb2 is second, fb3 fb3 and so on. You may use echo $QT_QPA_PLATFORM to check the macros.
- Copy the following PyQtGraph example python files and name it
test.py:
# -*- coding: utf-8 -*-
"""
Demonstrates common image analysis tools.
Many of the features demonstrated here are already provided by the ImageView
widget, but here we present a lower-level approach that provides finer control
over the user interface.
"""
import pyqtgraph as pg
from pyqtgraph.Qt import QtCore, QtGui
import numpy as np


# Interpret image data as row-major instead of col-major
pg.setConfigOptions(imageAxisOrder='row-major')

pg.mkQApp()
win = pg.GraphicsLayoutWidget()
win.setWindowTitle('pyqtgraph example: Image Analysis')

# A plot area (ViewBox + axes) for displaying the image
p1 = win.addPlot(title="")

# Item for displaying image data
img = pg.ImageItem()
p1.addItem(img)

# Custom ROI for selecting an image region
roi = pg.ROI([-8, 14], [6, 5])
roi.addScaleHandle([0.5, 1], [0.5, 0.5])
roi.addScaleHandle([0, 0.5], [0.5, 0.5])
p1.addItem(roi)
roi.setZValue(10)  # make sure ROI is drawn above image

# Isocurve drawing
iso = pg.IsocurveItem(level=0.8, pen='g')
iso.setParentItem(img)
iso.setZValue(5)

# Contrast/color control
hist = pg.HistogramLUTItem()
hist.setImageItem(img)
win.addItem(hist)

# Draggable line for setting isocurve level
isoLine = pg.InfiniteLine(angle=0, movable=True, pen='g')
hist.vb.addItem(isoLine)
hist.vb.setMouseEnabled(y=False) # makes user interaction a little easier
isoLine.setValue(0.8)
isoLine.setZValue(1000) # bring iso line above contrast controls

# Another plot area for displaying ROI data
win.nextRow()
p2 = win.addPlot(colspan=2)
p2.setMaximumHeight(250)
win.resize(800, 800)
win.show()


# Generate image data
data = np.random.normal(size=(200, 100))
data[20:80, 20:80] += 2.
data = pg.gaussianFilter(data, (3, 3))
data += np.random.normal(size=(200, 100)) * 0.1
img.setImage(data)
hist.setLevels(data.min(), data.max())

# build isocurves from smoothed data
iso.setData(pg.gaussianFilter(data, (2, 2)))

# set position and scale of image
img.scale(0.2, 0.2)
img.translate(-50, 0)

# zoom to fit imageo
p1.autoRange()


# Callbacks for handling user interaction
def updatePlot():
    global img, roi, data, p2
    selected = roi.getArrayRegion(data, img)
    p2.plot(selected.mean(axis=0), clear=True)

roi.sigRegionChanged.connect(updatePlot)
updatePlot()

def updateIsocurve():
    global isoLine, iso
    iso.setLevel(isoLine.value())

isoLine.sigDragged.connect(updateIsocurve)

def imageHoverEvent(event):
    """Show the position, pixel, and value under the mouse cursor.
    """
    if event.isExit():
        p1.setTitle("")
        return
    pos = event.pos()
    i, j = pos.y(), pos.x()
    i = int(np.clip(i, 0, data.shape[0] - 1))
    j = int(np.clip(j, 0, data.shape[1] - 1))
    val = data[i, j]
    ppos = img.mapToParent(pos)
    x, y = ppos.x(), ppos.y()
    p1.setTitle("pos: (%0.1f, %0.1f)  pixel: (%d, %d)  value: %g" % (x, y, i, j, val))

# Monkey-patch the image to use our custom hover function.
# This is generally discouraged (you should subclass ImageItem instead),
# but it works for a very simple use like this.
img.hoverEvent = imageHoverEvent


## Start Qt event loop unless running in interactive mode or using pyside.
if __name__ == '__main__':
    import sys
    if (sys.flags.interactive != 1) or not hasattr(QtCore, 'PYQT_VERSION'):
        QtGui.QApplication.instance().exec_()
- Run the example:
python3 test.py
- You may experienced that Mouse is crashing with PyQtGraph's script, you can simply disable raspberry pi's desktop using
sudo raspi-config->Boot options->Desktop/CLI->Console Autologin.
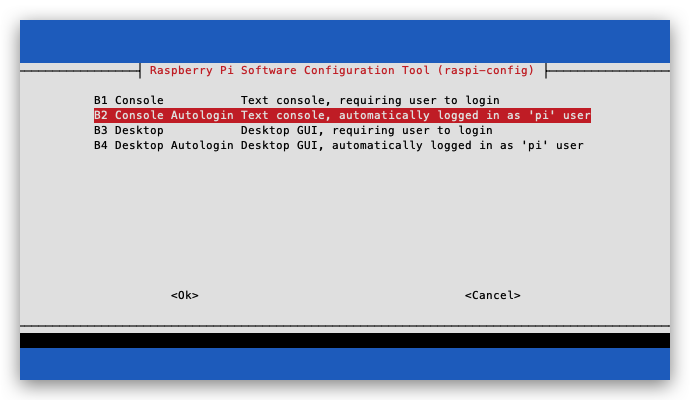
Now when you run the PyQtGraph script, it work just fine!
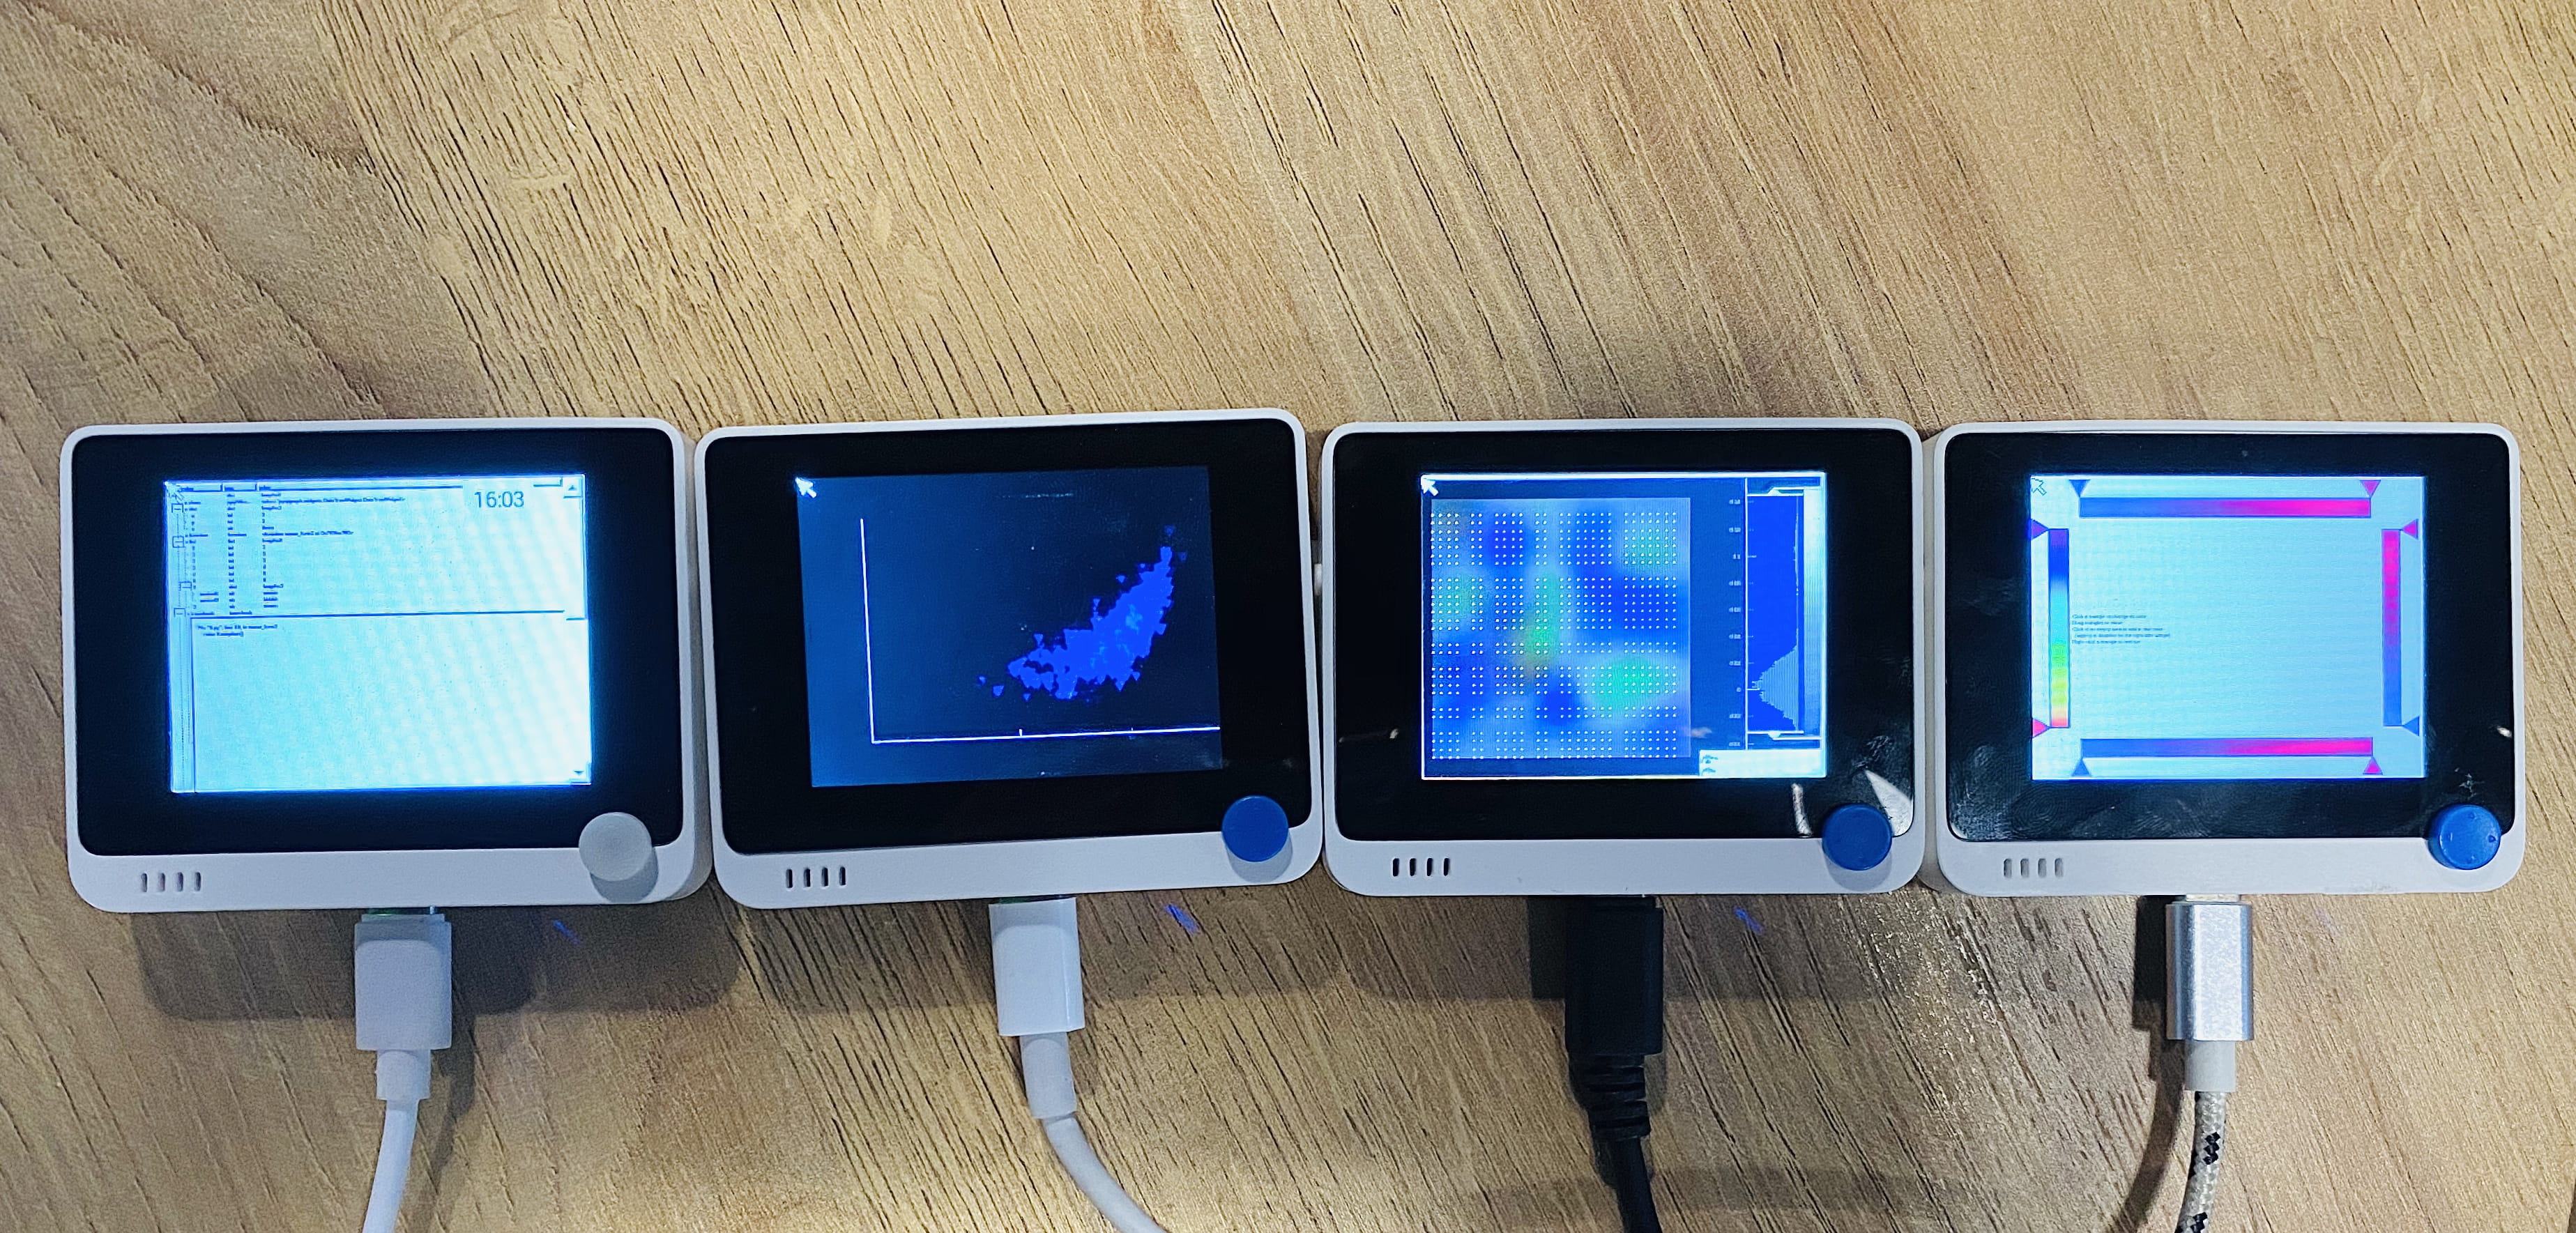
You may run different PyQtGraph scripts on different screens as followed:
Usermod SDK
This USB display driver also works on your PC. Please check this wiki for more information.
Further Development
Need a bigger screen? Need a higher resolution? Higher refresh rate? Please contact [email protected] for more information.
Resource
FAQ
Q. When I connect the Wio Terminal to the Raspberry Pi and turn on the Raspberry Pi, the Wio Terminal LCD is completely white.
A. While the Wio Terminal is still connected to the Raspberry Pi, navigate to: seeed-linux-usbdisp/drivers/linux-driver and run the command: make & sudo make install. After that run: sudo reboot
Tech Support & Product Discussion
Thank you for choosing our products! We are here to provide you with different support to ensure that your experience with our products is as smooth as possible. We offer several communication channels to cater to different preferences and needs.