mmWave Kit And Grove Connect To ESPHome
Introduction
mmWave Human Detection Sensor Kit powered by Seeed Studio XIAO ESP32C3, it supports Wi-Fi/BLE connectivity and offers precise human detection via mmWave sensors. Seamlessly connect grove modules for added features. Achieve easy setup for Home Assistant within 1-2 minutes, coupled with convenient wireless Over-The-Air (OTA) updates. Enable extensive versatility with replaceable mmWave sensors. Ideal for customize smart home automation, detect intrusions, and monitor the well-being of the elderly.
Hardware Preparation
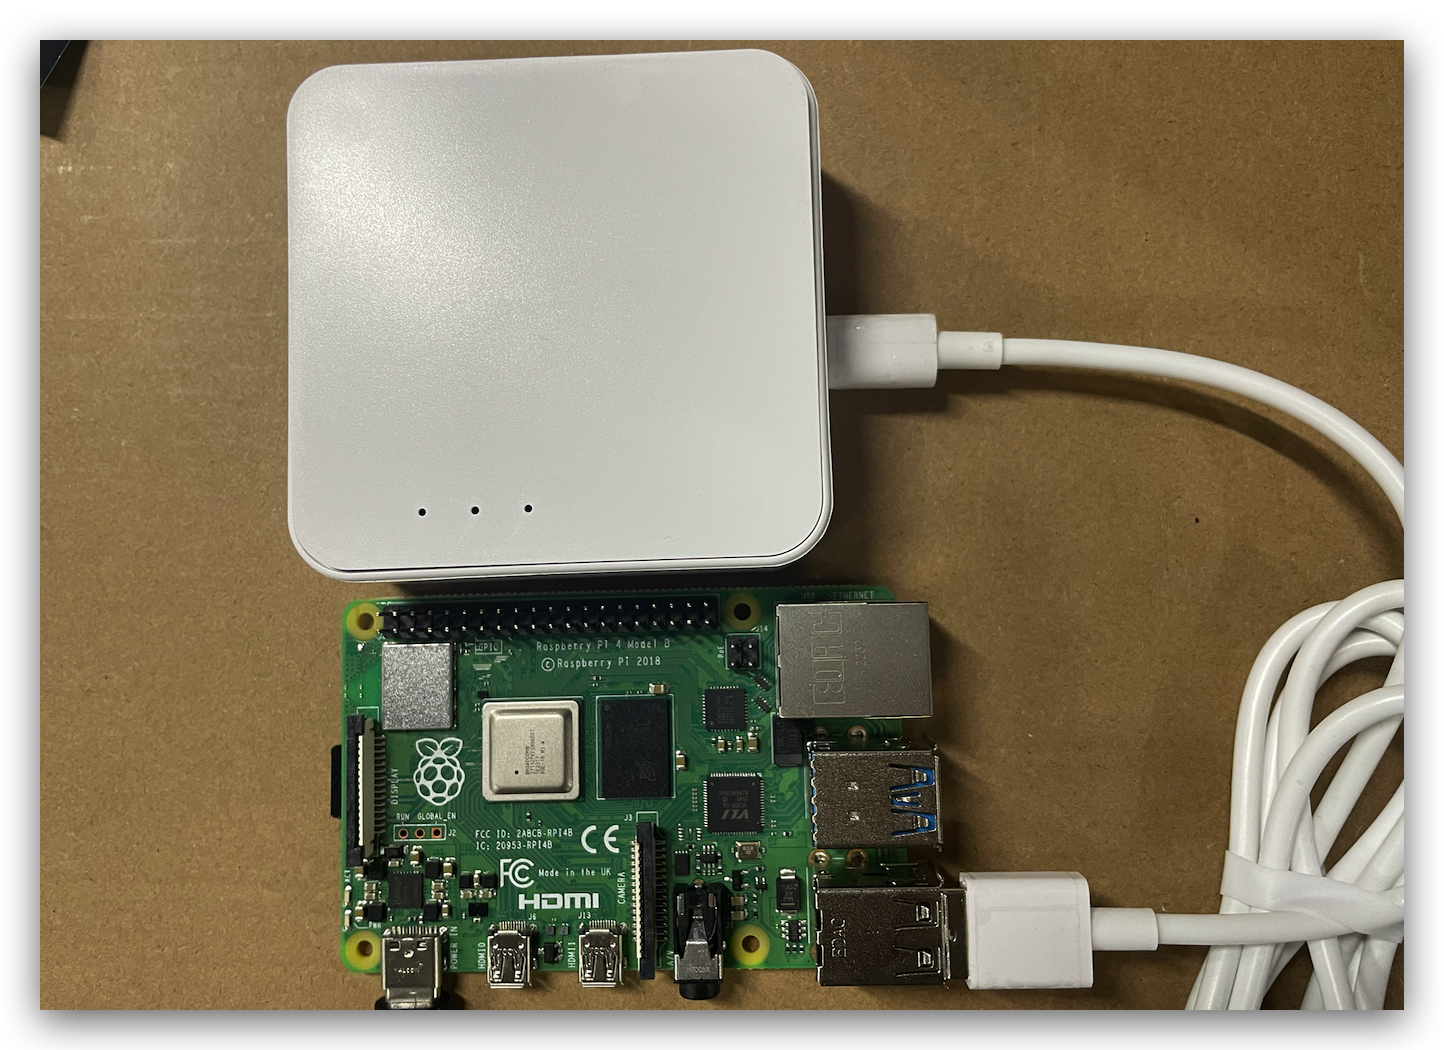
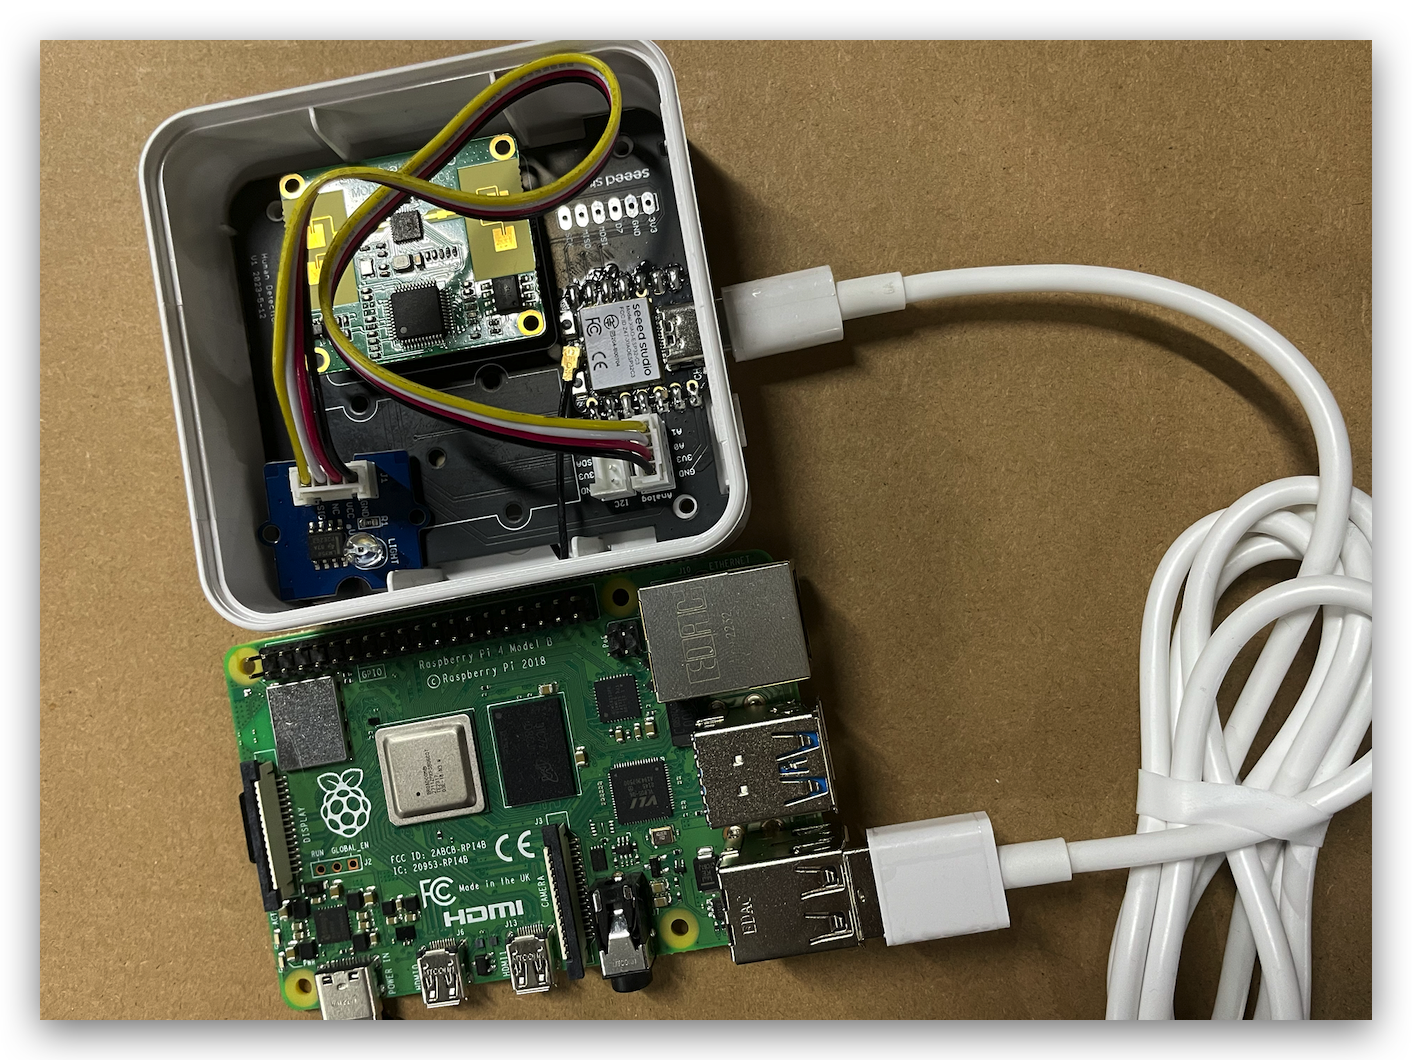
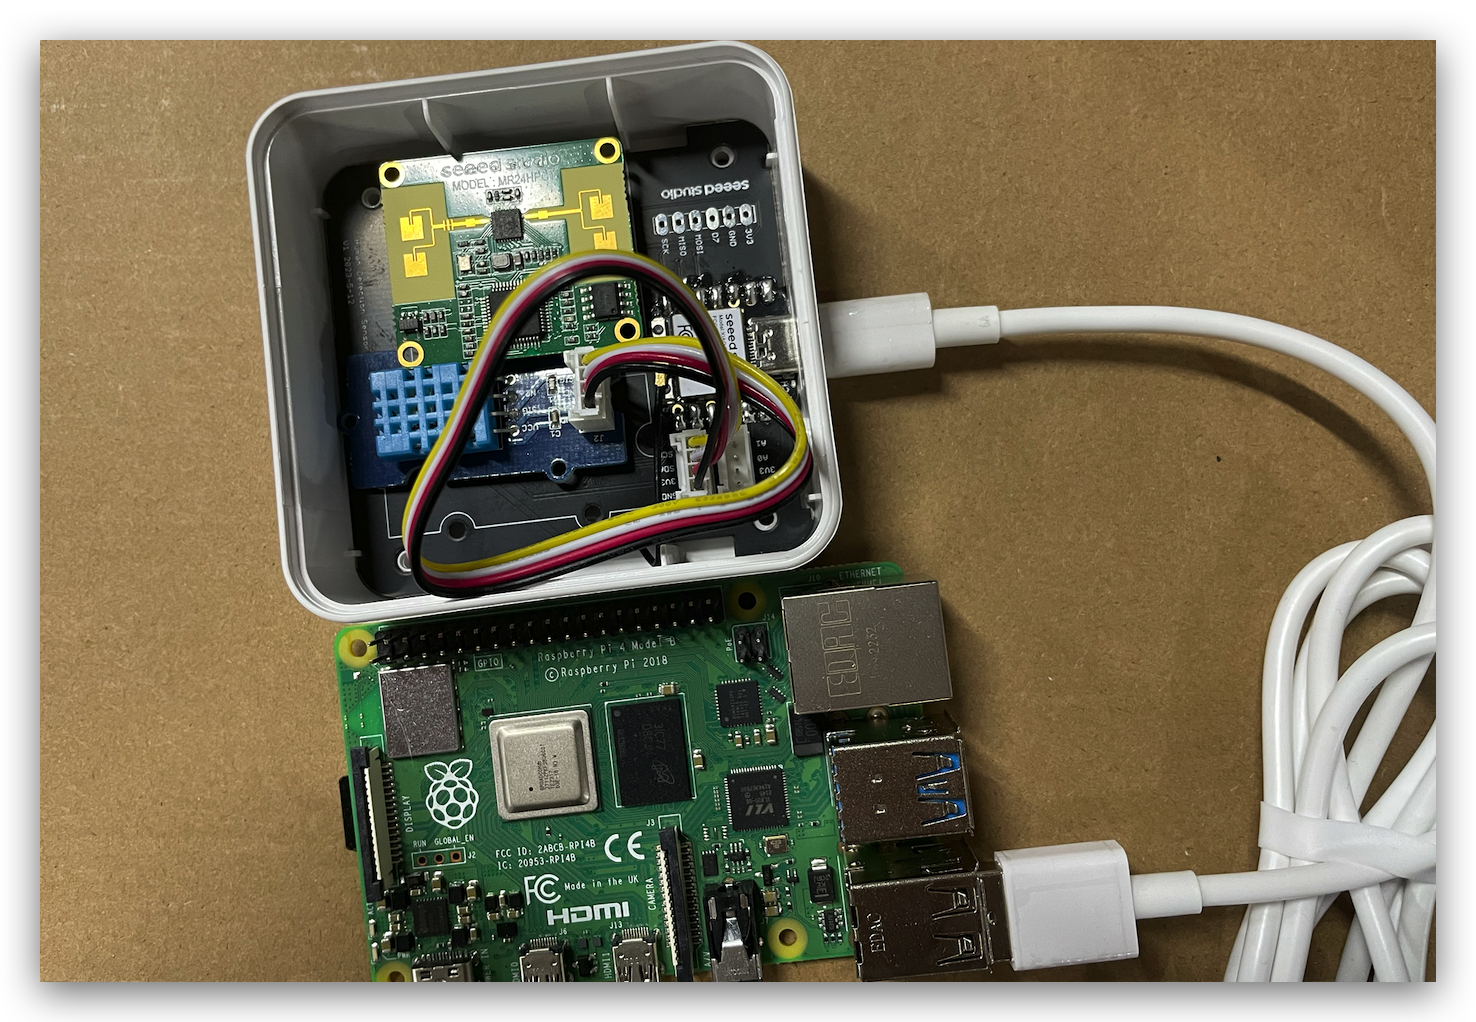
I am using Raspberry Pi 4B as server to run HomeAssistant, using mmWave Human Detection Sensor Kit as the hardware here, along with multiple Grove Sensors.
| mmWave Human Detection Sensor Kit | Raspberry Pi 4B |
|---|---|
 |  |
Grove Sensors
Software Preparation
Install Home Assistant
Make sure you already have Home Assistant up and running. There are multiple wiki introducing how to flash Home Assistant into the products here. I'm using Raspberry Pi 4B so I can directly use the official one to flash the OS into the Raspberry Pi 4B.
Install ESPHome on Home Assistant
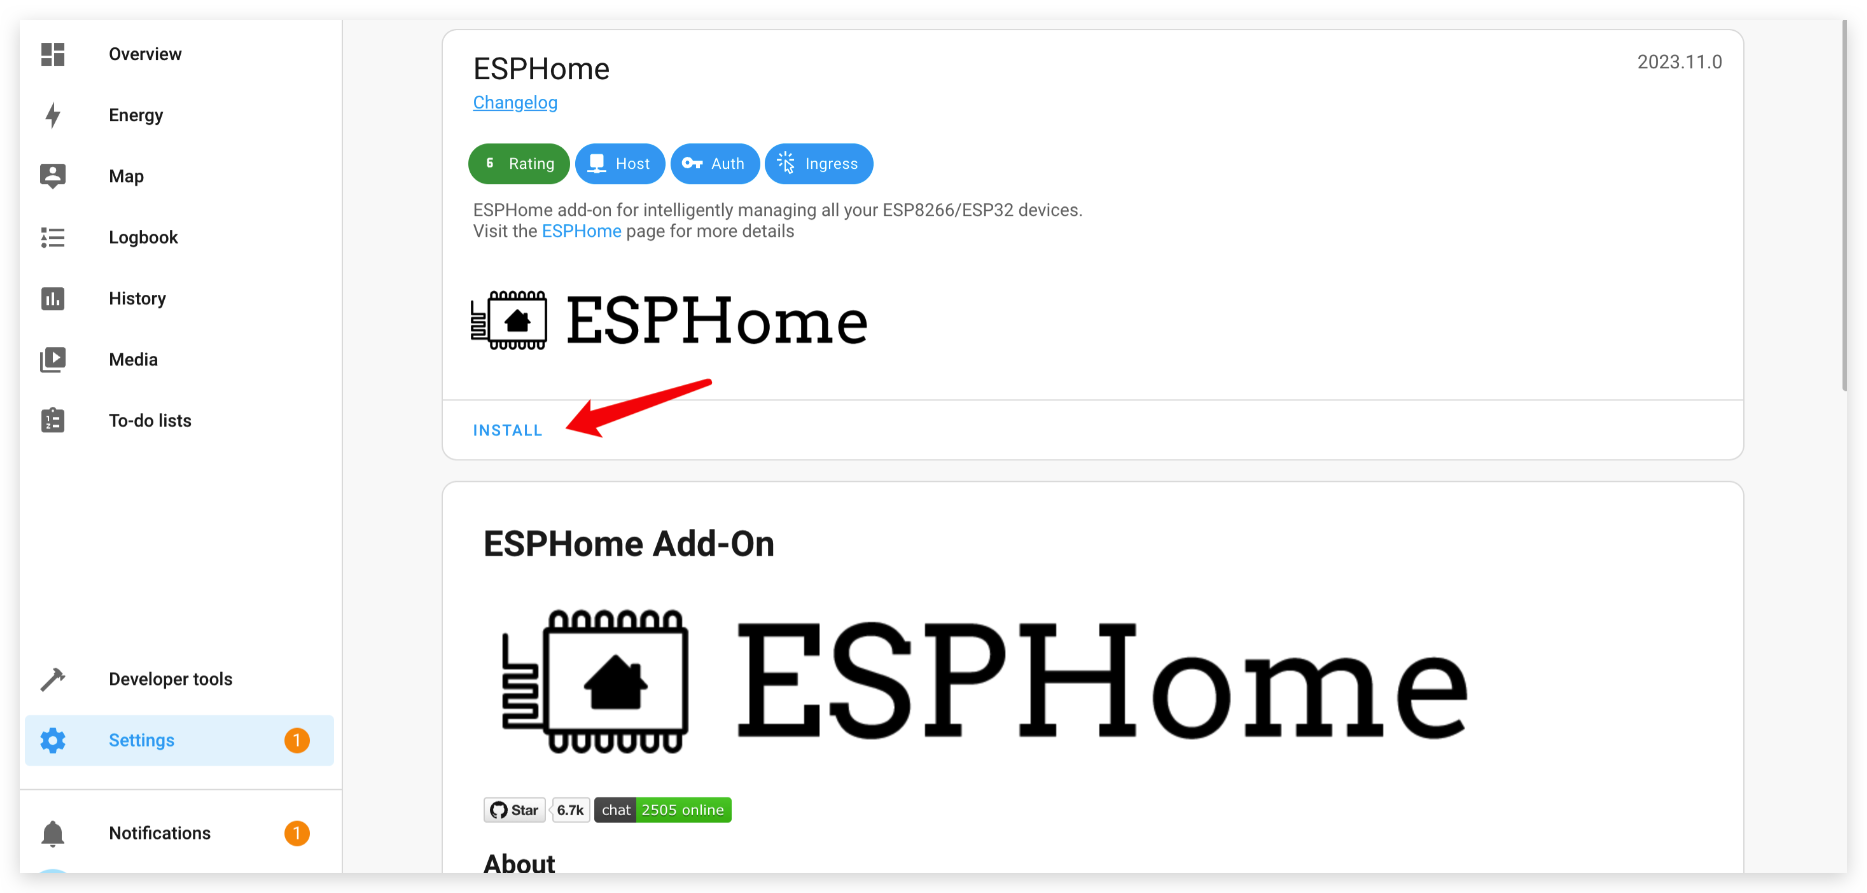
ESPHome is available as a Home Assistant Add-On and can simply be installed via the add-on store.

- Step 1. Click INSTALL
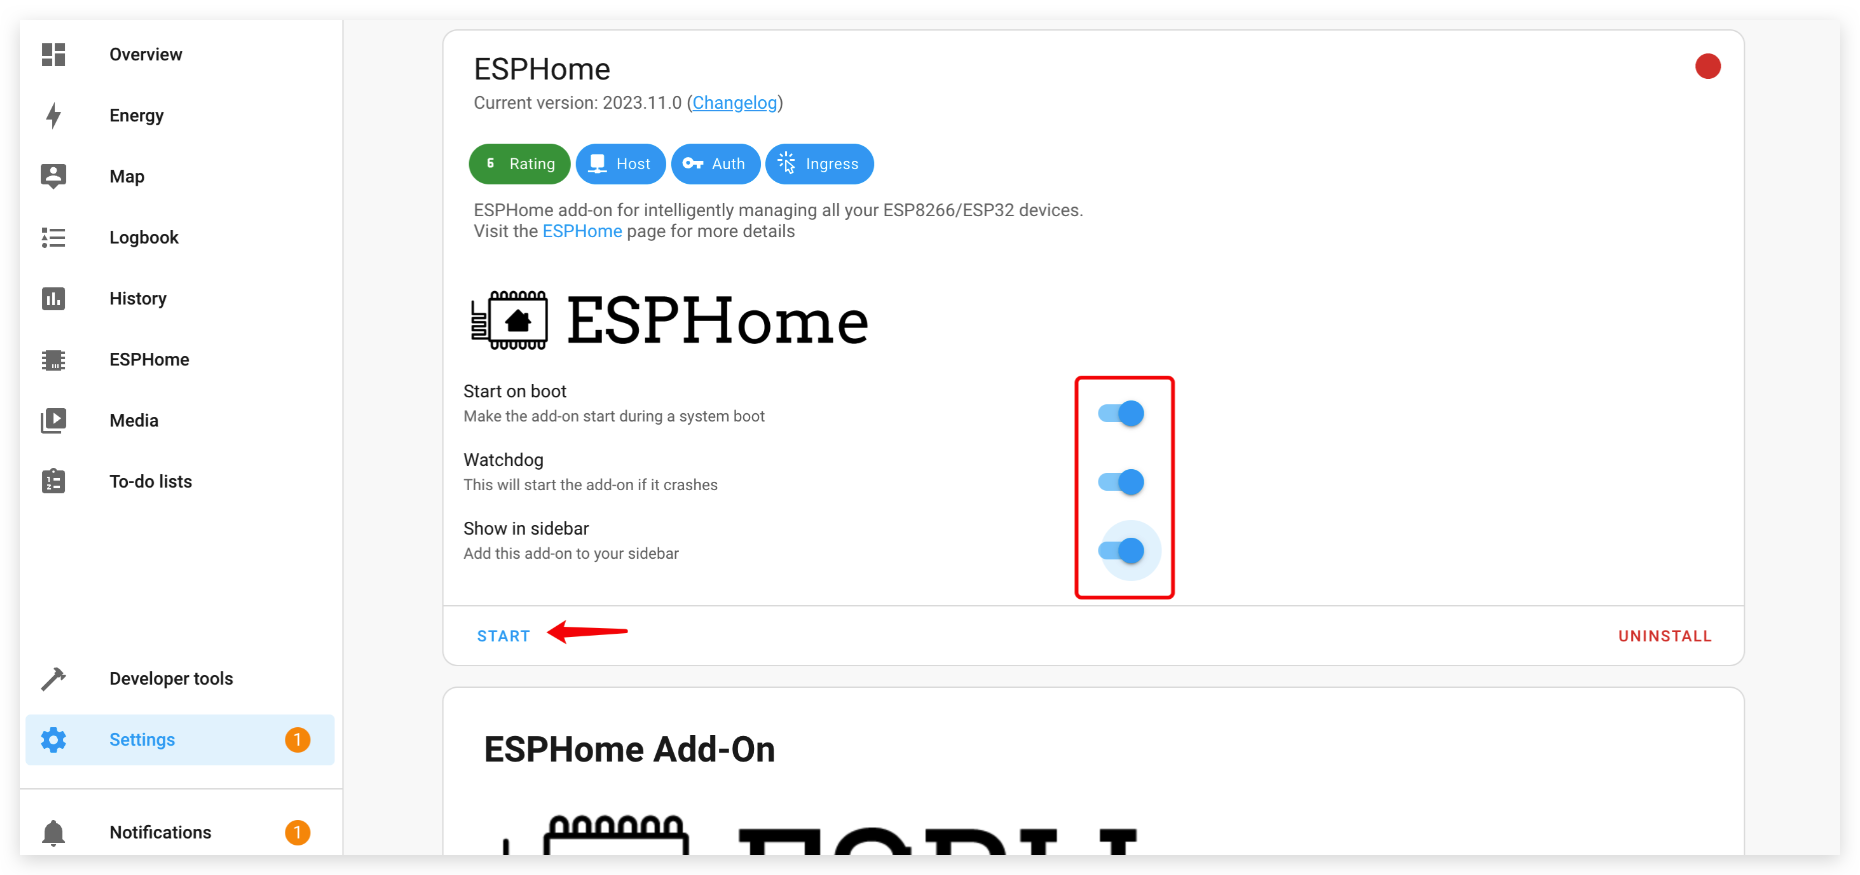
- Step 2. Enable all the options and click START
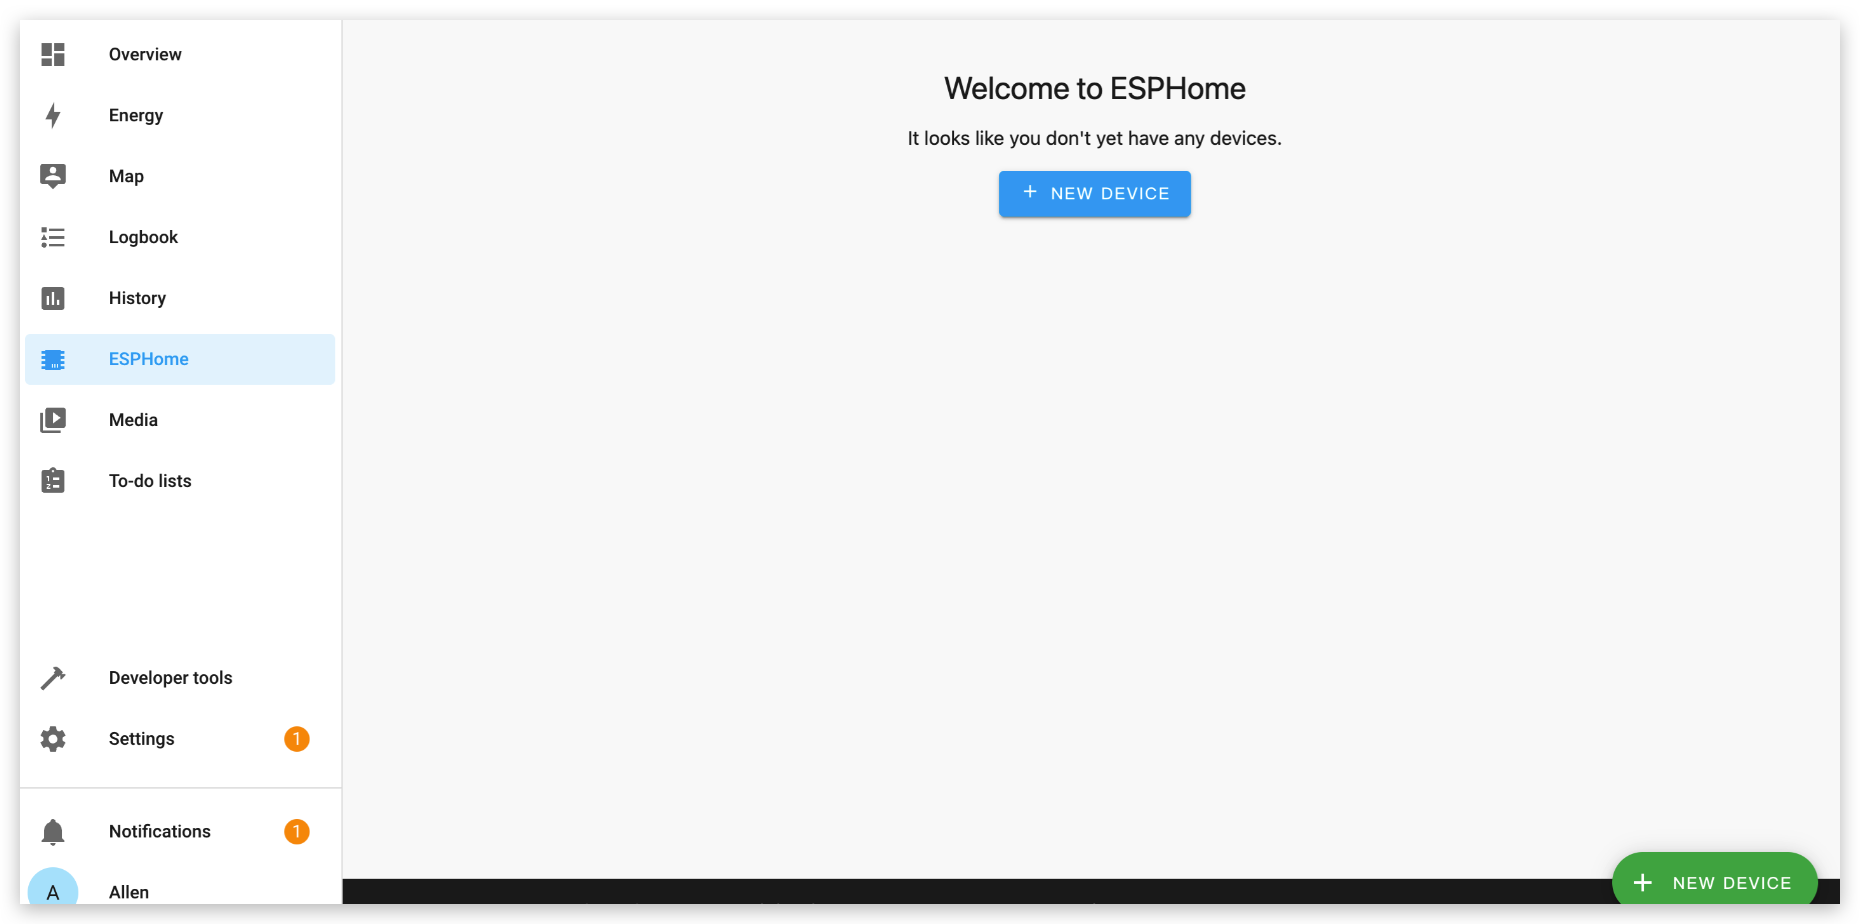
You will see the following window if ESPHome is successfully loaded
Geting started
mmWave kit connect to ESPHome
Step 1: Hardware connection
Connect the mmwave kit to the HomeAssistant via Type-C cable, you can refer the picture below.
Step 2: Software setup
a. Setup mmwave kit
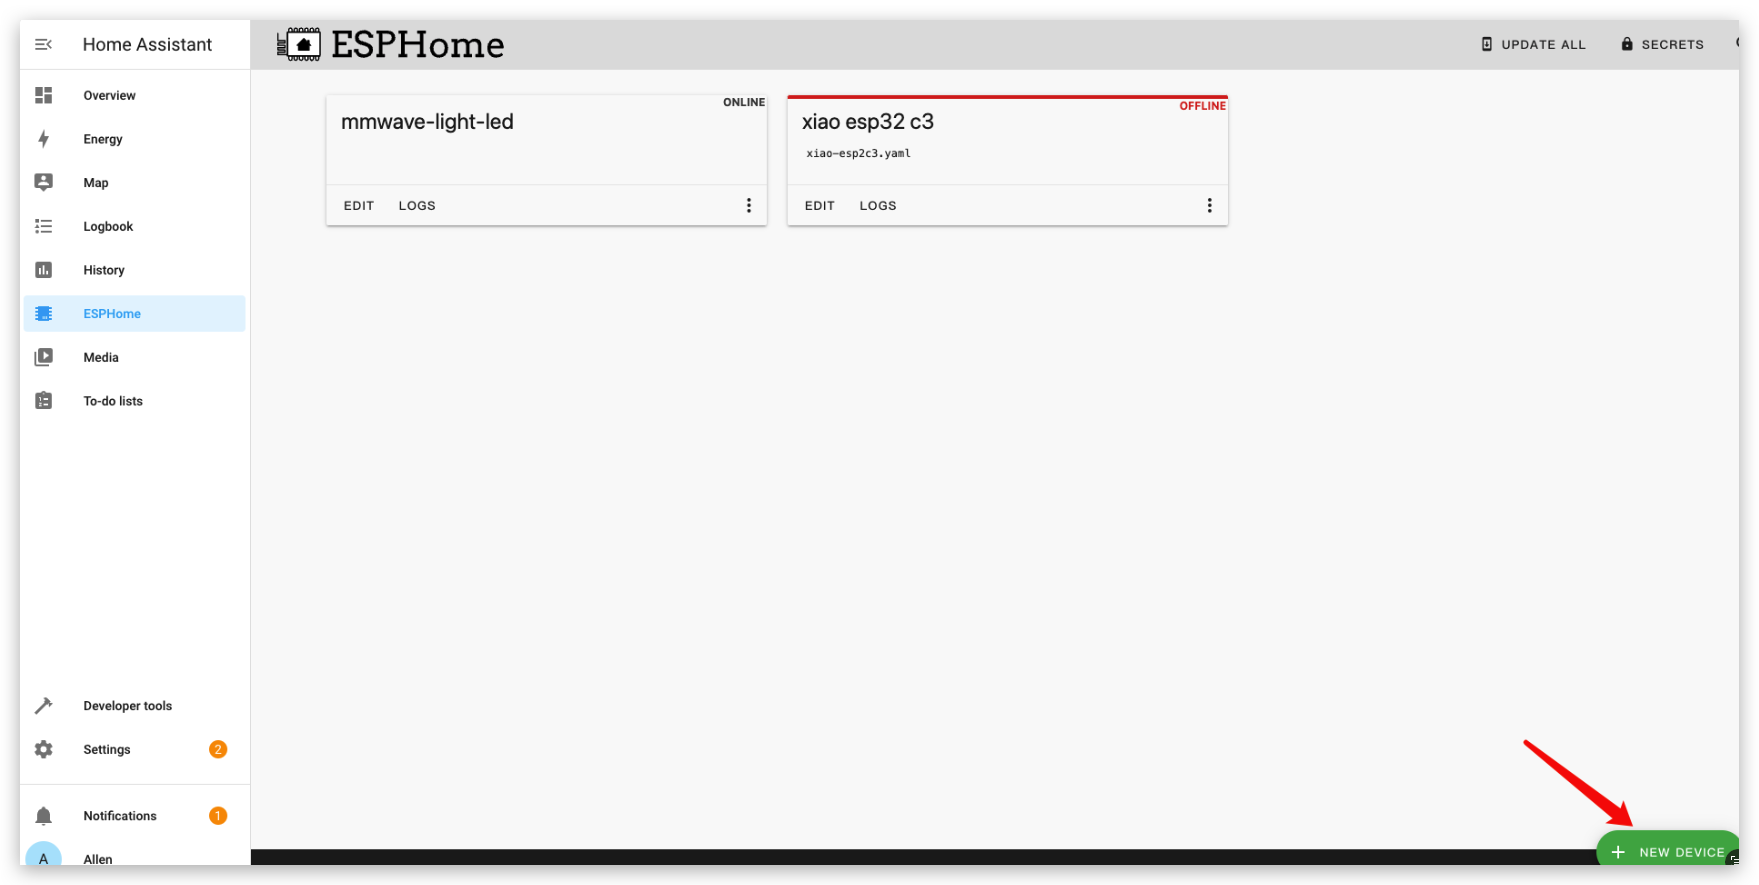
- Open ESPHome page and click the NEW DEVICE button on the lower right corner.
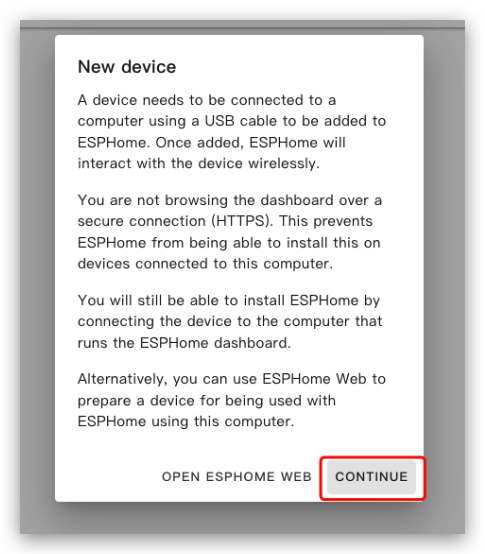
- And then, click CONTINUE.
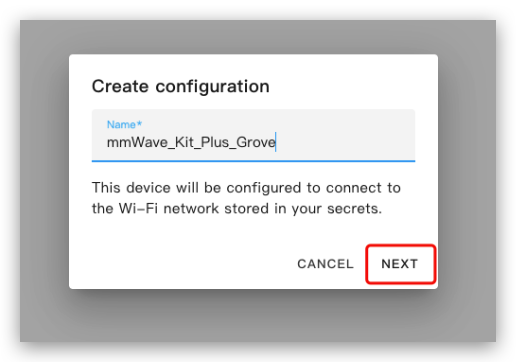
- Give it a name you want, click NEXT.
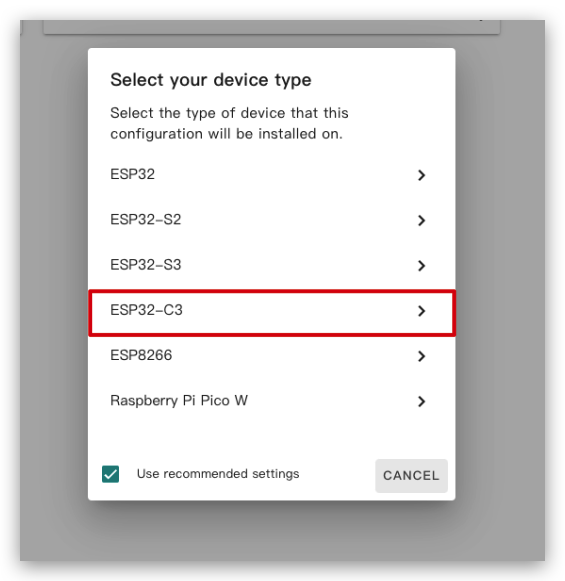
- Select your device type, click ESP32-C3.
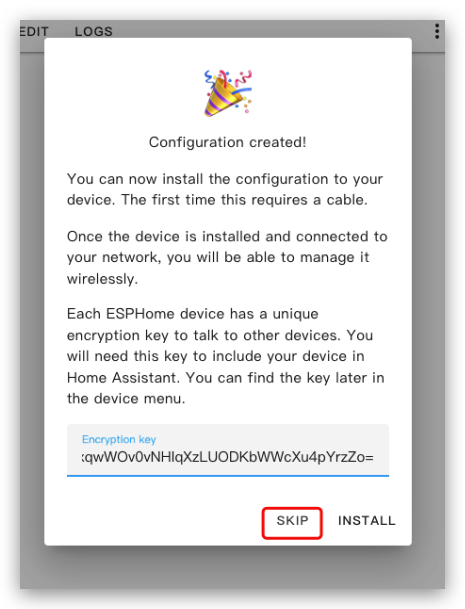
- You can find the key later in the configuration file, so here just click SKIP.
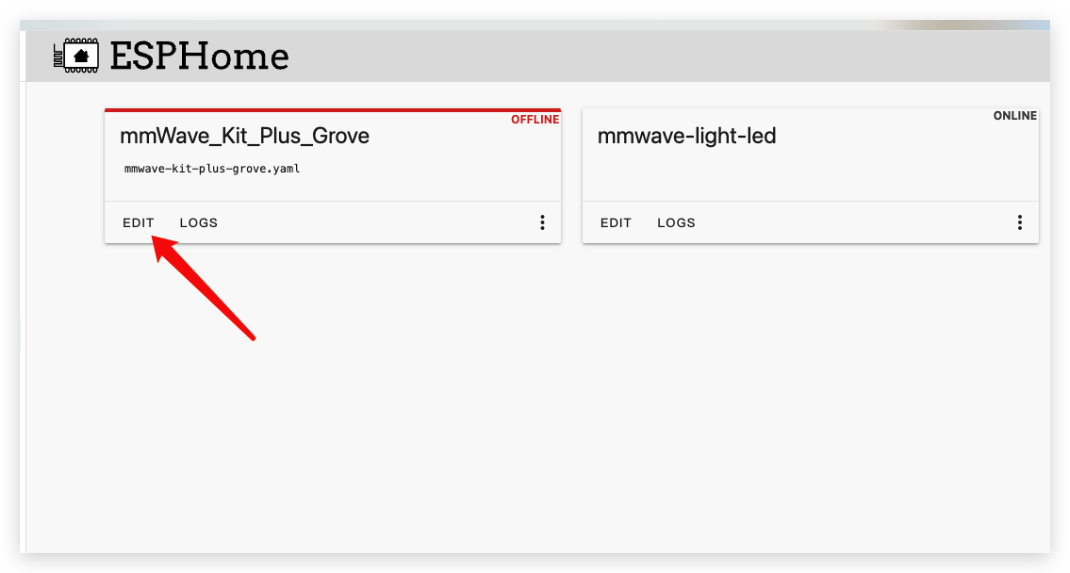
- We need to edit the configuration file here, click EDIT.
- The code below is for your reference. You can copy them to your configuration file. After finishing the code, click INSTALL button on the upper right corner.
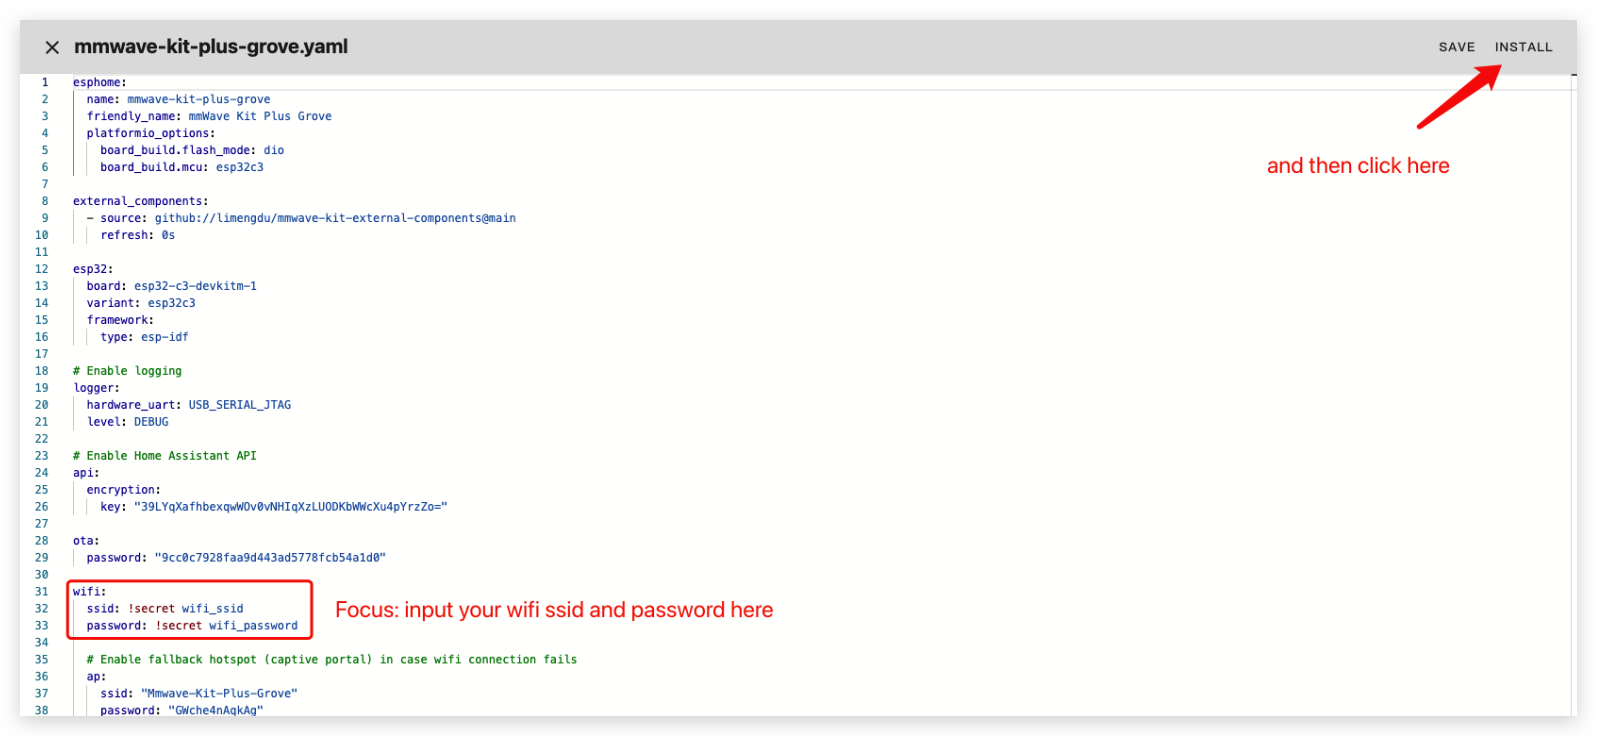
- api and ota part have default key or password you needn't to change it.
- wifi part you need to change your own ssid and password.
- click here to see code
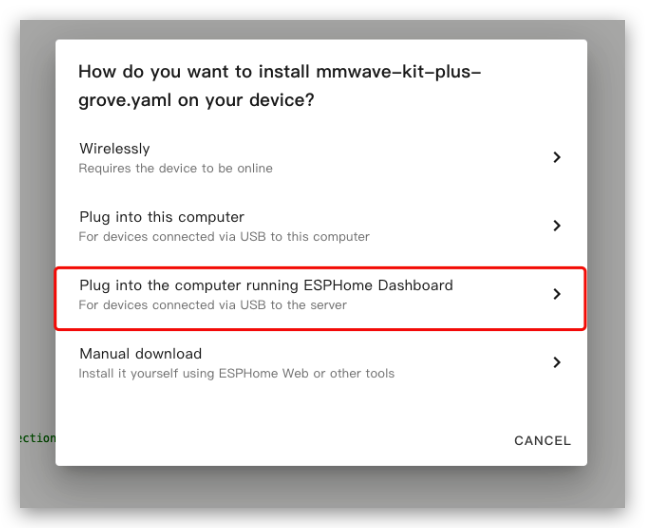
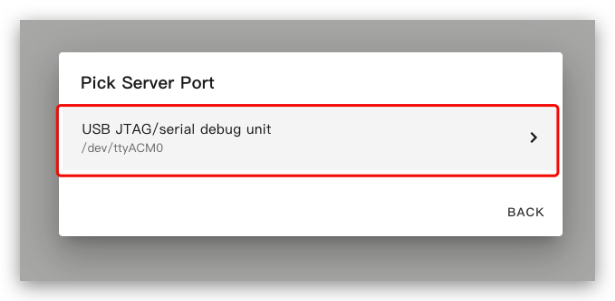
- And then will be a pop-up window, click on the third entry.
- Click as below.
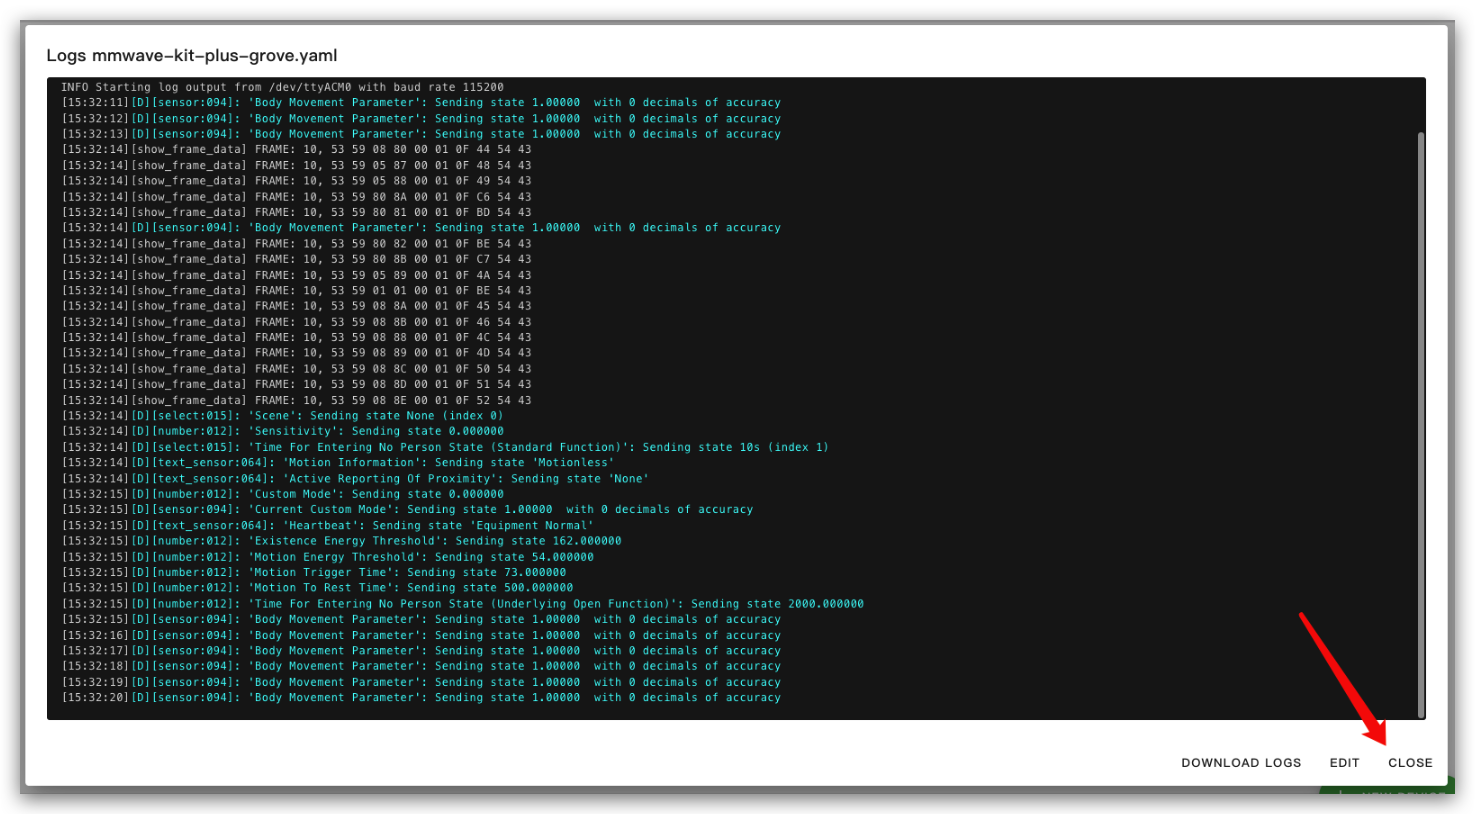
- Now the mmwave kit already setup and you will see this page, click the CLOSE button on the lower right corner.
b. Add mmwave kit data to overview
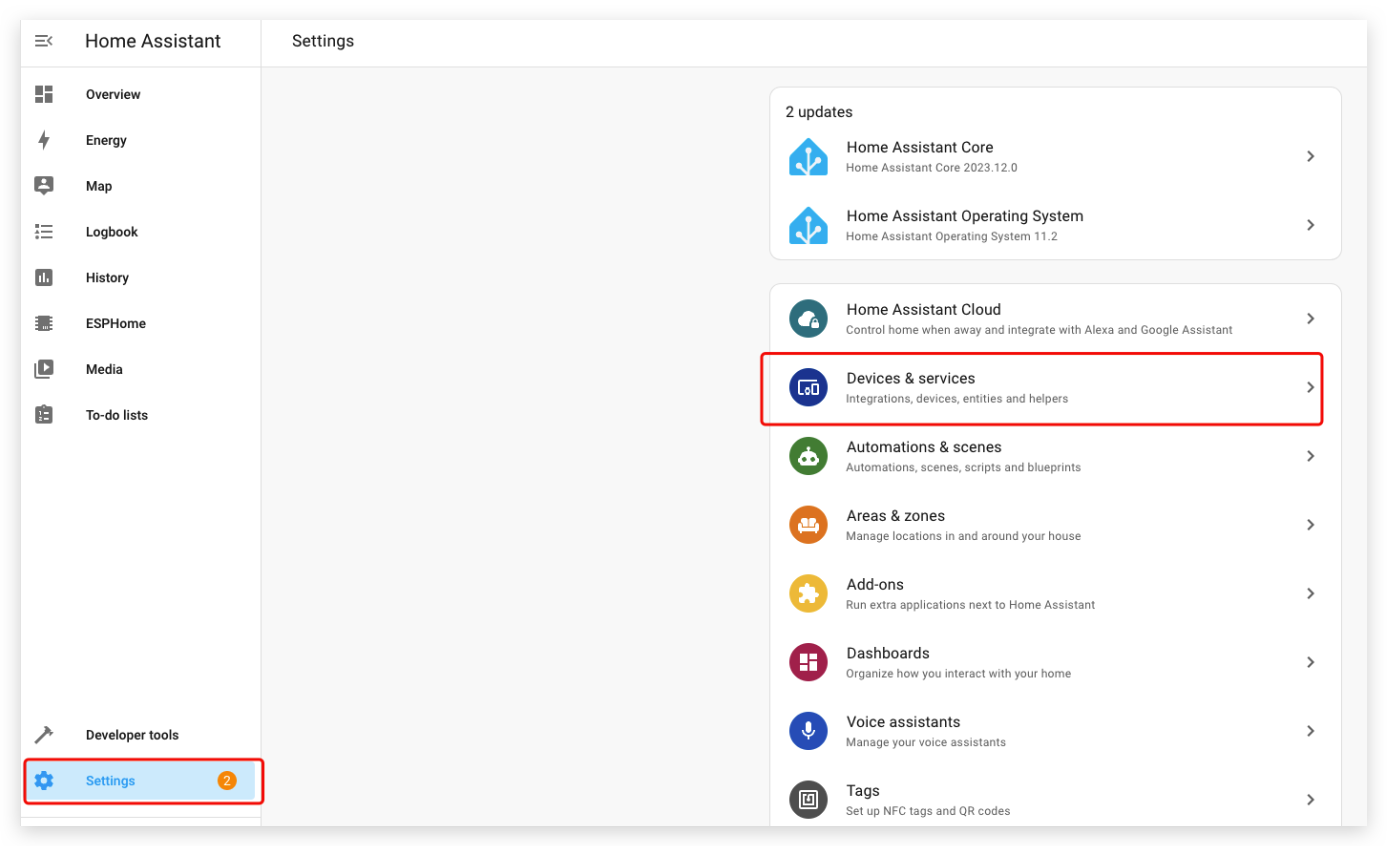
- Go to the Settings page and click Devcies & services.
- Click ESPHome in the Configured zone.
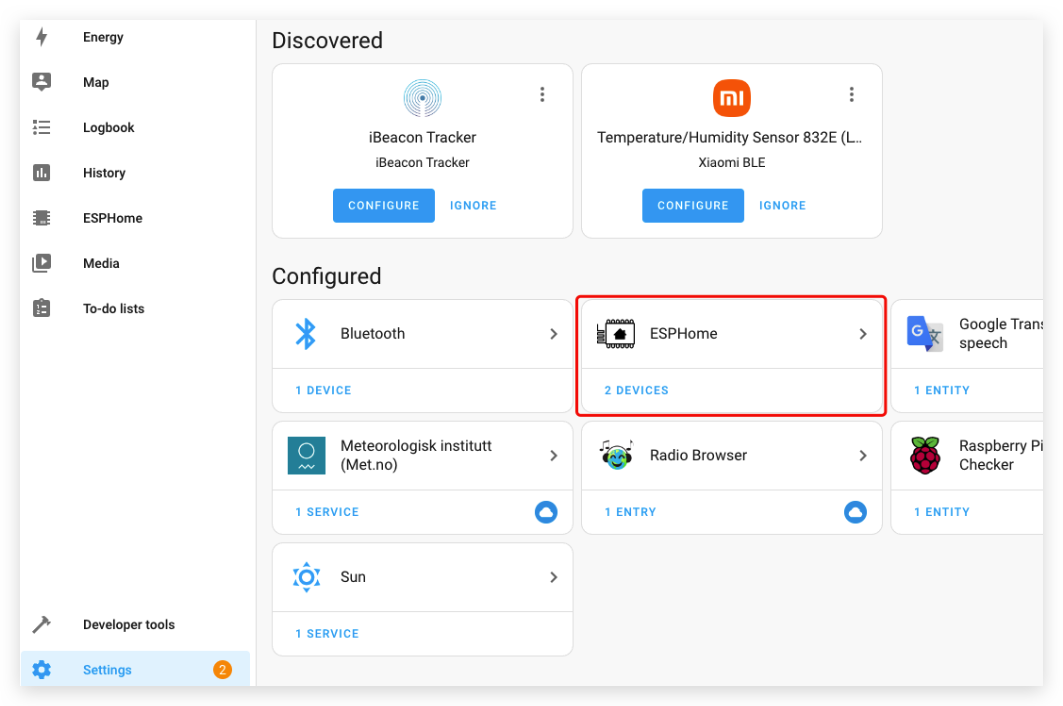
If you found ESPHome not in the Configured zone, but in Discovered zone upper. You can follow step15 to step18 in this link.
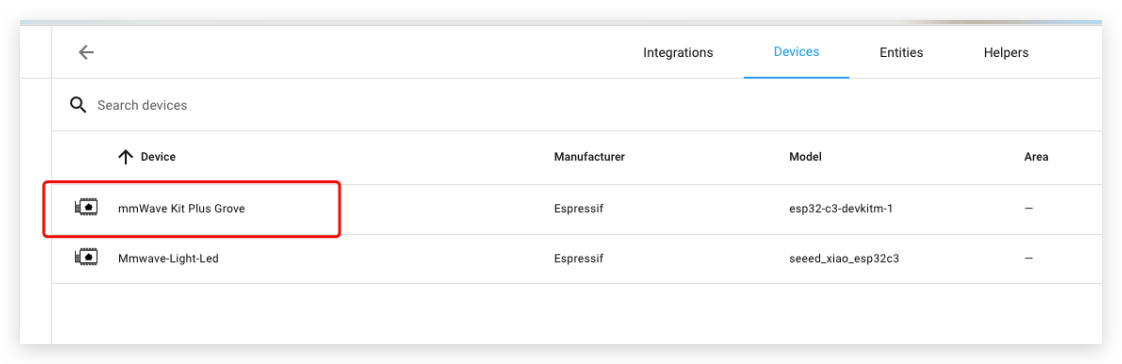
- Click the devices. I have 2 devices here, probably in your situation just get 1 device.
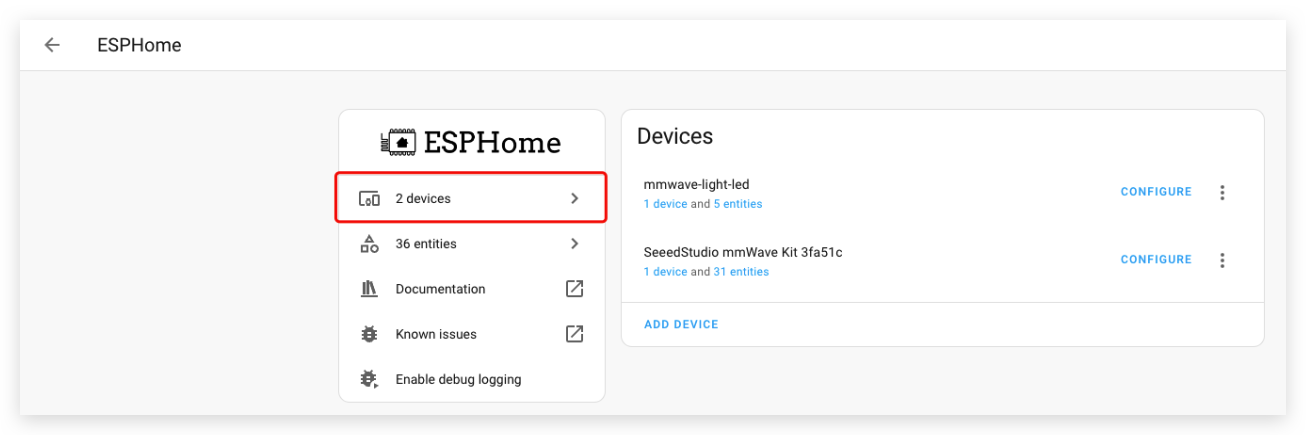
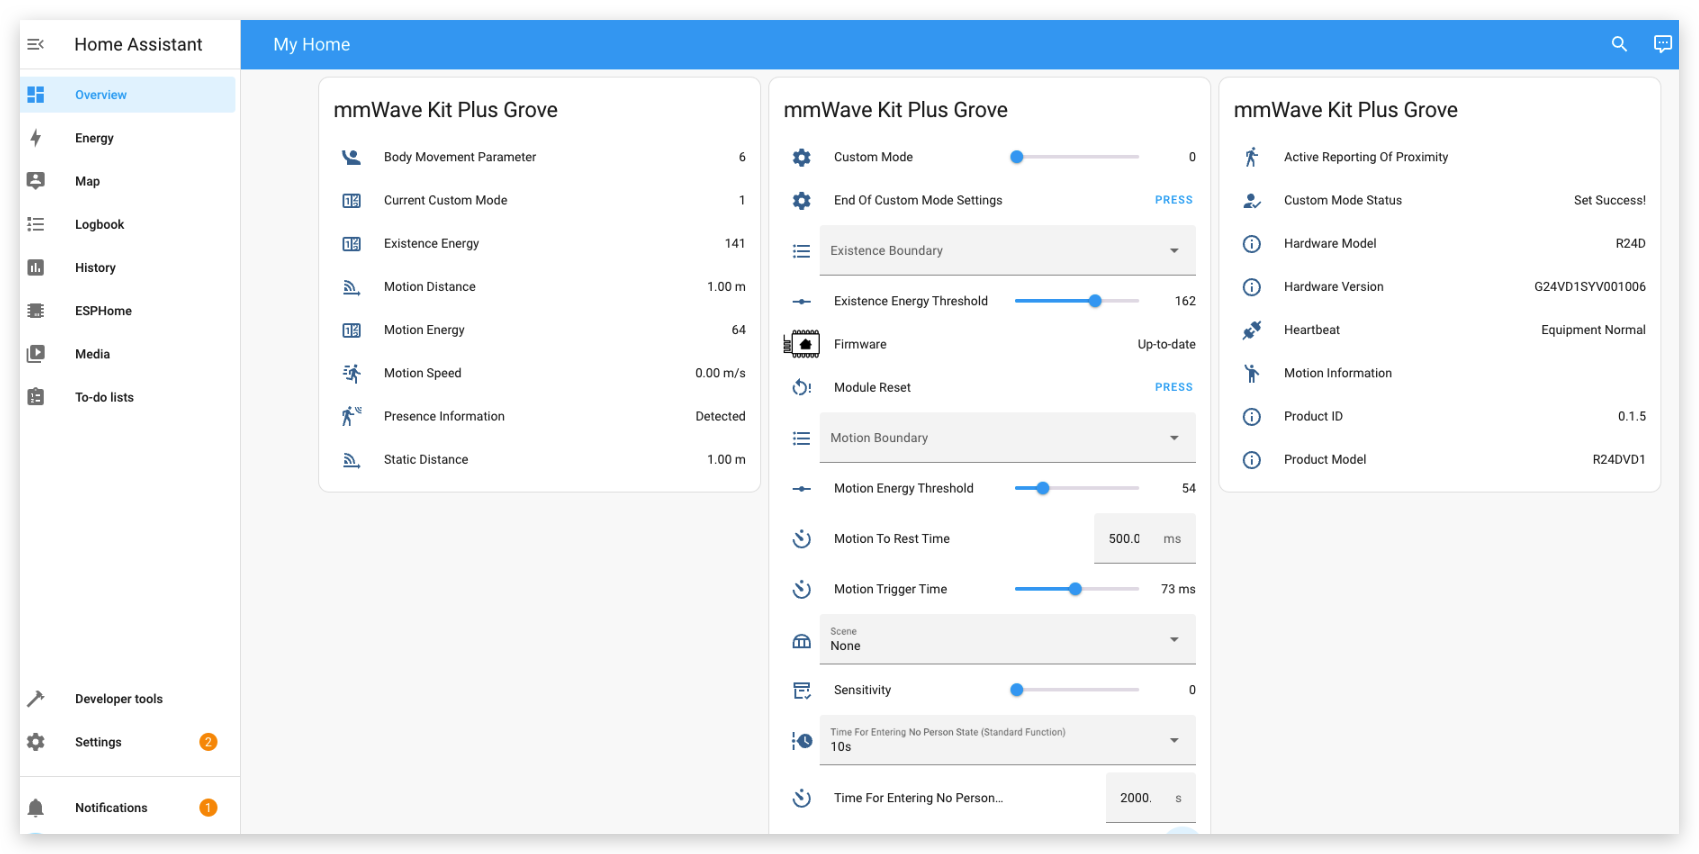
- Click the mmWave Kit Plus Grove.
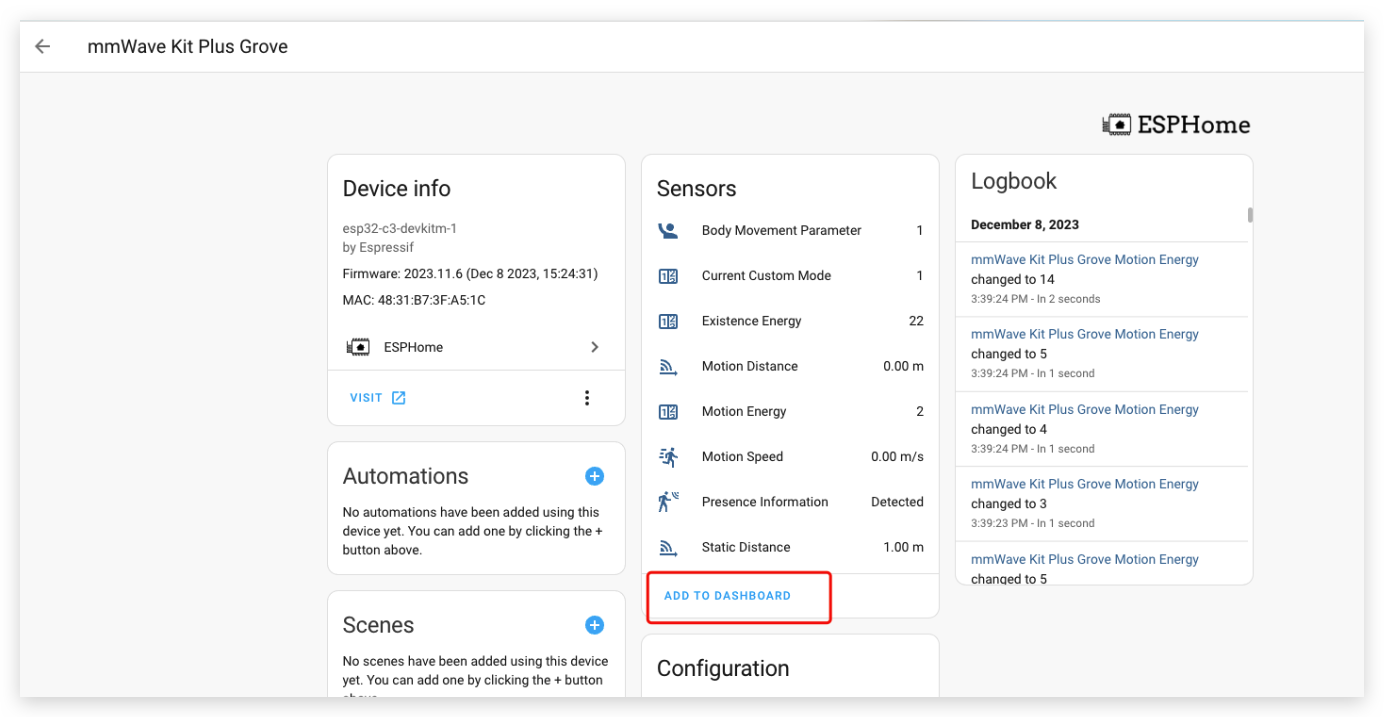
- Click ADD TO DASHBOARD to add those information to the dashboard. And you can scroll down this page to add more information you want.
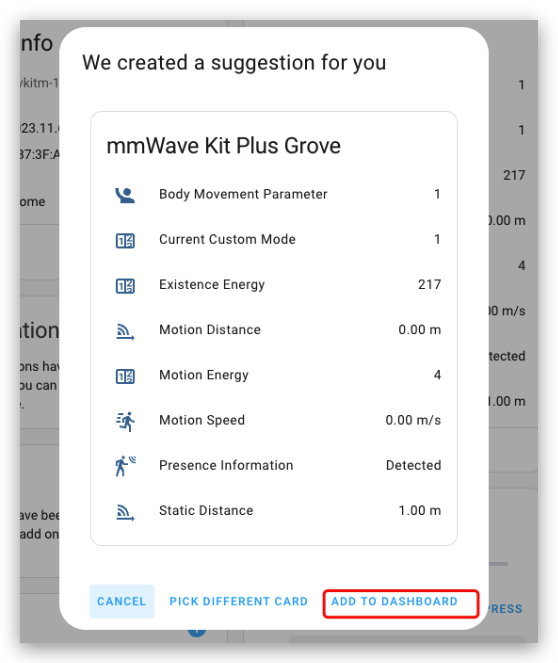
- Continue to click ADD TO DASHBOARD.
- Finally you can see these information in the dashboard by click overview botton on the upper left corner.
Grove connect to ESPHome
Light sensor(LS06-S)
Step 1: Hardware connection
Connect light sensor to mmwave kit via Grove cable, you can refer the picture below.
Step 2: Software setup
a. Setup light sensor
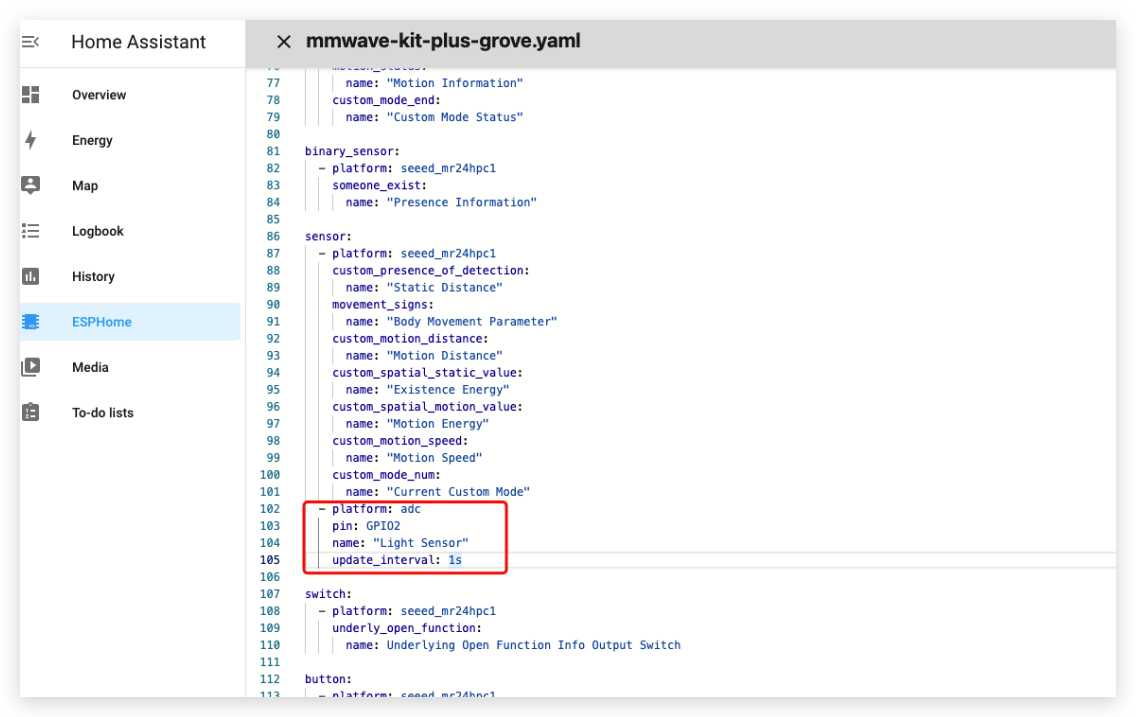
- Add these code to your configuration file at corresponding position you can refer to the image below.
  - platform: adc
    pin: GPIO2
    name: "Light Sensor"
    update_interval: 1s
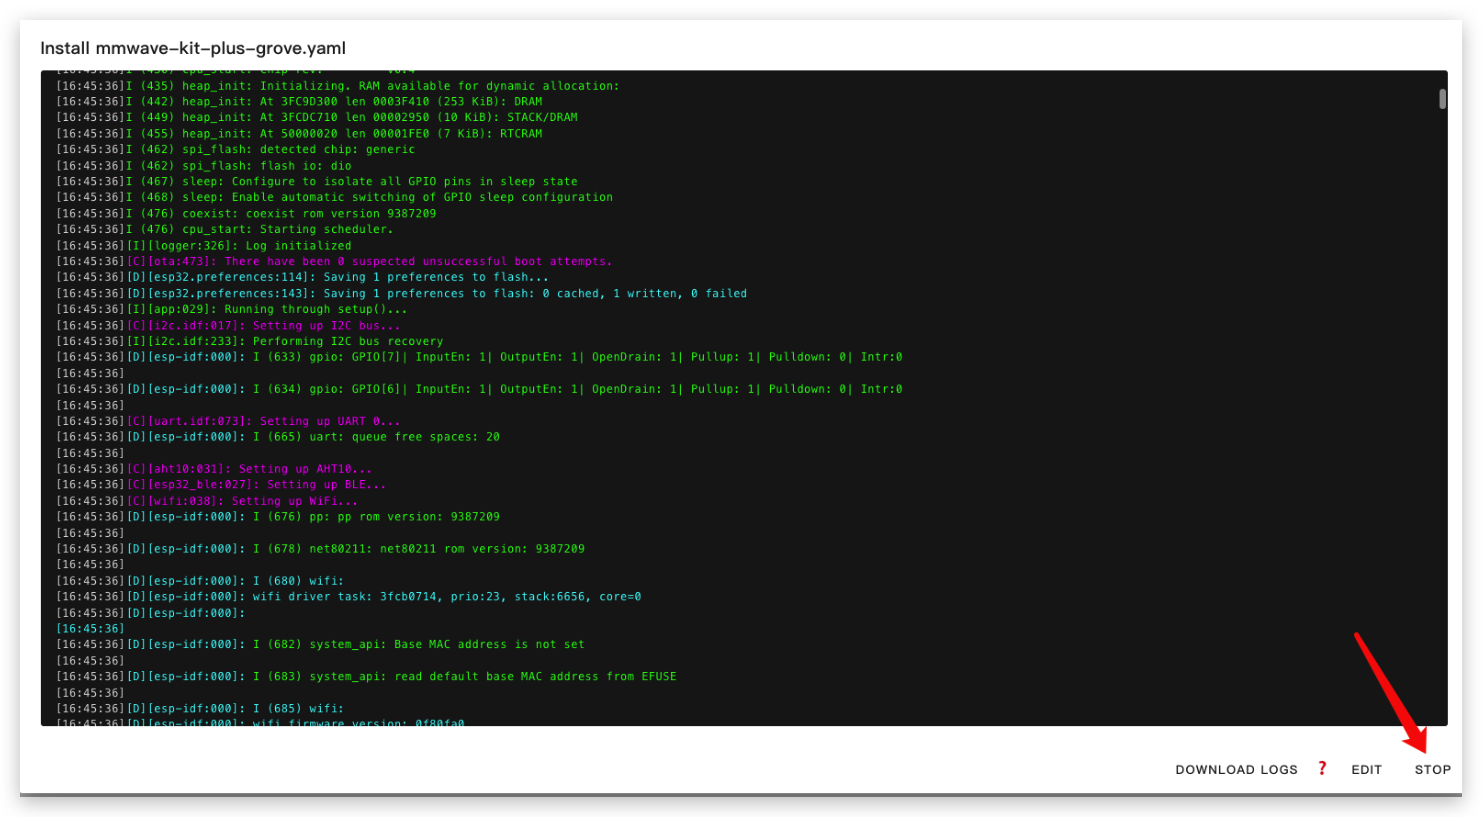
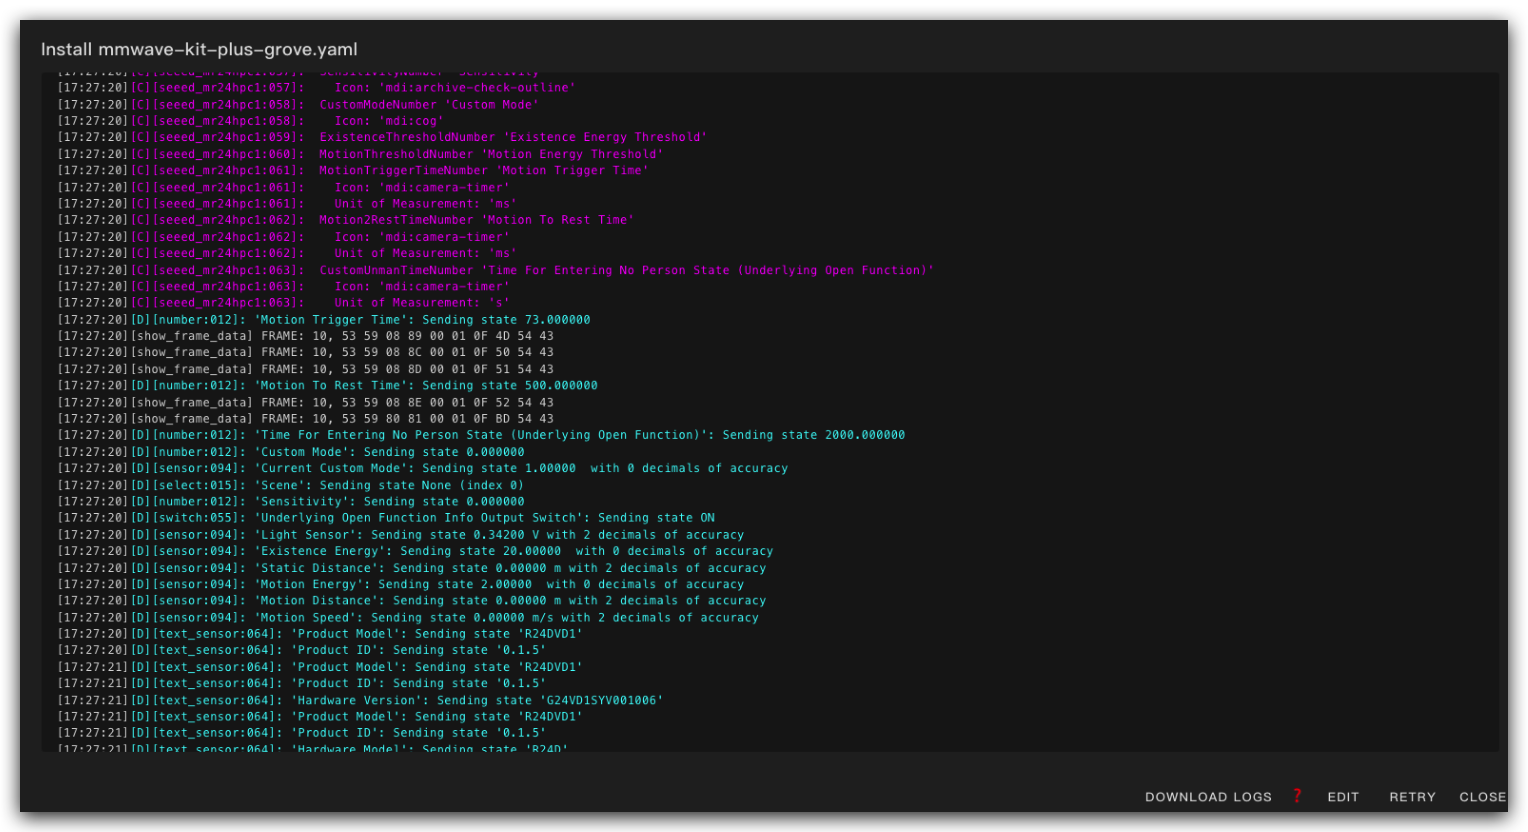
- And then click the INSTALL button on the upper left corner. If going well you will see this image.
- Probably you will meet a error like this.
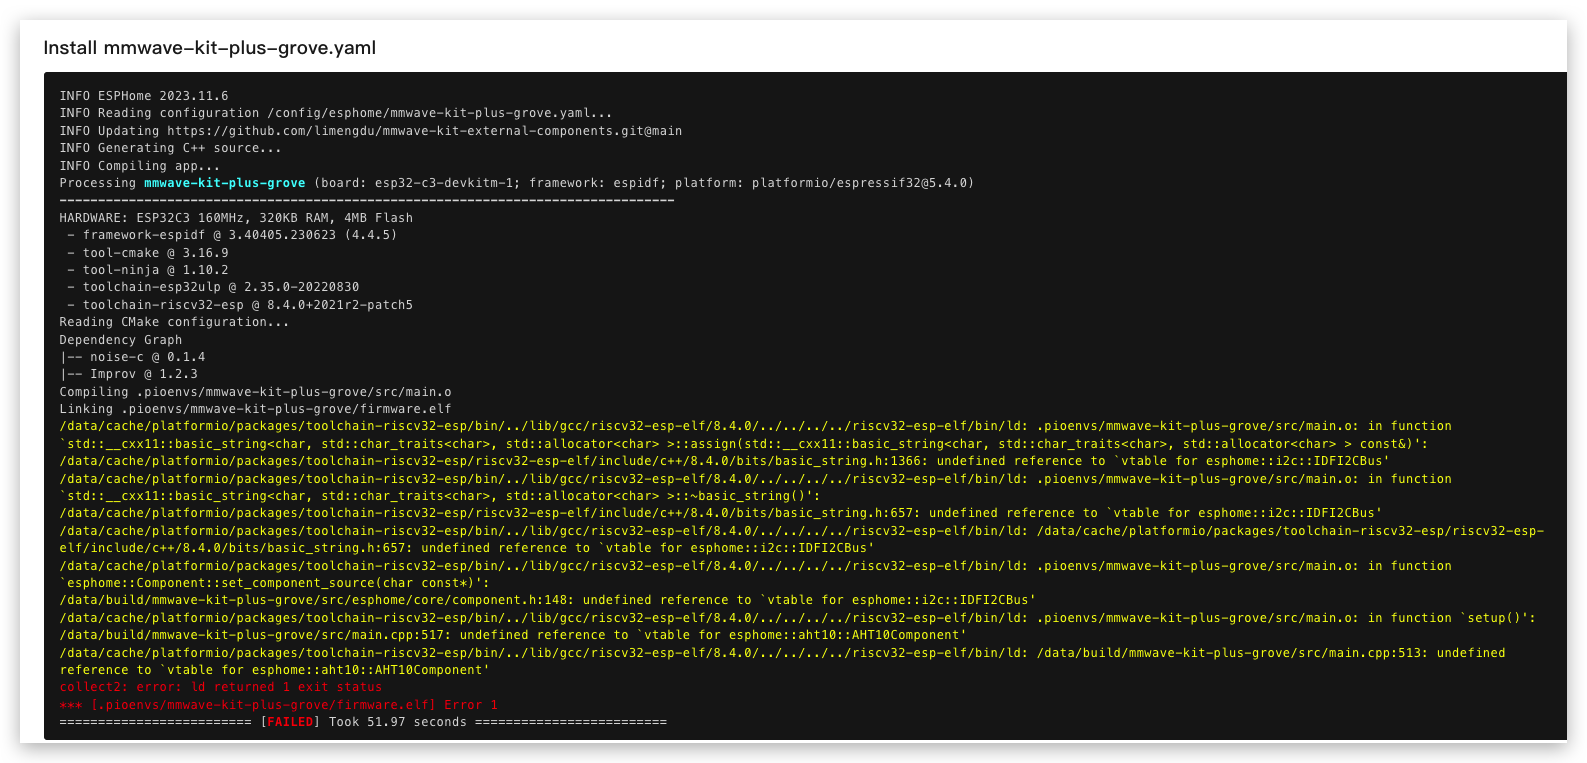
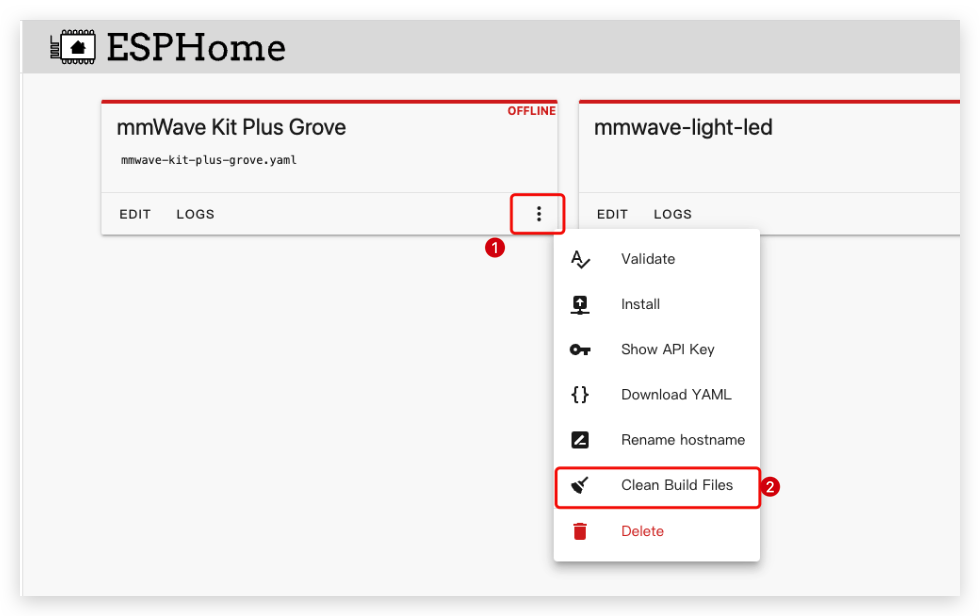
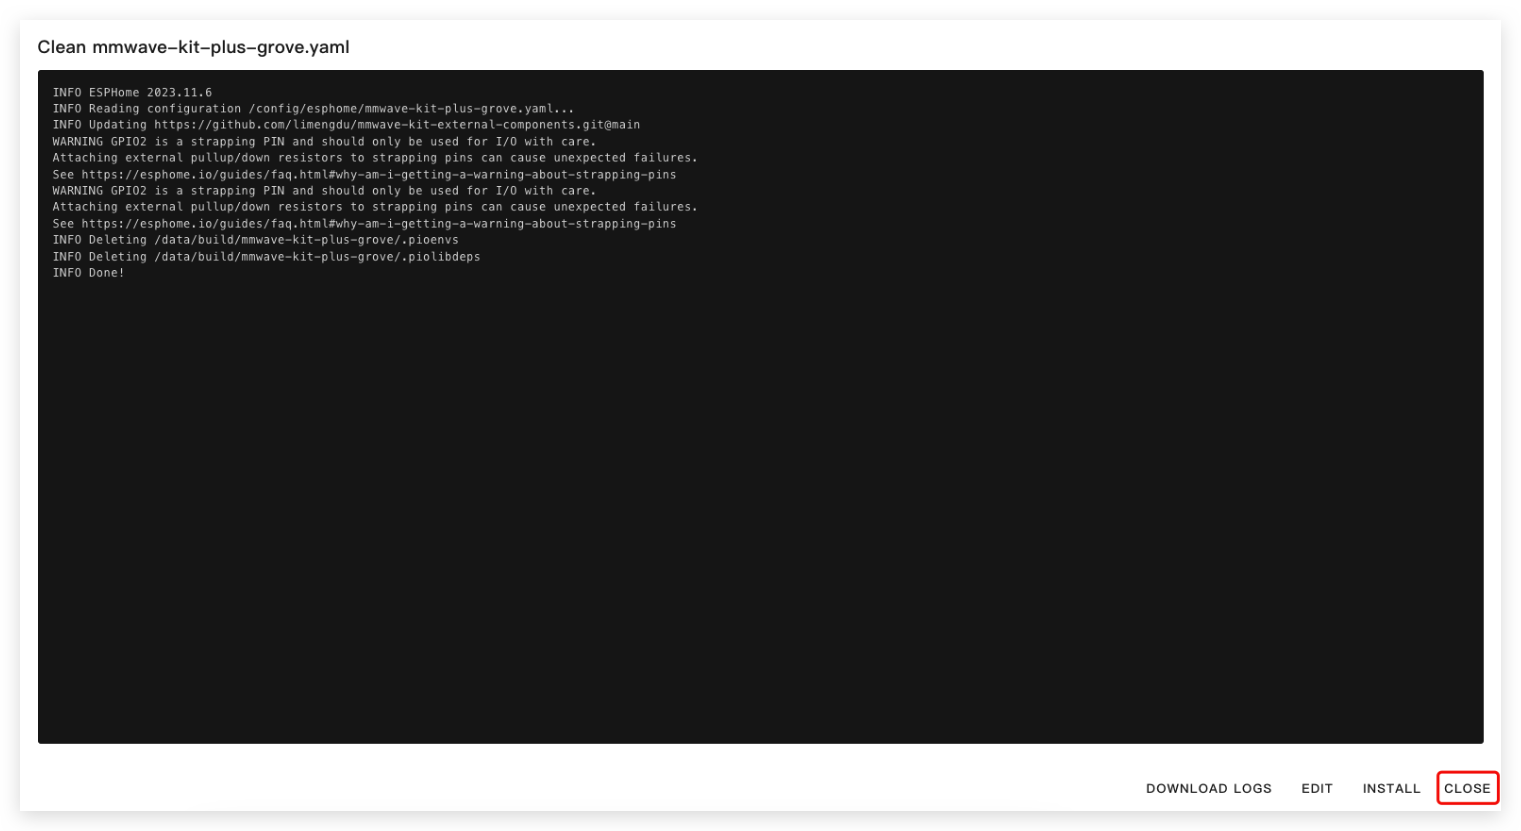
- You can Click Clean Build Files to clean some files.
- After cleaning, click CLOSE and try to INSTALL again.
b. Add light sensor to dashboard
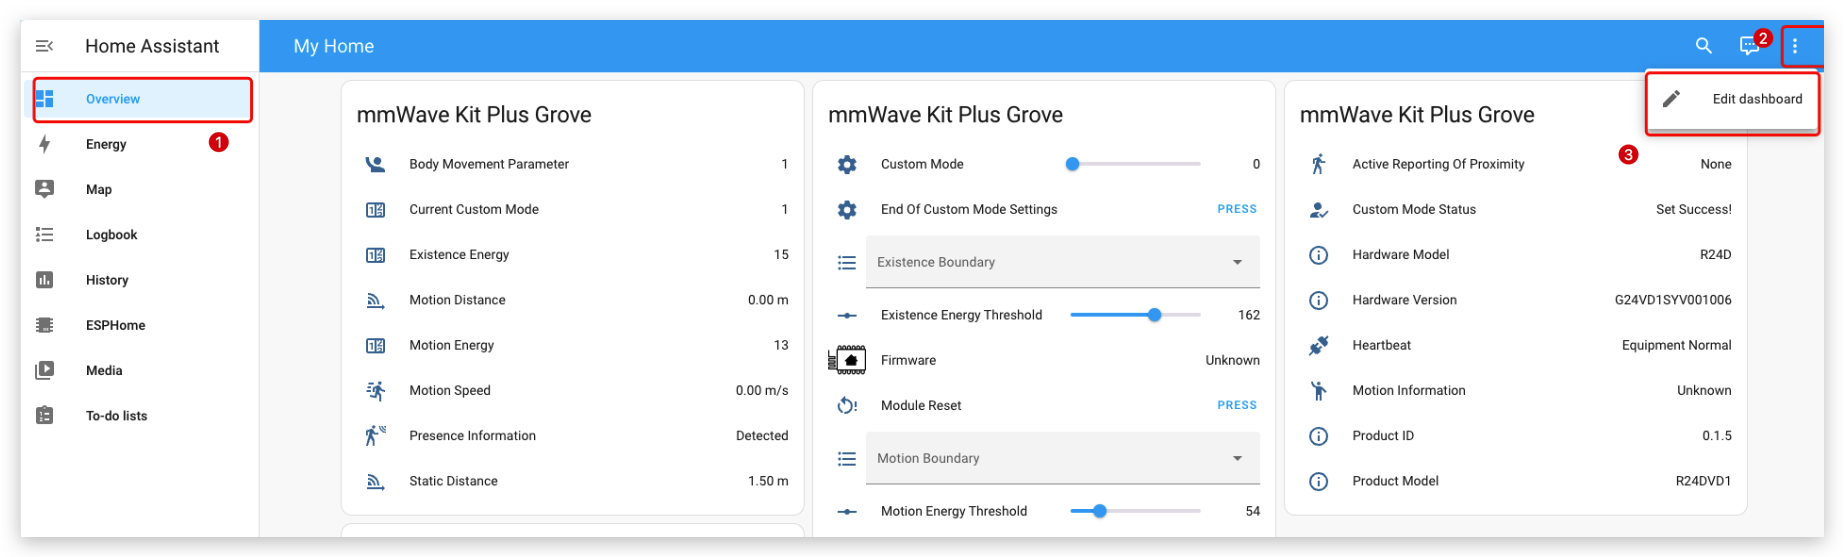
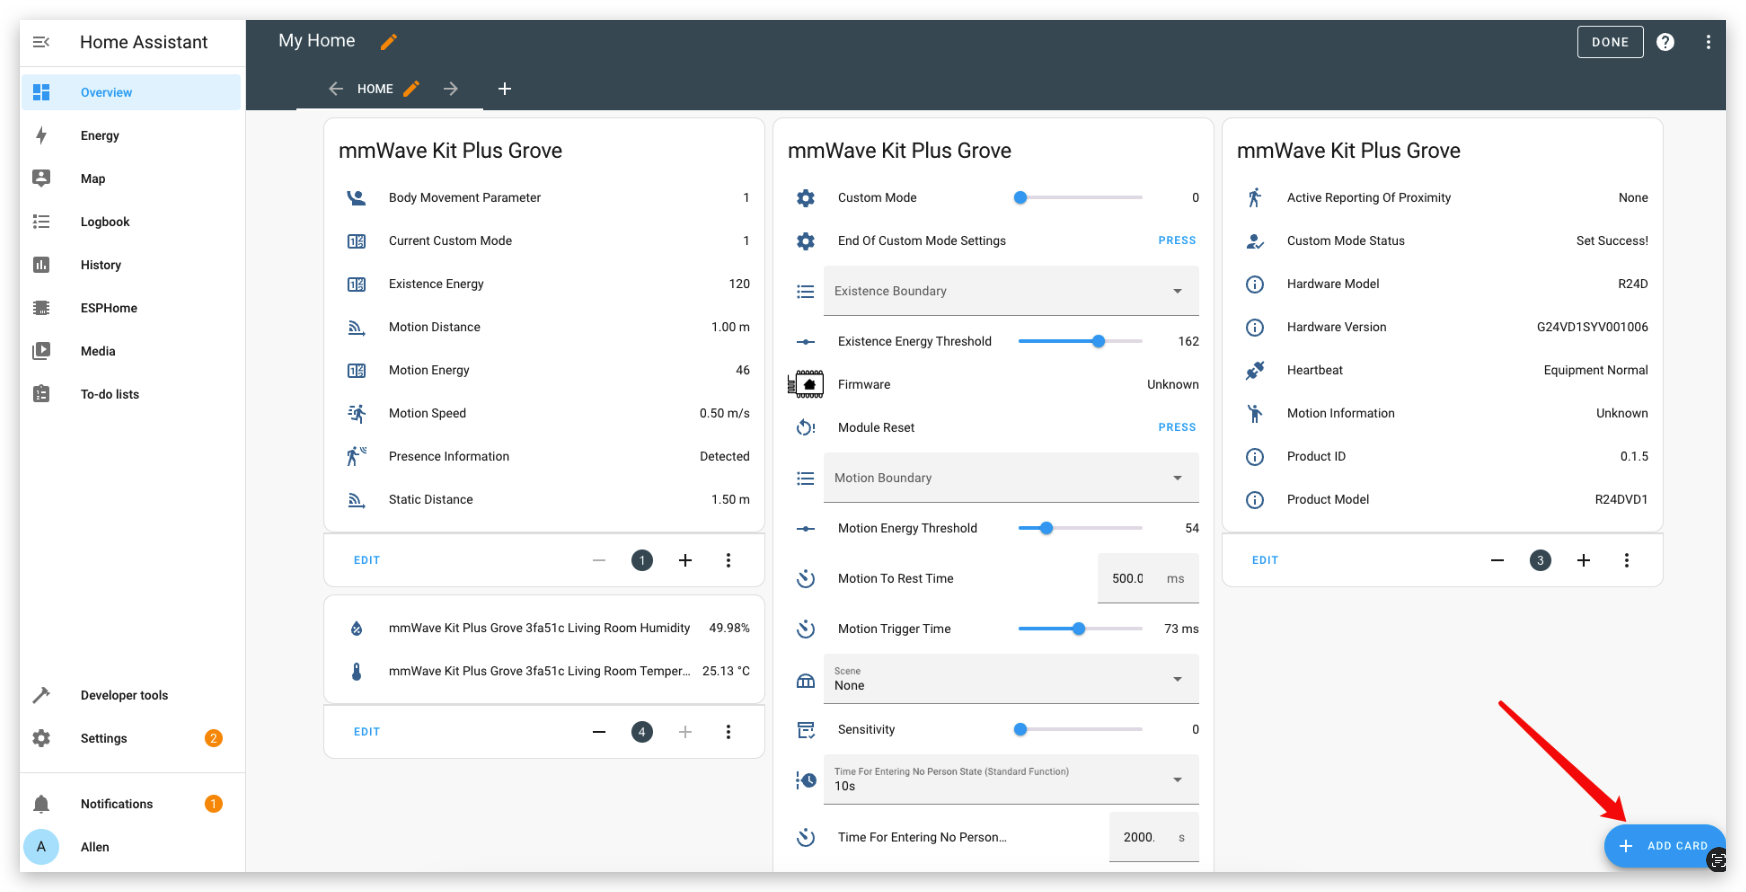
- Click Overview on the upper left corner and the click "three points" and Edit dashboard on the upper right corner.
- Click ADD CARD on the lower right corner.
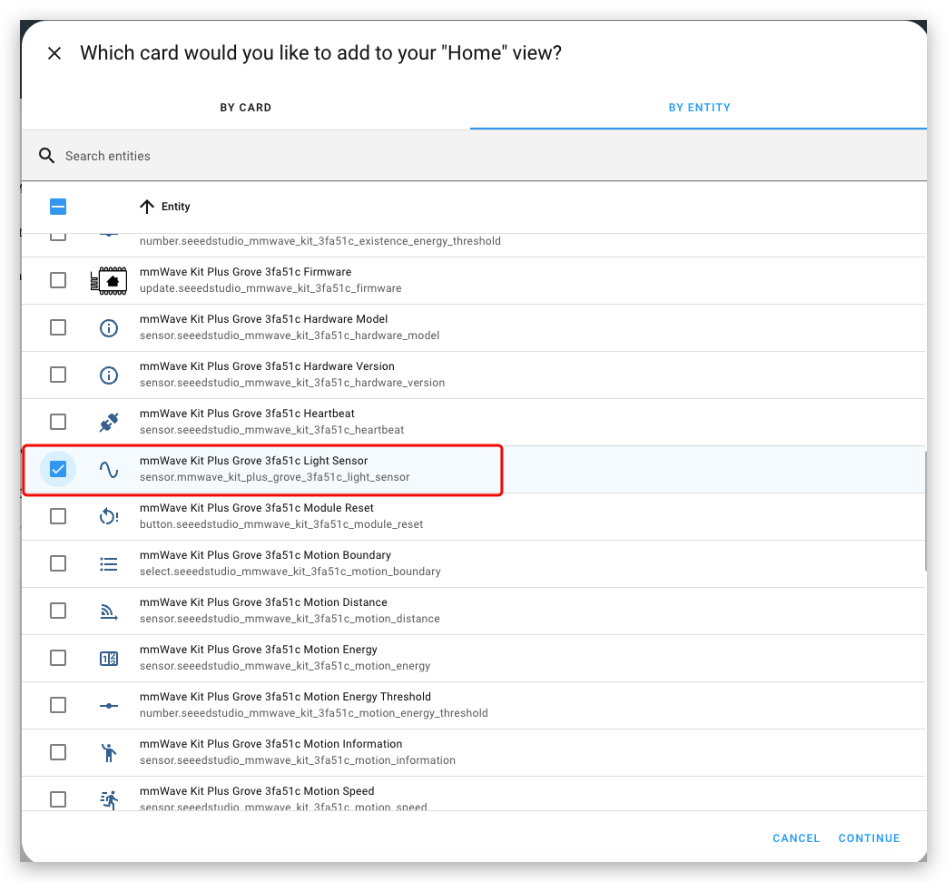
- Click BY ENTITY, select the Light Sensor entry and then click CONTINUE.
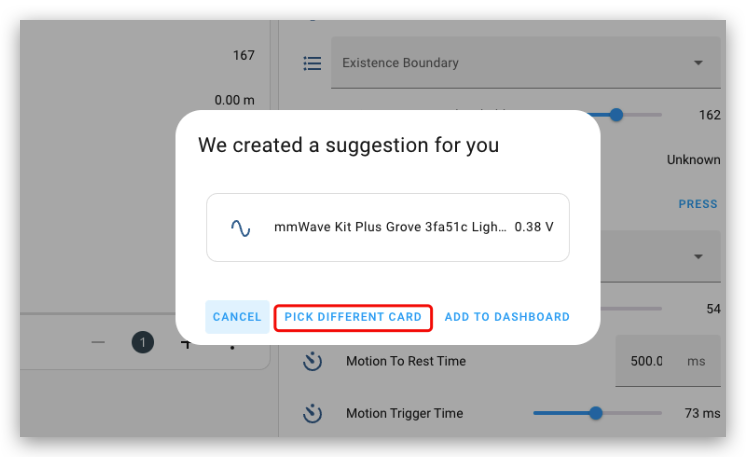
- Select PICK DIFFERENT CARD.
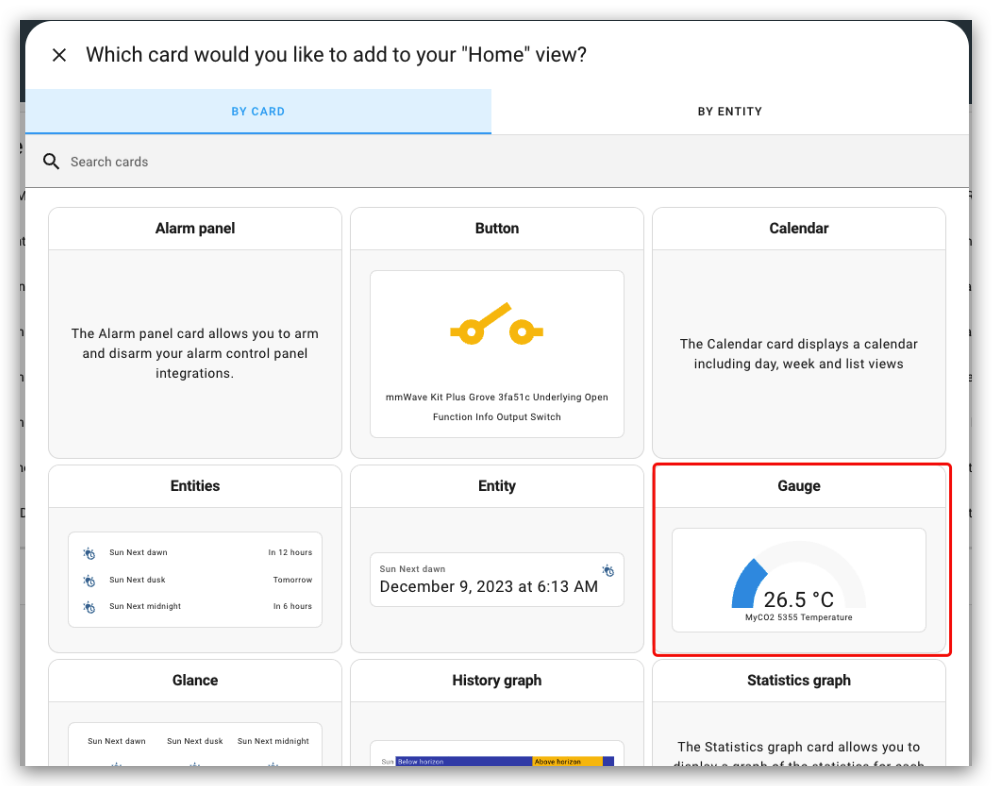
- Select Gauge.
- Set the Minimum as 0 and Maximum as 1, click SAVE.
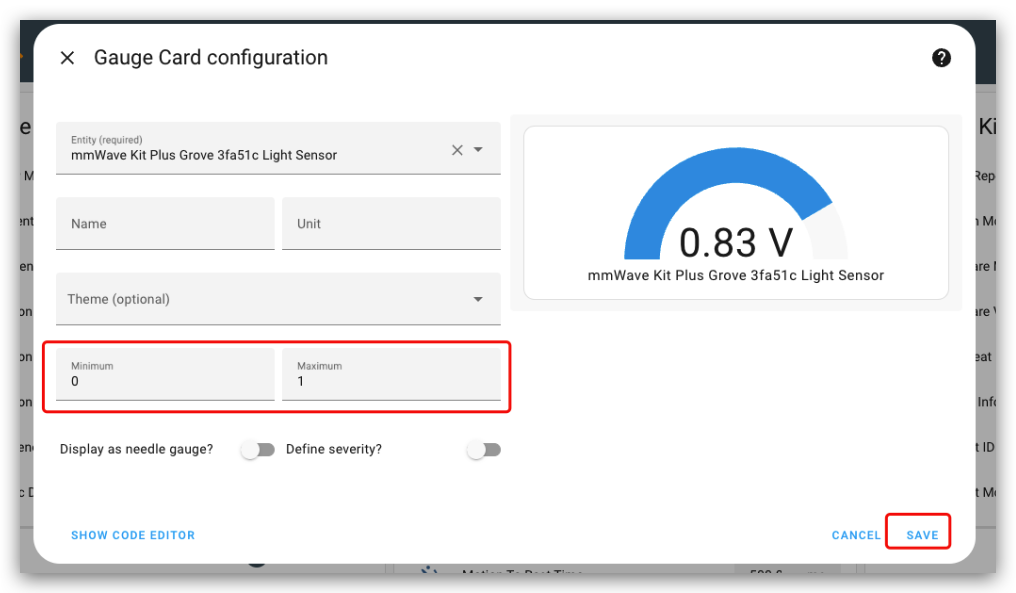
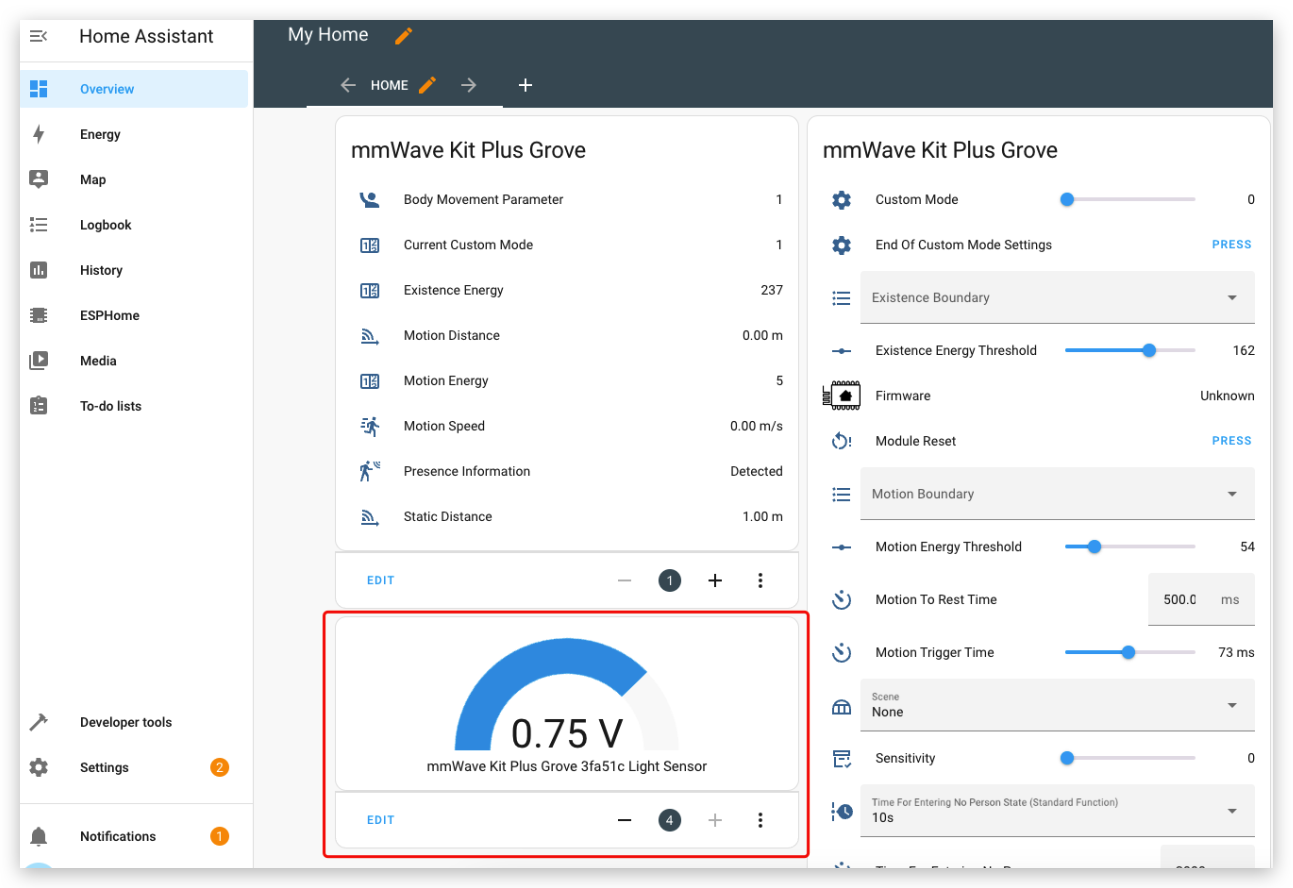
- Finally you will see the light sensor in your dashboard.
Temperature and humidity sensor(DHT20)
Step 1: Hardware connection
Connect temperature and humidity sensor to mmwave kit via Grove cable, you can refer the picture below.
Step 2: Software setup
a. Setup Temperature and humidity sensor
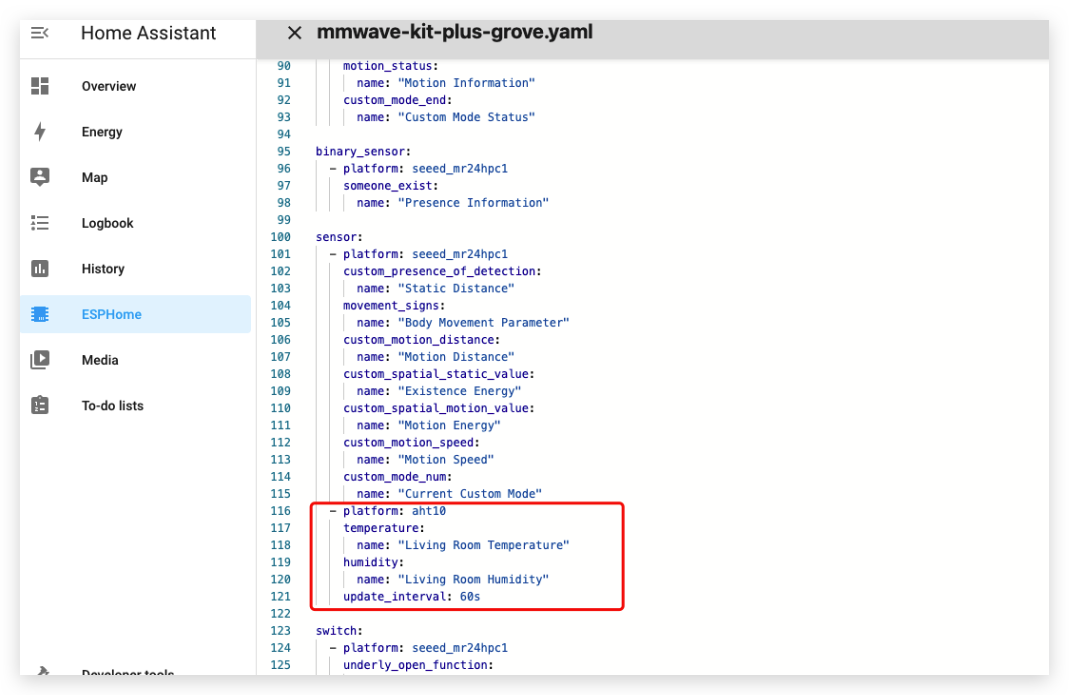
- Add these code to your configuration file at corresponding position you can refer to the image below.
i2c:
  sda: GPIO6
  scl: GPIO7
  scan: True
  id: bus_0x38
sensor:
  - platform: aht10
    temperature:
      name: "Living Room Temperature"
    humidity:
      name: "Living Room Humidity"
    update_interval: 60s

- And then click the INSTALL button on the upper left corner. If going well you will see this image.
If you meet error, you can jump to here for your reference.
b. Add Temperature and humidity sensor to dashboard
- Click Overview on the upper left corner and the click "three points" and Edit dashboard on the upper right corner.
- Click ADD CARD on the lower right corner.
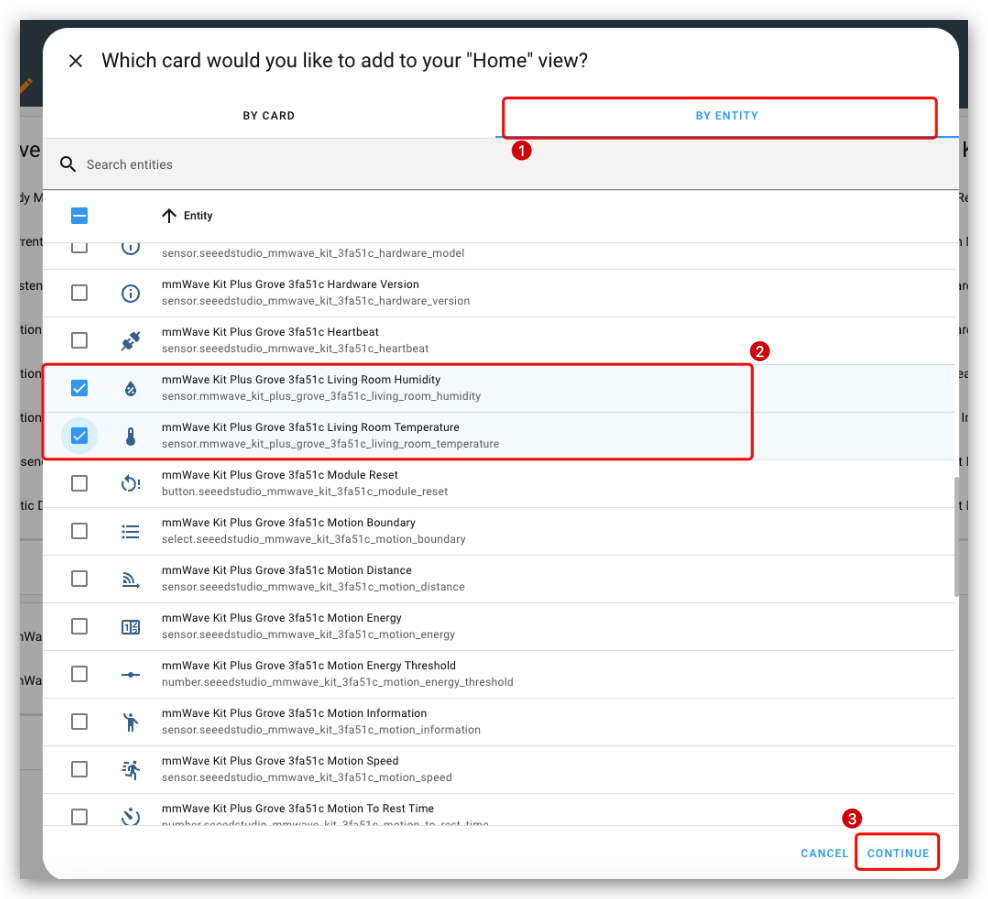
- Click BY ENTITY, select Humidiy and Temperature entry and then click CONTINUE.
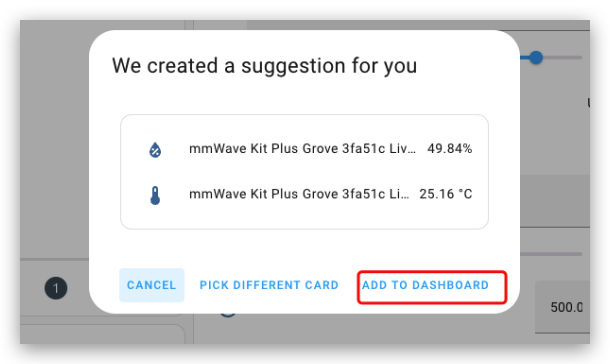
- Click ADD TO DASHBOARD.
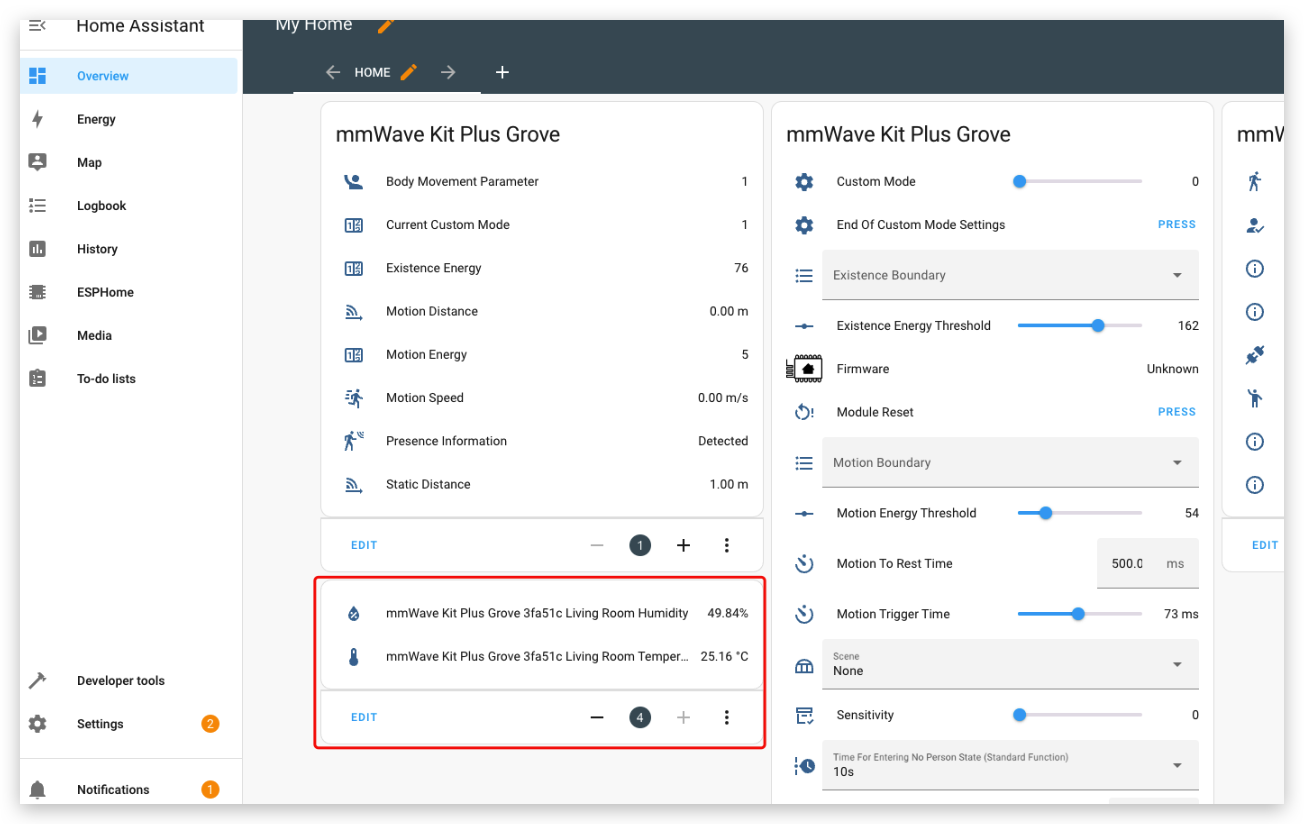
- Finally you will see the Temperature and Humidity data in your dashboard.
Flame sensor
Step 1: Hardware Connection
Use Grove cable connect flame sensor to mmWave kit analog port. You can refer the video below.
Step 2: Software Setup
a. Setup flame sensor
Add the code below to your configuration file and INSTALL to mmWave kit.
binary_sensor:
  - platform: gpio
    pin:
      number: GPIO3
      inverted: true
    name: "Flame Detecctor"
    device_class: smoke
b. Add flame sensor to dashboard
You can refer light sensor or temperature and humidity sensor above.
Other sensors with Yaml files
Supported by Seeed Studio Contributor Program, thanks Mohammed and there are more supported sensors below:
ATH20 sensor SHT35 sensor SHT40 sensor Vibration Sensor
Tech Support & Product Discussion
Thank you for choosing our products! We are here to provide you with different support to ensure that your experience with our products is as smooth as possible. We offer several communication channels to cater to different preferences and needs.