Developing Grove Vision AI V2 using Himax SDK
This tutorial is designed to guide you through using the Himax SDK for the Grove Vision AI platform, with a focus on how to effectively utilize microSD cards for data management and PDM microphones for audio capture. By the end of this guide, you'll learn to implement these components in your AI projects, enabling you to store large datasets and capture high-quality sound with ease, directly on your Grove Vision AI device.
Here is a list of the table of contents for this tutorial.
- Install Ubuntu 22.04 on Windows Subsystem for Linux (WSL)
- Preparation of the compilation environment
- Run the recording example using the Himax SDK
- Himax SDK Code Analysis
Getting Started
Before the tutorial content of this article begins, you may need to have the following hardware ready.
Materials Required
| Grove Vision AI V2 |
|---|
 |
If you want to use microSD card routines, then you may need to purchase your own microSD card (The largest capacity tested so far is 64GB), the format of the supported memory card is: FAT12/FAT16/FAT32/exFAT.
Install Ubuntu 22.04 on Windows Subsystem for Linux (WSL)
This section applies to Windows computers only; if you are not using a Windows computer, skip this section and continue to the Preparation of the compilation environment.
The Himax SDK needs to be compiled in a Linux environment, so if you are using a Windows computer you will need to install WSL. To install Ubuntu 22.04 on Windows Subsystem for Linux (WSL), you'll need to follow these general steps. Before starting, ensure that you're running a compatible version of Windows 10 or Windows 11.
Step 1. Download and Install Ubuntu 22.04.3
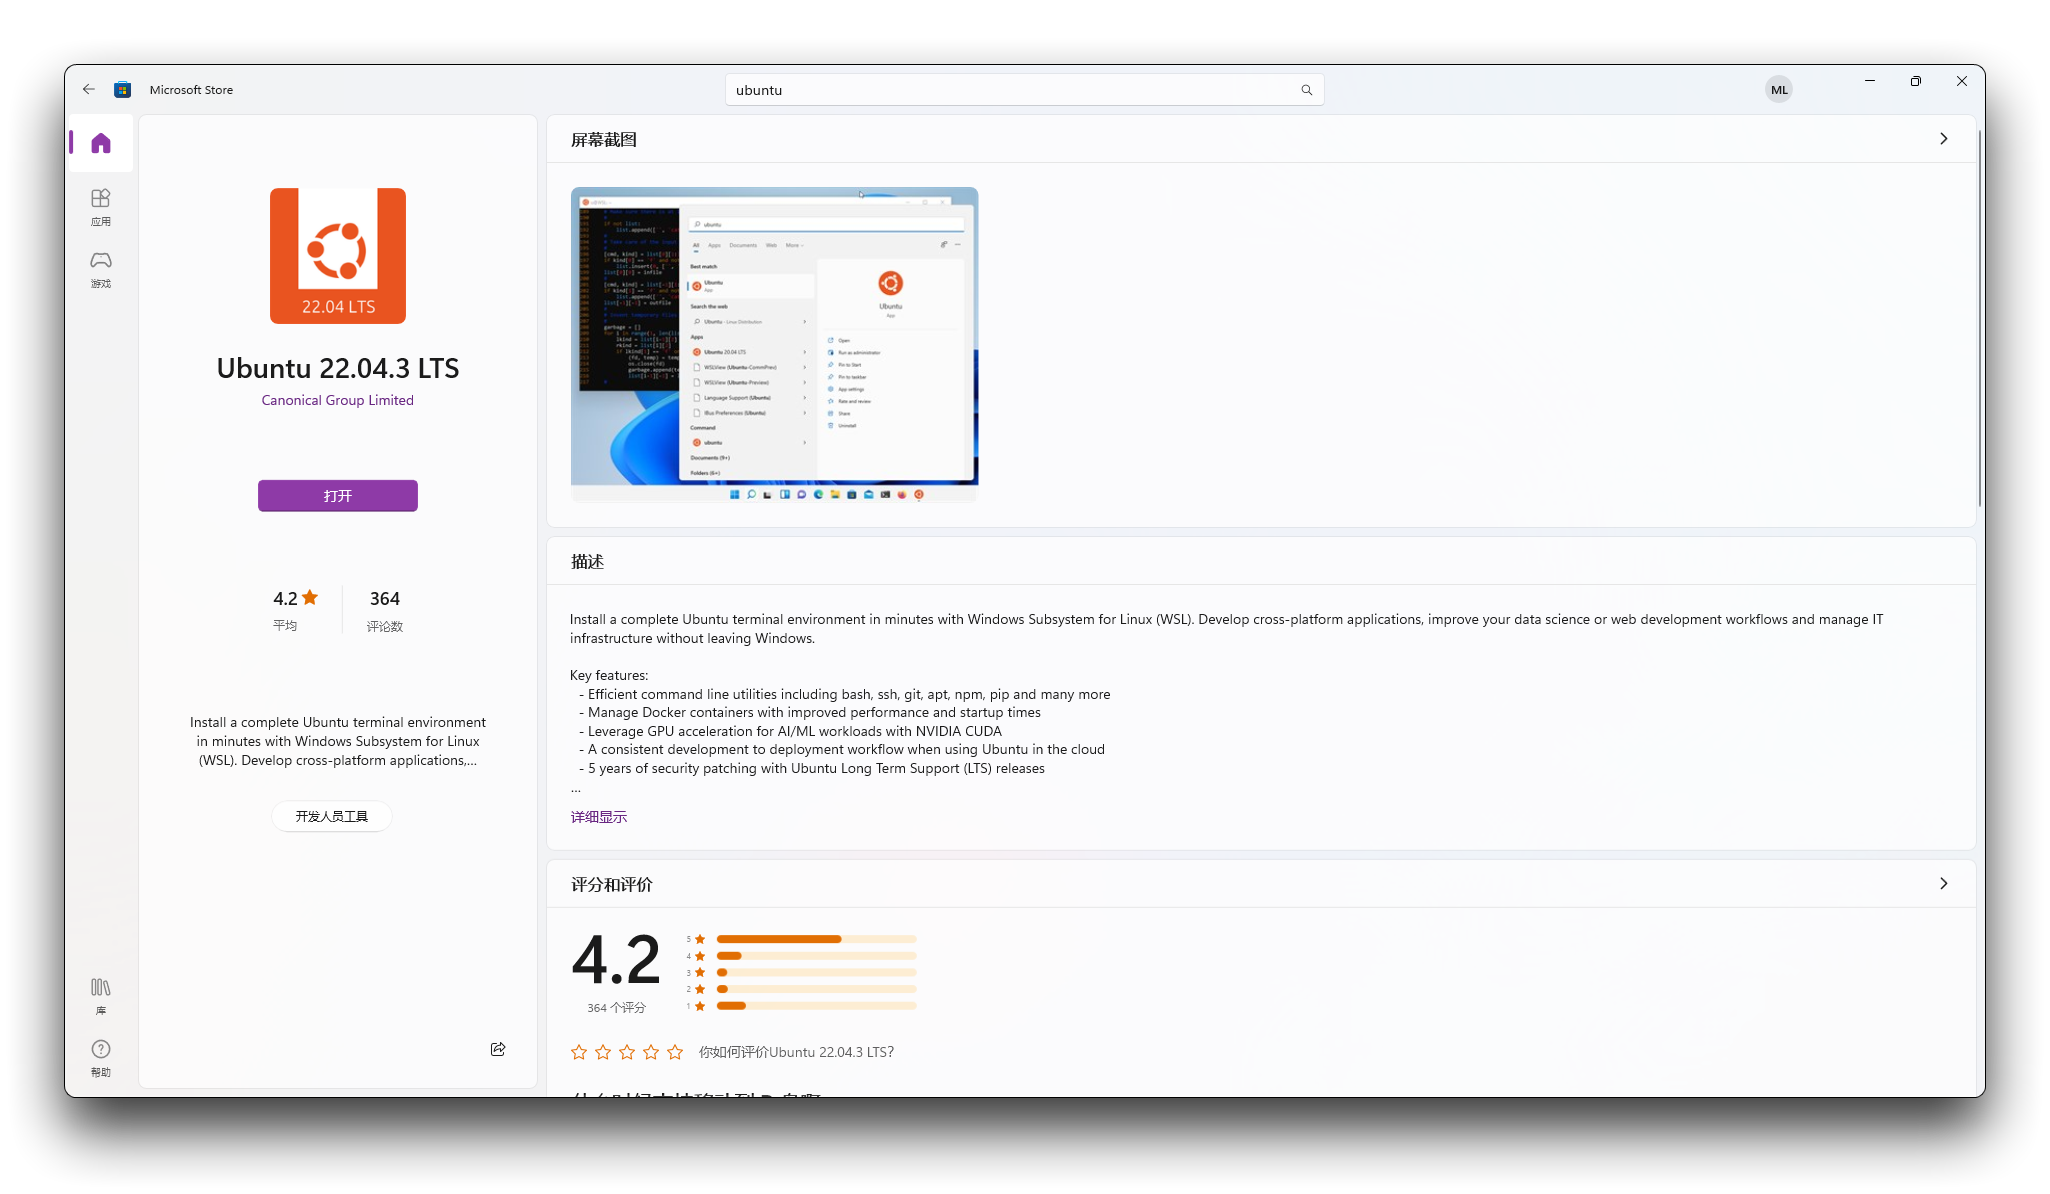
Now, you can install Ubuntu from the Microsoft Store:
Open the Microsoft Store. Search for Ubuntu 22.04.3 LTS. Select the Ubuntu 22.04.3 LTS version from the search results. Click "Get" or "Install" to download and install the Ubuntu app.
Alternatively, you can install Ubuntu using the command line. Open PowerShell or Command Prompt. Run the following command:
wsl --install -d Ubuntu-22.04
Once Ubuntu is installed, launch it from the Start menu. The first time you launch it, you'll be asked to create a user account and password. Follow the prompts to set it up.
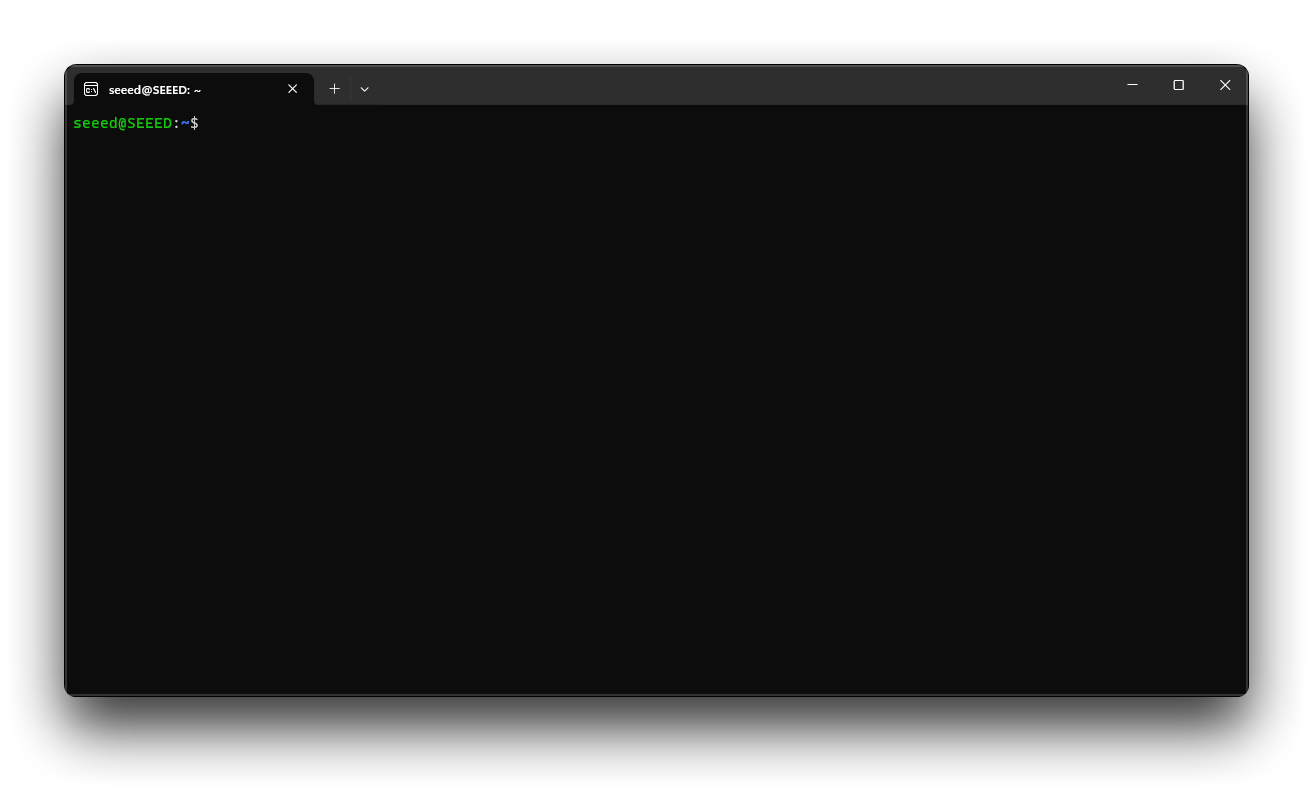
Now you can use Ubuntu on your Windows machine using WSL. You can access the Linux terminal, install packages, and run Linux applications.
If you've previously installed WSL 1 and you want to upgrade to WSL 2, you'll need to follow some additional steps which include installing the WSL 2 Linux kernel update package and setting your existing distributions to use WSL 2. You can find the instructions for these additional steps in the official Microsoft documentation.
Remember to check the official Microsoft documentation for the most up-to-date instructions and troubleshooting tips.
Preparation of the compilation environment
Step 2. Install Microsoft VSCode
Visual Studio Code (VSCode) is a free, open-source code editor developed by Microsoft that is available for Windows, macOS, and Linux. Below I'll guide you through the steps to install VSCode on each of these platforms.
Windows:
-
Download the Installer:
- Visit the official Visual Studio Code download page.
- Click on the Windows installer to download the
.exefile.
-
Run the Installer:
- Once the download is complete, run the installer (
VSCodeSetup-x.y.z.exe, where x.y.z is the version number). - Follow the prompts in the setup wizard. You can accept the default selections, although you may want to check the boxes to add VSCode to your PATH and to create a desktop icon for easy access.
- Once the download is complete, run the installer (
-
Complete Installation:
- Click 'Finish' to complete the installation. VSCode should open automatically.
-
Launching VSCode:
- You can launch VSCode by double-clicking the desktop icon or by searching for it in the Start menu.
macOS:
-
Download the Installer:
- Go to the official Visual Studio Code download page.
- Click on the macOS version to download the
.zipfile.
-
Install the Application:
- Once the download is complete, open the
.zipfile to extract the application. - Drag-and-drop Visual Studio Code into the Applications folder. This will make it available in the Launcher.
- Once the download is complete, open the
-
Launching VSCode:
- Open the Launchpad, and click on the Visual Studio Code icon.
- The first time you open VSCode, you may receive a warning since it was downloaded from the Internet. Click 'Open' to continue.
Linux:
You can install VSCode on Linux using snap packages or through the package repository for your distribution. Here's how to do it through the command line for Ubuntu as an example:
-
Update Package Index (Ubuntu/Debian-based distributions):
sudo apt update -
Install the Dependencies (if not already installed):
sudo apt install software-properties-common apt-transport-https wget -
Add Microsoft's GPG Key and Repository:
wget -q https://packages.microsoft.com/keys/microsoft.asc -O- | sudo apt-key add -
sudo add-apt-repository "deb [arch=amd64] https://packages.microsoft.com/repos/vscode stable main" -
Install VSCode:
sudo apt update
sudo apt install code -
Launching VSCode:
- You can start VSCode by searching for it in your applications menu or by running
codein the terminal.
- You can start VSCode by searching for it in your applications menu or by running
For distributions that support snap packages:
sudo snap install --classic code
Remember that the installation commands can differ slightly depending on your Linux distribution, so you should consult the official documentation or package management instructions for your specific Linux flavor.
Step 3. Install Python
Installing Python 3 is a straightforward process that can vary depending on your operating system. Below, I'll guide you through the installation steps for Windows, macOS, and Linux.
Windows:
-
Download Python:
- Go to the official Python website at python.org.
- Click on "Download Python" to get the latest version for Windows.
- Choose the executable installer for the version you want.
-
Run the Installer:
- Launch the installer.
- Make sure to check the box that says "Add Python 3.x to PATH" at the bottom of the installer window to ensure that Python is added to your environment variables.
- Click "Install Now."
-
Verify Installation:
- Open Command Prompt and type the following command to verify Python is installed correctly:
python --versionYou should see the Python version that you installed.
macOS:
-
Download Python:
- Visit the official Python website at python.org.
- Click on "Download Python" to get the latest version for macOS.
- Download the macOS 64-bit installer.
-
Run the Installer:
- Open the downloaded package and follow the instructions to install Python.
-
Verify Installation:
- Open Terminal and type the following command:
python3 --versionThe system should display the Python version installed.
Linux:
Python 3 is often pre-installed on many Linux distributions. To check if Python 3 is already installed and to verify the version, open a terminal and enter:
python3 --version
If Python 3 is not installed or you want to install a different version, you can use the package manager included with your Linux distribution.
For example, on Ubuntu or Debian-based systems, you can install Python 3 by following these steps:
-
Update Package Lists:
sudo apt update -
Install Python 3:
sudo apt install python3 -
Verify Installation:
python3 --version
On Fedora or Red Hat-based systems, you would use dnf:
sudo dnf install python3
On Arch Linux or Manjaro:
sudo pacman -S python
Step 4. Install python-pip
-
Install
pip:pipis the package installer for Python. You can use it to install packages from the Python Package Index and other indexes. On Windows and macOS,pipis included with the Python installer. On Linux, you might need to install it separately:For Ubuntu or Debian-based systems:
sudo apt install python3-pipFor Fedora:
sudo dnf install python3-pipFor Arch Linux:
sudo pacman -S python-pip -
Verify
pipInstallation:Check the installation of pip by running:
pip3 --version -
Virtual Environments:
It's a good practice to use virtual environments to manage dependencies for your Python projects. You can create a virtual environment using the following command:
python3 -m venv /path/to/new/virtual/environment
Remember to replace /path/to/new/virtual/environment with the directory where you want to place your new virtual environment.
By following these steps, you should be able to install Python 3 and pip on your system and get started with Python development.
Step 5. Install the make compilation environment
Clone the project repository to the location where you want to save it.
cd /mnt/c/Users/mengd/Desktop/
git clone https://github.com/limengdu/Seeed_Grove_Vision_AI_V2_SD-Mic.git
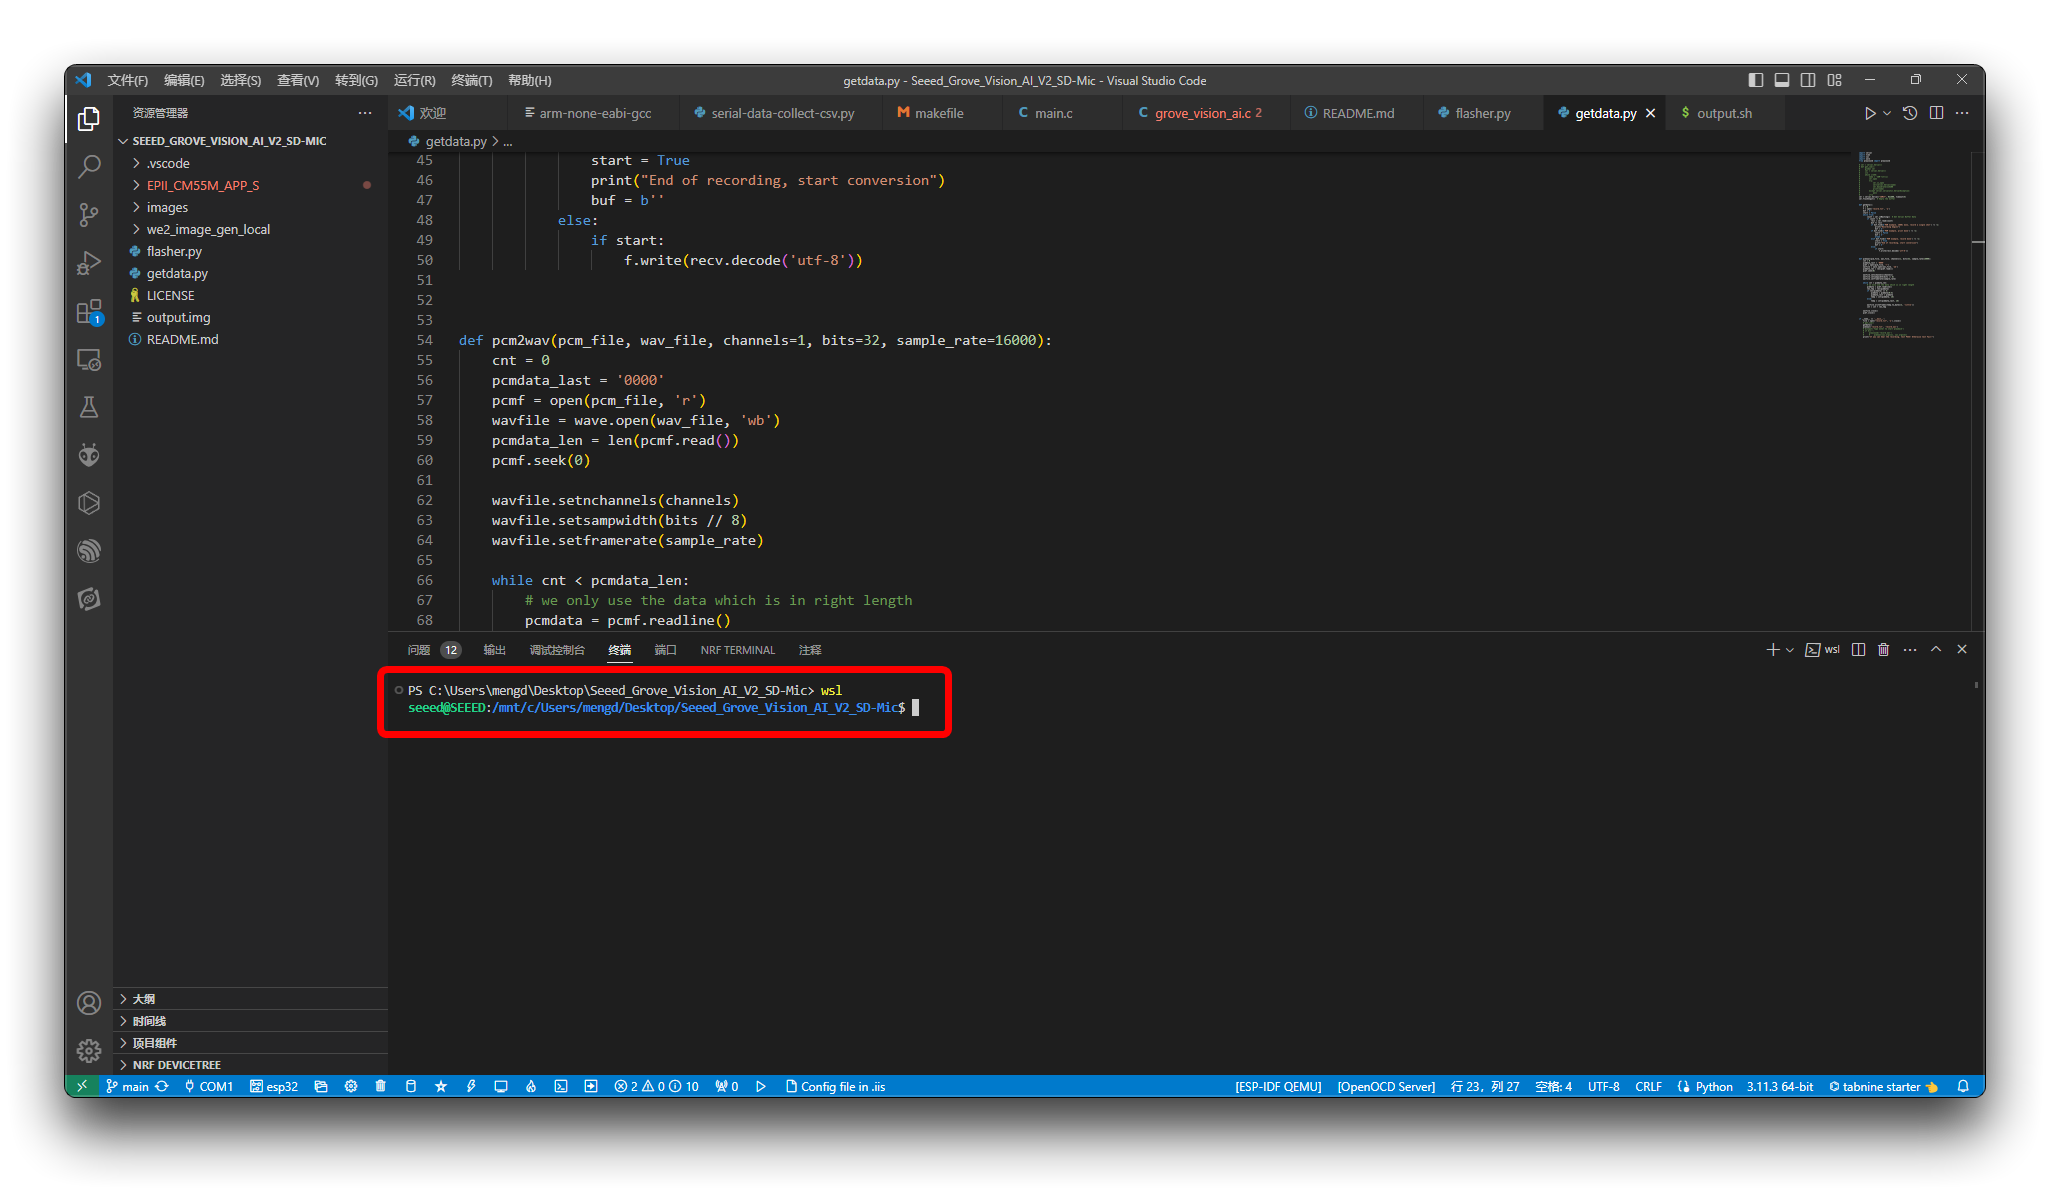
Then, please open the project in VSCode and enter the Linux environment by typing the command wsl in VSCode's terminal. (If you are on MacOS or Linux, this command is not necessary)
Next, please run the following commands in a WSL environment (Windows) or Linux environment to install the compilation environment.
Install Prerequisites
First, you need to install make, which is an essential build automation tool.
sudo apt install make
Type your password when prompted to proceed with the installation.
Download Arm GNU Toolchain
You will need the Arm GNU Toolchain for compiling ARM projects. To download it, navigate to your home directory and use wget to download the package. Please choose a suitable address to install it and you will be able to find out where it is. Here, I will install it in the upper directory of the project folder.
cd /mnt/c/Users/mengd/Desktop/
wget https://developer.arm.com/-/media/Files/downloads/gnu/13.2.rel1/binrel/arm-gnu-toolchain-13.2.rel1-x86_64-arm-none-eabi.tar.xz
This command will fetch the specified version of the ARM toolchain.
Extract the Toolchain Archive
After downloading the toolchain, you need to extract it. In your terminal, execute the following:
tar -xvf arm-gnu-toolchain-13.2.rel1-x86_64-arm-none-eabi.tar.xz
This will create a directory with all the necessary toolchain files.
Update Your PATH
Finally, to use the toolchain from any directory, you should add the bin directory of the extracted files to your system's PATH. Run this command:
export PATH="/mnt/c/Users/mengd/Desktop/arm-gnu-toolchain-13.2.Rel1-x86_64-arm-none-eabi/bin/:$PATH"
For the change to be permanent, you should add the export command to your ~/.bashrc, ~/.zshrc, or the configuration file of your preferred shell.
echo 'export PATH="$HOME/arm-gnu-toolchain-13.2.Rel1-x86_64-arm-none-eabi/bin/:$PATH"' >> ~/.bashrc
Afterward, apply the changes by sourcing your profile or closing and reopening the terminal:
source ~/.bashrc
Verification
To verify that everything is set up correctly, you can type:
echo $PATH | tr ':' '\n' | grep gnu
arm-none-eabi-gcc --version

This should display the version of the ARM GCC compiler, indicating that it's correctly installed and accessible from anywhere on your system.
Now, your environment is ready for ARM development.
Please do not use apt install to install the arm compiler, this version is too old and may not compile this project. Please check that the version you are using is the same as version 13.2 on the screenshot.
Run the recording example using the Himax SDK
Step 6. Compile and upload recording projects
At this point, we have completed the basic environment configuration, and then we can compile the project and upload it. The project folder is named EPII_CM55M_APP_S.
Continue to compile the project by executing the following commands in wsl or Linux environment.
cd Seeed_Grove_Vision_AI_V2_SD-Mic/EPII_CM55M_APP_S
make clean
Then, please open the makefile file in the EPII_CM55M_APP_S folder and change the path to GNU_TOOLPATH in line 47 of the code.
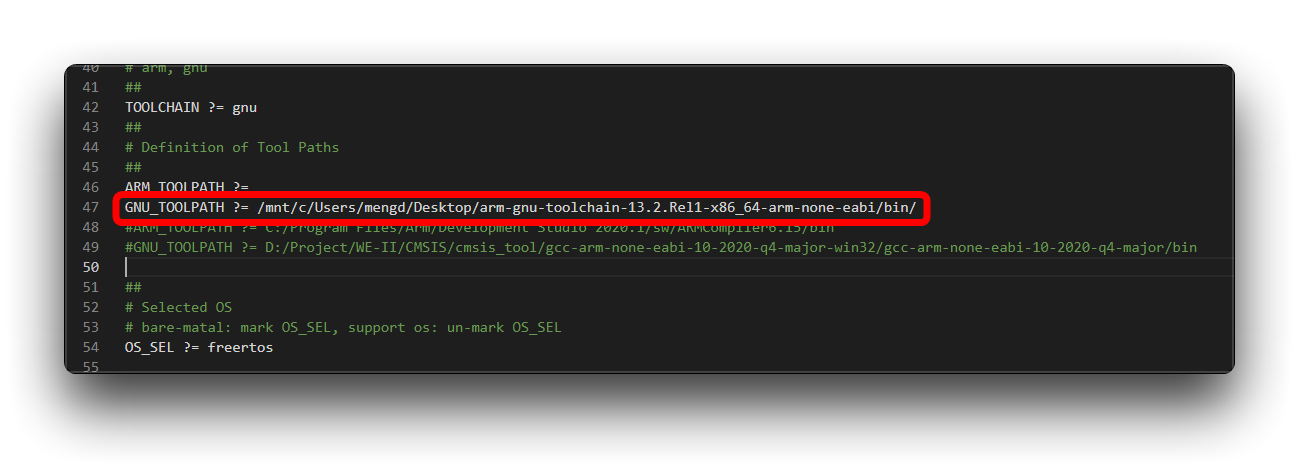
This path needs to be filled in with the absolute path to the bin folder of the Arm GNU Toolchain you unzipped in Step 5.
Then save the file. Execute the following command to compile the project.
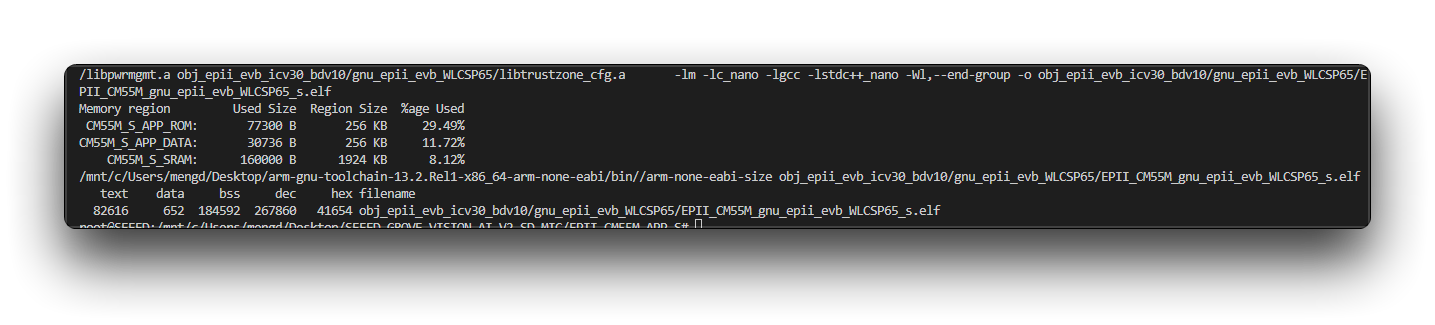
make
If the compilation goes well, you will see the following compilation result.
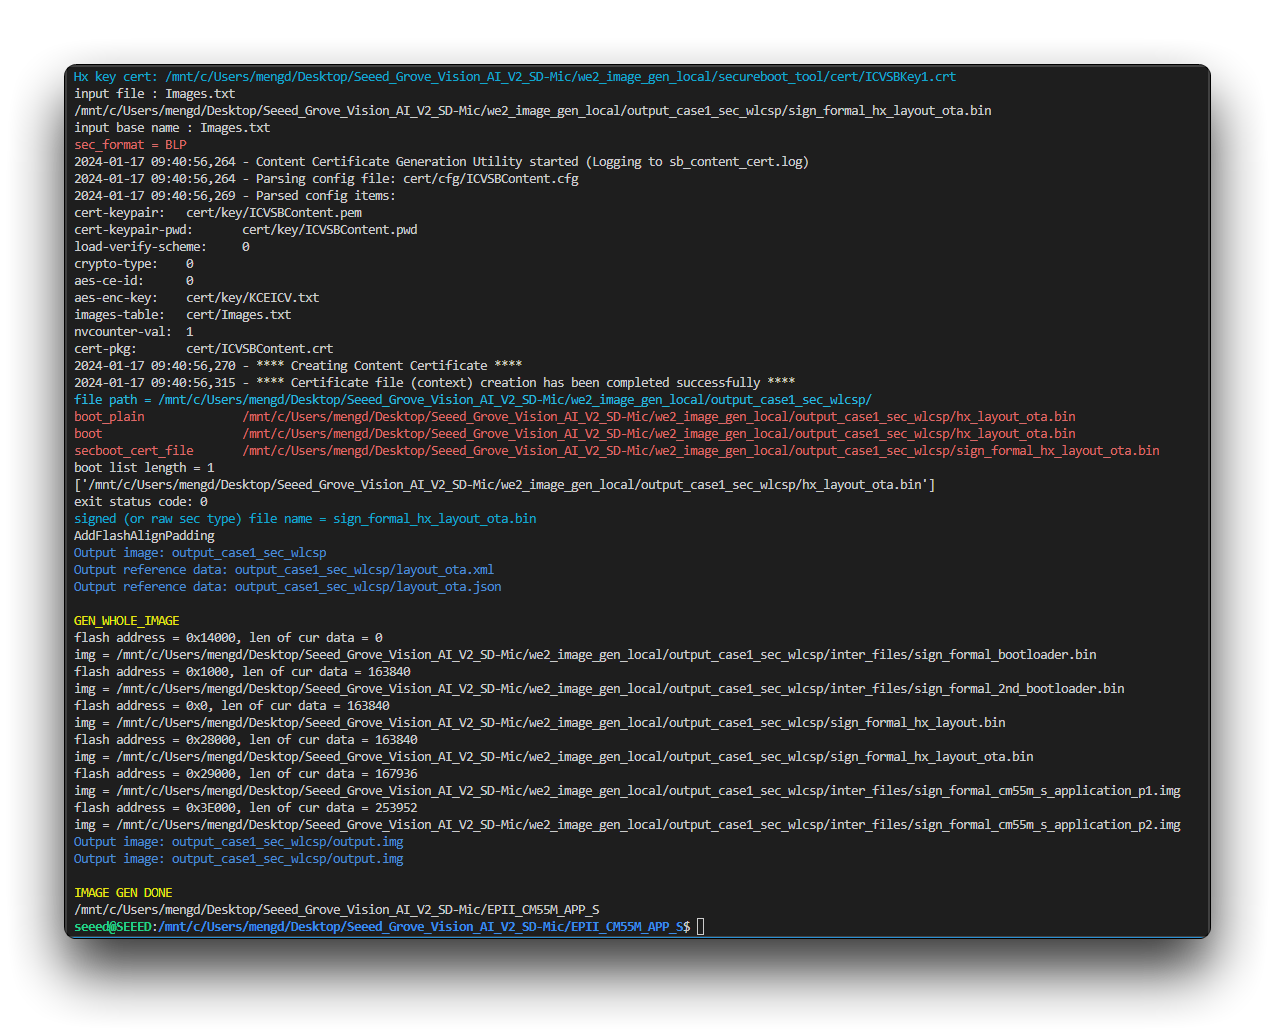
We then need to convert the .elf file to an .img file for flashing to the Grove Vision AI V2. We just need to execute the script output.sh.
./output.sh
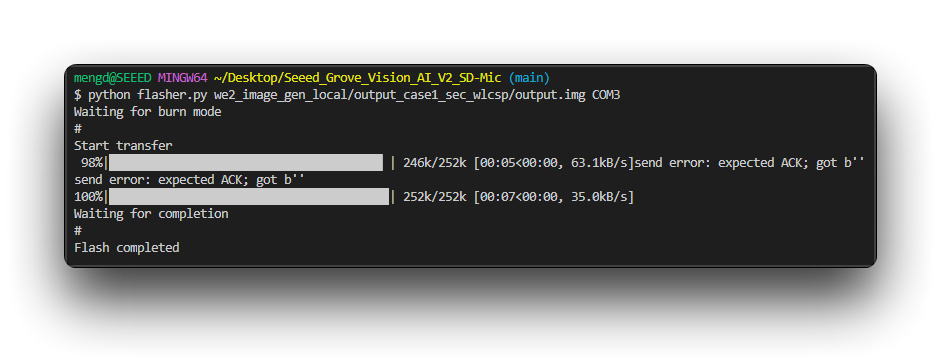
By executing the flasher.py script, we can flash the generated firmware to the device.
If you have a Windows computer, create a new terminal and make sure you execute the following commands in a git bash environment.
pip install xmodem --user
cd ..
python flasher.py we2_image_gen_local/output_case1_sec_wlcsp/output.img COM3
COM3 in the command indicates the port number of the device, please change it according to the real device port number of your Grove Vision AI V2.
Step 7. Recording and saving
Then, we can start executing the commands for recording with the help of Python's recording programme.
pip install playsound --user
python getdate.py
The code records a piece of audio of about 4 seconds and saves it to a folder called record.wav in Seeed_Grove_Vision_AI_V2_SD-Mic.
Himax SDK Code Analysis
To make it easier for developers to use Himax's SDK to develop hardware on the Grove Vision AI V2, this section will focus on the microphone and SD code in the SDK for you. The main program code path for this project is as follows:
EPII_CM55M_APP_S\app\scenario_app\grove_vision_ai\grove_vision_ai.c
The provided code configures and uses a Pulse Density Modulation (PDM) interface to capture audio data in an embedded system, transferring the data using Direct Memory Access (DMA). It incorporates several external libraries and device drivers, involving file system operations and GPIO control.
Include Headers and Macro Definitions
#include <stdio.h>
#include <assert.h>
#include <stdbool.h>
#include <stdint.h>
#include <string.h>
#include <stdlib.h>
This section includes standard C library headers for input/output, assertions, boolean data types, integer types, string operations, and standard library functionalities.
#ifdef TRUSTZONE_SEC
// ...
#endif
This conditional compilation block contains TrustZone security-related configuration code, which is compiled only if the TRUSTZONE_SEC macro is defined. This section typically includes security features, such as memory protection and secure calls.
Device and Board Support Package Headers
#include "WE2_device.h"
#include "WE2_device_addr.h"
#include "board.h"
#include "hx_drv_scu.h"
#include "hx_drv_spi.h"
#include "hx_drv_gpio.h"
#include "WE2_core.h"
#include "WE2_debug.h"
#include "mmc_we2.h"
#include "hx_drv_swreg_aon.h"
#include "hx_drv_pdm_rx.h"
These headers include hardware-specific and board-level definitions and interfaces, such as drivers and configurations for GPIO, SPI, and PDM.
PDM Audio Buffer and Callback Flag Definition
#define quarter_second_mono_bytes 8000
#define blk_num 20
int16_t audio_buf[blk_num * quarter_second_mono_bytes / 2];
volatile bool rx_cb_flag;
Defines the size of the audio buffer and the number of blocks, declares an integer array as an audio buffer, and a flag variable rx_cb_flag to indicate if the DMA reception is complete.
PDM DMA Receive Callback Function
void app_pdm_dma_rx_cb()
{
    // ...
}
Defines a callback function that will be called upon completion of PDM DMA reception. The function includes cache invalidation to ensure data is read from memory updated by DMA.
PDM Configuration Function
int app_pdm_setting()
{
    // ...
}
Sets up the PDM device configuration parameters such as the sampling rate, DMA channel, clock source, etc., and associates the callback functions with the PDM device.
Main Function
int app_main(void)
{
    // ...
}
The main function performs device initialization and configuration:
- Sets GPIO pin multiplexing and initializes GPIO states.
- Initializes PDM and sets up DMA transfer.
- Configures the FatFS file system for file operations.
- Reads input status through GPIO and controls output status.
- Uses a loop to check for DMA reception flag and capture audio data.
- Outputs data to the debug console and stops PDM after completion.
PDM Microphone Part
The code includes the use of a microphone, which is achieved through the configuration and use of a Pulse Density Modulation (PDM) interface.
PDM Configuration
int app_pdm_setting()
{
    // PDM configuration settings
    // ...
}
This function, app_pdm_setting, sets up the PDM device configuration parameters. These parameters, such as the sampling rate, DMA (Direct Memory Access) channel, and clock source, are crucial for capturing data from the microphone.
PDM Initialization and DMA Transfer Setup
if (hx_drv_pdm_init(&pdm_dev_info) != PDM_NO_ERROR)
    return -1;

hx_drv_pdm_dma_lli_transfer((void *)audio_buf, blk_num, quarter_second_mono_bytes, 0);
This section of the code initializes the PDM device and sets up DMA transfer. The hx_drv_pdm_dma_lli_transfer function call initiates the DMA transfer process, which will capture audio data from the connected microphone and store it in the predefined buffer audio_buf.
PDM DMA Receive Callback Function
void app_pdm_dma_rx_cb()
{
    // Callback function invoked when PDM DMA reception is complete
    // ...
}
app_pdm_dma_rx_cb is a callback function that is called once the PDM interface has completed receiving audio data via DMA. Within this function, the received audio data (stored in the audio_buf buffer) is output for further processing.
From the described code, we can see that the program primarily involves the configuration and use of a microphone to capture audio data.
microSD Part
The code includes operations related to a microSD card through the use of the FatFS file system library.
FATFS fs;
TCHAR drv[3] = {_T('0'), _T(':'), _T('0')};
FRESULT res = f_mount(&fs, drv, 1);
bool mount = false;
if (res != FR_OK)
{
    mount = false;
    xprintf("Mount Failed: %d\n", res);
}
else
{
    mount = true;
    xprintf("Mount Success\n");
}
This section attempts to mount the file system located on the microSD card, which is necessary to perform read and write operations on the card.
FIL file;
res = f_open(&file, _T("/test.txt"), FA_CREATE_ALWAYS | FA_WRITE | FA_READ);
// ...
This part of the code tries to open (or create if it does not exist) a file named "test.txt" on the mounted file system, which would be on the microSD card if the mount was successful.
res = f_write(&file, buffer, strlen(buffer), NULL);
// ...
Here, the code attempts to write data to the file that was previously opened. This operation would save the data to the microSD card.
res = f_read(&file, buffer, 512, NULL);
// ...
This section reads data from the "test.txt" file and stores it in a buffer. This operation would retrieve data from the microSD card.
In summary, the code includes functionality to mount a microSD card, create or open a file, write data to the file, and read data from the file, indicating that the microSD card is being used for storage in this application.
The code grove_vision_ai.c already has a more complete configuration for the use of the PDM microphone and memory card. However, since the microphone output is via the serial port in the SDK, in order to save the audio file, you need to use getdata.py to read the serial port and then transcribe it. The microSD card, on the other hand, does not require a separate Python program for storage tasks.
Resources
Tech Support & Product Discussion
Thank you for choosing our products! We are here to provide you with different support to ensure that your experience with our products is as smooth as possible. We offer several communication channels to cater to different preferences and needs.