Getting Started with N3uron
What is N3uron?
N3uron is a complete Industrial Edge Platform for IIoT & DataOps that enables seamless integration between the industrial plant floor and third-party applications, whether on-premises or in the cloud.
With N3uron, you can easily create bidirectional data pipelines between OT and IT systems and decouple devices from applications by consolidating, modeling, processing, and visualizing all your operational data in a single source of truth and ultimately making all this data available across the entire organization.
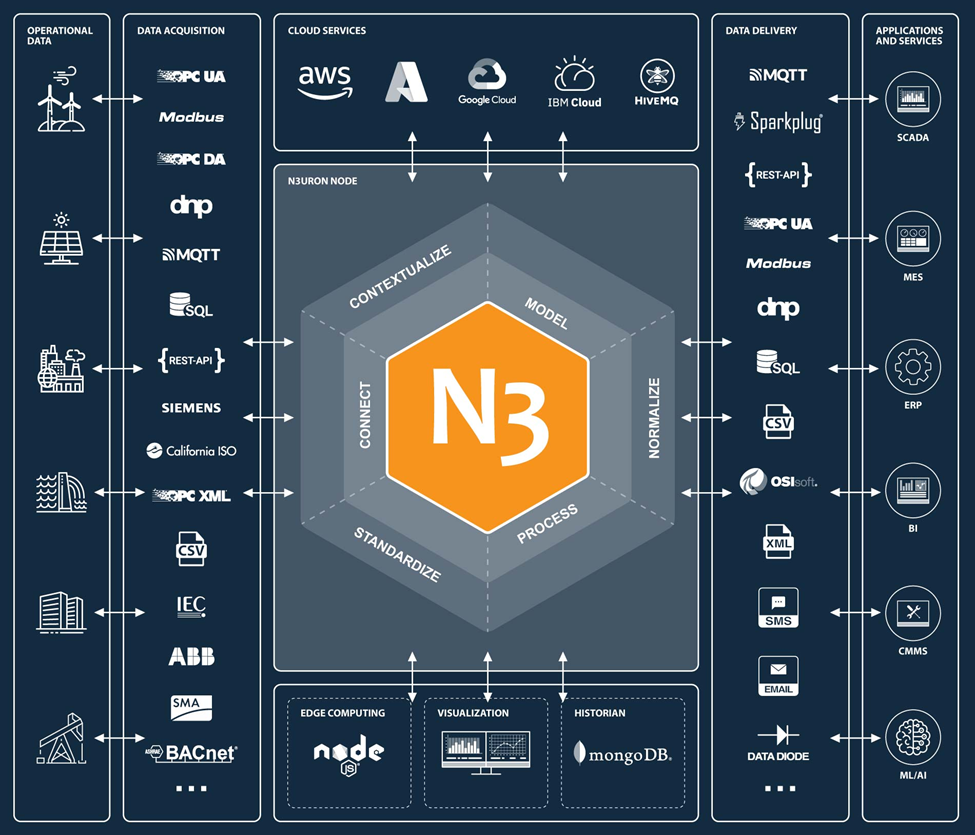
- Modular: It is fully modular, with nearly fifty modules, users can stack as required to meet their project needs, acquiring only the ones strictly necessary for their applications.
- Cross-platform: N3uron can run on most versions of Windows and Linux distributions as well as on ARM architectures like Raspberry Pi.
- Unlimited license: N3uron boasts an unlimited licensing model, offering unrestricted usage in terms of tags, users, devices, and connections, all at an affordable price.
- Web-based: Once installed all you need to access the node is a web browser.
- Rapid deployment and development: N3uron can be installed in less than a minute, and its development environment facilitates quick data model creation, especially when utilizing templates.
- Extremely efficient: A single node can easily manage several hundred thousand tags, while maintaining low hardware requirements.
- Scalable and versatile architecture: From its inception, N3uron was conceived to seamlessly deploy distributed architectures with several hundred or thousand nodes. Users can connect multiple nodes quickly using N3uron Links, effortlessly scaling their architecture to suit their needs.
Prerequisites
Hardware
| reTerminal DM |
|---|
 |
Software
We recommend installing the Bullesye version of Raspberry Pi 64 bit OS from their official website. If you prefer to install a new Raspbian OS, please follow the steps outlined in this guide
Installation
N3uron can be easily installed with our one-step automated installation script. Before proceeding with the following steps, please verify that your reTerminal DM is connected to the internet. Additionally, we assume that you are utilizing the default Raspberry Pi OS provided with reTerminal.
Step 1: First you need to gain access to the reTerminal DM.
-
Desktop: Connect the mouse and keyboard directly.Please proceed to open the Terminal application on your reTerminal DM device.
-
VNC: Full remote desktop using Virtual Network Computing (VNC).
-
SSH: Remote connection using Secure Shell (SSH).Make sure that your reTerminal is accessible via network and the SSH server is enable.
For more information, visit: Setting up an SSH Server on reTerminal DM.
In your terminal, enter the command:
ssh {USERNAME}@{RETERMINALDM_IP_ADDRESS}
In Raspberry Pi OS, the default username is pi. For instance:
You will be asked to enter the password, in Raspberry Pi OS, the default password is raspberry.
- Step 2: Installing N3uron with one-step automated installation script.
curl -fsSL https://get.n3uron.com/install.sh | sudo bash
In a few seconds you’ll have N3uron installed, up and running.

Uninstall
To uninstall N3uron from the reTerminal, run the following commands in your Terminal
Step 1: Uninstall N3uron service.
sudo <n3uron folder>/bin/n3uron uninstall
For example, if N3uron is installed in the ‘/opt/n3uron’ folder, the command would be:
sudo /opt/n3uron/bin/n3uron uninstall
Step 2: Delete N3uron folder (optional).
sudo rm -r <n3uron folder>
For example, if the N3uron folder is ‘/opt/n3uron’ the command would be:
sudo rm -r /opt/n3uron
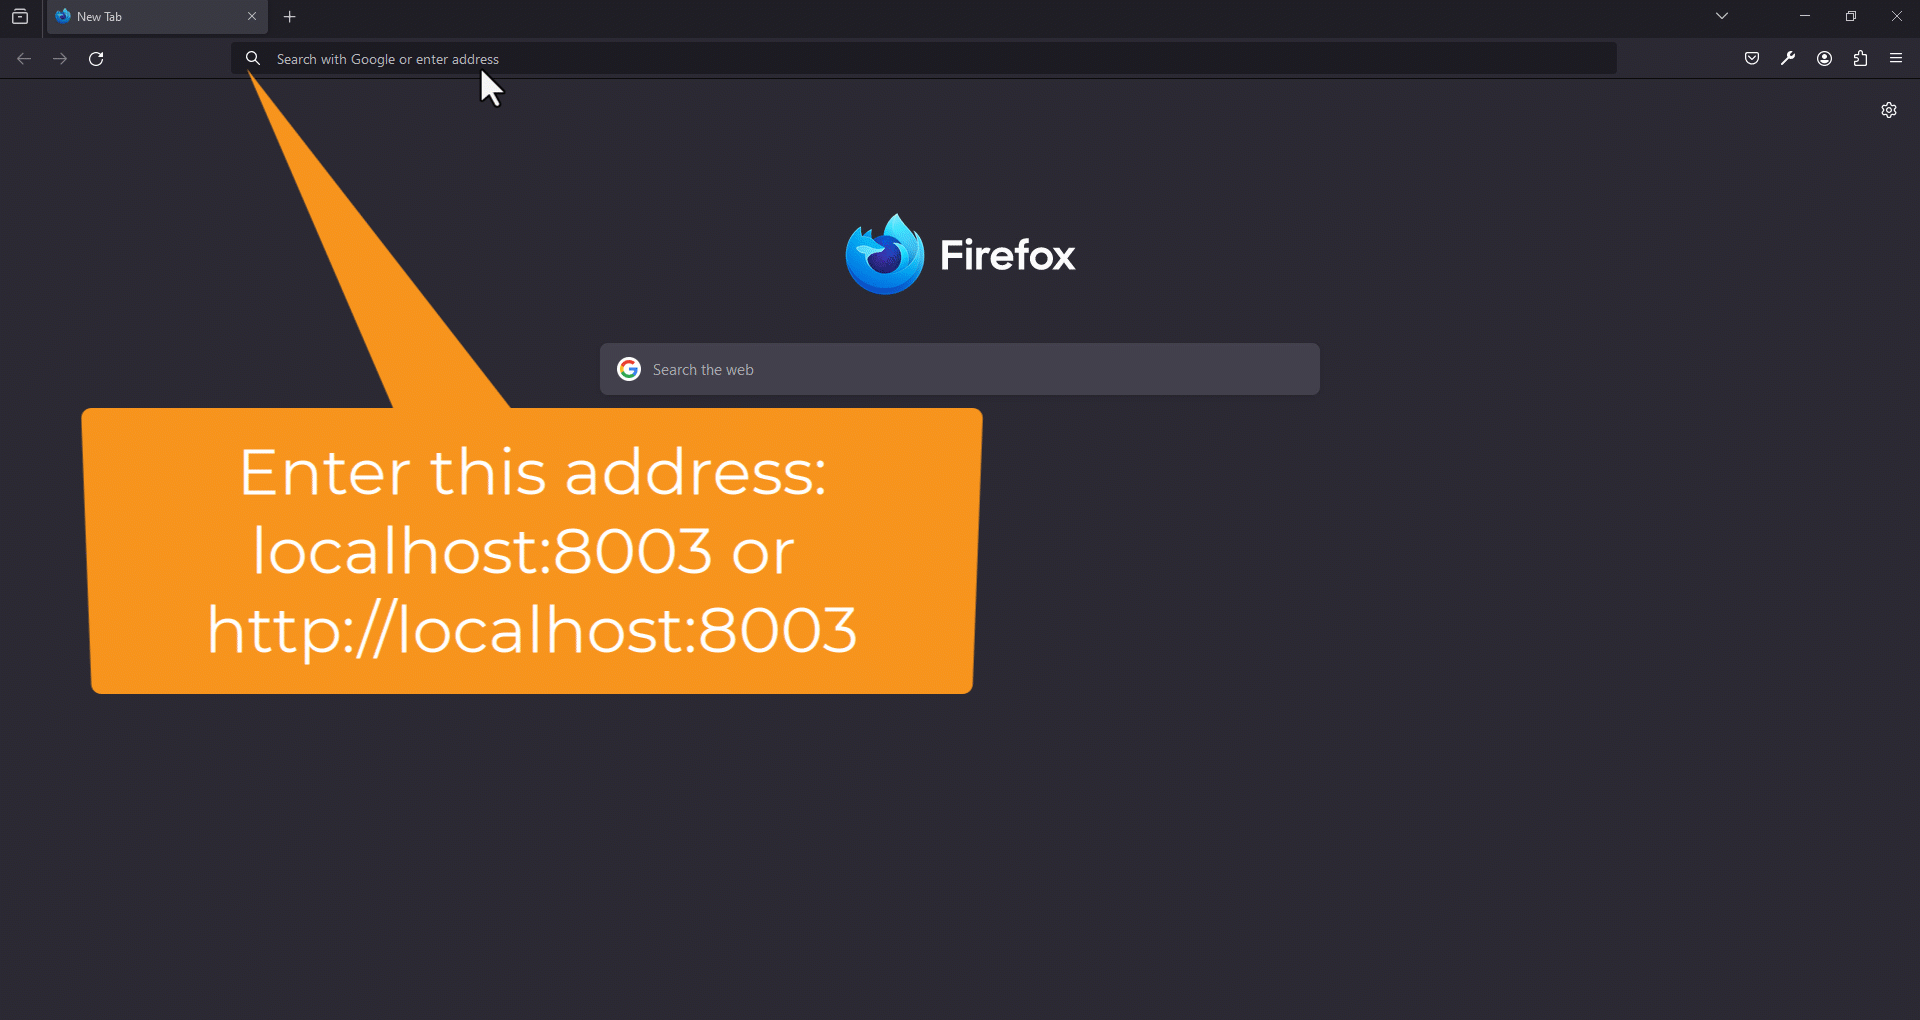
Accessing the N3uron WebUI
To access the N3uron WebUI, follow these steps:
Step 1: Open a web browser on your local machine.
Step 2: Enter one of the following addresses into the browser's address bar:
- For local access: http://localhost:8003 .
- For remote access within the local area network (LAN): http://reTerminal_IpAddress:8003.
- For local secure access: https://localhost:8443 .
- For secured remote access within the local area network (LAN): https://reTerminal_IpAddress:8443.
Step 3: Press Enter to navigate to the N3uron WebUI login page.
Step 4: Enter the default username admin and password n3uron when prompted.
Usage
N3uron was designed with a microservice-oriented architecture in which each module runs as an independent process and Bootstrap is the core service that manages the rest of the processes. By default the WebUI module is automatically activated, making it accessible as soon as the installation is complete, additional functionalities are enabled creating new module instances.
Each module requires a valid license to run in production mode. If a module doesn’t find a valid license, it will run in demo mode for two hours. To restart the demo period, the module must be restarted.
Let's utilize the WebVision module to craft our first HMI experience, enhancing the visualization capabilities of our reTerminal DM.
Introducing WebVision to reTerminal DM
WebVision is a self-contained, pure web HMI/SCADA interface tailored for industrial applications. Built entirely on JavaScript, HTML5, and CSS technologies, WebVision offers unparalleled flexibility, enabling users to seamlessly control their applications across a myriad of devices such as smartphones, tablets, touchscreens, laptops, desktop computers, and control room video walls.
Designed as an all-in-one solution, WebVision eliminates the need for external applications—everything you need comes straight out of the box. From monitoring and control to data collection and analysis, WebVision sets the standard for efficiency and convenience. For more information, please visit our dedicated website for WebVision in our Knowledge Base.
Instantiate a WebVision module
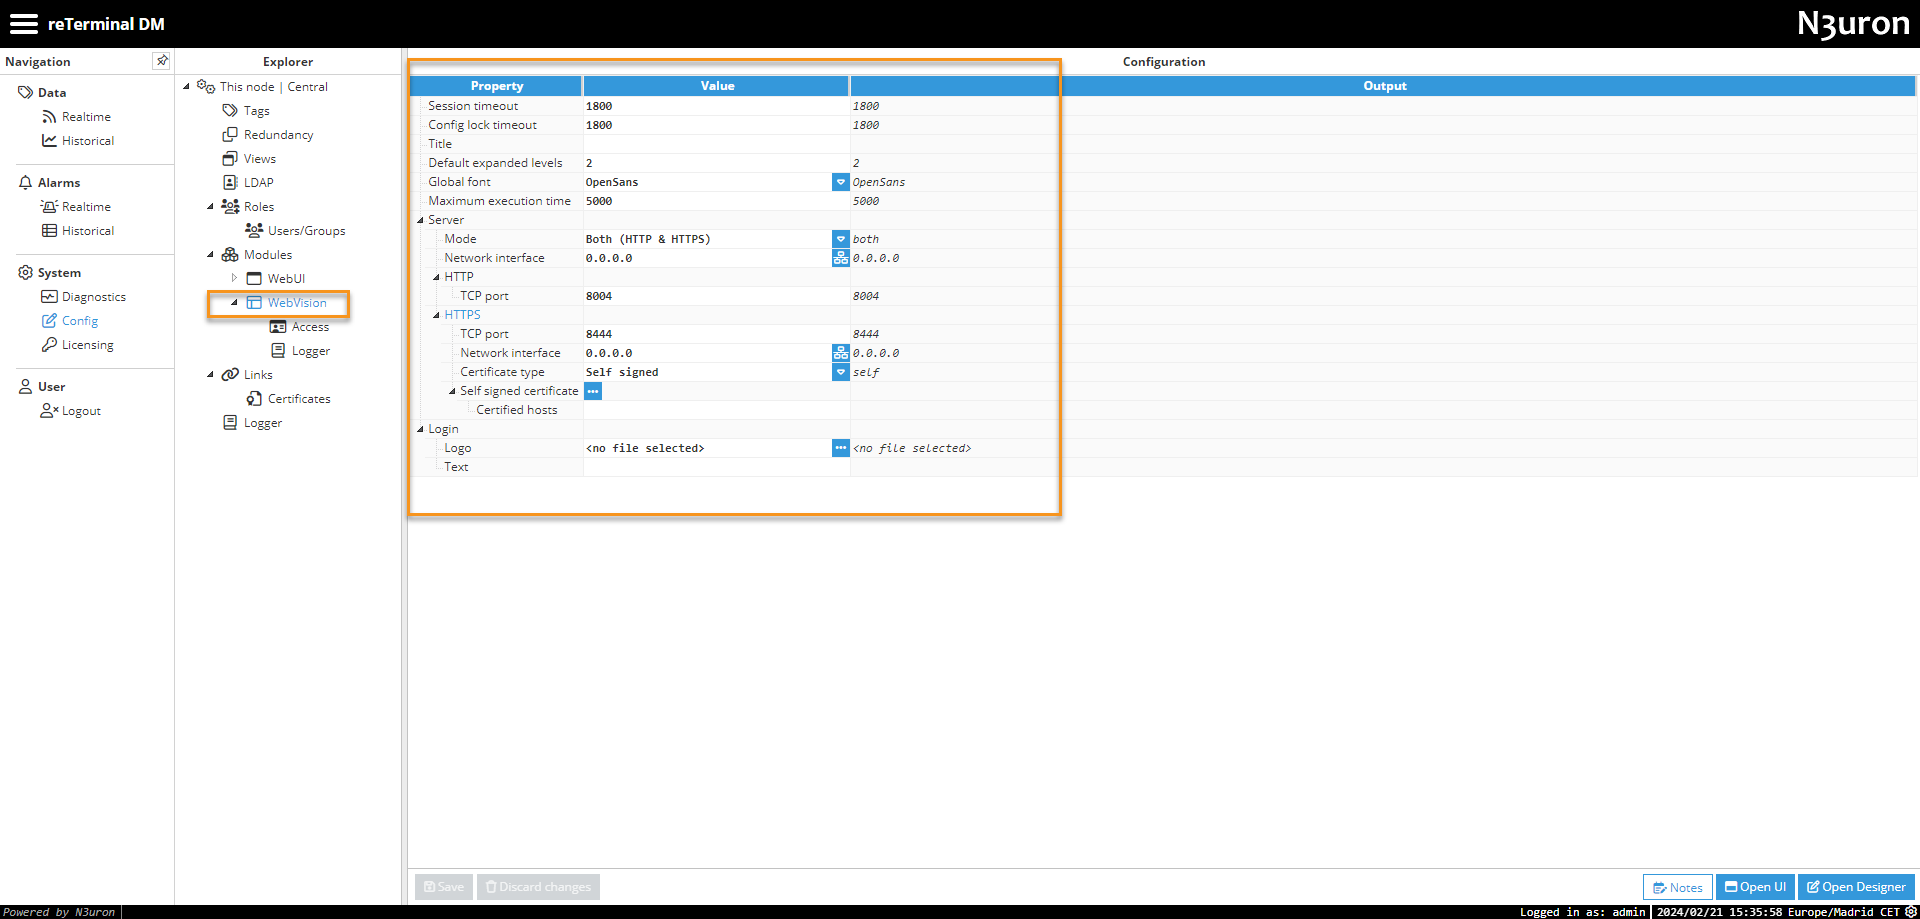
Step 1: Open N3uron and navigate to the Config menu.
Step 2: Click on Modules, then create a new module. This instance can be given any name (except names with special characters like ‘.’, ‘/’, etc.), although users are recommended to name instances in a similar way to the name of the module being instantiated for easy identification. In this example, the WebVision module has been selected and has also been named WebVision.

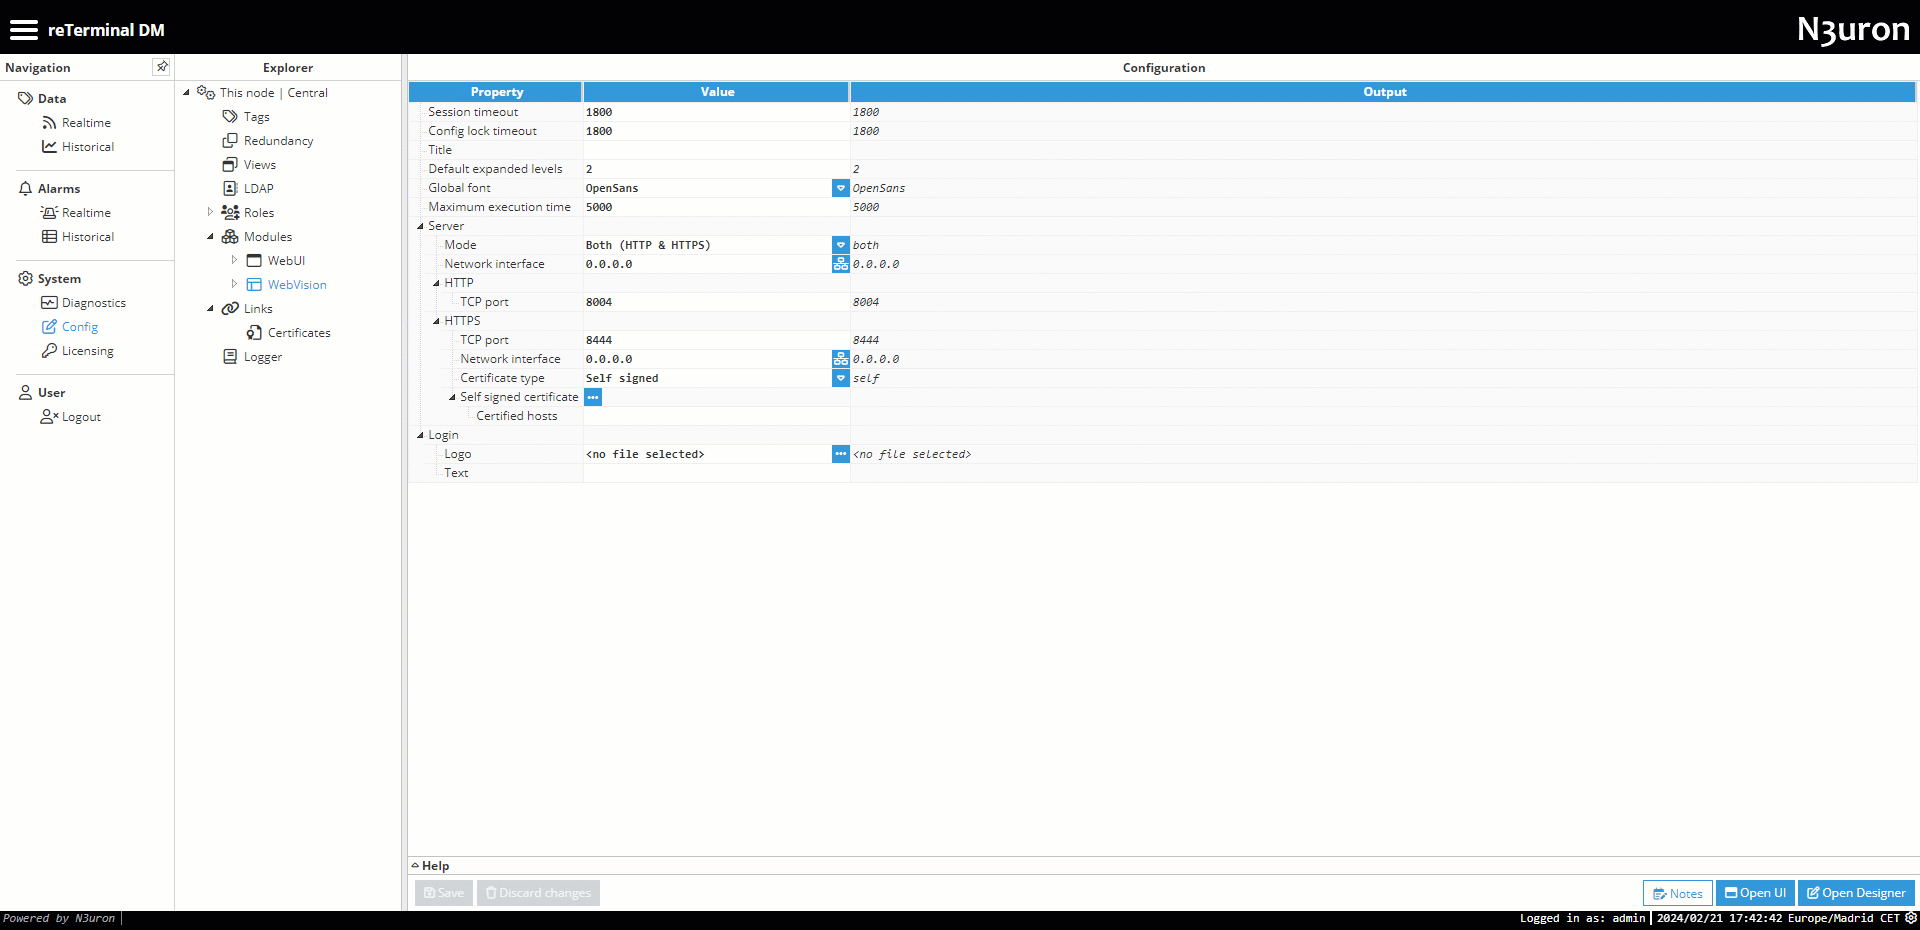
Step 3: Navigate to the main configuration of WebVision and choose the appropriate server settings. The default settings should suffice for most use cases. For further details, please refer to the following link: WebVision Initial Configuration.
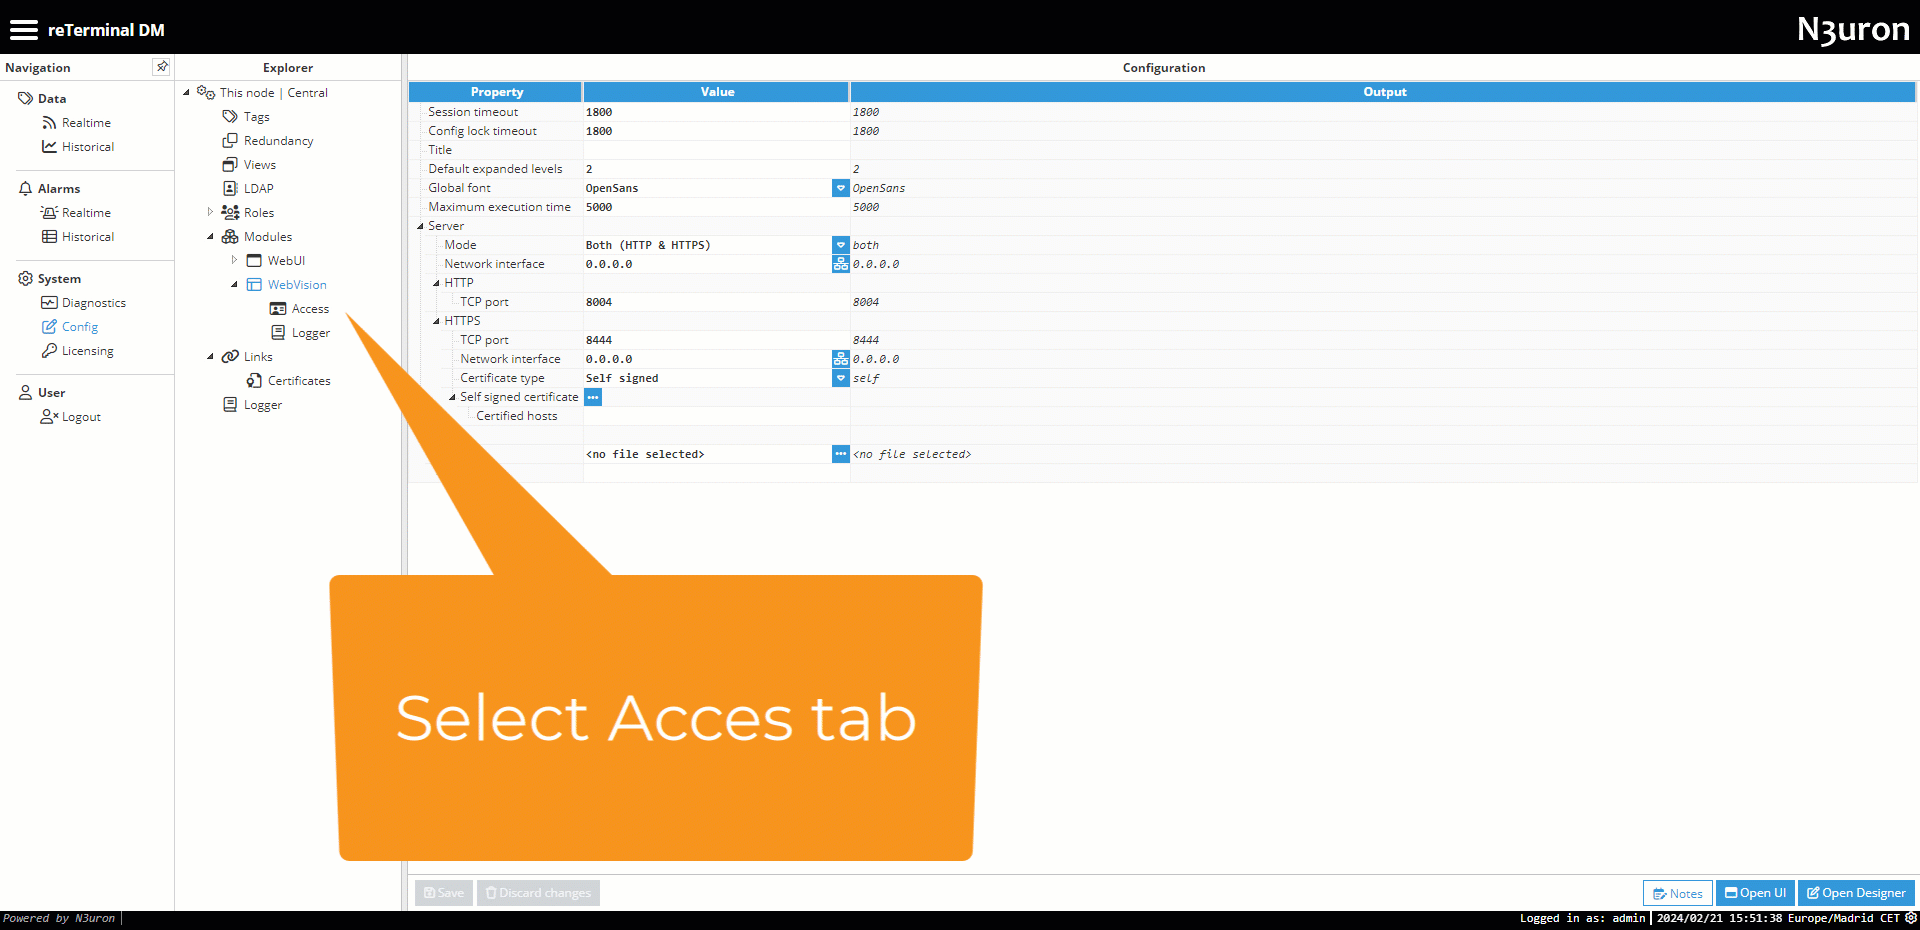
Step 4: Once the WebVision module has been instantiated, the first step is to assign permissions to the roles previously created in the Roles section of WebUI. By default, two roles exist: Administrator for administrative access and User for regular access. You can add users to these roles or create new ones as needed. Once roles are established, set permissions for Designer and Viewer roles accordingly. Additionally, establish a Tag filter path for each role. Tag filter path access determines which tags from the tag model will be accessible for visualization by the corresponding role. In this case, we will assign the complete path of the tag model to both roles.
- Administrator:
- Designer: Edit
- Viewer: View
- TagFilterPath:
- Mode: Include
- Path: /
- Regex pattern: .*
- User:
- Designer: None
- Viewer: View
- TagFilterPath:
- Mode: Include
- Path: /
- Regex pattern: .*
-
Useful Links
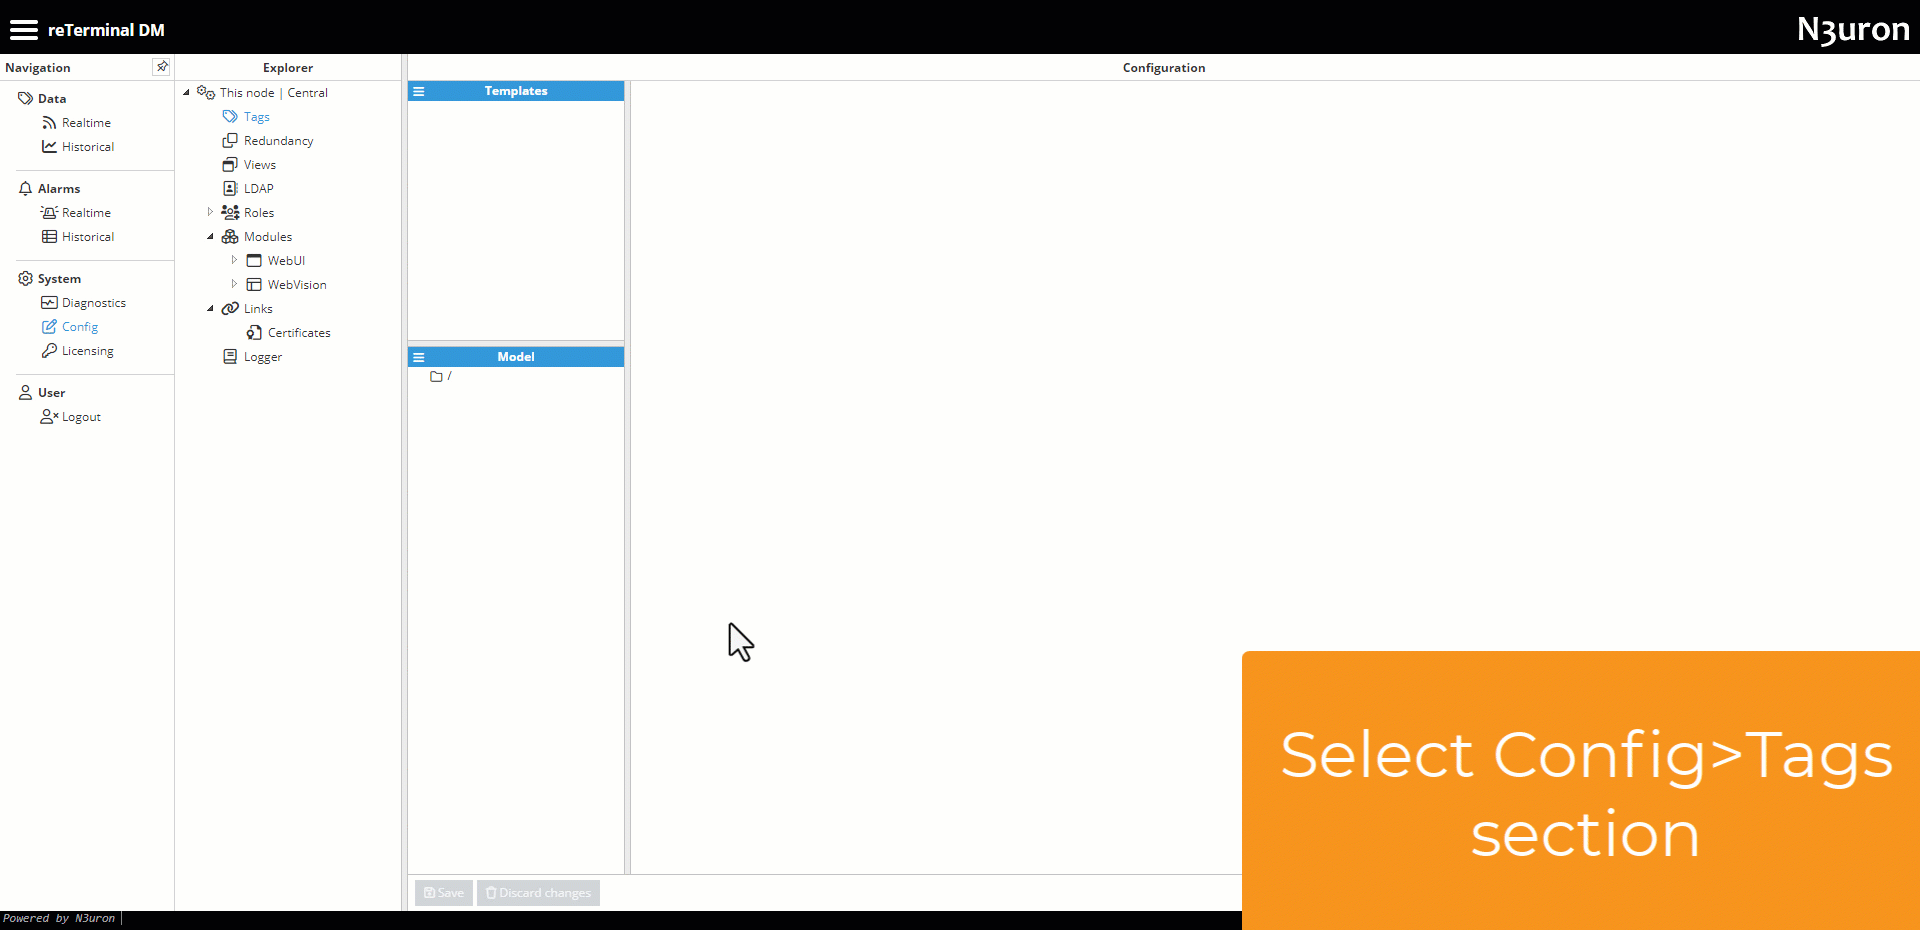
Step 5: To test our initial WebVision screen, let's create a tag. Go to the WebUI, select Config, and then click on Tag. In the Model section, click on the menu and choose New Tag. Name it TestTag, for instance, select the type as Number, grant it Read-Write permission, initialize it to 0 (optional) and then save the settings.
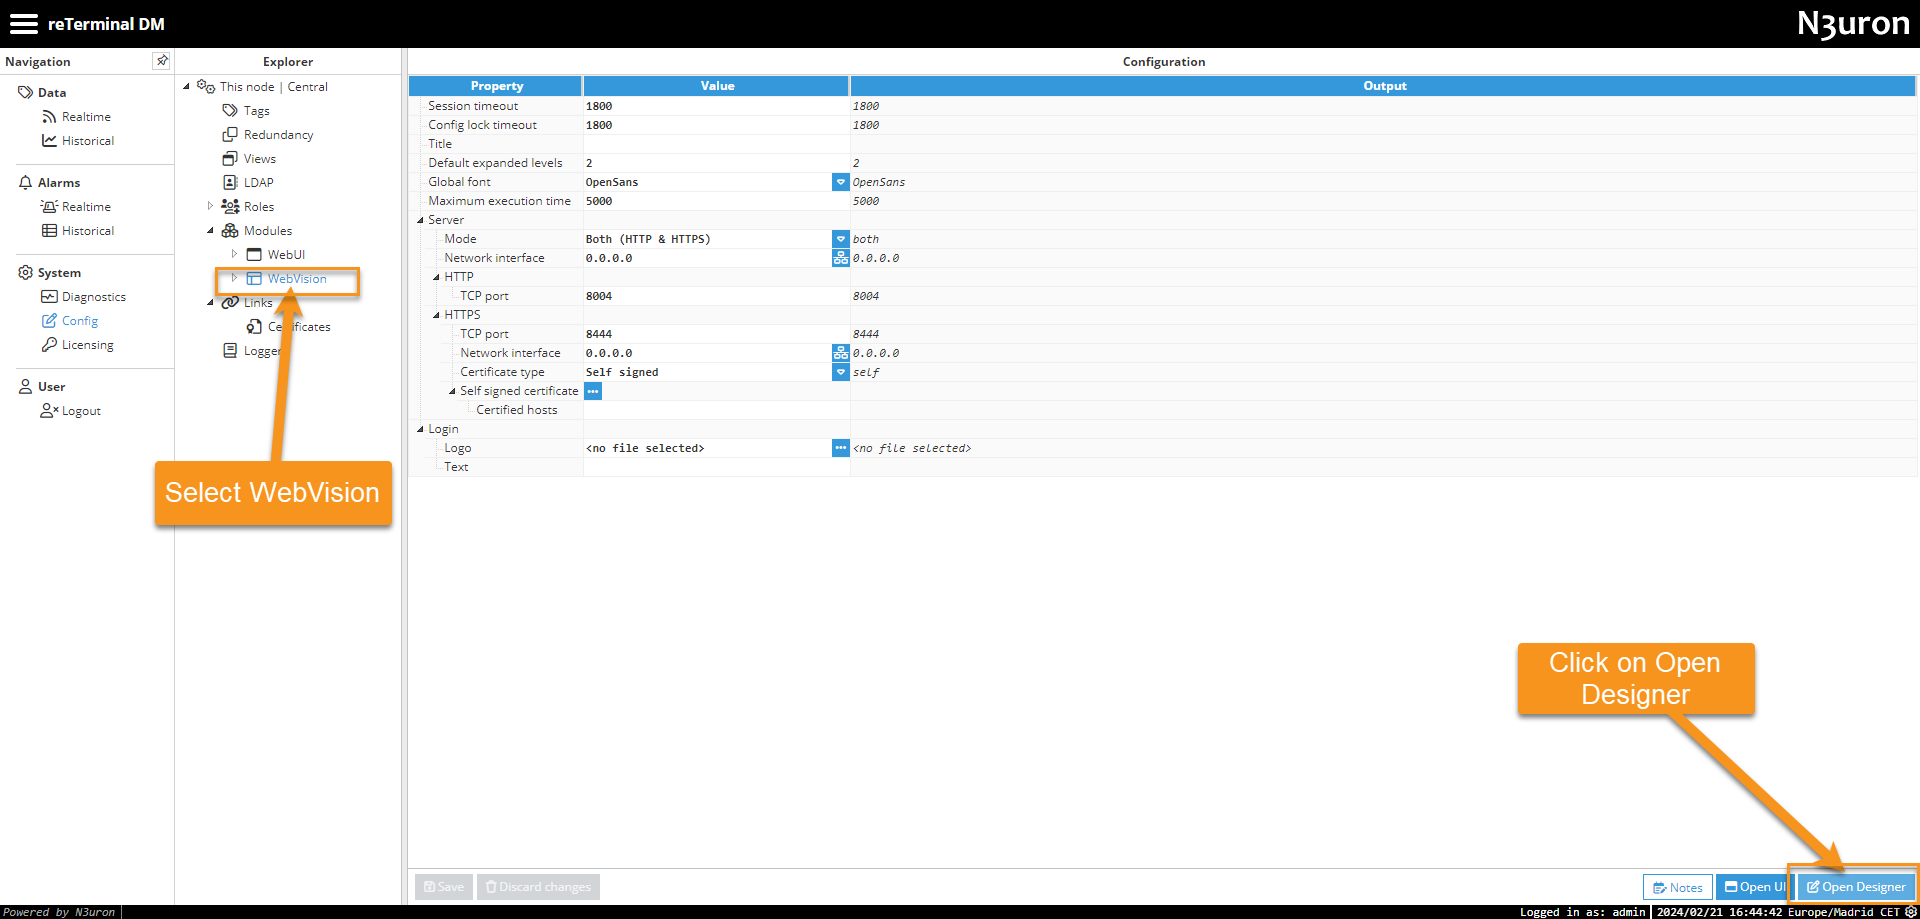
Step 6: Next, navigate to WebVision in the Config section and click on Open Designer. Log in using your Administrator credentials.
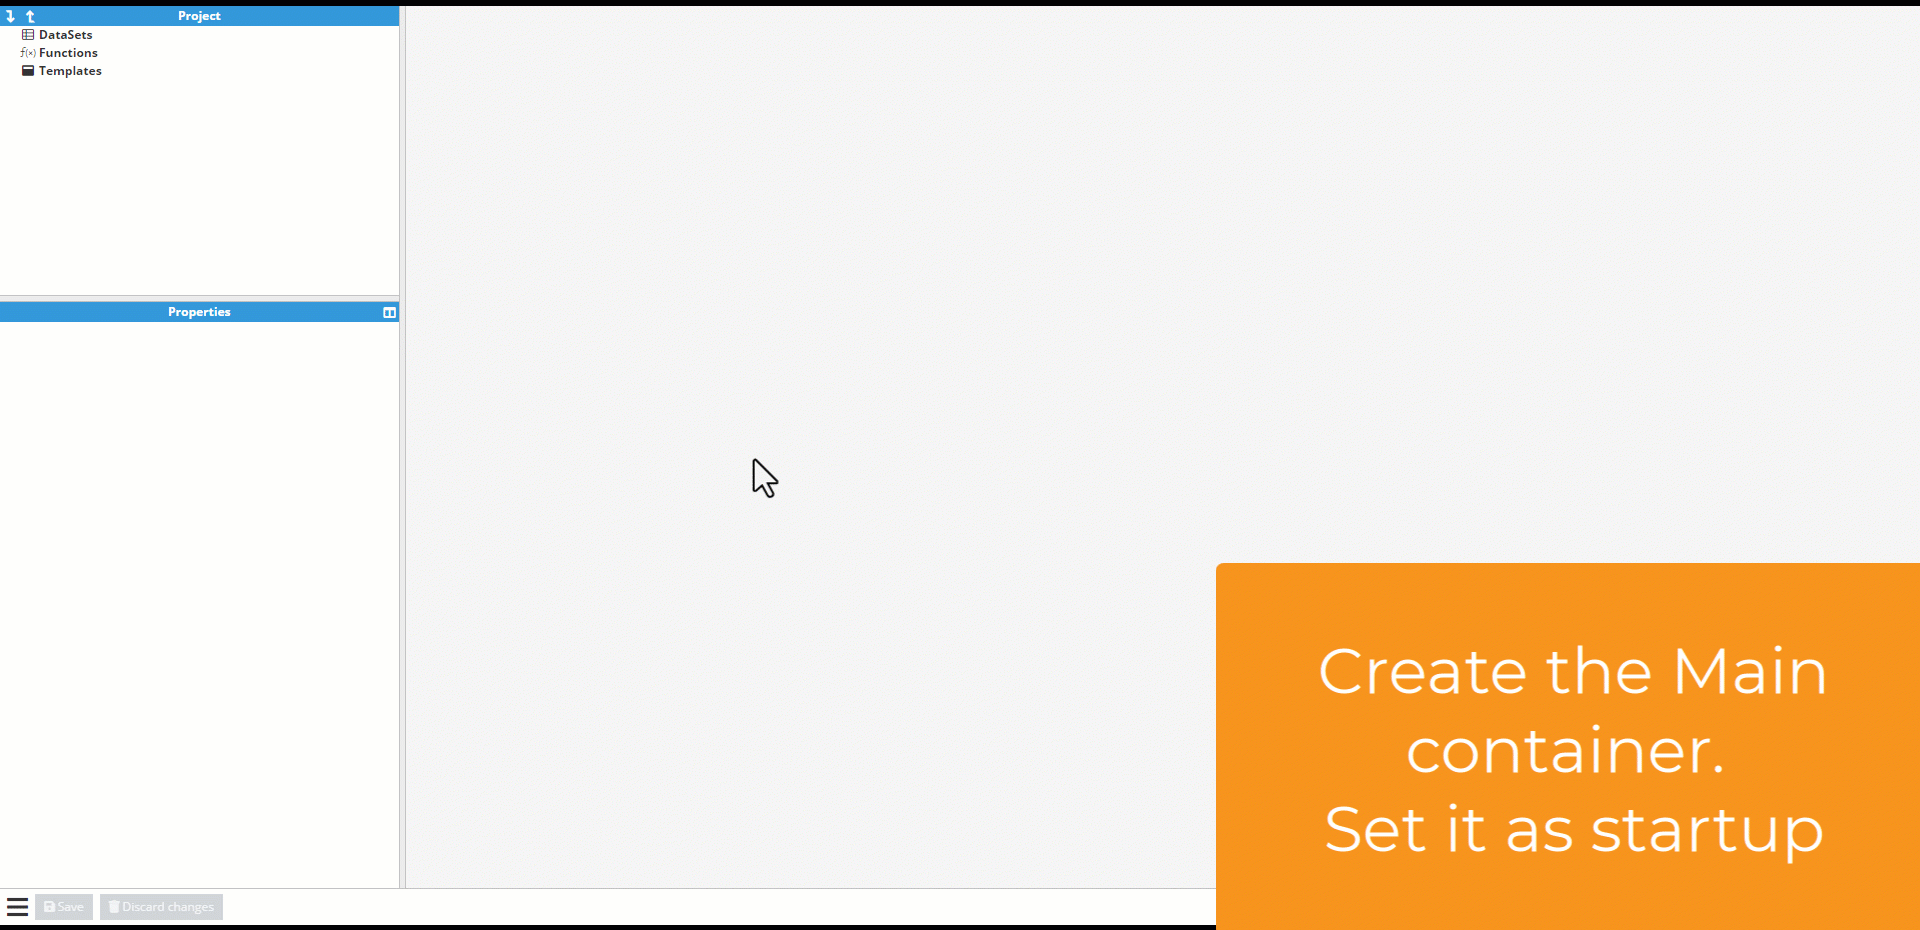
Step 7: In the Templates section, create a new Container named Main. Then, designate this container as the startup. This will set Main as our initial WebVision screen. It will appear with an asterisk symbol (*) beside it.
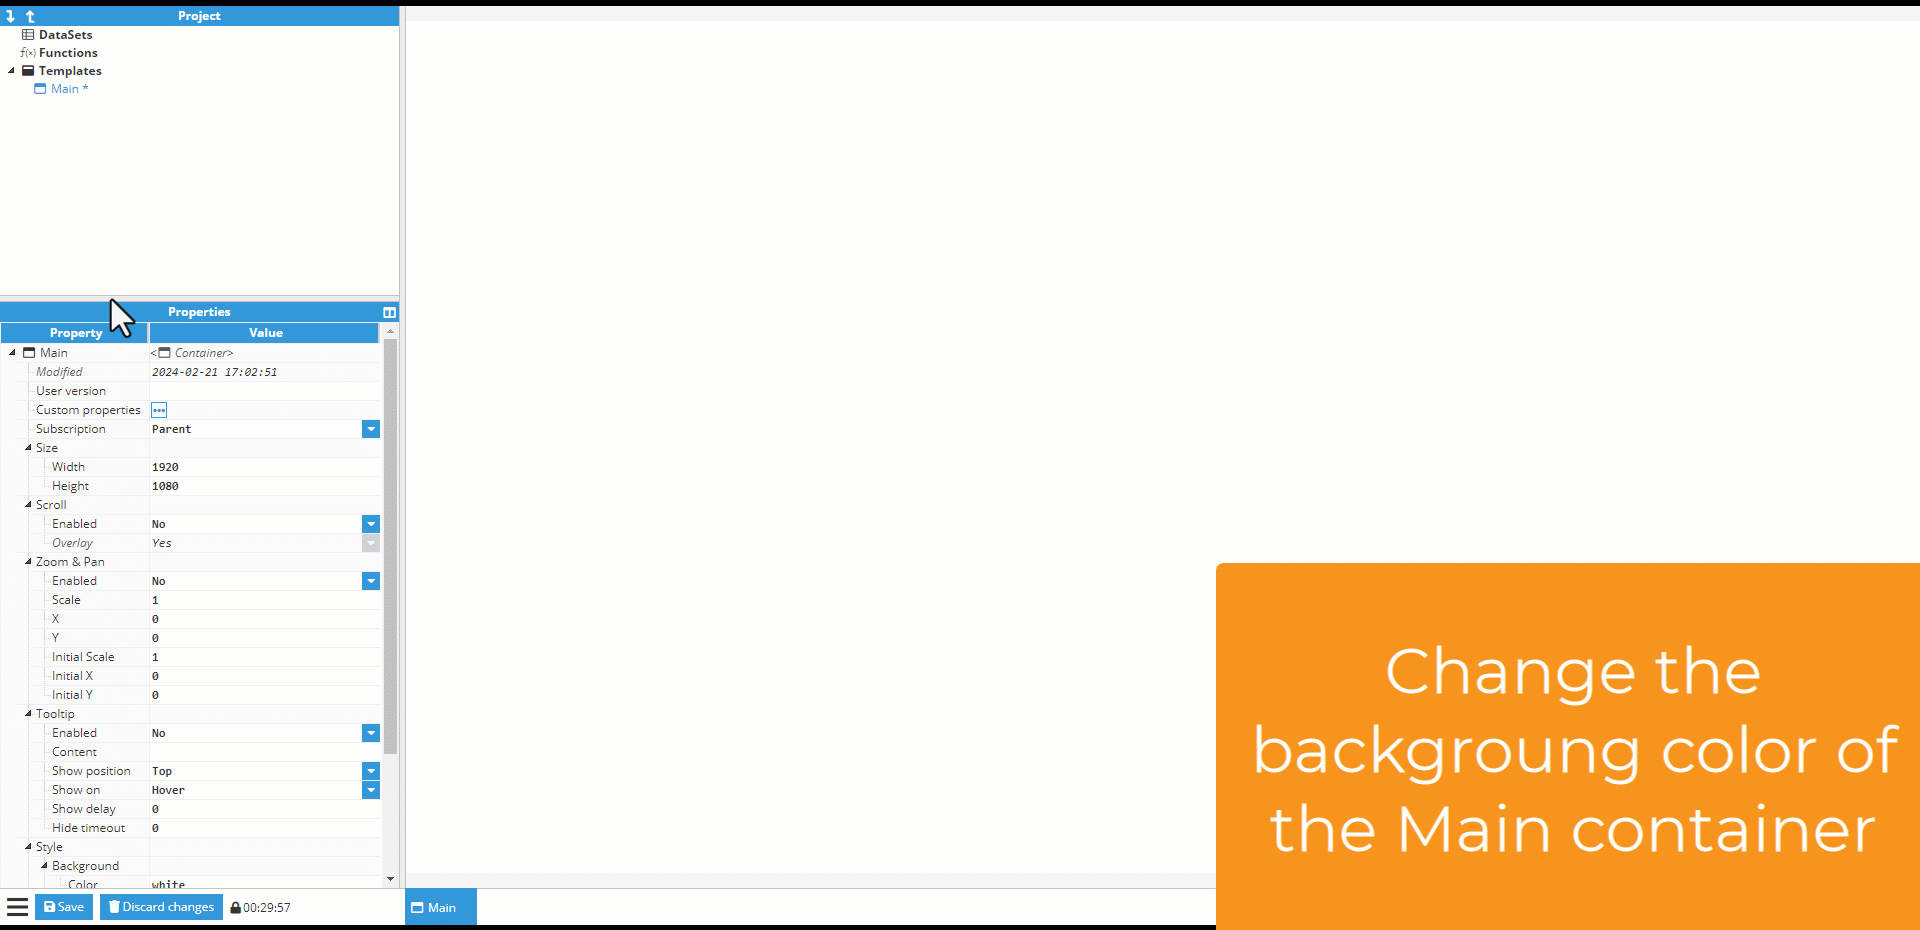
Step 8: Change the background color of the Main container.
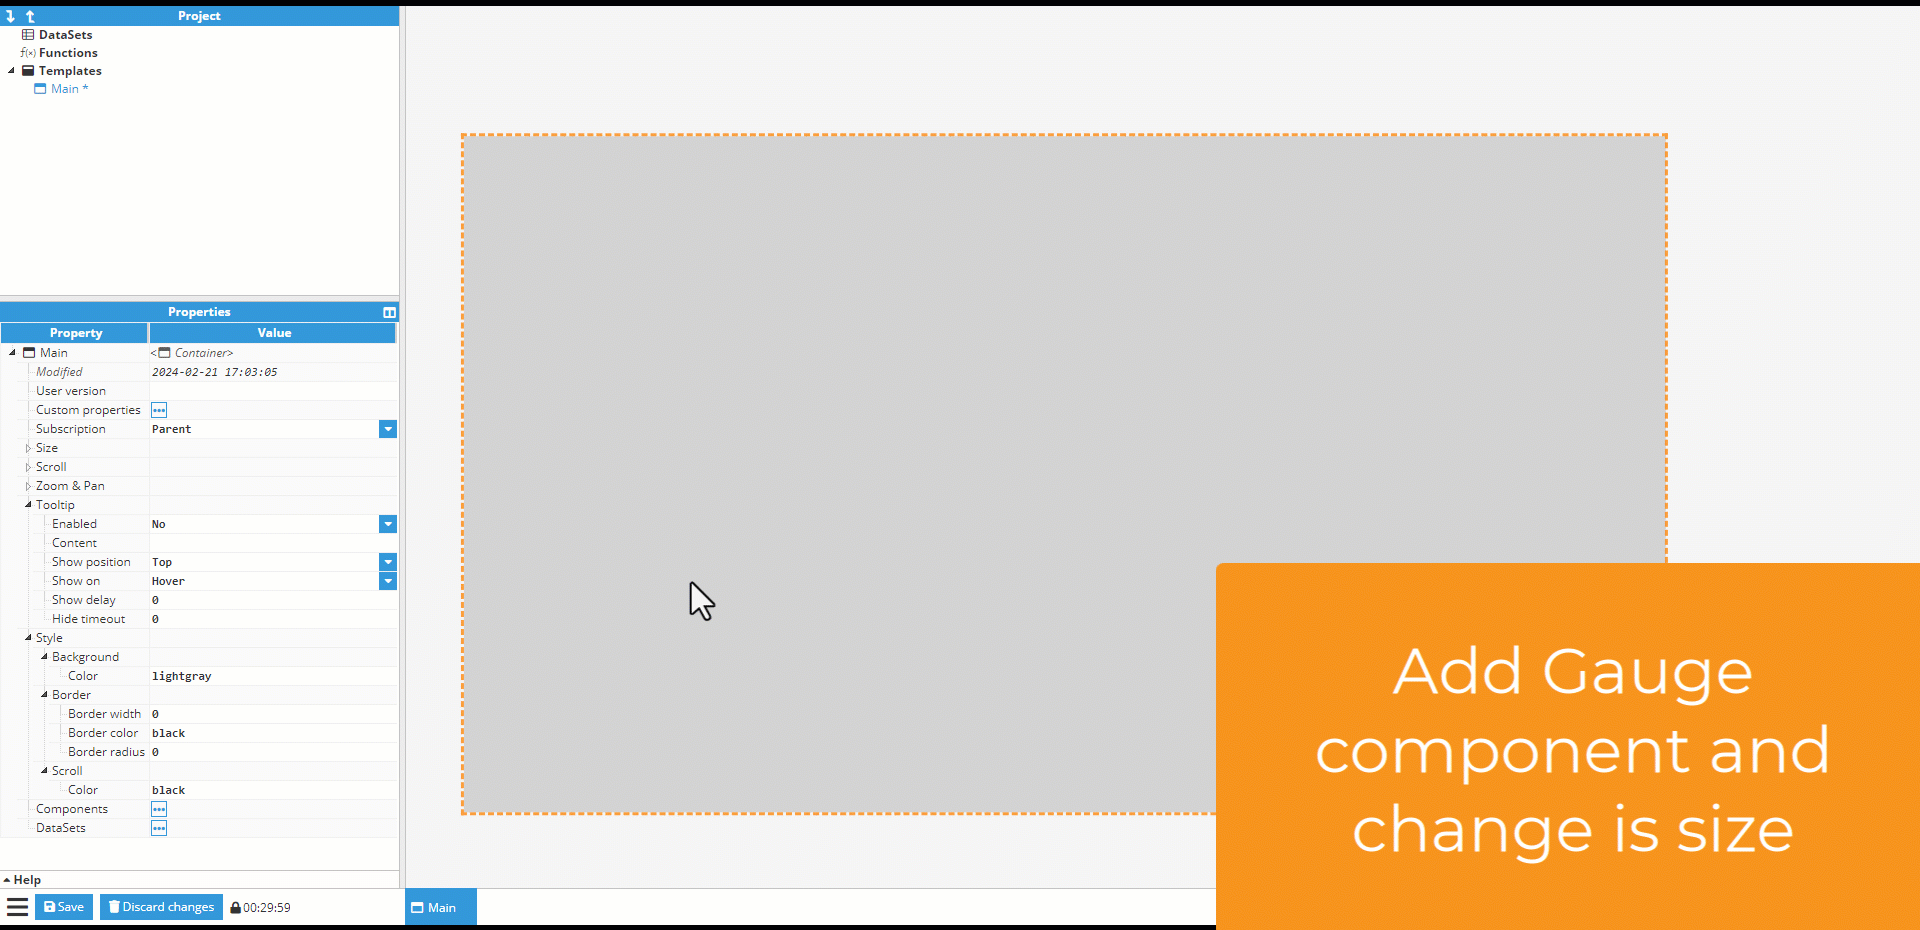
Step 9: Inside the Main container, navigate to Components and add a new component. For this example, select the Gauge component.
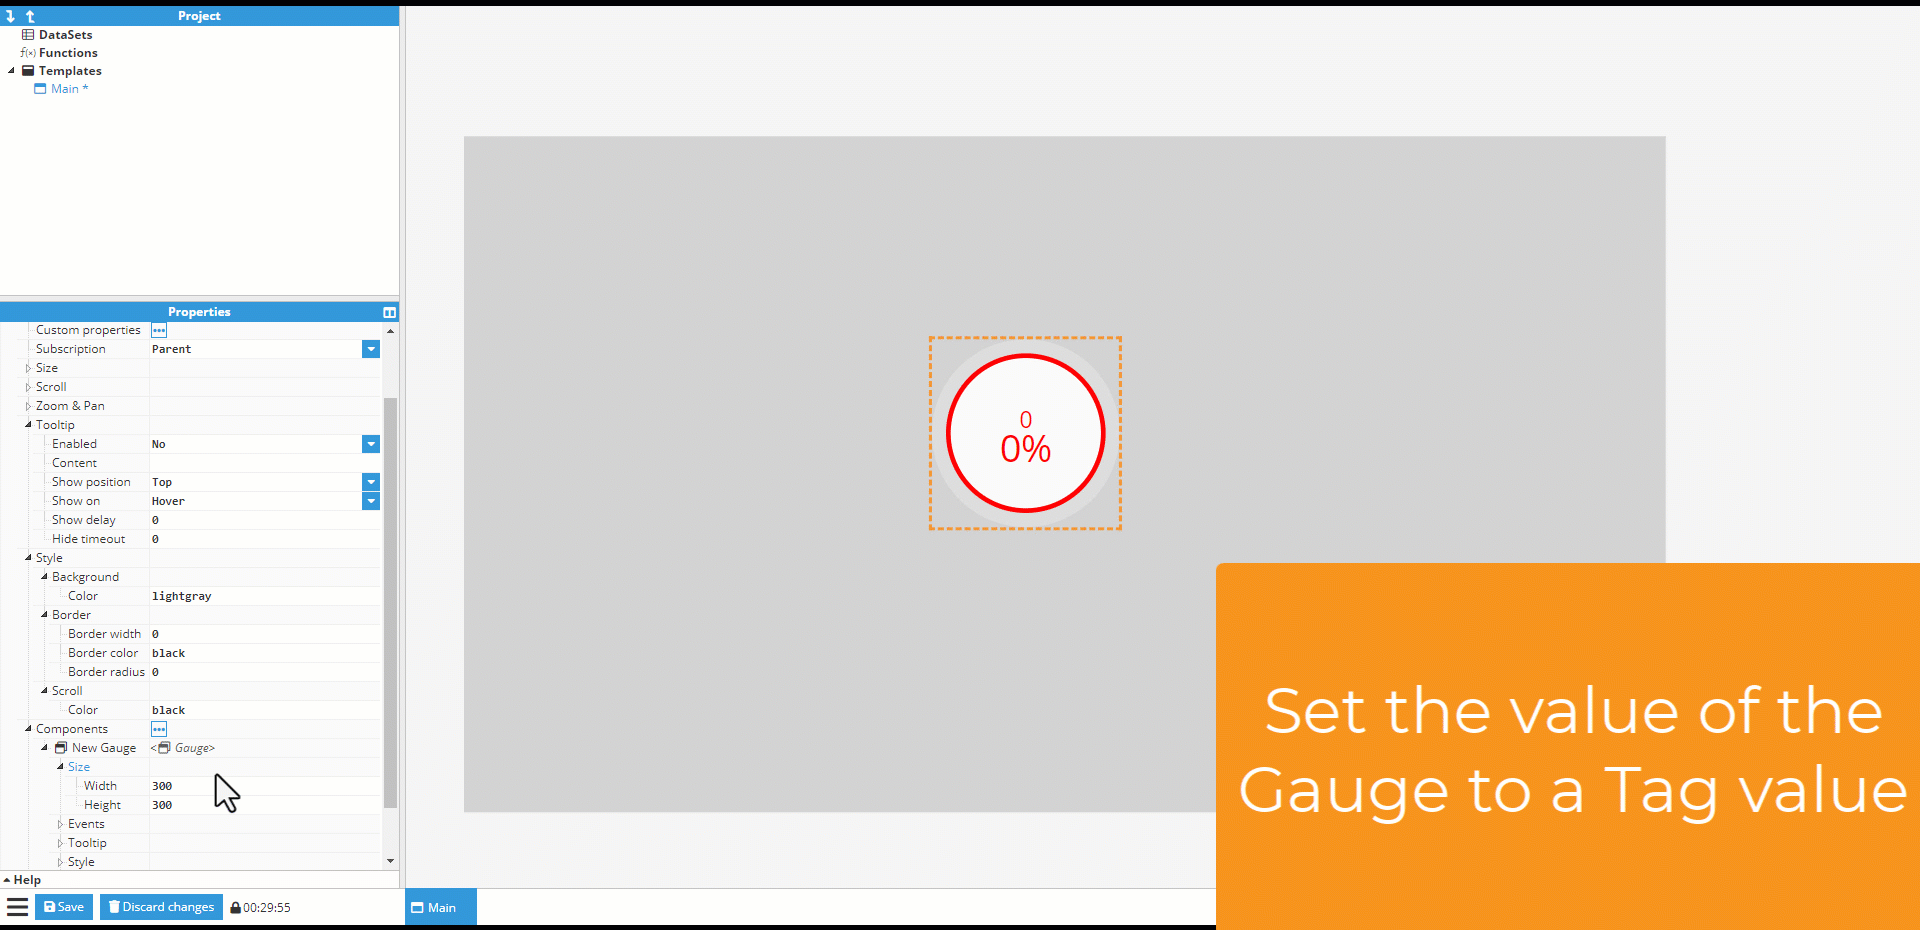
Step 10: Within the Gauge component, select the tag that will provide the values displayed on the gauge component.
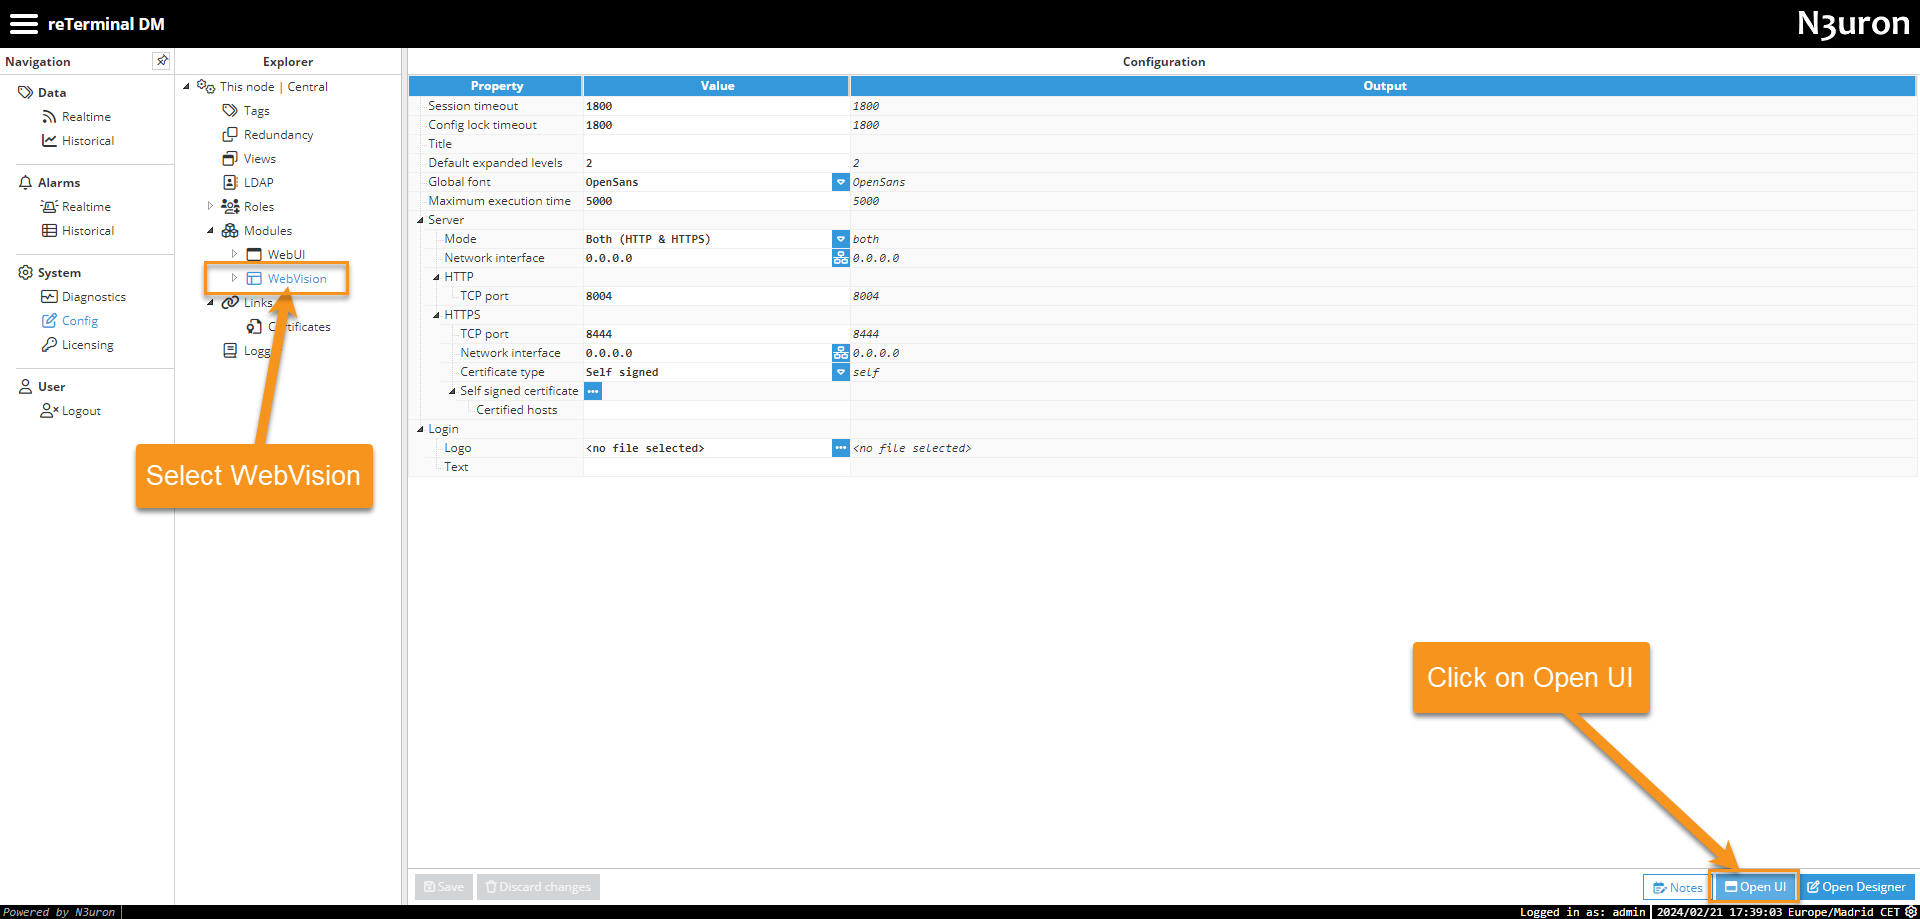
Step 11: Next, navigate to WebVision in the Config section and click on Open UI. Log in using your Administrator credentials.
Step 12: To test our simple design, navigate to the WebUI and select Data > Realtime. Change the value of TestTag. Afterwards, return to the WebVision UI and verify if the value displayed by the Gauge component has been updated.
There is much to explore about WebVision to enhance your reTerminal DM experience. For further details, please refer to our Knowledge Base on WebVision.
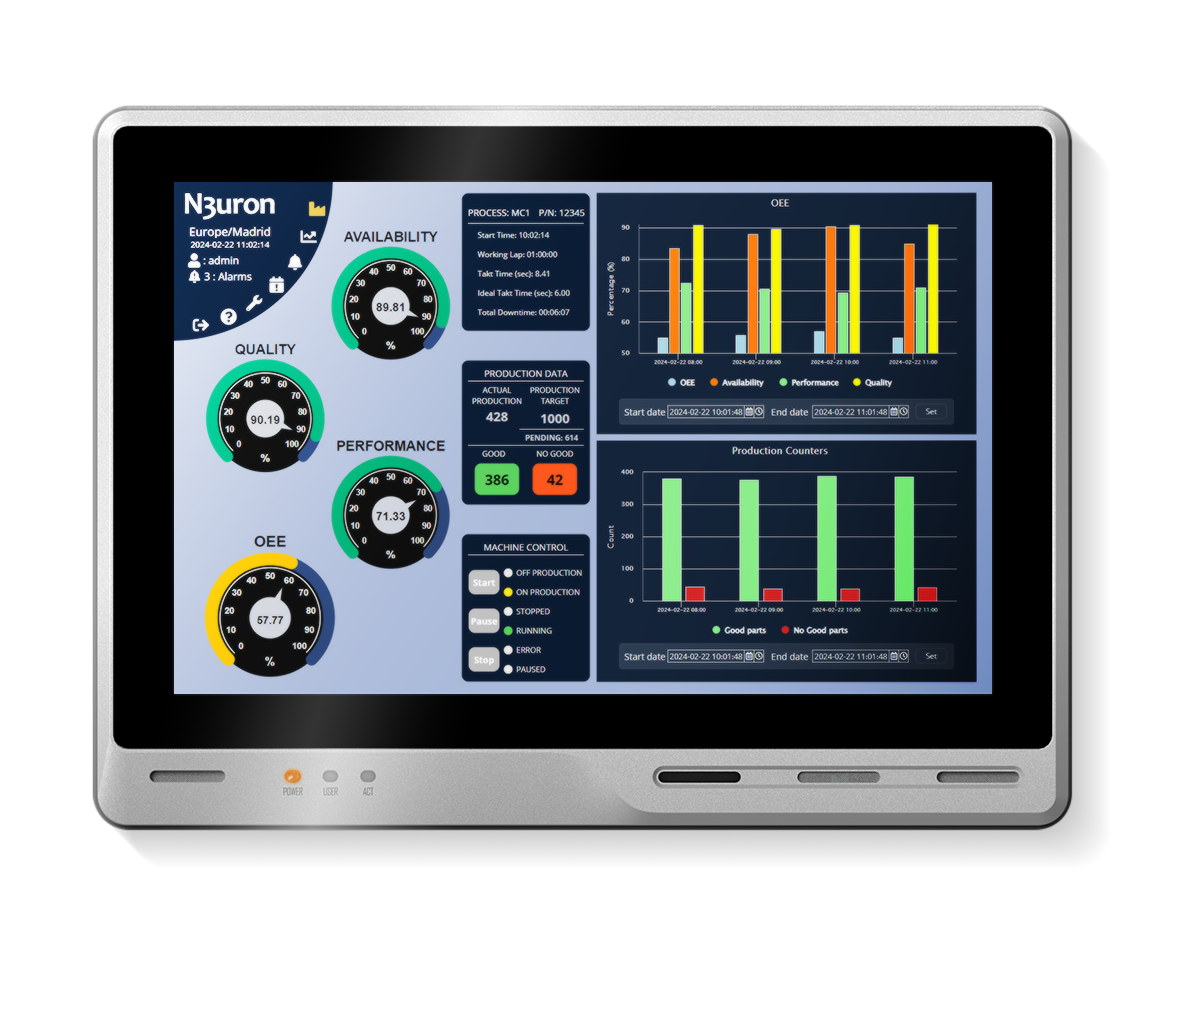
N3uron's WebVision module paired with Seeed Studio's reTerminal DM delivers powerful visual processing for SCADA and HMI applications, exemplified in this image for illustrative purposes.
What you've seen is just the beginning. Embrace the limitless possibilities offered by its impressive array of nearly 50 modules. Dare to dream big, innovate, and take your projects to new heights with N3uron's cutting-edge features. For a deeper dive into this powerful platform, visit https://n3uron.com/ and embark on an exciting journey of discovery!
Tech support
Thank you for choosing our products! We are here to provide you with different support to ensure that your experience with our products is as smooth as possible. We offer several communication channels to cater to different preferences and needs.