Grove - Temperature & Humidity Sensor

Introduction
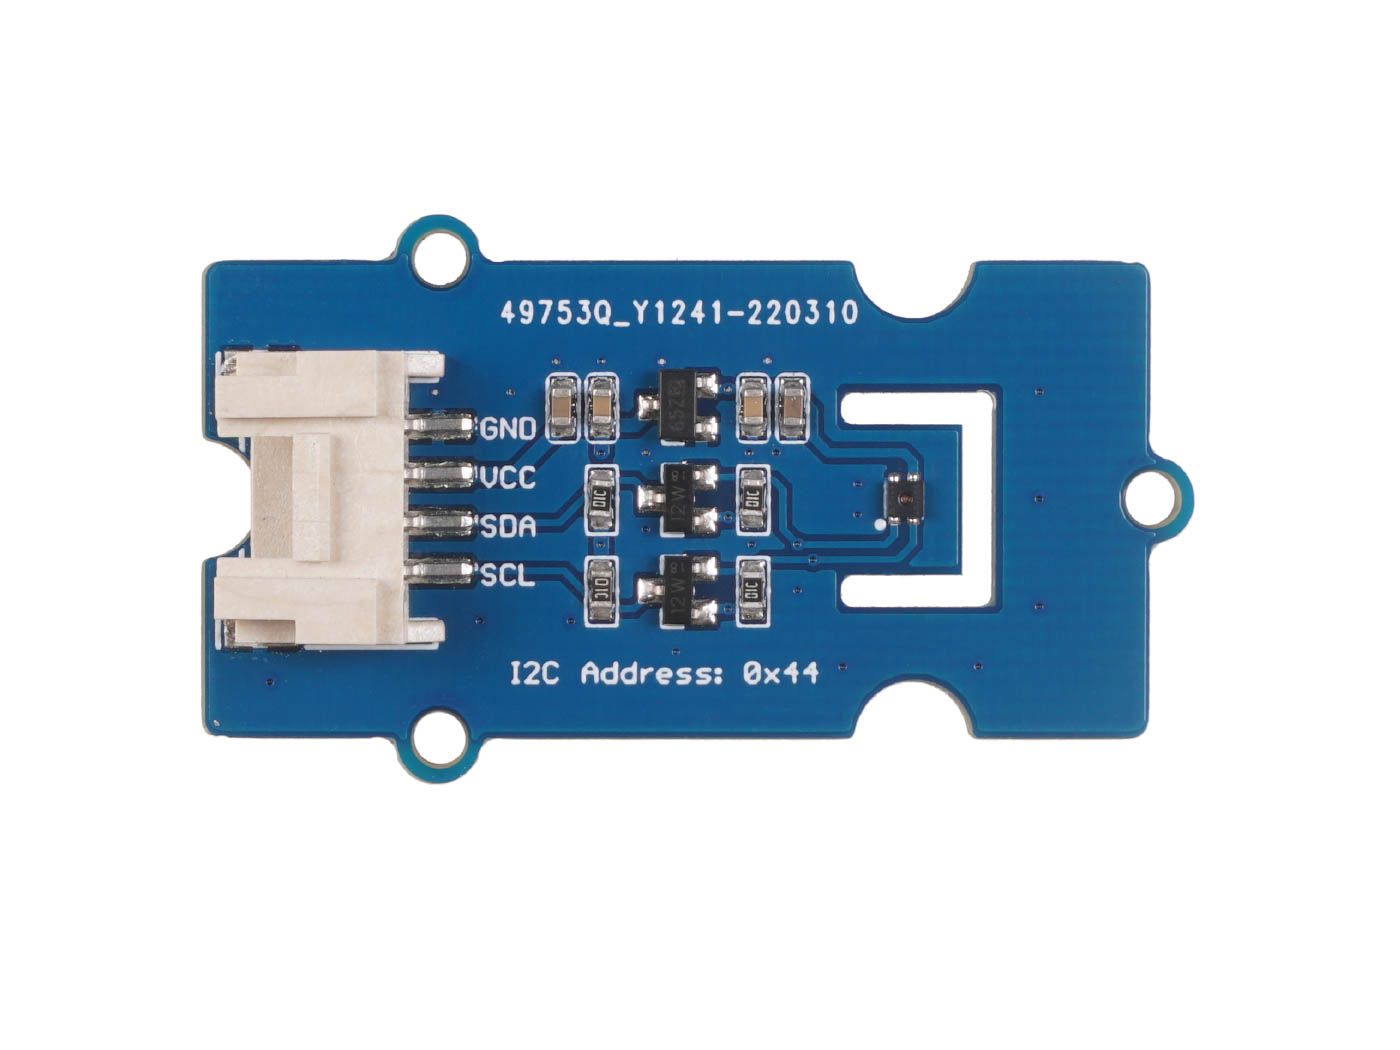
This Grove SHT40 digital sensor is based on Sensirion's industry-proven humidity and temperature sensors. It can provide constant temperature and humidity accuracy over an extensive measurement range And with the grove platform, you are ready to plug and play the SHT4x sensor on any microcontroller (Arduino) or microprocessor (Raspberry Pi).
Hardware Overview
Before everything starts, it is quite essential to have some basic parameters of the product. The following table provides information about the characteristics of Grove - Temperature & Humidity Sensor.
| Parameter | Rating |
| Temperatur accuracy rate | ±0.2 ℃ |
| Humidity accuracy rate | ±1.8% RH |
| Operating temperature range | -40°C to 125°C |
| Operating Humidity range | 0% to 100% RH |
| Grove power supply | 5/3.3 v |
| Serial Protocol | I2C |
| Grove average current | 32 µA |
| Grove idle current | 1.2µA |
| Product Dimension | 20mm x 40mm |
| Communication | IIC |
| Rate | 115200 |
Getting Started
Now we can set up the module and detect humidity and temperature.
Preparation
Hardware
- Grove - Temperature & Humidity Sensor
- Windows host PC or MacOS PC (Win 10 & MacOS 12.2 tested)
- Type-C cable
Software
Arduino Library Overview
If this is your first time using Arduino, we highly recommend you to refer to Getting Started with Arduino.
The library we use here is published on the Github, including the example.
![]()
Function
Serial.begin(115200);—— The number here means the rate is set up at 115200. When we upload the code, it is required to set up rate as 115200 while monitor openning
Installation
Since you have downloaded the zip Library, open your Arduino IDE, click on Sketch > Include Library > Add .ZIP Library. Choose the zip file you just downloaded,and if the library install correct, you will see Library added to your libraries in the notice window. Which means the library is installed successfully.

Upgrading the Package
For the sake of product continuity, we may optimize and upgrade the product library at a later stage. According to the two library installation methods provided above, there are also two ways to update the library for reference.
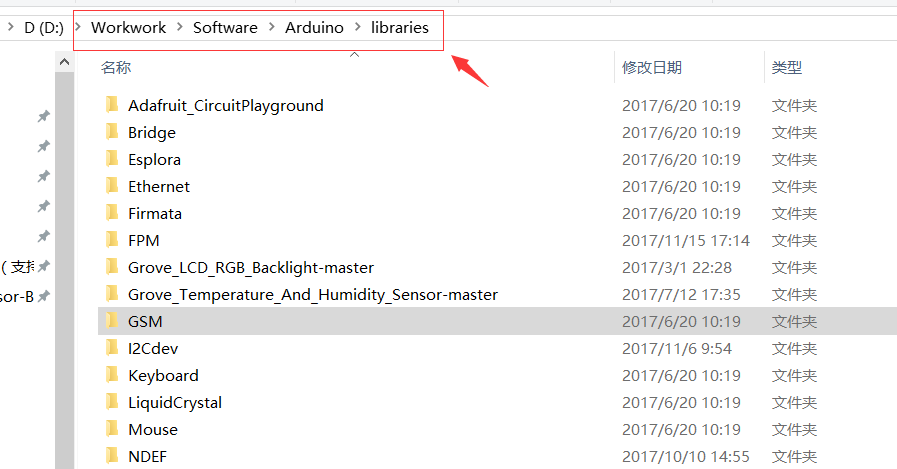
We will be the first to update GitHub when the library is optimized. You can delete the original library folder in your computer's folder, then download the latest version from GitHub, unzip it and put it in the Arduino IDE library directory. (...\Arduino\libraries. .... is the path you setup Arduino)
Arduino Example
Now that we have our library installed and we understand the basic functions, let's run some examples for our Grove - Temp & Humidi Sensor to see how it behaves.
Prerequisite
| Seeeduino V4.2 | Base Shield | Grove - Temp & Humidi Sensor |
|---|---|---|
 |  | |
| Get ONE Now | Get ONE Now | Get ONE Now |
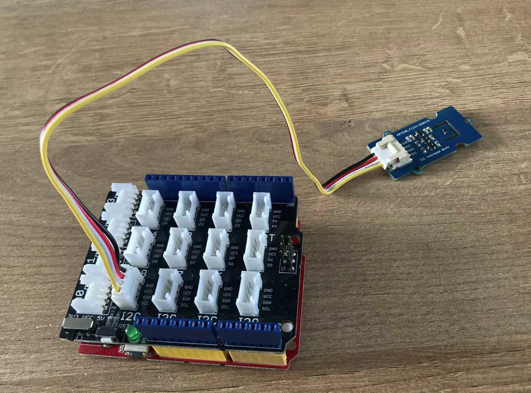
Step 1. Connect the hardware like below, and focus on the IIC port connection:
Step 2. You need to Install an Arduino Software.

Step 3. Launch the Arduino application.
Step 4. Negative to "file-->examples-->Sensirion IIC Sen4x-->exampleUsage" and open the example provided in the library. You can also copy the code below:
#include <Arduino.h>
#include <SensirionI2CSht4x.h>
#include <Wire.h>

SensirionI2CSht4x sht4x;

void setup() {

    Serial.begin(115200);
    while (!Serial) {
        delay(100);
    }

    Wire.begin();

    uint16_t error;
    char errorMessage[256];

    sht4x.begin(Wire);

    uint32_t serialNumber;
    error = sht4x.serialNumber(serialNumber);
    if (error) {
        Serial.print("Error trying to execute serialNumber(): ");
        errorToString(error, errorMessage, 256);
        Serial.println(errorMessage);
    } else {
        Serial.print("Serial Number: ");
        Serial.println(serialNumber);
    }
}

void loop() {
    uint16_t error;
    char errorMessage[256];

    delay(1000);

    float temperature;
    float humidity;
    error = sht4x.measureHighPrecision(temperature, humidity);
    if (error) {
        Serial.print("Error trying to execute measureHighPrecision(): ");
        errorToString(error, errorMessage, 256);
        Serial.println(errorMessage);
    } else {
        Serial.print("Temperature:");
        Serial.print(temperature);
        Serial.print("\t");
        Serial.print("Humidity:");
        Serial.println(humidity);
    }
}
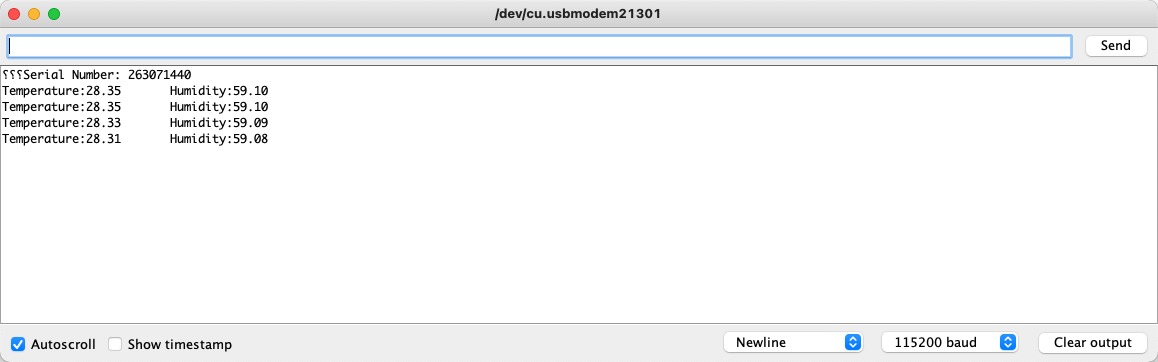
Step 5. Upload the code to Arduino software and click the "monitor" on the upper right corner. The monitor result might show up like:
Resources
- [PDF] SHT4x Datasheet
Tech Support & Product Discussion
Thank you for choosing our products! We are here to provide you with different support to ensure that your experience with our products is as smooth as possible. We offer several communication channels to cater to different preferences and needs.