Project Overview
In this wiki, we will show how to use the Bluetooth 5.0 BLE capabilities of the Seeed Studio XIAO nRF52840 with the Seeed Studio Grove Temperature & Humidity Sensor (DHT20) to broadcast measurements of temperature and humidity to Home Assistant using the BTHome protocol.
We will be using CircuitPython for the code.
Getting Started
To follow this tutorial , you need the following hardware
| Seeed Studio XIAO nRF52840-Sense | Seeed Studio Grove Temperature&Humidity Sensor V2.0 (DHT20) |
|---|---|
 | 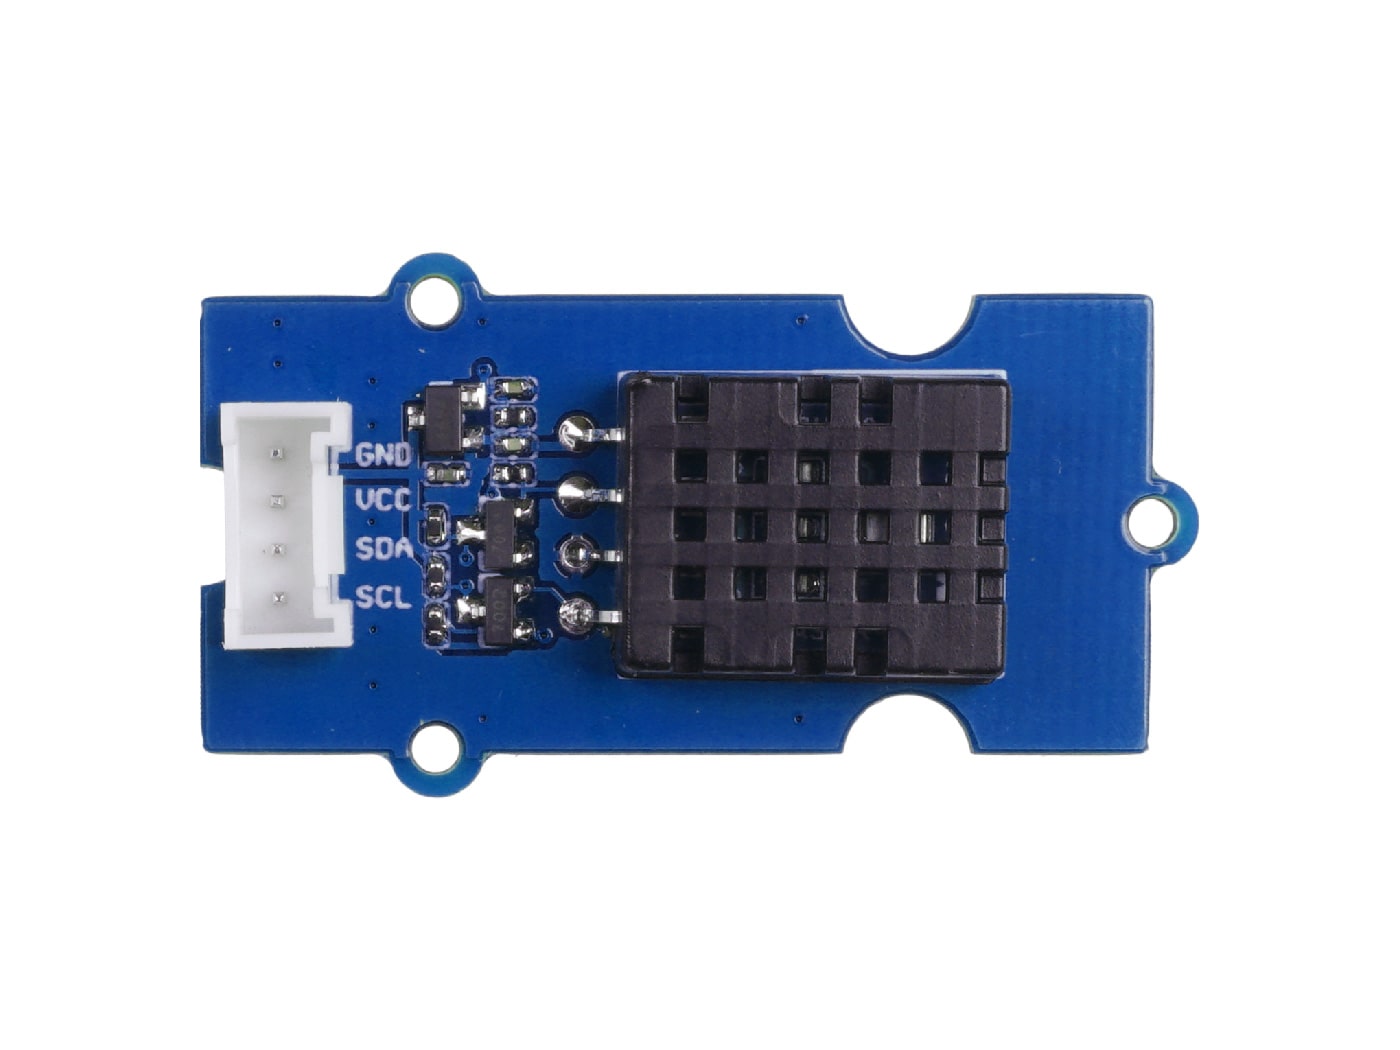 |
Hardware Preparation
The Grove DHT20 sensor uses I2C for communication. We need to connect it to the I2C pins of the XIAO nRF52840 Sense:
- We can use a XIAO Grove Shield with a Universal 4 pin Unbuckled cable
- Connect the DHT20 sensor directly to the XIAO nRF52840 Sense using a 4 pin Female Jumper to Grove 4 pin Conversion Cable
Here's the pinout for XIAO nRF52840 Sense and XIAO Grove Shield


Hardware setup
Wiring is straight forward. Either using the Shield or not, the following Fritzing Schematic show how to wire the components together.


Software Preparation
We're going to use Thonny IDE software (Linux) and some related libraries and files. These are the steps we're going to take:
- Install CircuitPython on the XIAO nRF52840 Sense
- Install the necessary libraries
- Code our sensor using the BTHome protocol
- Configure Home Assistant
Step 1 - Install CircuitPython
Let's install CircuitPython.
Go to CircuitPython and download a version for the XIAO nRF52840 Sense. Choose Downloads and in the search field start writing the XIAO nRF52840 until the results show the sensor.

Next, press the download button to get the file for our device.

You should have a .uf2 file. To install it we need to enter bootloader mode. Connect the XIAO nRF52840 Sense to your computer and press the reset button twice.

A new drive should have appeared on your computer called XIAO-SENSE.

Next, copy the downloaded file to the drive.

After a while, a new drive appears named CIRCUITPY. We have CircuitPython installed on our microcontroller.

Step 2 - Install libraries
To use our Grove Temperature & Humidity sensor V2.0 (DHT20), we need the Adafruit's AHT20 library.
The previous website has instructions on how to install libraries.
After installed, we should have the following files (this are the required for our DHT20 sensor):

Step 3 - Upload Code
Before going for the code, we need to understand what BTHome is.
![]()
BTHome
BTHome is an open standard for broadcasting sensor data and button presses over Bluetooth Low Energy (BLE). It is designed to be energy efficient, flexible, and secure. BTHome is supported by popular home automation platforms, such as Home Assistant, out of the box.
Some benefits of BTHome:
- Is an open standard, so devices from different manufacturers can work together.
- Devices are designed to be energy efficient, so they can run for a long time on a single battery.
- Data is encrypted, so it is secure from unauthorized access.
- Is a flexible format, so it can be used to transmit a variety of sensor data and button presses.
BTHome is a versatile and powerful standard for broadcasting sensor data and button presses over BLE. It is a good option for anyone who wants to add sensor data and button presses to their smart home.
You can read more about it and learn about the data format on the official site.
Code
Here's the CircuitPython code.
Click to copy the CircuitPython code
# BTHome with DHT20
# This code is based on the excelent code by Koen Vervloesem
# https://github.com/koenvervloesem/BTHome-Inertial-Sensor-in-CircuitPython
# We don't use deep sleep because it just doesn't work
# on the XIAO nRF52840 Sense. It's a pitty.

from _bleio import adapter
from time import sleep
import board
# for the Grove sensor
import adafruit_ahtx0


# The size of the name is important.
DEVICE_NAME = "XIAO nRF52840 Sense"
INTERVAL = 0.1

# Because this is delaying just 0.1s - 100 milliseconds, we don't need to read the sensor
# values everytime. It's overkill - let's just read every 5 minutes.
# Let's create a timer that will add every INTERVAL
# when it reaches 30 - it will be 5 minutes passed
# then we read the sensor
# INTERVAL * 60 seconds * 5 minutes
# CONVERTING 0.1ms to seconds * 60s * minutes = 300
MINUTES_PER_READING = 5
readTimer = INTERVAL * 10 * 60 * MINUTES_PER_READING


# convert the measurement value to the BTHome format
def value_to_little_endian (measurement):

    # Calculate the integer value by dividing the temperature by the factor
    integer_value = int(measurement / 0.01)

    # Extract the lower and upper bytes for little-endian representation
    lower_byte = integer_value & 0xFF
    upper_byte = (integer_value >> 8) & 0xFF

    # Reverse the order of the bytes
    little_endian_bytes = bytes([upper_byte, lower_byte])
    return little_endian_bytes

class BTHomeAdvertisement:
    _ADV_FLAGS = [0x02, 0x01, 0x06]
    _ADV_SVC_DATA = [0x0a, 0x16, 0xd2, 0xfc, 0x40, 0x02, 0x00, 0x00, 0x03, 0xbf, 0x13]

    def _name2adv(self, local_name):
        adv_element = bytearray([len(local_name) + 1, 0x09])
        adv_element.extend(bytes(local_name, "utf-8"))
        return adv_element

    def __init__(self, local_name=None):
        if local_name:
            self.adv_local_name = self._name2adv(local_name)
        else:
            self.adv_local_name = self._name2adv(adapter.name)

    def adv_data(self, temperature, humidity):
        adv_data = bytearray(self._ADV_FLAGS)
        adv_svc_data = bytearray(self._ADV_SVC_DATA)
        # temperature
        # change values according -
        temp = value_to_little_endian (temperature)
        # returned value is list
        adv_svc_data[6] = temp[1]
        adv_svc_data[7]= temp[0]
        # humidity
        # change values according -
        hum = value_to_little_endian (humidity)
        # returned value is list
        adv_svc_data[9] = hum[1]
        adv_svc_data[10]= hum[0]
        adv_data.extend(adv_svc_data)
        adv_data.extend(self.adv_local_name)
        return adv_data


# BTHome
bthome = BTHomeAdvertisement(DEVICE_NAME)

# Create sensor object
sensor = adafruit_ahtx0.AHTx0(board.I2C())

# because we want a initial reading
# let's initialize with the readTimer variable
# so we force the script to read the values
currentTimer = 0
# inital reading
temp = sensor.temperature
hum = sensor.relative_humidity

#DEBUG
#print("\nTemperature: %0.1f C" % temp)
#print("Humidity: %0.1f %%" % hum)

while True:
    adv_data = bthome.adv_data(temp,hum)
    adapter.start_advertising(
        adv_data, scan_response=None, connectable=False, interval=INTERVAL * 2
    )
    sleep(INTERVAL)
    adapter.stop_advertising()
    # increase currentTimer
    currentTimer += INTERVAL
    #print (f"Current timer: {currentTimer}")
    if (currentTimer >= readTimer):
        #print (f'Read new values')
        # Read new values
        temp = sensor.temperature
        hum = sensor.relative_humidity
        #reset counter
        currentTimer = 0
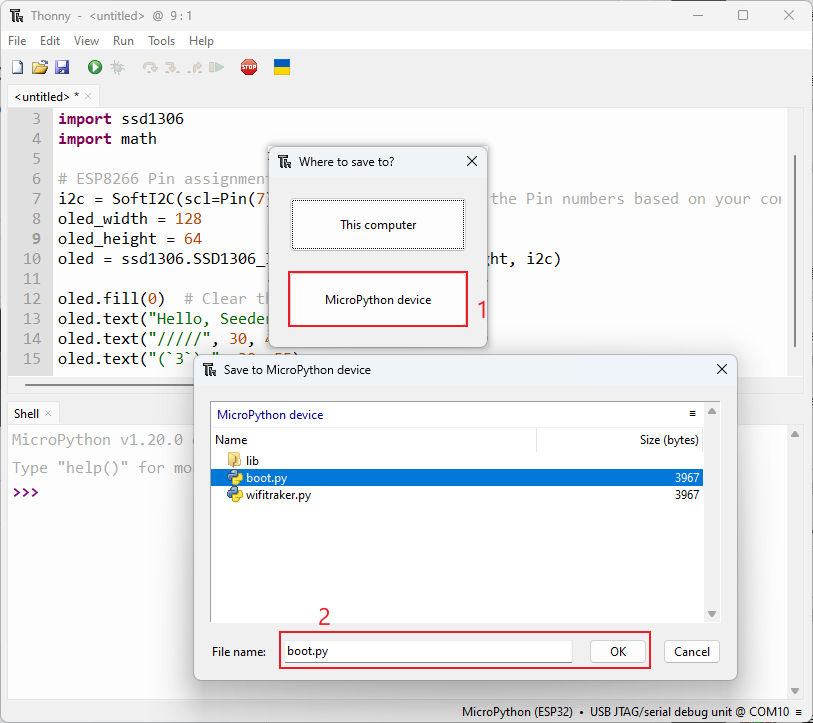
Remember to save it as code.py so it gets executed on boot.
A bit of code explaining
- The code is full of comments to explain it a bit.
- Basically, every 0.2s it is broadcasting the temperature and humidity coming from the DHT20 sensor.
- Because we don't want to overload the sensor and read values every 0.2s, we've placed a timer. It will only read the values every 5 minutes. This time is controlled by the
MINUTES_PER_READINGvariable.
Step 4 - Display data on Home Assistant
Step 4.1 - Add XIAO nRF52840 Sense on Home Assistant
![]()
Home Assistant is a free and open-source software for home automation. It is designed to be a central control system for smart home devices with a focus on local control and privacy.
Home Assistant acts as a central smart home controller hub by combining different devices and services in a single place and integrating them as entities. The provided rule-based system for automation allows creating custom routines based on a trigger event, conditions and actions, including scripts. These enable building automation, alarm management of security alarms and video surveillance for home security system as well as monitoring of energy measuring devices.
You can read more about it on the official site.
Requirements
One crucial requirement is that HA (Home Assistant) has Bluetooth. If you're running HA on a Raspberry PI, chances are you have. All is dependent on the RPi version.
Configuration
On "Step 3 - Upload Code", we coded the XIAO nRF52840 and for the next step, it must be running, so HA can detect it.
Open your HA installation. Go to Settings -> Devices and Services

Now, your Integrations page shows up. Select Bluetooth

And the Integration should appear.

NOTE: If something is not working, check if Passive scanning is not selected

When entering the Integrations page, if you have the XIAO nRF52840 Sense connected, it should already have been detected and will appear on the page.

Press "Configure" to configure this new Integration. Press Submit.

Now you just need to select the area where to put this new sensor and were done.

Next, go again to Settings -> Integrations and select the new BTHome integration

We then are taken to the integration page. We can see that we have 1 device and 3 entities. The entities are the temperature, humidity and signal strength

If we click on the entities, we get a new page where we can have a view of them all.

If instead, we pressed on device, we get the device page with all the options as well the current values. Using this page, we can add it to the dashboard.

By pressing "ADD to DASHBOARD", we get to choose the view where to put it.

After that, we get a view of the card. Just press "ADD TO DASHBOARD" to add it to the dashboard.

If we go to the dashboard, our newly added card with the temperature and humidity broadcasted by the XIAO nRF52840 Sense.

What's More - Deep Sleep Function
I couldn't make it work. If someone has a solution, please leave a comment. You can share your thoughts at GitHub
✨ Contributor Project
- This project is supported by the Seeed Studio Contributor Project.
- Thanks Bruno's efforts and your work will be exhibited.
Tech Support & Product Discussion
Thank you for choosing our products! We are here to provide you with different support to ensure that your experience with our products is as smooth as possible. We offer several communication channels to cater to different preferences and needs.