Getting Started with Seeed Studio Round Display for XIAO
Introduction
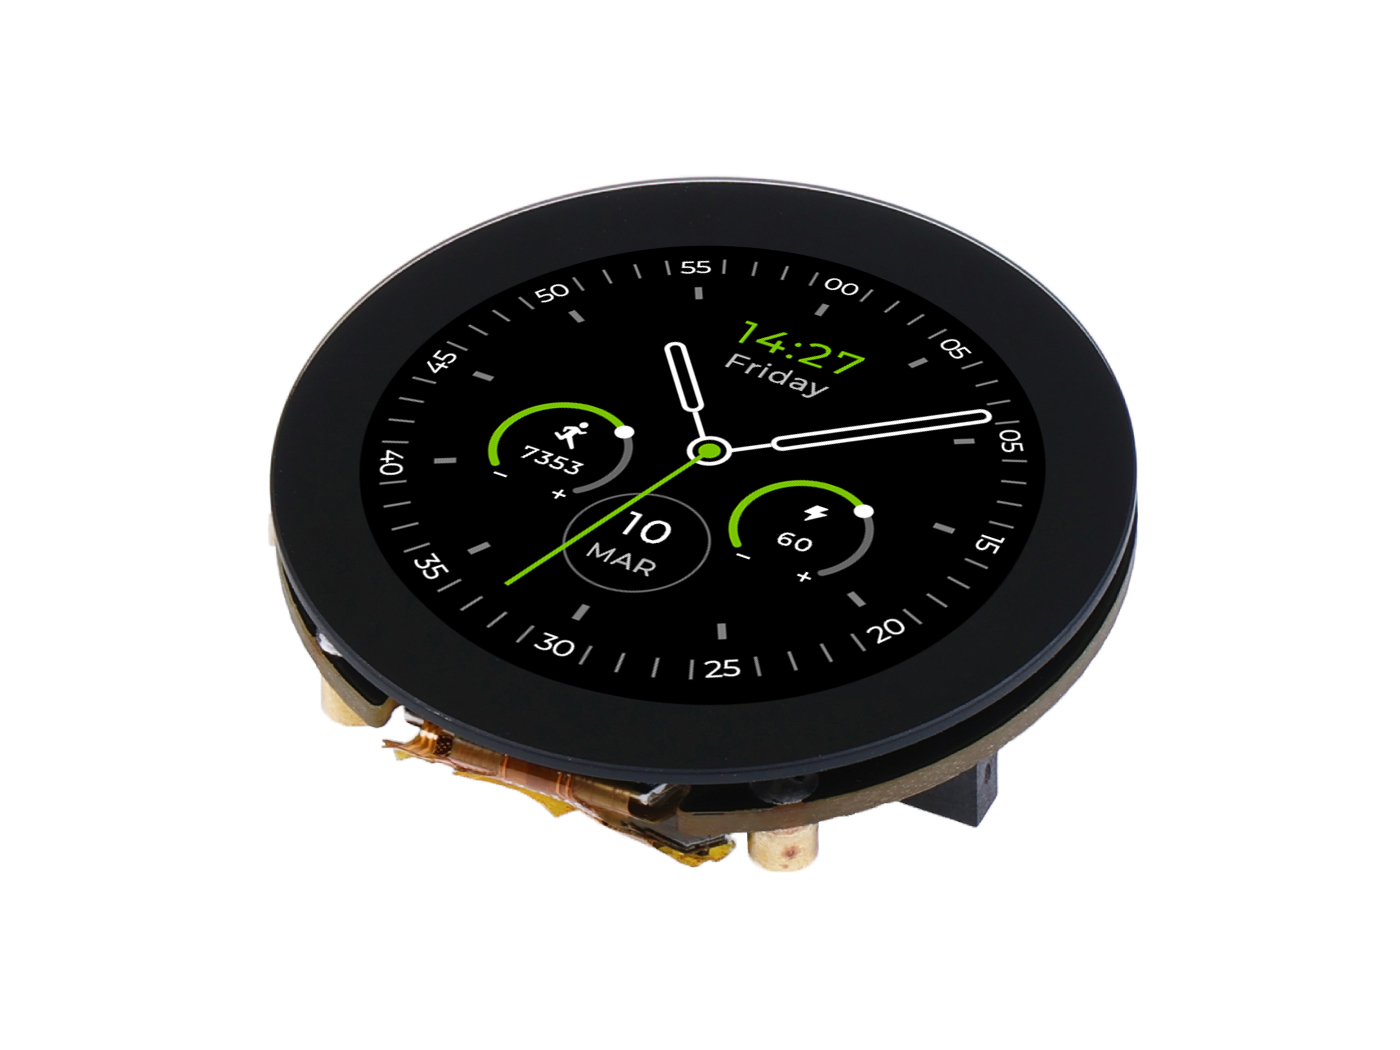
Seeed Studio Round Display for XIAO is an expansion board compatible with all XIAO development boards. It features a fully covered touch screen on one side, designed as a 39mm disc. It contains onboard RTC, charge chip, TF card slot within its compact size, perfect for interactive displays in smart home, wearables and more.
| REV | Description | DATE | BY |
|---|---|---|---|
| v1.0 | Initial Version | 2023/1/29 | Linus.Liao |
| v1.1 | 1.Change Li Battery Charge IC 2.Add a switch to A0 and D6 | 2023/4/7 | Linus.Liao |
Specification
| Item | Detail |
|---|---|
| Power Supply | USB Type-C: 5V @35 mA Battery Charge: 3.7V @37mA |
| Charge current | ~ 485 mA |
| Expandable memory | TF Card Slot for up to 32GB FAT |
| Screen | 1.28-inch touch screen 240×240 resolution 65K colors |
| Other External Equipment | JST 1.25 connector |
| Dimension | 39mm x 39mm |
Features
- Capacitive Touch Screen Expansion Board: Display with 1.28-inch round, 240×240 resolution, 65K colors, providing clear and colorful images exhibition
- High Compatibility: Highly compatible with all XIAO series products, easily integrated into your current projects
- Rich Peripheral: Feature onboard RTC, battery charge chip, TF card slot, JST 1.25 connector, all within its compact size
- Watch-sized Design: Come with 39 mm circular design, suitable for wearable and space-limited projects
- Plug and Play: All pins are led out, no soldering is needed
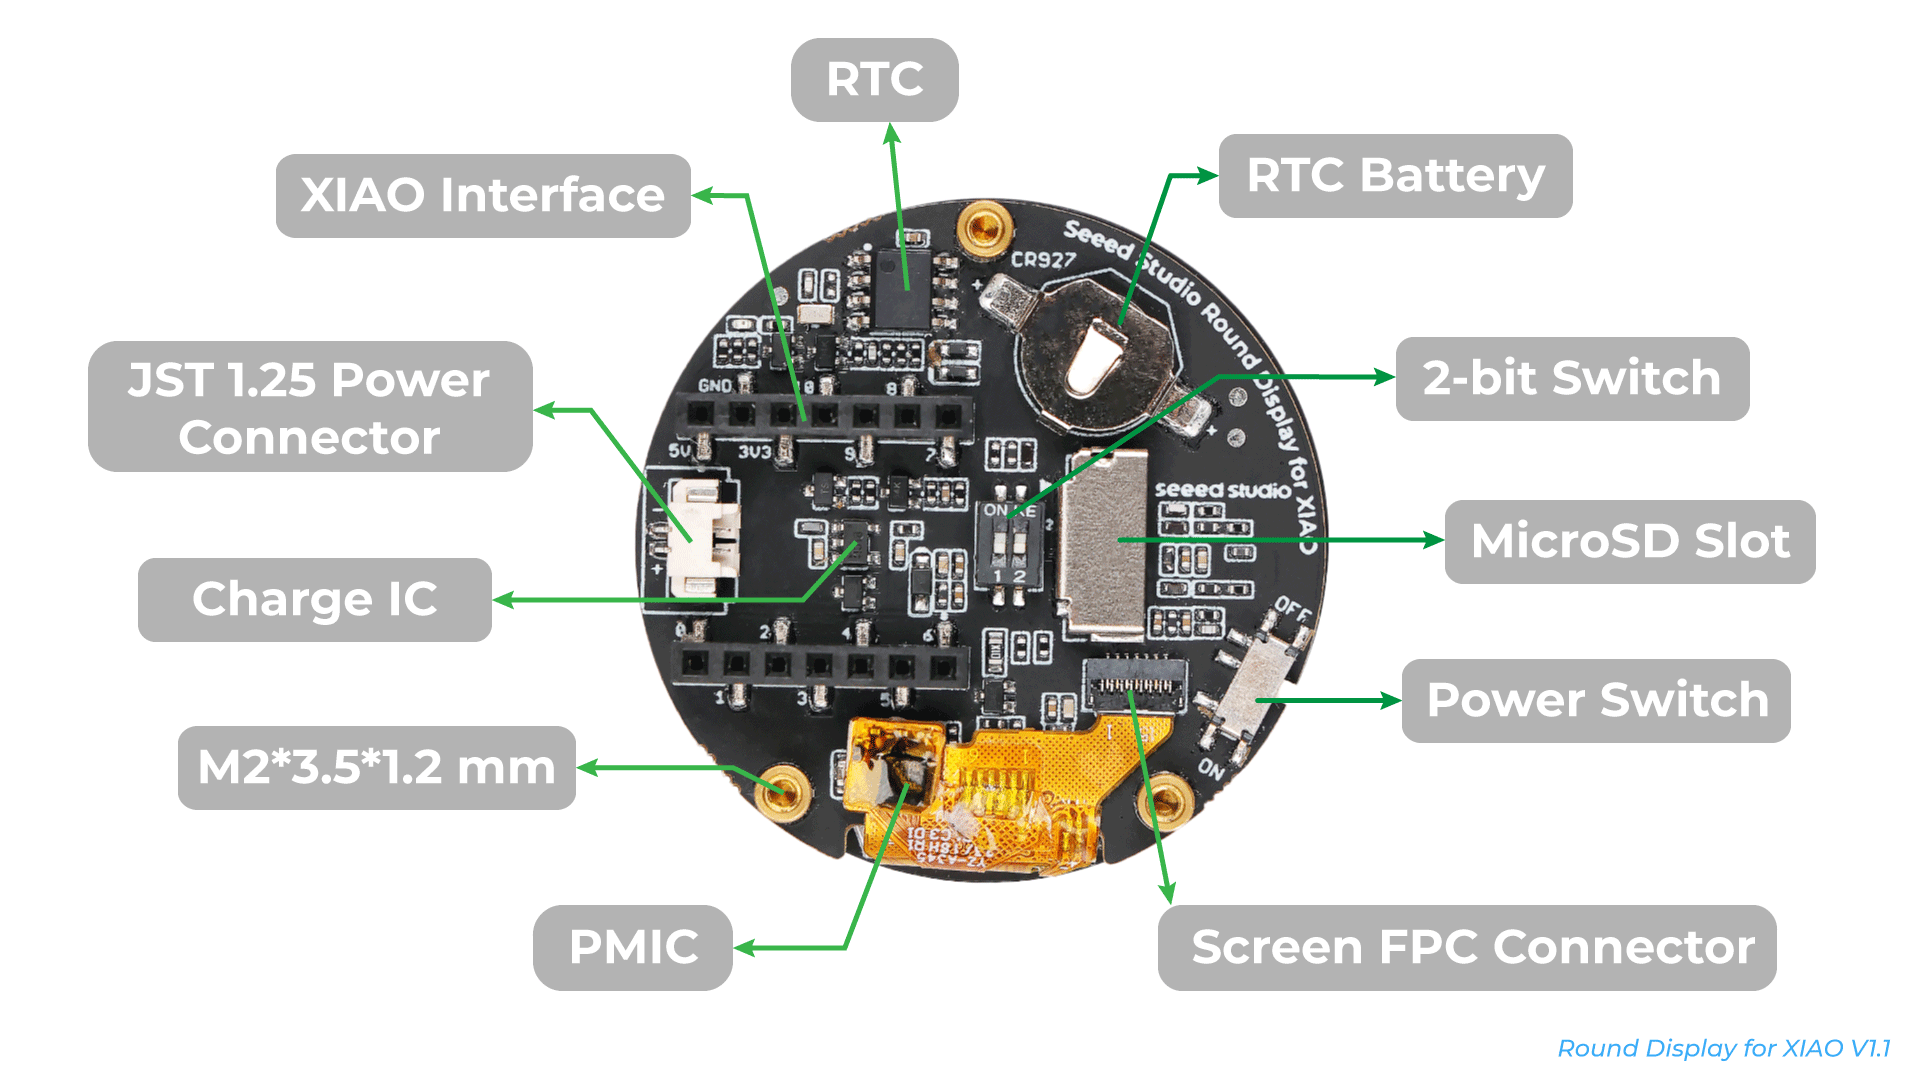
Hardware Overview
Before we start, we can refer to the following pictures to understand the pin design of the Round Display to facilitate our understanding of the function of the Round Display.

Since April 7, 2023, the revamped Round Display adds a 2-bit Switch to control the screen backlight and battery voltage readout. For the user to freely choose whether to use the pin or release it. Click here to read more details.
Getting Started
Hardware Preparation
If you want to take advantage of the full capabilities of the Round Display and have a great experience, we highly recommend that you purchase our XIAO series as the motherboard for the Round Display.
XIAO SAMD21,RP2040 and RA4M1 may not be compatible with circular screens due to insufficient memory.
| Seeed Studio XIAO nRF52840 (Sense) | Seeed Studio XIAO ESP32C3 | Seeed Studio XIAO ESP32S3 (Sense) | Seeed Studio XIAO ESP32C6 |
|---|---|---|---|
 |  |  |  |
The row of pins on the back of Round Display is designed for XIAO series. If you have XIAO on hand, you don't need to prepare any additional cables, just align the pins of XIAO and plug them directly into Round Display.
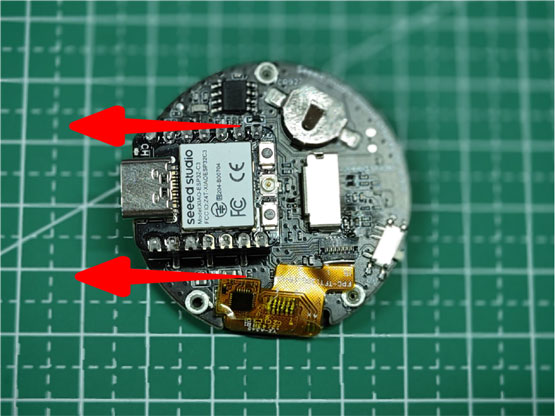
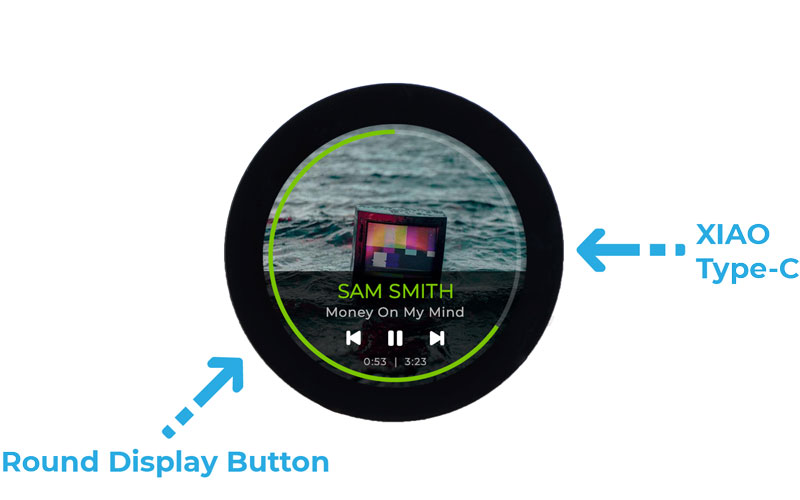
Please note that when connecting the XIAO, the Type-C connector of the XIAO should be facing the outside of the Round Display. If you accidentally reversed polarity, don't worry too much, the Round Display has a power protection circuit that won't be easily damaged, but we don't recommend you to stay in the reverse connection for a long time.
The recommended orientation for Round Display is: when you face Round Display, the XIAO's Type-C connector faces to the right, so that the on/off button of Round Display is in the lower left corner.
Software Preparation
To use the Round Display, we need to program the XIAO series. The recommended programming tool is the Arduino IDE, and you need to configure the Arduino environment for the XIAO and add the on-board package.
If this is your first time using Arduino, we highly recommend you to refer to Getting Started with Arduino.
Step 1. Download and Install the stable version of Arduino IDE according to your operating system
Step 2. Launch the Arduino application
Step 3. Configure the Arduino IDE for the XIAO you are using
-
If you want to use Seeed Studio XIAO RP2350 for the later routines, please refer to this tutorial to finish adding.
-
If you want to use Seeed Studio XIAO nRF52840 for the later routines, please refer to this tutorial to finish adding.
-
If you want to use Seeed Studio XIAO ESP32C3 for the later routines, please refer to this tutorial to finish adding.
-
If you want to use Seeed Studio XIAO ESP32C6 for the later routines, please refer to this tutorial to finish adding.
-
If you want to use Seeed Studio XIAO ESP32S3 for the later routines, please refer to this tutorial to finish adding.
Step 4. Installation of graphics libraries and screen driver libraries
To use round display, we need to install two libraries in advance. One is the round display device driver library, which is used to drive the screen and touch functions of the device. The other is the graphics display library, which provides some very common interfaces for drawing graphics.
- Download the Seeed_Arduino_RoundDisplay library from GitHub:
- Download the Seeed_GFX library from GitHub:
- Install the library by adding the ZIP file in Arduino IDE. Go to Sketch > Include Library > Add .ZIP Library and select the downloaded ZIP file.
If you have previously installed the TFT_eSPI library, you may need to temporarily remove or rename it from your Arduino libraries folder to avoid conflicts, as Seeed_GFX is a fork of TFT_eSPI with additional features.
Arduino Library Overview
As we can probably tell from the above tutorial, Round Display mainly uses LVGL, TFT_eSPI and Arduino GFX libraries. For the sake of space, we will introduce the use of LVGL and TFT_eSPI libraries separately with the example of drawing a dial.
-
You can learn about the interface and use of the TFT_eSPI library by clicking here.
-
You can learn about the interface and use of the LVGL library by clicking here.
-
You can learn about the interface and use of the Arduino GFX library by clicking here.
Light up your Round Display
Demo 1: Arduino Life - How to use Seeed_GFX library on round display
Open the example sketch from the Seeed_GFX library: File > Seeed_GFX > Examples > Round Display > Arduino_Life
Create a new file named driver.h in the same folder as your Arduino sketch by clicking on the arrow next to the example tab and selecting "New Tab".
Name the new file as driver.h.

Go to the Seeed GFX Configuration Tool, and select "Round Display for Seeed Studio XIAO" as shown in the image.

Copy the generated code and paste it into the driver.h file you created. The code should look like this:
#define BOARD_SCREEN_COMBO 501 // Round Display for Seeed Studio XIAO (GC9A01)
Now you can upload the example to your Round Display and see the LCD display in action!

Note that the code for all subsequent screens needs to be accompanied by a driver.h file, which is used to select the type of screen to use.
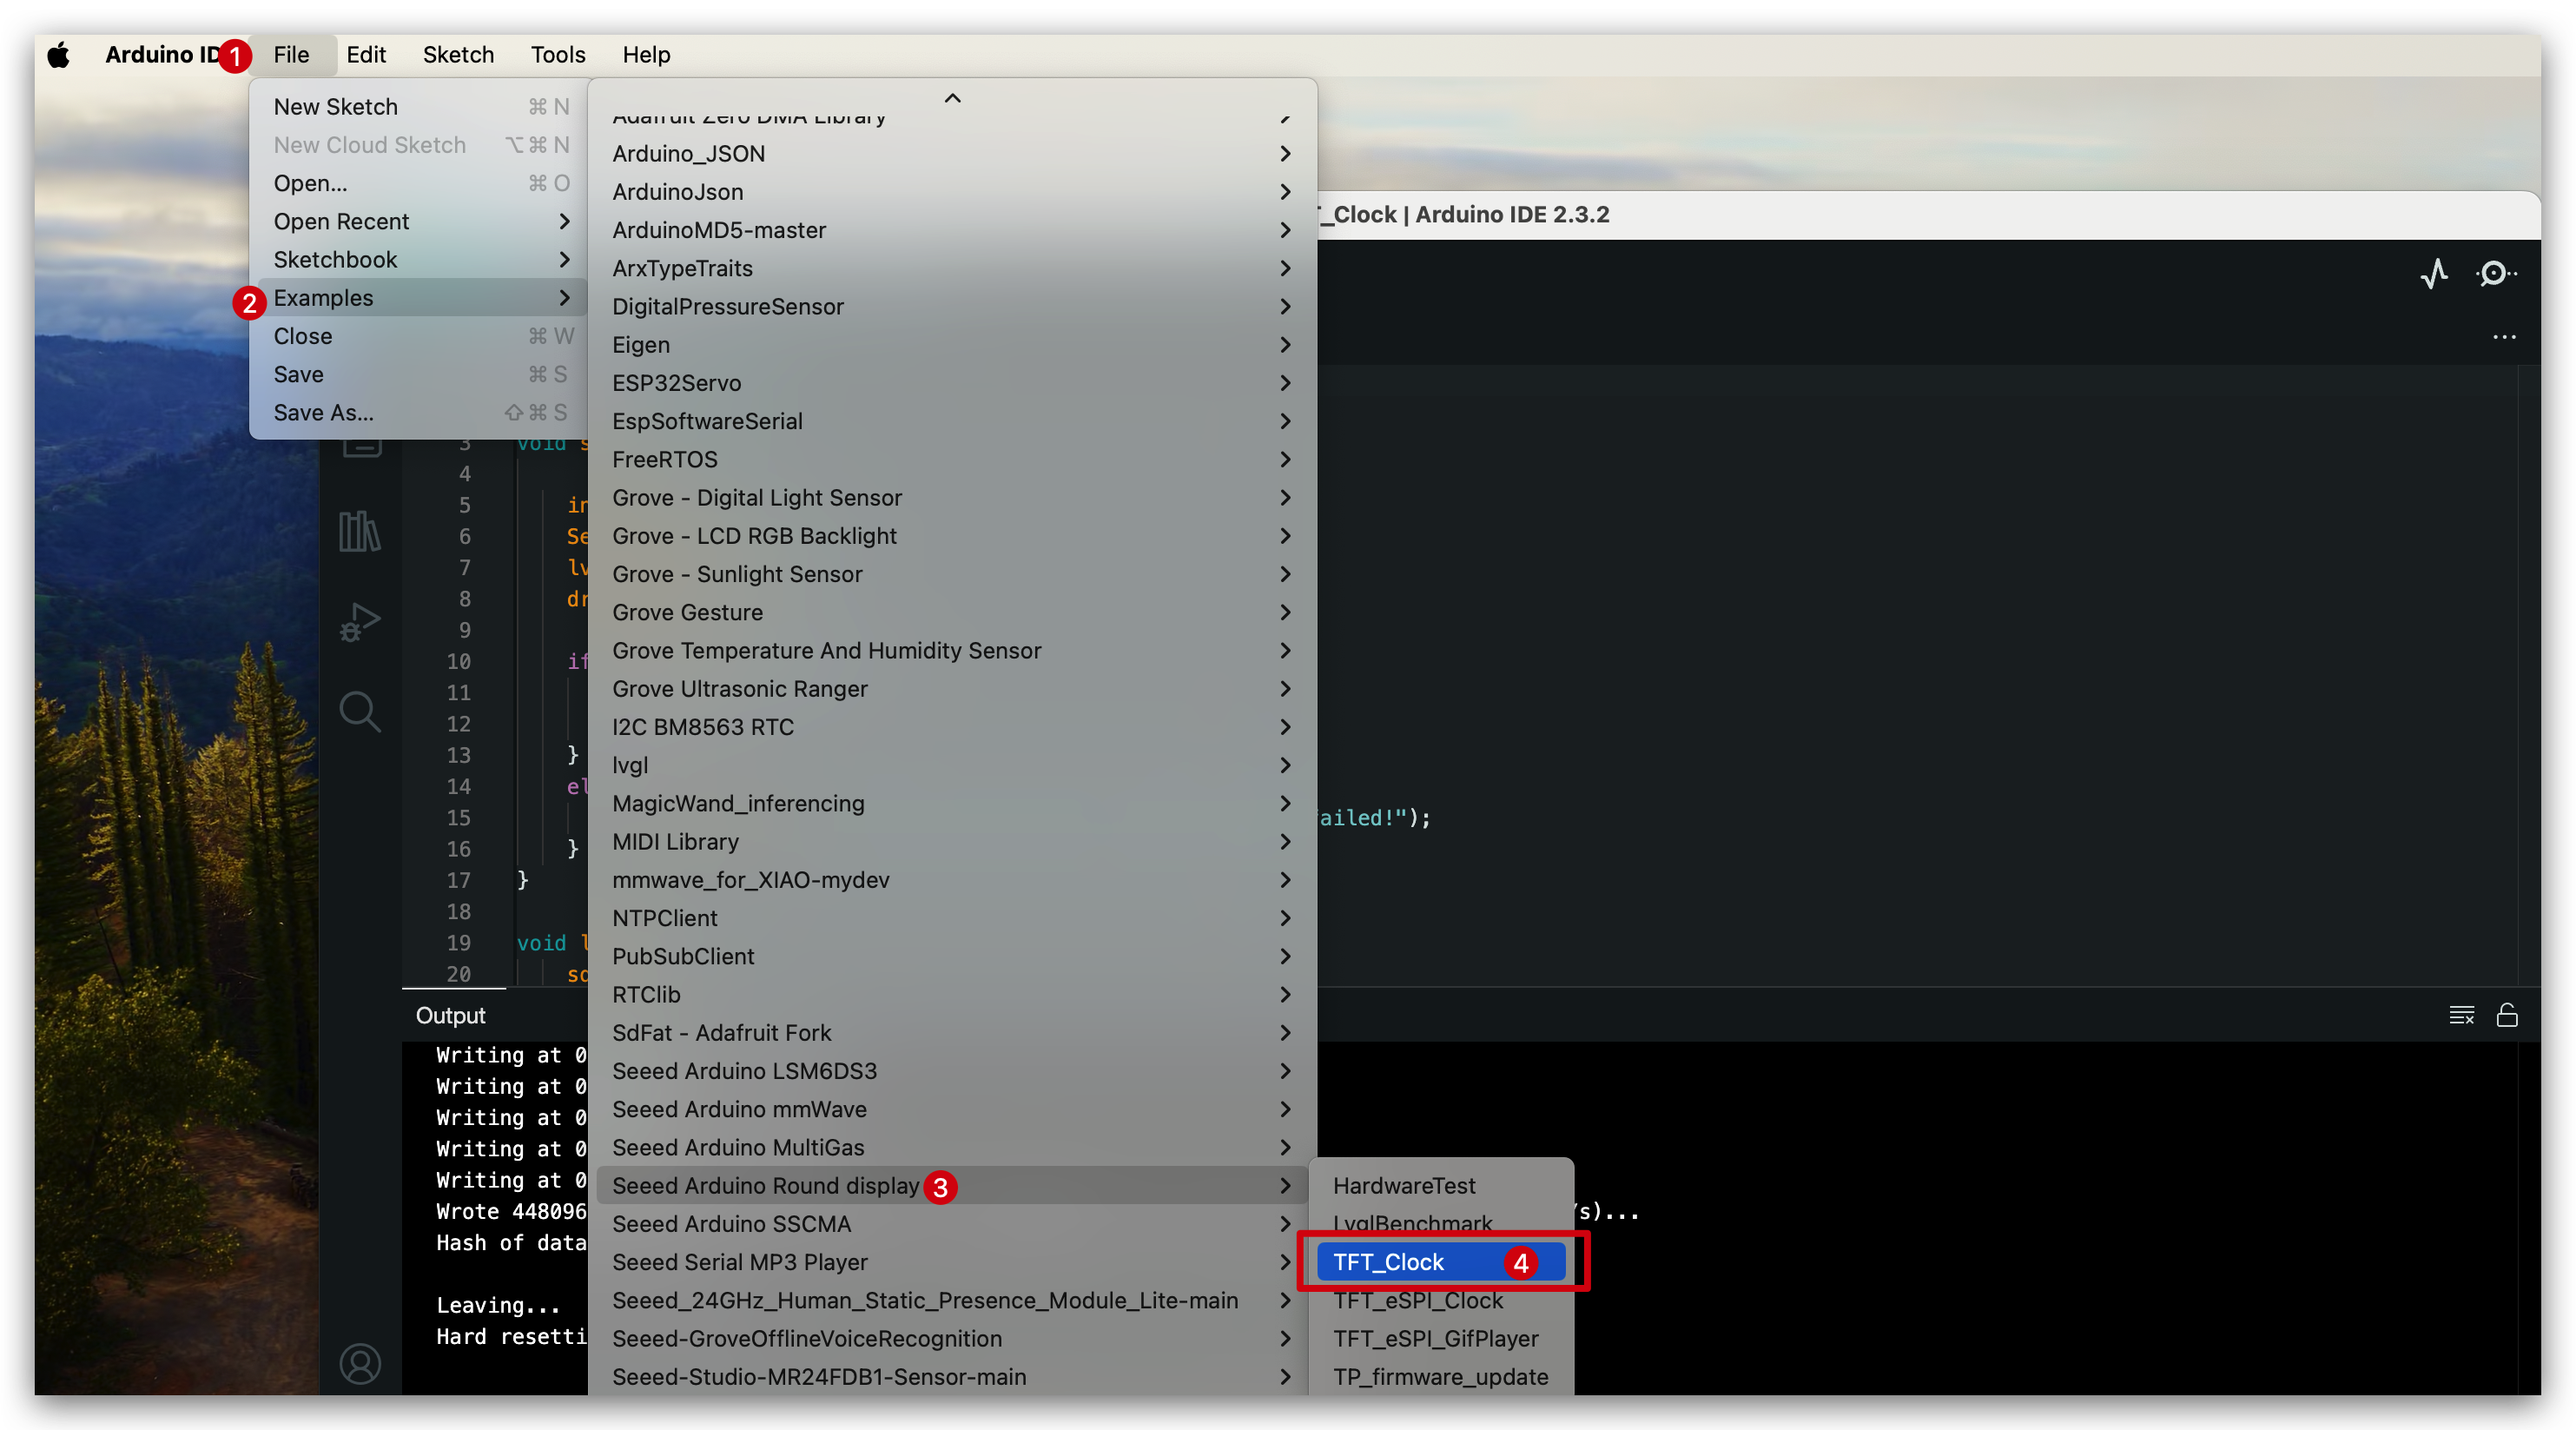
Demo 2: TFT Clock
Please refer to Demo1, create a new driver.h file in the same directory as the .ino file, and keep the following code on it: #define BOARD_SCREEN_COMBO 501
We need to use the RTC function on the round display, so you also need to search and install the I2C BM8563 RTC library.
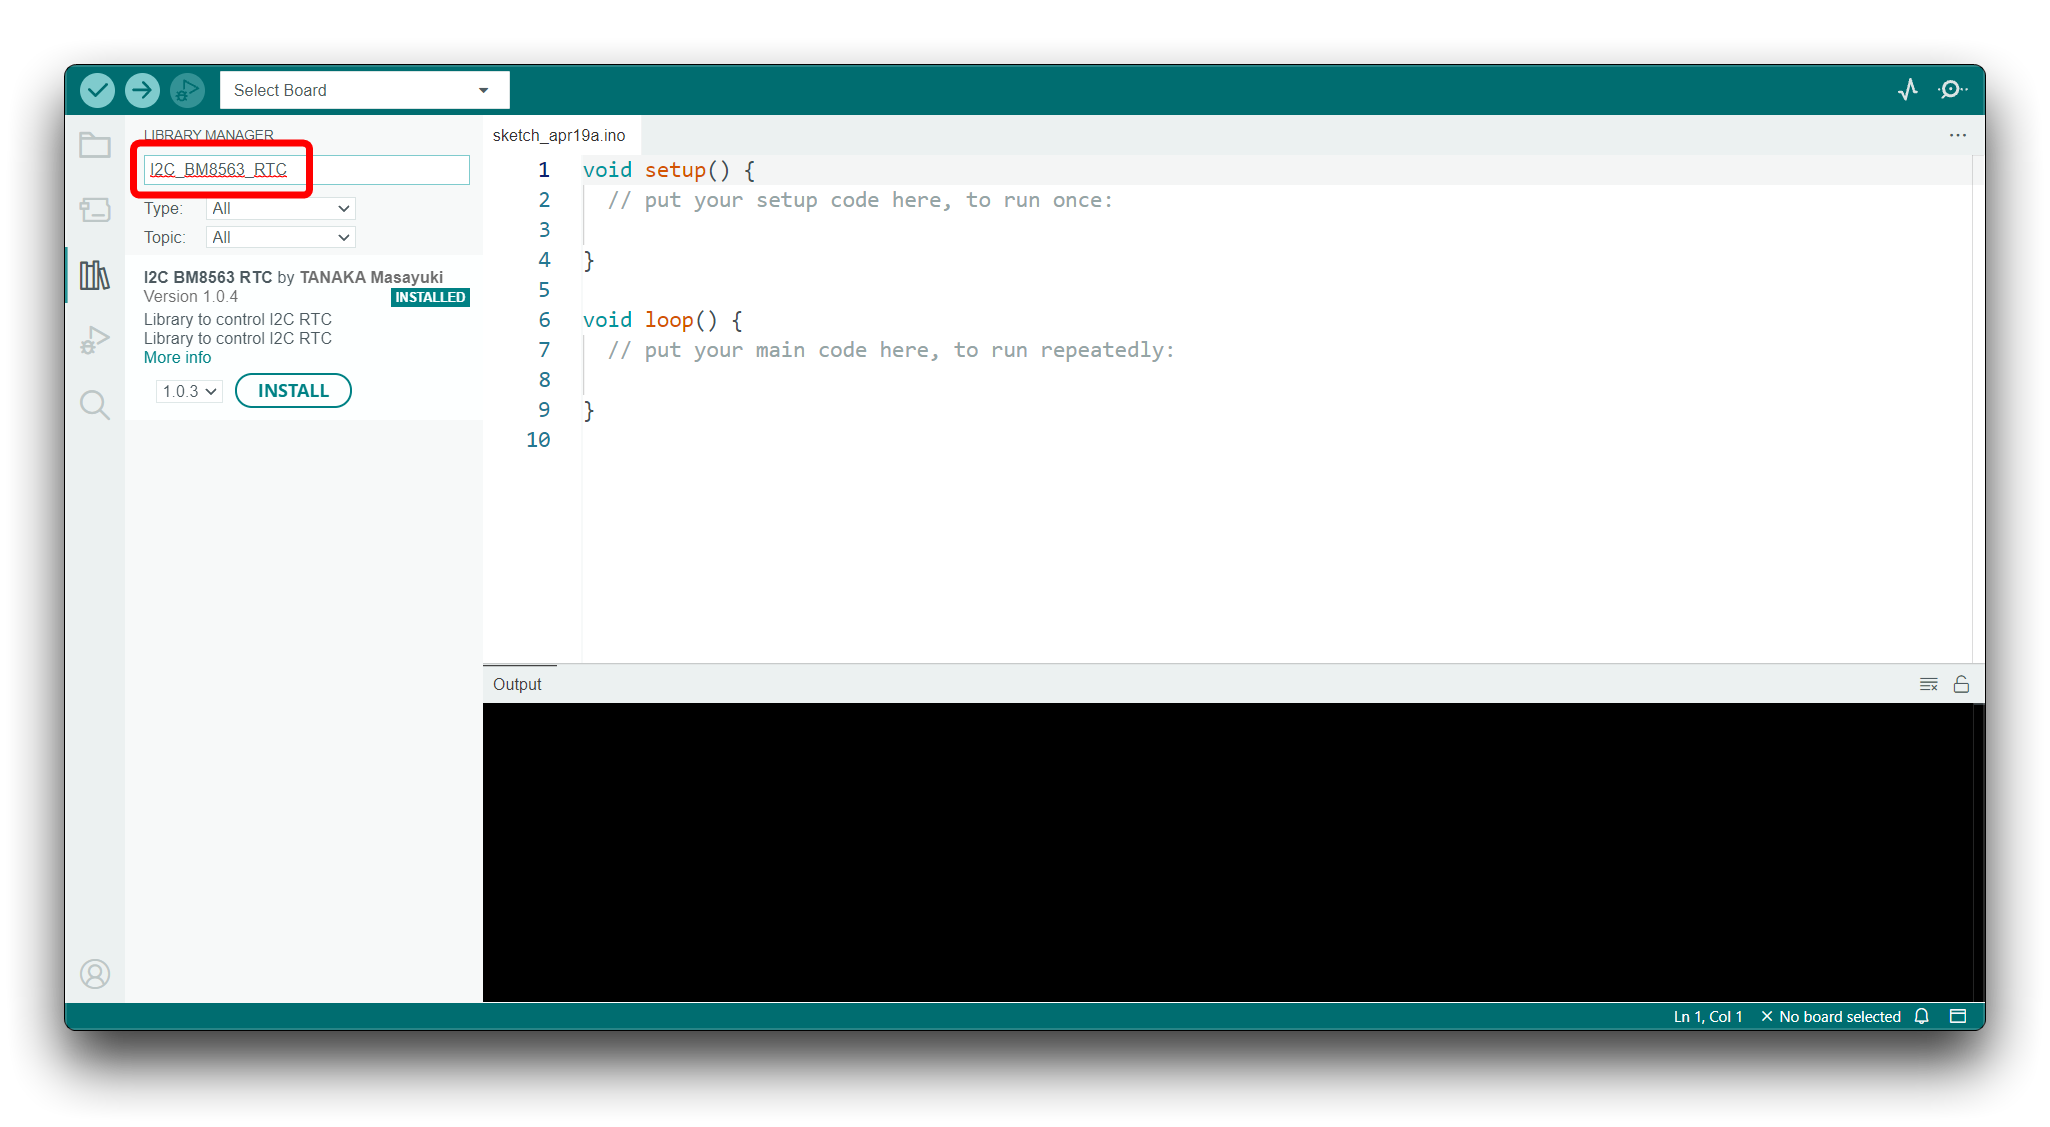
Once the hardware and software are ready, we start uploading our first example program. This sample program can be used to check if the Round Display's RTC clock are working properly. Because this demo requires a small amount of memory, suitable for all XIAO models.
If you want to modify this demo to implement more complex displays, please be mindful of the memory size of the XIAO you are using. The specific size can be found on the introduction page of that XIAO.
You can find this sample program in the Arduino IDE under File -> Examples -> Seeed Arduino Round display -> TFT_Clock.
Just select the XIAO you are using and the port number where the XIAO is located, compile and upload it.
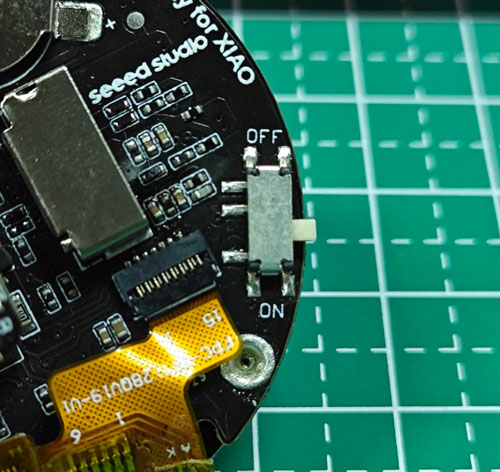
Make sure the Round Display switch is toggled to the ON position.
If the program runs smoothly, you will see the following effect.

Demo 3: Hareware Test
Please refer to Demo1, create a new driver.h file in the same directory as the .ino file, and keep the following code on it: #define BOARD_SCREEN_COMBO 501
Because the HardwareTest demo is a bit complex and occupies a larger amount of memory, some XIAO models may fail to run successfully due to insufficient memory. We have created a test table for your reference, using TFT library and Arduino GFX library.
| TFT library | Arduino GFX | |
|---|---|---|
| XIAO SAMD21 | ❌ | ❌ |
| XIAO RP2040 | ❌ | ❌ |
| XIAO RA4M1 | ❌ | ❌ |
| XIAO nRF52840 non mbed version | ✅ | ❌ |
| XIAO nRF52840 mbed version | ❌ | ✅ |
| XIAO ESP32C3 | ✅ | ✅ |
| XIAO ESP32C6 | ✅ | ❌ |
| XIAO ESP32S3 | ✅ | ✅ |
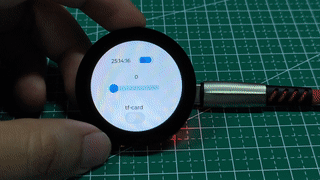
This sample program can be used to check if the Round Display's RTC clock, SD card and touch functions are working properly.
We need to use the RTC function on the round display, so you also need to search and install the I2C BM8563 RTC library.
You can find this sample program in the Arduino IDE under File -> Examples -> Seeed Arduino Round display -> HardwareTest.
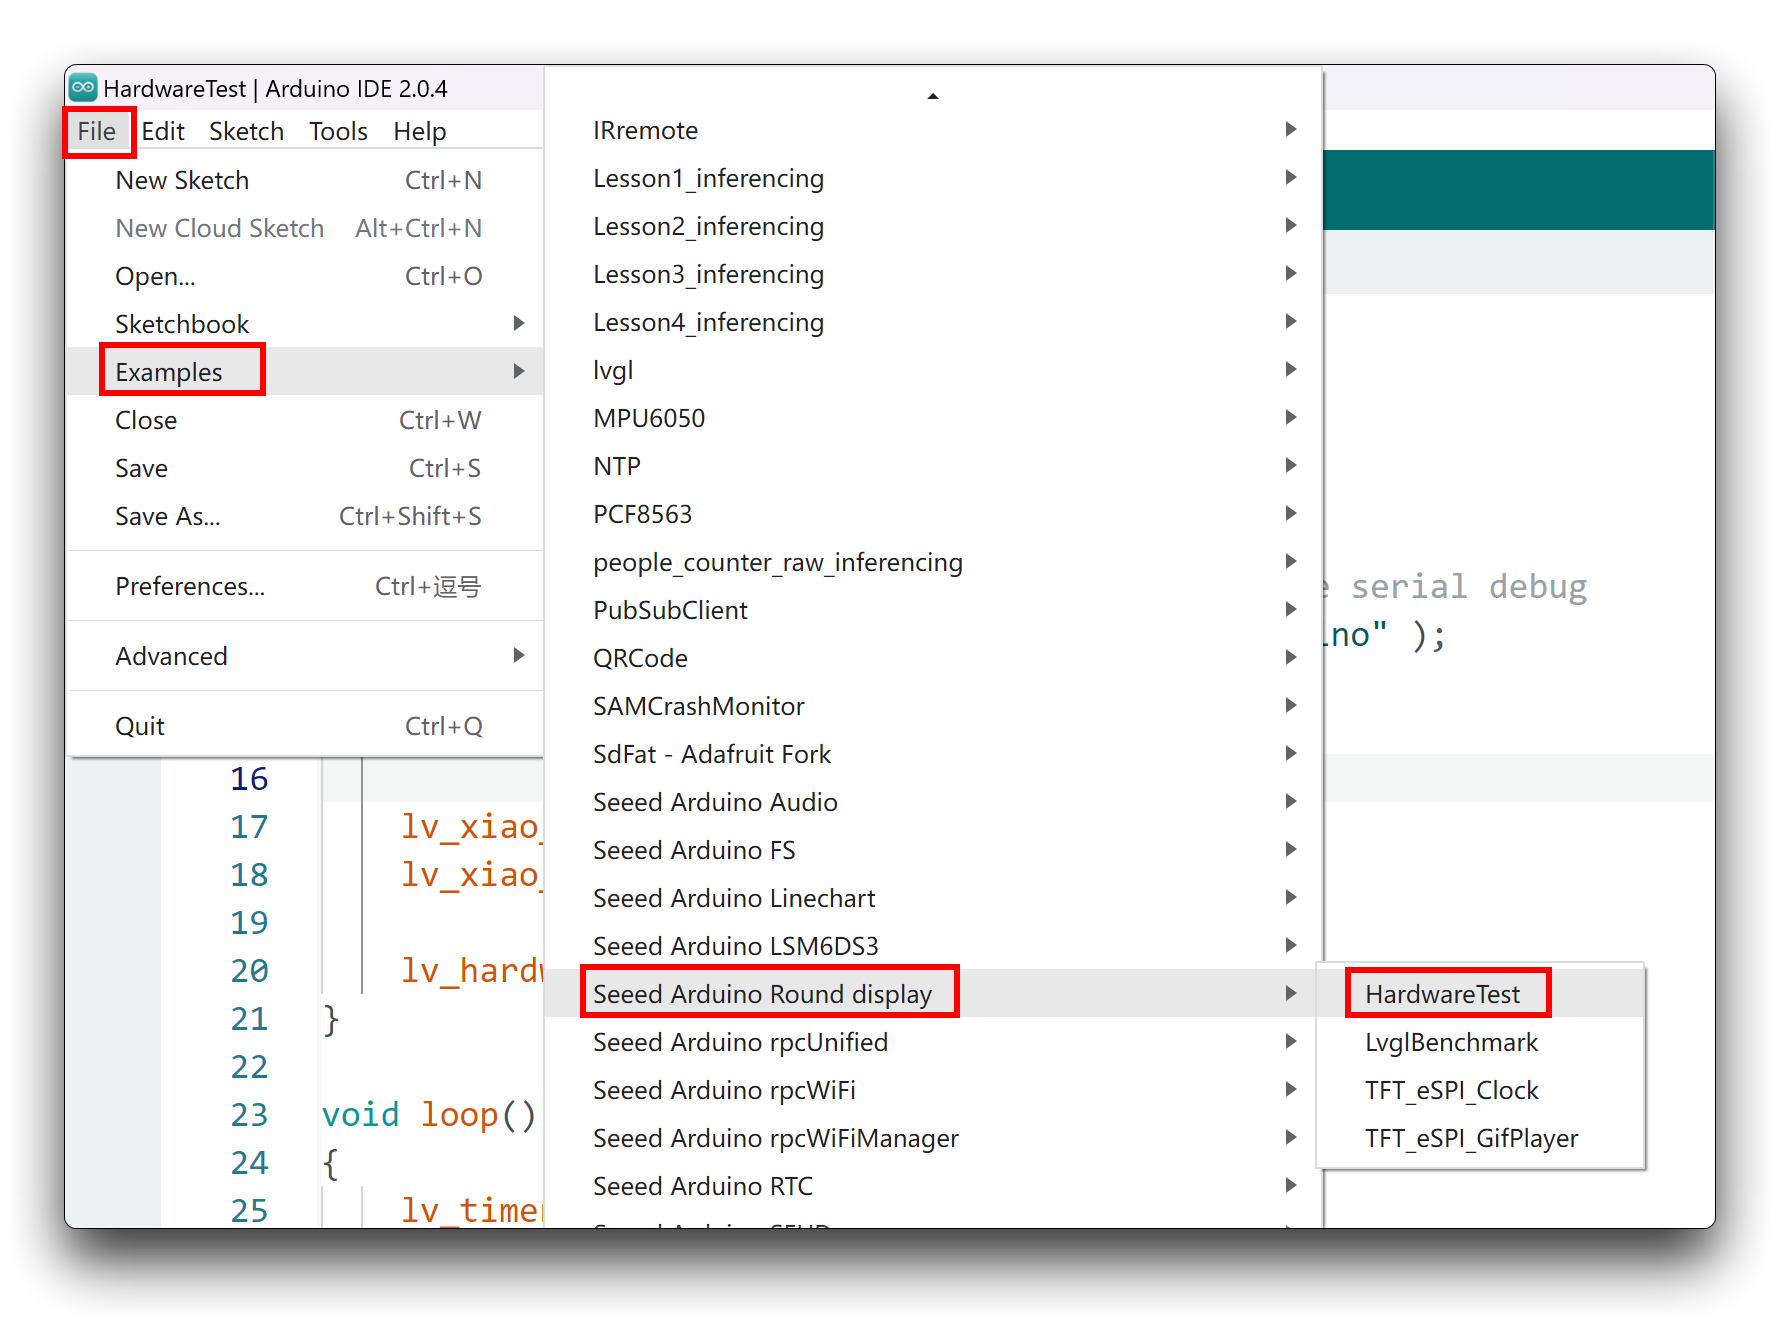
Just select the XIAO you are using and the port number where the XIAO is located, compile and upload it.
Make sure the Round Display switch is toggled to the ON position.
If the program runs smoothly, you will see the following effect.
This sample program will test all the functional items of the expansion board, including the RTC function. If you do not have the I2C BM8563 RTC library installed, then an error may be reported, you can comment out the function lv_hardware_test(), then the functional detection of the SD card will also be turned off.
Calibration Firmware Update
If you find that the touch is sometimes unresponsive, you can follow the steps below to update the calibration firmware for the screen.
- Download codes from this link
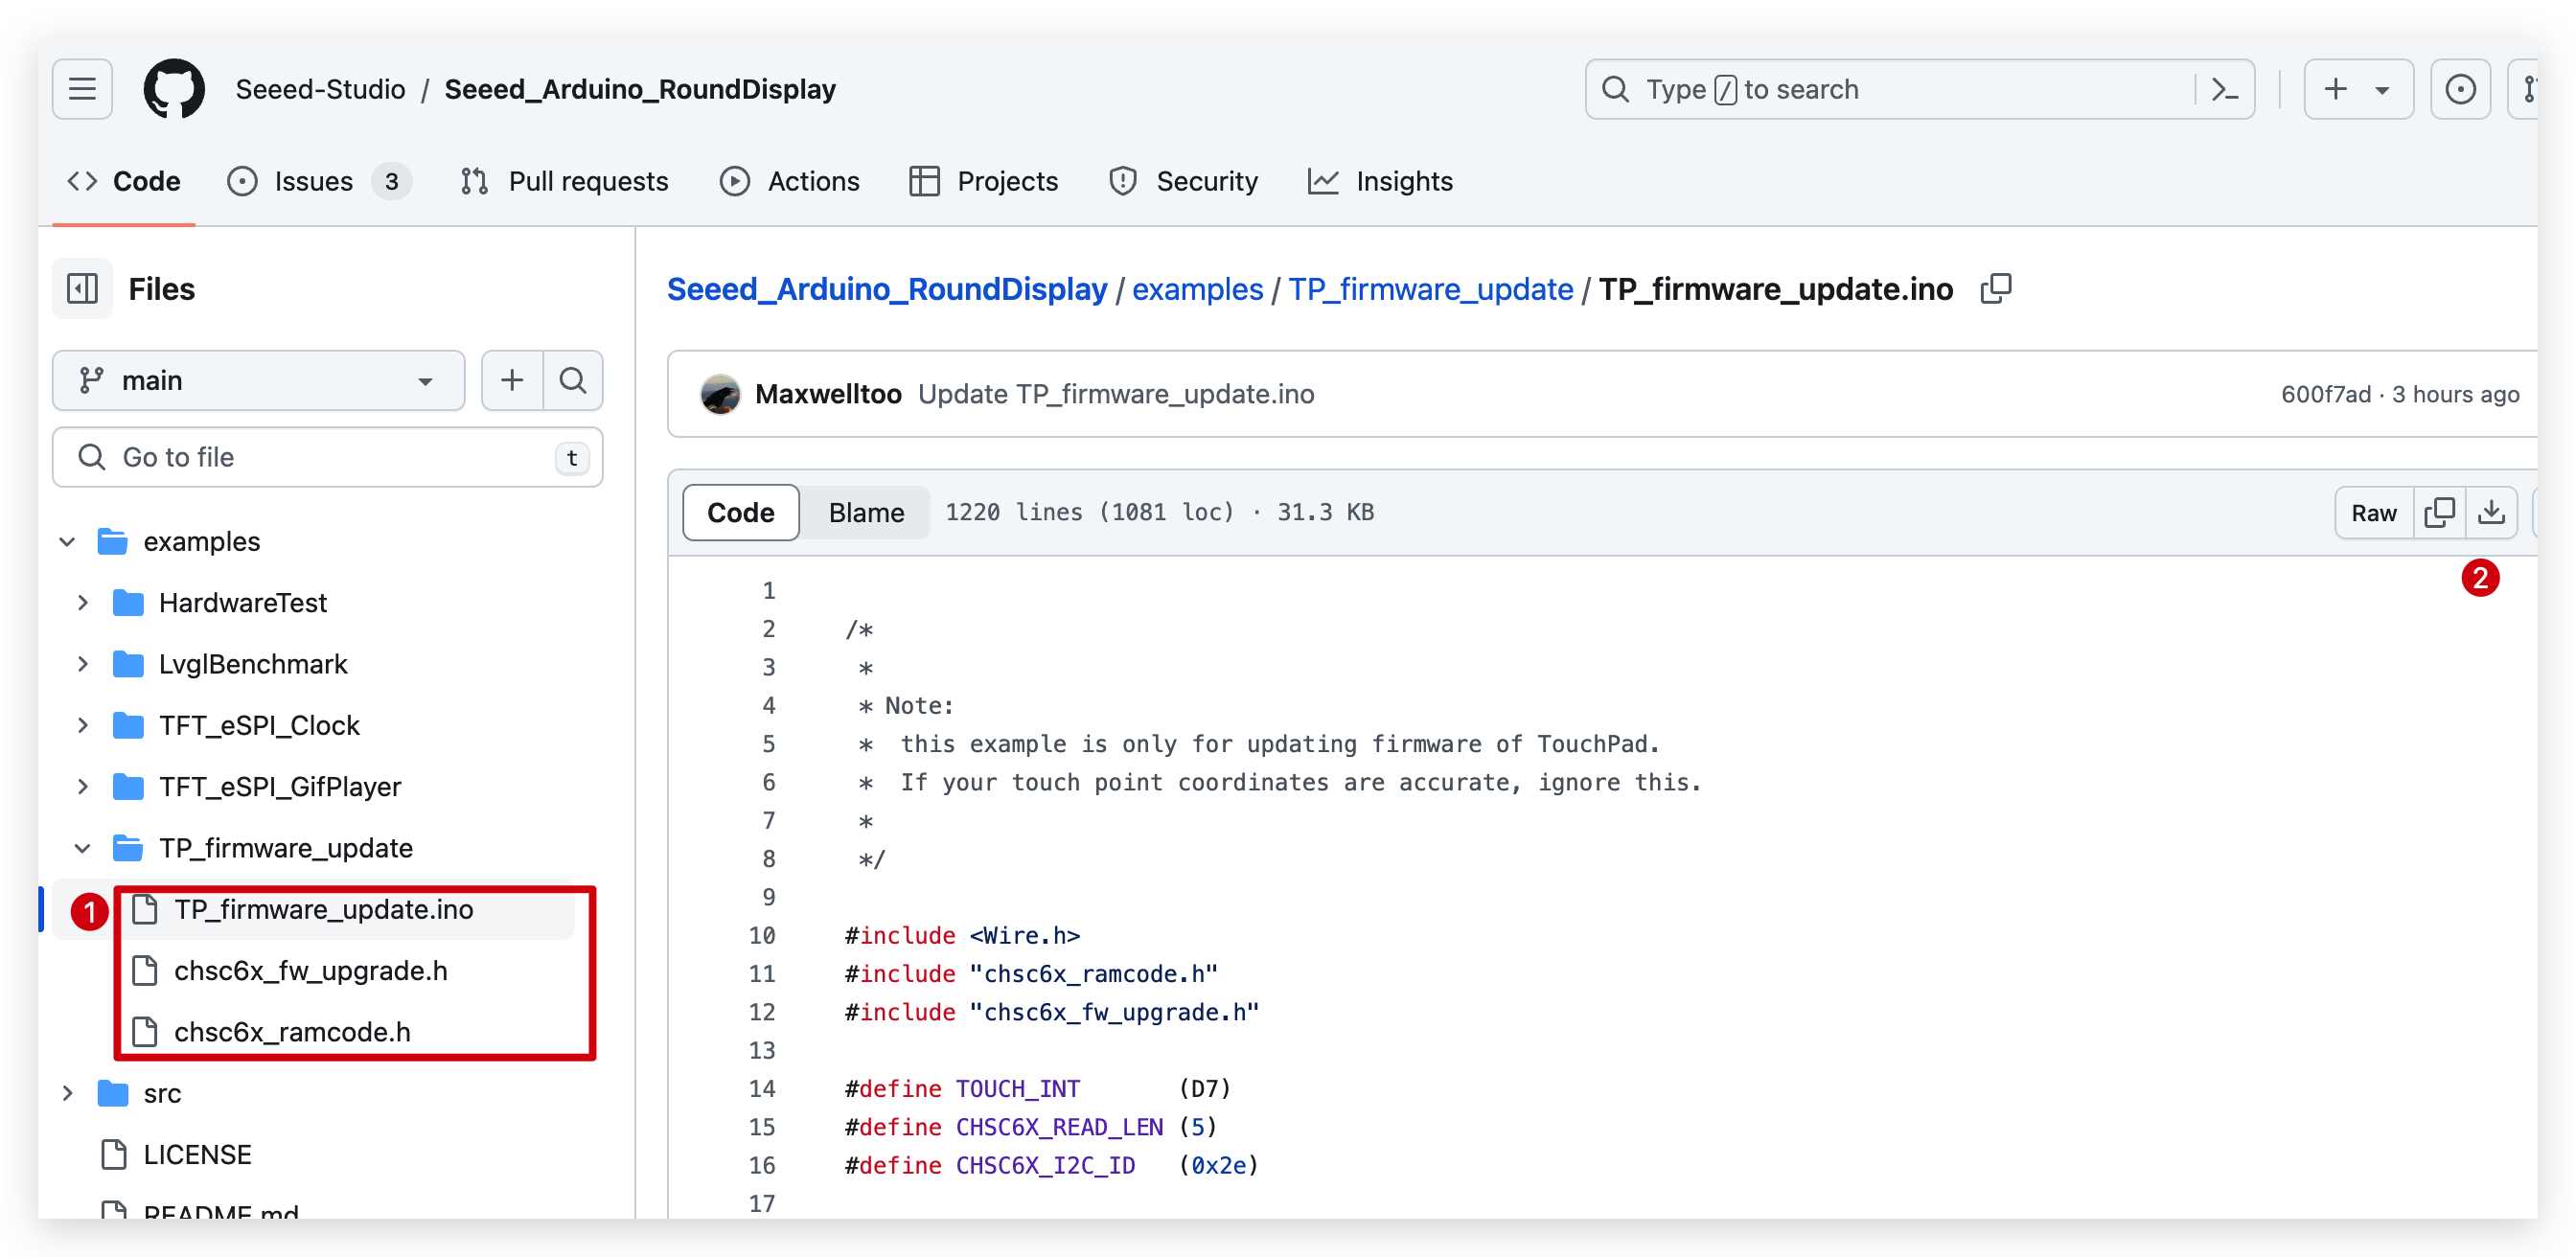
- Put them in the same directory and run this firmware.
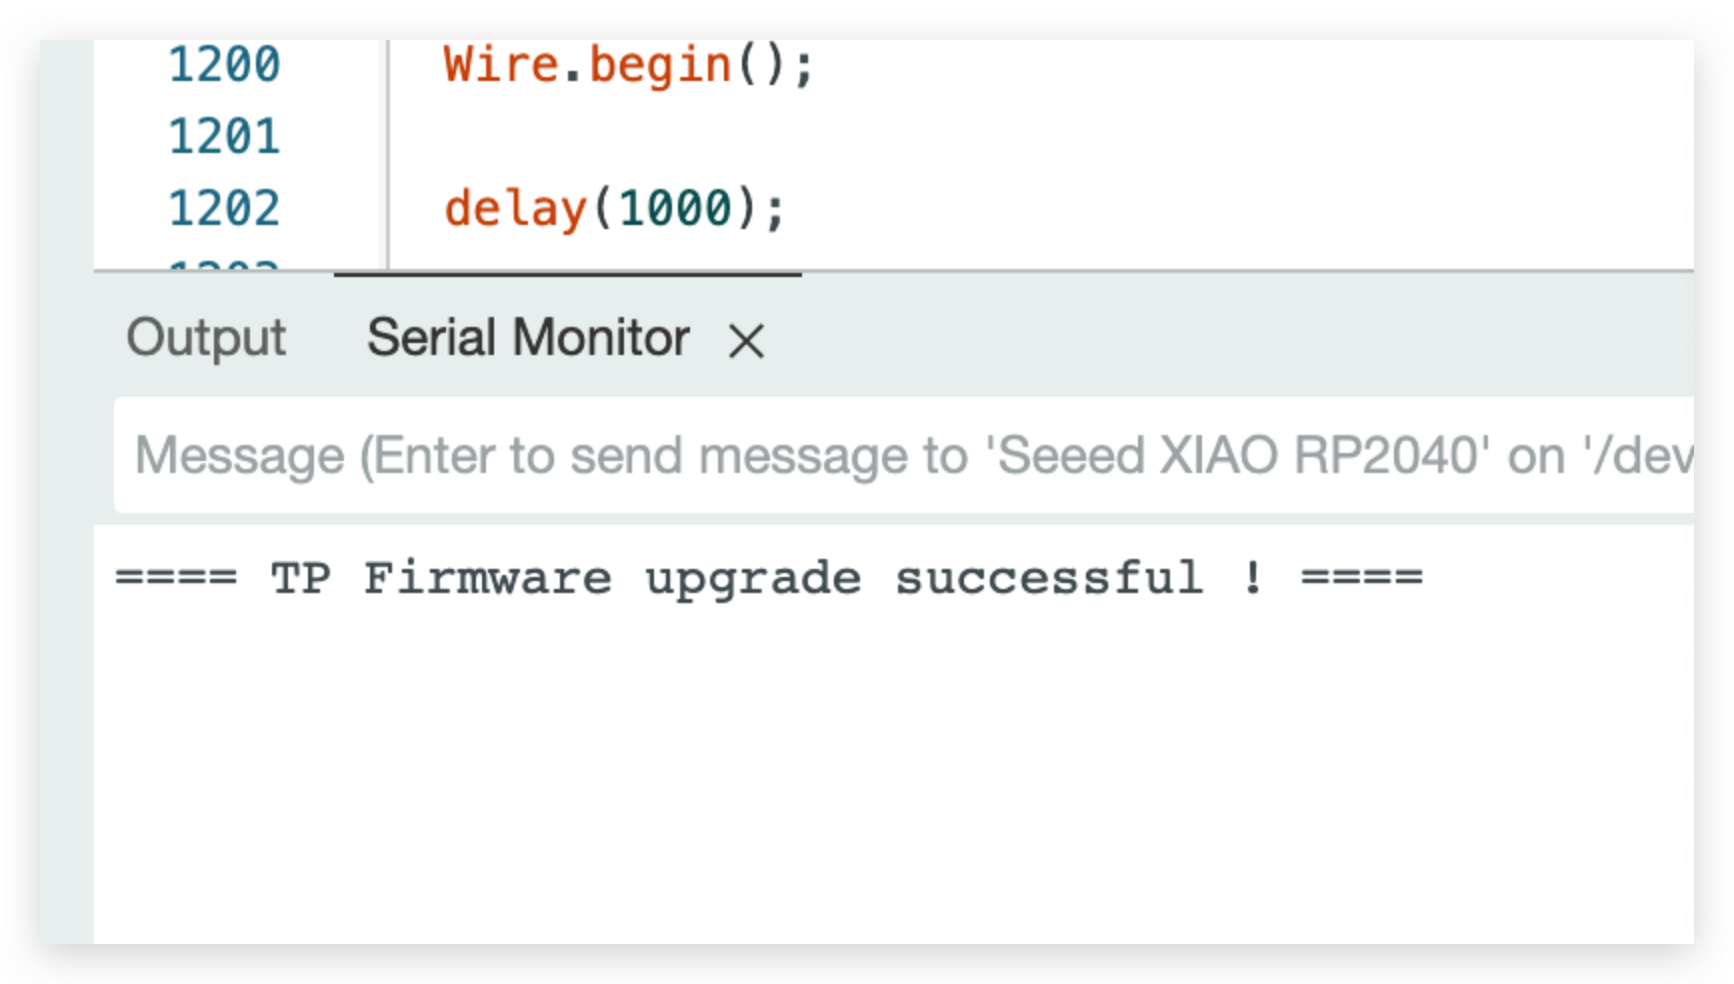
- Open serial monitor and you will see successful message like this image below, which means update successfully and you can upload your program to try it!
Troubleshooting
Q1: Why doesn't the display show anything after I upload the program?
A: Please check that the Round Display switch is turned on. If you are using the XIAO ESP32C3, you may also need to press Reset after uploading the program to make it work.
Q2: If I want to connect Seeed Studio XIAO ESP32S3 Sense to this extension screen, will there be a conflict with two TF card slots?
A: This does not create a conflict. The different SD card slots are controlled via chip select, if you want to use the microSD card slot on Sense, the chip select pin should be 21, if you want to use the microSD card slot on Round Display, the chip select pin should be D2.
We have examples of using both hardware and microSD cards in the S3 Sense camera tutorial.
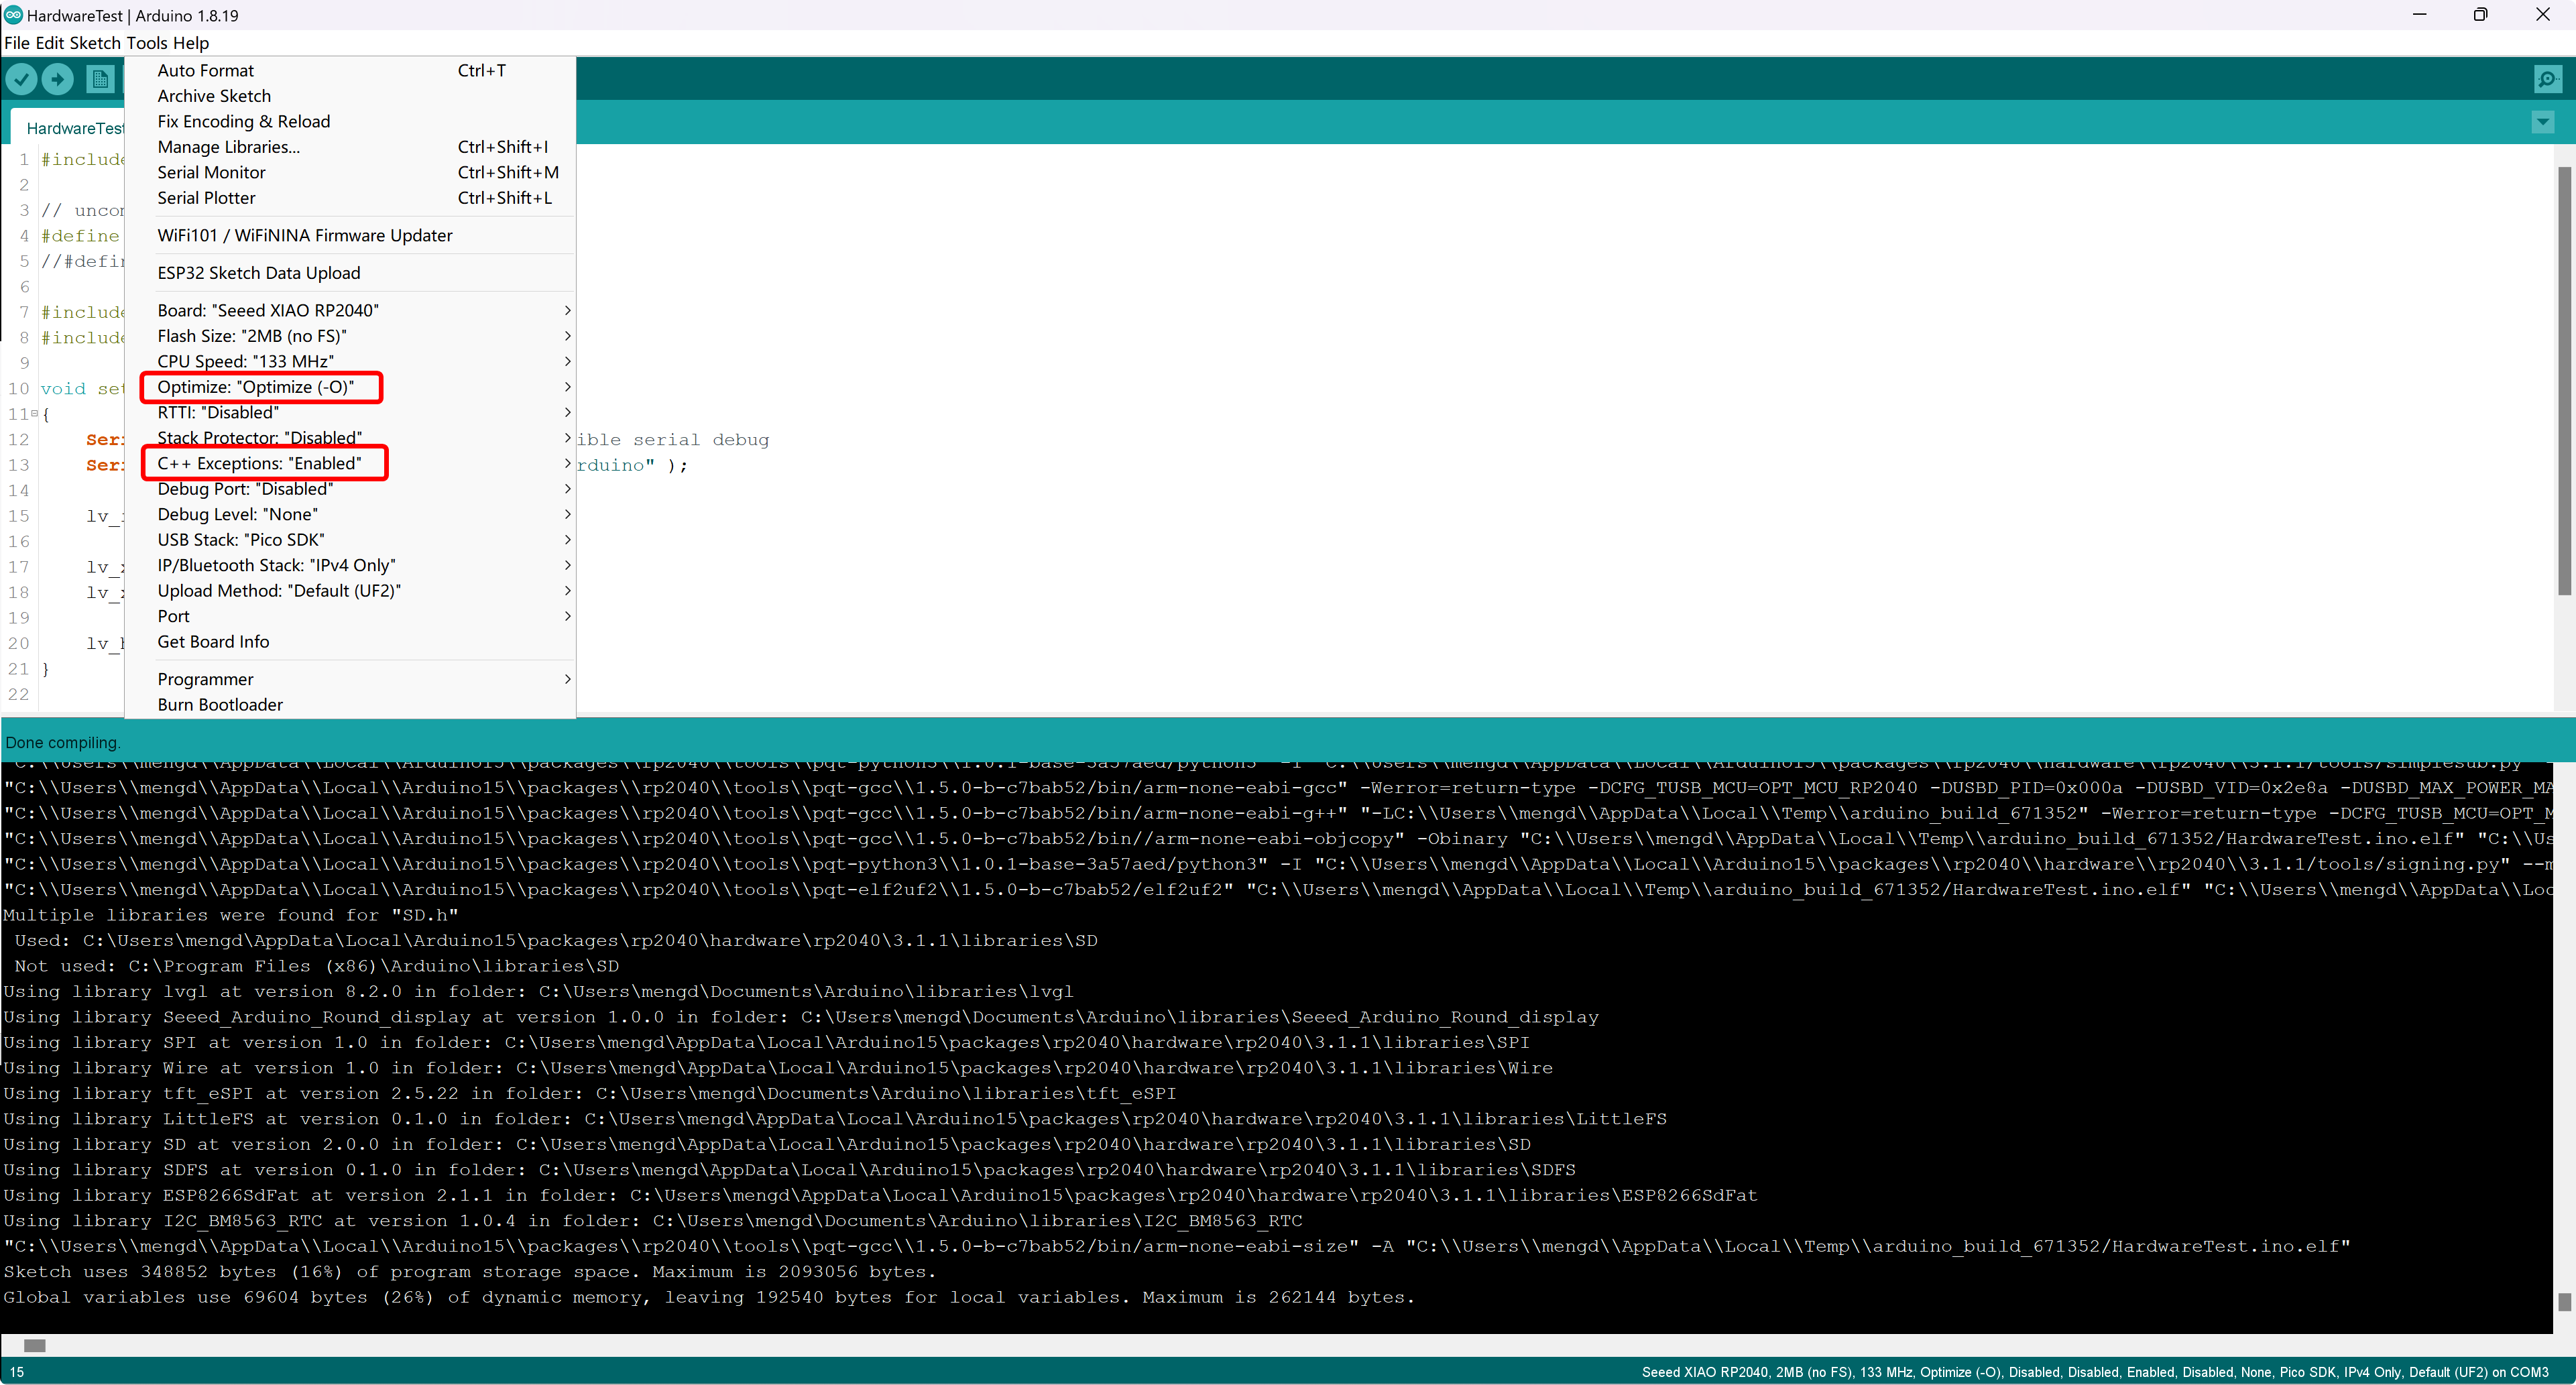
Q3: Why does my XIAO RP2040 get a very strange C++ error when using the code for HardwareTest with Round Display?
A: This may be caused by you not selecting the appropriate compile option for the XIAO RP2040. Please refer to the diagram below to set and re-upload the program.
Resources
- [PDF] Charge IC datasheet
- [PDF] ETA3410 datasheet
- [PDF] RTC PCF8563 datasheet
- [PDF] 1.28'' a-Si TFT Liquid Crystal Display datasheet
- [PDF] Seeed Studio Round Display for XIAO SCH
- [PDF] Seeed Studio Round Display for XIAO SCH v1.1
- [PDF] GJX0128A4-15HY Datasheet
- [ZIP] Seeed Studio Round Display for XIAO SCH&PCB
- [ZIP] Seeed Studio Round Display for XIAO SCH&PCB v1.1
- [3DM] The 3D model of the Round Display for XIAO
- [STL] The 3D model diagram of the shell for Round Display
- [STL] Seeed Studio XIAO ESP32 S3 Sense Case With Round Screen
Tech Support & Product Discussion
Thank you for choosing our products! We are here to provide you with different support to ensure that your experience with our products is as smooth as possible. We offer several communication channels to cater to different preferences and needs.