XIAO ESP32C3 Data Permanently in different ways
When we use development boards, many of us will want to be able to use the flash memory on the chip to store some important data. This requires a storage method that ensures that no data is lost even in the event of an abnormal development board.
This tutorial will introduce how to store important data on the XIAO ESP32C3's flash memory from two different storage methods as follows
-
First guide shows how to save data permanently on the ESP32 flash memory using the
Preferences.hlibrary. The data held in the flash memory persists across resets or power failures. Using thePreferences.hlibrary is useful to save data like network credentials, API keys, threshold values, or even the last state of a GPIO. You’ll learn how to save and read data from flash memory. -
Second guid explains what is the XIAO ESP32C3 EEPROM and what it is useful for. We’re also going to show you how to write and read from the EEPROM and build a project example to put the concepts learned into practice.
The vast majority of this article comes from RandomNerdTutorials.com, and some of the programs and descriptions have been slightly modified to fit the XIAO ESP32C3. Special thanks to RandomNerdTutorials.com for providing the tutorials and methods. Here is the direct link to the original source.
Save Data Permanently using Preferences Library
Preferences.h Library
This library is “installed” automatically when you install the XIAO ESP32C3 boards in your Arduino IDE.
The Preferences.h library is preferably used to store variable values through key:value pairs. Saving data permanently can be important to:
-
Remember the last state of a variable;
-
Save settings;
-
Save how many times an appliance was activated;
-
Or any other data type you need to save permanently.
If you want to use XIAO ESP32C3 to store files or very long strings or data, we recommend you to use the expansion board & SD card, we do not recommend you to use the two methods in this tutorial.
The following is Preferences.h Library Useful Functions
Func 1. The begin() method opens a “storage space” with a defined namespace. The false argument means that we’ll use it in read/write mode. Use true to open or create the namespace in read-only mode.
preferences.begin("my-app", false);
In this case, the namespace name is my-app. Namespace name is limited to 15 characters.
Func 2. Use clear() to clear all preferences under the opened namespace (it doesn’t delete the namespace):
preferences.clear();
Func 3. Remove a key from the opened namespace:
preferences.remove(key);
Func 4. Use the end() method to close the preferences under the opened namespace:
preferences.end();
Func 5. You should use different methods depending on the variable type you want to save.
When using the Preferences.h library, you should define the data type you want to save. Later, if you want to read that data, you must know the saved data type. In other words, the data type of writing and reading should be the same.
You can save the following data types using Preferences.h: char, Uchar, short, Ushort, int, Uint, long, Ulong, long64, Ulong64, float, double, bool, string and bytes.
| Char | putChar(const char*key, int8_t value) |
| Unsigned Char | putUChar(const char* key, int8_t value) |
| Short | putShort(const char*key, int16_t value) |
| Unsigned Short | putUShort(const char* key, uint16_t value) |
| Int | putInt(const char*key, int32_t value) |
| Unsigned Int | putUInt(const char* key, uint32_t value) |
| Long | putLong(const char*key, int32_t value) |
| Unsigned Long | putULong(const char* key, uint32_t value) |
| Long64 | putLong64(const char*key, int64_t value) |
| Unsigned Long64 | putULong64(const char* key, uint64_t value) |
| Float | putFloat(const char*key, const float_t value) |
| Double | putDouble(const char* key, const double_t value) |
| Bool | putBool(const char*key, const bool value) |
| String | putString(const char* key, const String value) |
| Bytes | putBytes(const charkey, const void value, size_t len) |
Func 6. Similarly, you should use different methods depending on the variable type you want to get.
| Char | getChar(const char*key, const int8_t defaultValue) |
| Unsigned Char | getUChar(const char* key, const uint8_t defaultValue) |
| Short | getShort(const char*key, const int16_t defaultValue) |
| Unsigned Short | getUShort(const char* key, const uint16_t defaultValue) |
| Int | getInt(const char*key, const int32_t defaultValue) |
| Unsigned Int | getUInt(const char* key, const uint32_t defaultValue) |
| Long | getLong(const char*key, const int32_t defaultValue) |
| Unsigned Long | getULong(const char* key, const uint32_t defaultValue) |
| Long64 | getLong64(const char*key, const int64_t defaultValue) |
| Unsigned Long64 | gettULong64(const char* key, const uint64_t defaultValue) |
| Float | getFloat(const char*key, const float_t defaultValue) |
| Double | getDouble(const char* key, const double_t defaultValue) |
| Bool | getBool(const char*key, const bool defaultValue) |
| String | getString(const char* key, const String defaultValue) |
| String | getString(const charkey, char value, const size_t maxLen) |
| Bytes | getBytes(const charkey, void buf, size_t maxLen) |
Func 7. Remove a Namespace
In the Arduino implementation of Preferences, there is no method of completely removing a namespace. As a result, over the course of several projects, the ESP32 non-volatile storage (nvs) Preferences partition may become full. To completely erase and reformat the NVS memory used by Preferences, create a sketch that contains:
#include <nvs_flash.h>

void setup() {
  nvs_flash_erase(); // erase the NVS partition and...
  nvs_flash_init(); // initialize the NVS partition.
  while(true);
}

void loop() {

}
You should download a new sketch to your board immediately after running the above, or it will reformat the NVS partition every time it is powered up.
For more information, you can access the Preferences.cpp file here.
General ways to use the Preferences.h library
Step 1. To use the Preferences.h library to store data, first you need to include it in your sketch:
#include <Preferences.h>
Step 2. Then, you must initiate an instance of the Preferences library. You can call it preferences, for example:
Preferences preferences;
Step 3. In the setup(), initialize the Serial Monitor at a baud rate of 115200.
Serial.begin(115200);
Step 4. Create a “storage space” in the flash memory called my-app in read/write mode. You can give it any other name.
preferences.begin("my-app", false);
Step 5. Use get and put methods to get/store data content.
Store/get Key:value Pair data
The data saved using preferences is structured like this:
namespace {
  key:value
}
You can save different keys on the same namespace, for example:
namespace {
  key1: value1
  key2: value2
}
You can also have multiple namespaces with the same key (but each key with its value):
namespace1{
  key:value1
}
namespace2{
  key:value2
}
For example, store the new value on the “counter” key:
preferences.putUInt("counter", counter);
Then, get the value of the counter key saved on preferences. If it doesn’t find any value, it returns 0 by default (which happens when this code runs for the first time).
unsigned int counter = preferences.getUInt("counter", 0);
So, your data is structured in this way:
my-app{
  counter: counter
}
Store/get String data
The following codes saves your network credentials permanently on the ESP32 flash memory using Preferences.h.
Create a key called ssid that saves your SSID value (ssid variable) – use the putString() method.
preferences.putString("ssid", ssid);
Add another key called password to save the password value (password variable):
preferences.putString("password", password);
So, your data is structured in this way:
my-app{
  ssid: ssid
  password: password
}
Get the SSID and password values using the getString() method. You need to use the key name that you used to save the variables, in this case, ssid and password keys:
String ssid = preferences.getString("ssid", "");
String password = preferences.getString("password", "");
As a second argument to the getString() function, we passed an empty String. This is the returned value in case there aren’t ssid or password keys saved on preferences.
Step 6. Close the Preferences.
preferences.end();
- The Store/get Key:value Pair data complete procedure is shown below.
#include <Preferences.h>

Preferences preferences;

void setup() {
  Serial.begin(115200);
  delay(3000);
  Serial.println();

  // Open Preferences with my-app namespace. Each application module, library, etc
  // has to use a namespace name to prevent key name collisions. We will open storage in
  // RW-mode (second parameter has to be false).
  // Note: Namespace name is limited to 15 chars.
  preferences.begin("my-app", false);

  // Remove all preferences under the opened namespace
  //preferences.clear();

  // Or remove the counter key only
  //preferences.remove("counter");

  // Get the counter value, if the key does not exist, return a default value of 0
  // Note: Key name is limited to 15 chars.
  unsigned int counter = preferences.getUInt("counter", 0);

  // Increase counter by 1
  counter++;

  // Print the counter to Serial Monitor
  Serial.printf("Current counter value: %u\n", counter);

  // Store the counter to the Preferences
  preferences.putUInt("counter", counter);

  // Close the Preferences
  preferences.end();

  // Wait 10 seconds
  Serial.println("Restarting in 10 seconds...");
  delay(10000);

  // Restart ESP
  ESP.restart();
}

void loop() {

}
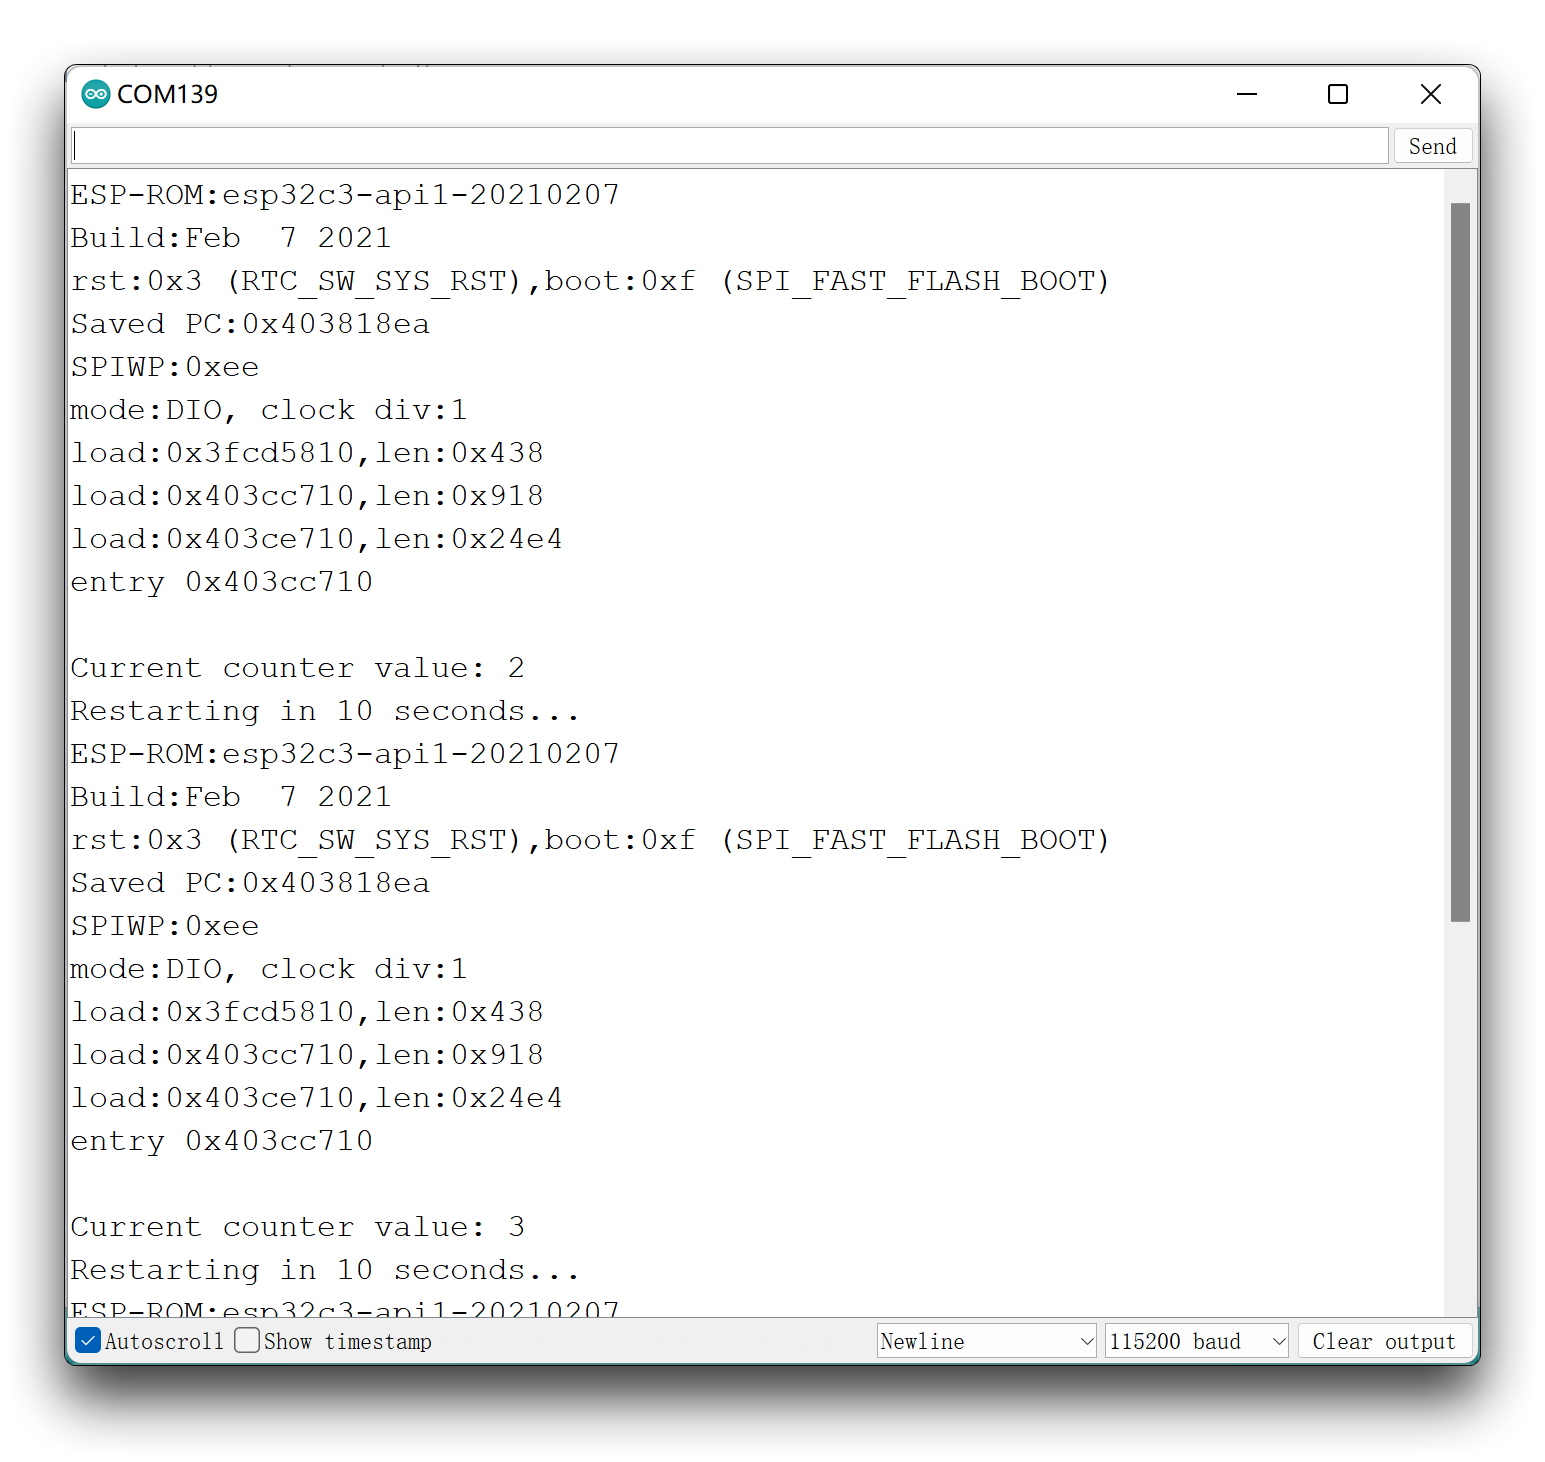
Upload the code to your board and this is what you should get on the Serial Monitor:
- The Store/get String data complete procedure is shown below.
Save Network Credentials using Preferences.h.
#include <Preferences.h>

Preferences preferences;

const char* ssid = "REPLACE_WITH_YOUR_SSID";
const char* password = "REPLACE_WITH_YOUR_PASSWORD";

void setup() {
  Serial.begin(115200);
  delay(3000);
  Serial.println();

  preferences.begin("credentials", false);
  preferences.putString("ssid", ssid);
  preferences.putString("password", password);

  Serial.println("Network Credentials Saved using Preferences");

  preferences.end();
}

void loop() {

}
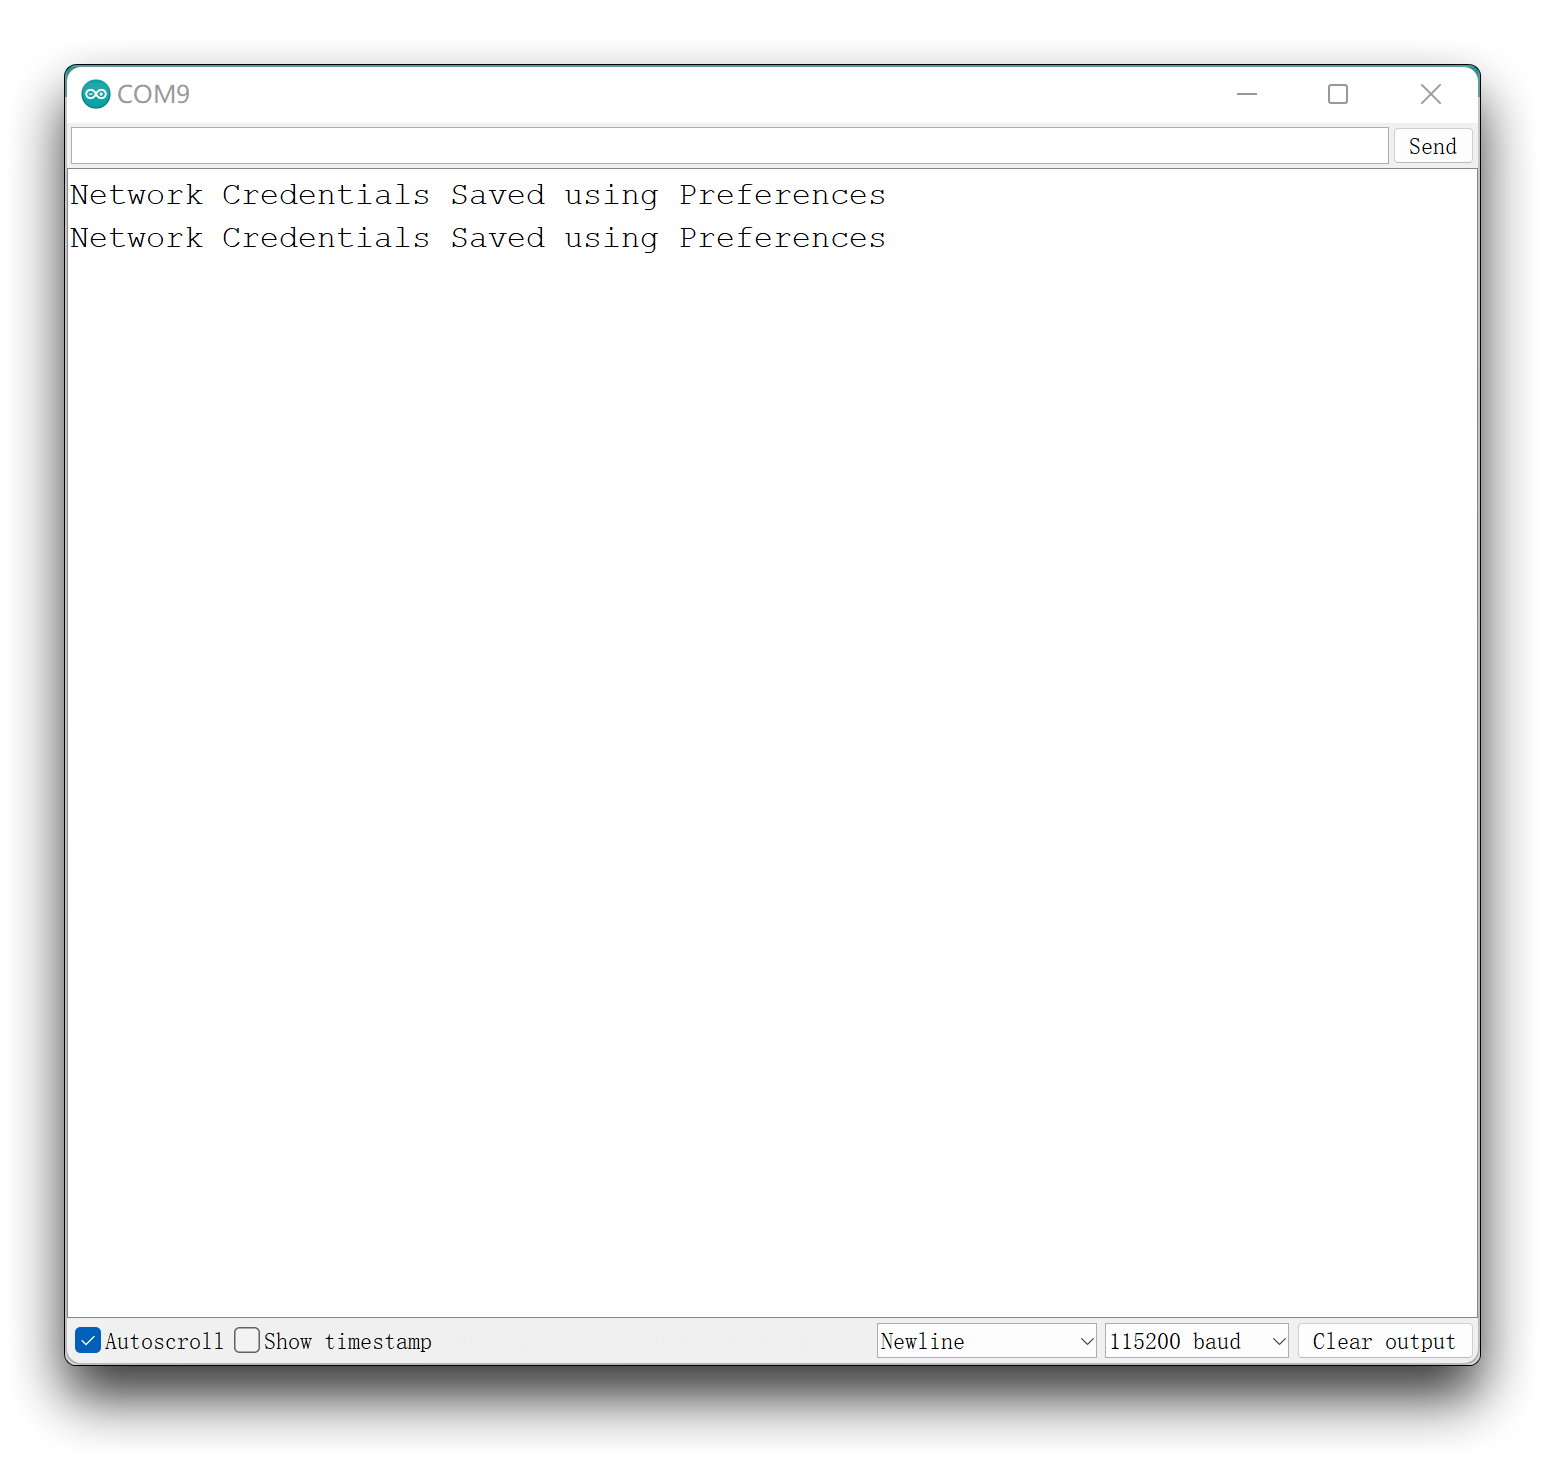
Upload the code to your board and this is what you should get on the Serial Monitor:
Connect to Wi-Fi with Network Credentials Saved on Preferences.
#include <Preferences.h>
#include "WiFi.h"

Preferences preferences;

String ssid;
String password;

void setup() {
  Serial.begin(115200);
  delay(3000);
  Serial.println();

  preferences.begin("credentials", false);

  ssid = preferences.getString("ssid", "");
  password = preferences.getString("password", "");

  if (ssid == "" || password == ""){
    Serial.println("No values saved for ssid or password");
  }
  else {
    // Connect to Wi-Fi
    WiFi.mode(WIFI_STA);
    WiFi.disconnect();
    delay(100);
    WiFi.begin(ssid.c_str(), password.c_str());
    Serial.print("Connecting to WiFi ");
    Serial.println(ssid);
    Serial.println(password);
    while (WiFi.status() != WL_CONNECTED) {
      Serial.print('.');
      delay(1000);
    }
    Serial.println(WiFi.localIP());
  }
}

void loop() {
  // put your main code here, to run repeatedly:
}
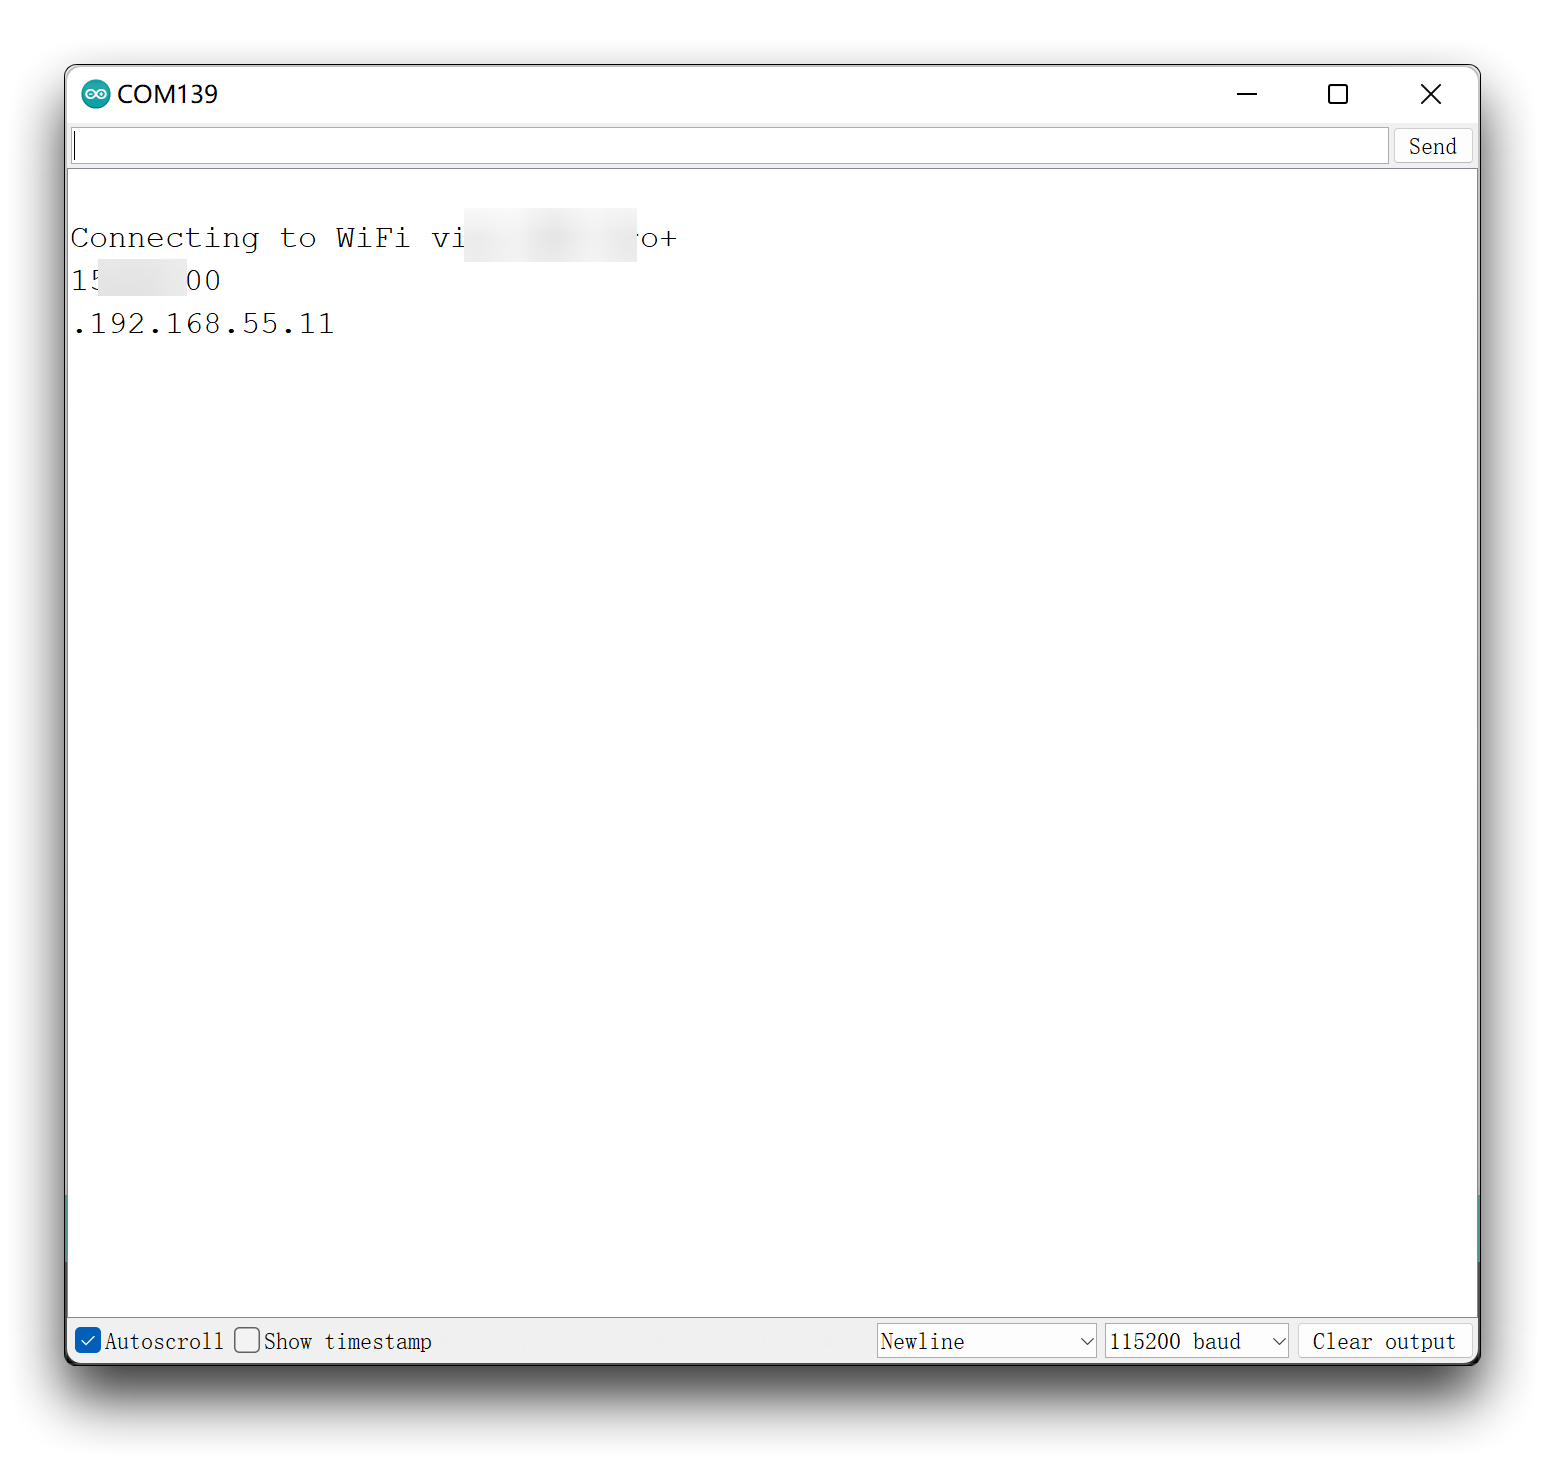
Upload this code to your board after the previous one (to ensure that you have the credentials saved). If everything goes as expected, this is what you should get on your Serial Monitor.
Store Permanent Data using EEPROM
What is EEPROM?
The EEPROM is an internal memory of the ESP32 microcontroller that allows to keep in memory data after restarting the board. When working with microcontrollers, it is interesting to keep data in memory especially when the card turns off whether it is wanted or not, as in the case of a loss of electrical power.
The ESP32 microcontroller has a Flash memory area that can be interfaced with like the EEPROM of an Arduino to keep data in memory even after the board is turned off.
An important thing to note is that EEPROM has a limited size and life span. The memory cells can be read as many times as necessary but the number of write cycles is limited to 100,000. It is advisable to pay close attention to the size of the stored data and how often you want to update it. The EEPROM memory can store 512 values from 0 to 255 or 128 IP addresses or RFID tags.
The microcontroller on the ESP32 has EEPROM (Electrically Erasable Programmable Read-Only Memory). This is a small space that can store byte variables. The variables stored in the EEPROM kept there, event when you reset or power off the ESP32. Simply, the EEPROM is permanent storage similar to a hard drive in computers.
The EEPROM can be read, erased and re-written electronically. In Arduino, you can read and write from the EEPROM easily using the EEPROM library.
Each EEPROM position can save one byte, which means you can only store 8-bit numbers, which includes integer values between 0 and 255.
Available EEPROM Functions
To read and write from the ESP32 flash memory using Arduino IDE, we’ll be using the EEPROM library. Using this library with the ESP32 is very similar to using it with the Arduino. So, if you’ve used the Arduino EEPROM before, this is not much different.
So, we also recommend taking a look at our article about Arduino EEPROM.
Func 1. Initialize the memory size
Before using the function, we have to initialize the size of the memory with EEPROM.begin().
EEPROM.begin(EEPROM_SIZE);
Func 2. Write & Put
To write data into the EEPROM, you use the EEPROM.write() function that takes in two arguments. The first one is the EEPROM location or address where you want to save the data, and the second is the value we want to save:
EEPROM.write(address, value);
EEPROM.write() is equivalent to using EEPROM.put().
EEPROM.put(address, value);
For example, to write 9 on address 0, you’ll have:
EEPROM.write(0, 9);
If we want to store float data, we usually use the EEPROM.put() method instead of the EEPROM.write() method. If you want to store it using the write() method, then you need to use EEPROM.writeFloat().
Func 3. Read & Get
To read a byte from the EEPROM, you use the EEPROM.read() function. This function takes the address of the byte has an argument.
EEPROM.read(address);
EEPROM.read() is equivalent to using EEPROM.get().
EEPROM.get(address);
For example, to read the byte stored previously in address 0.:
EEPROM.read(0);
This would return 9, which is the value stored in that location.
If we want to get float data, we usually use the EEPROM.get() method instead of the EEPROM.read() method. If you want to get it using the read() method, then you need to use EEPROM.readFloat().
Func 4. Update a value
The EEPROM.update() function is particularly useful. It only writes on the EEPROM if the value written is different from the one already saved.
As the EEPROM has limited life expectancy due to limited write/erase cycles, using the EEPROM.update() function instead of the EEPROM.write() saves cycles.
You use the EEPROM.update() function as follows:
EEPROM.update(address, value);
At the moment, we have 9 stored in the address 0. So, if we call:
EEPROM.update(0, 9);
It won’t write on the EEPROM again, as the value currently saved is the same we want to write.
To learn more about EEPROM operation, you can read the official Arduino documentation.
General ways to use the EEPROM
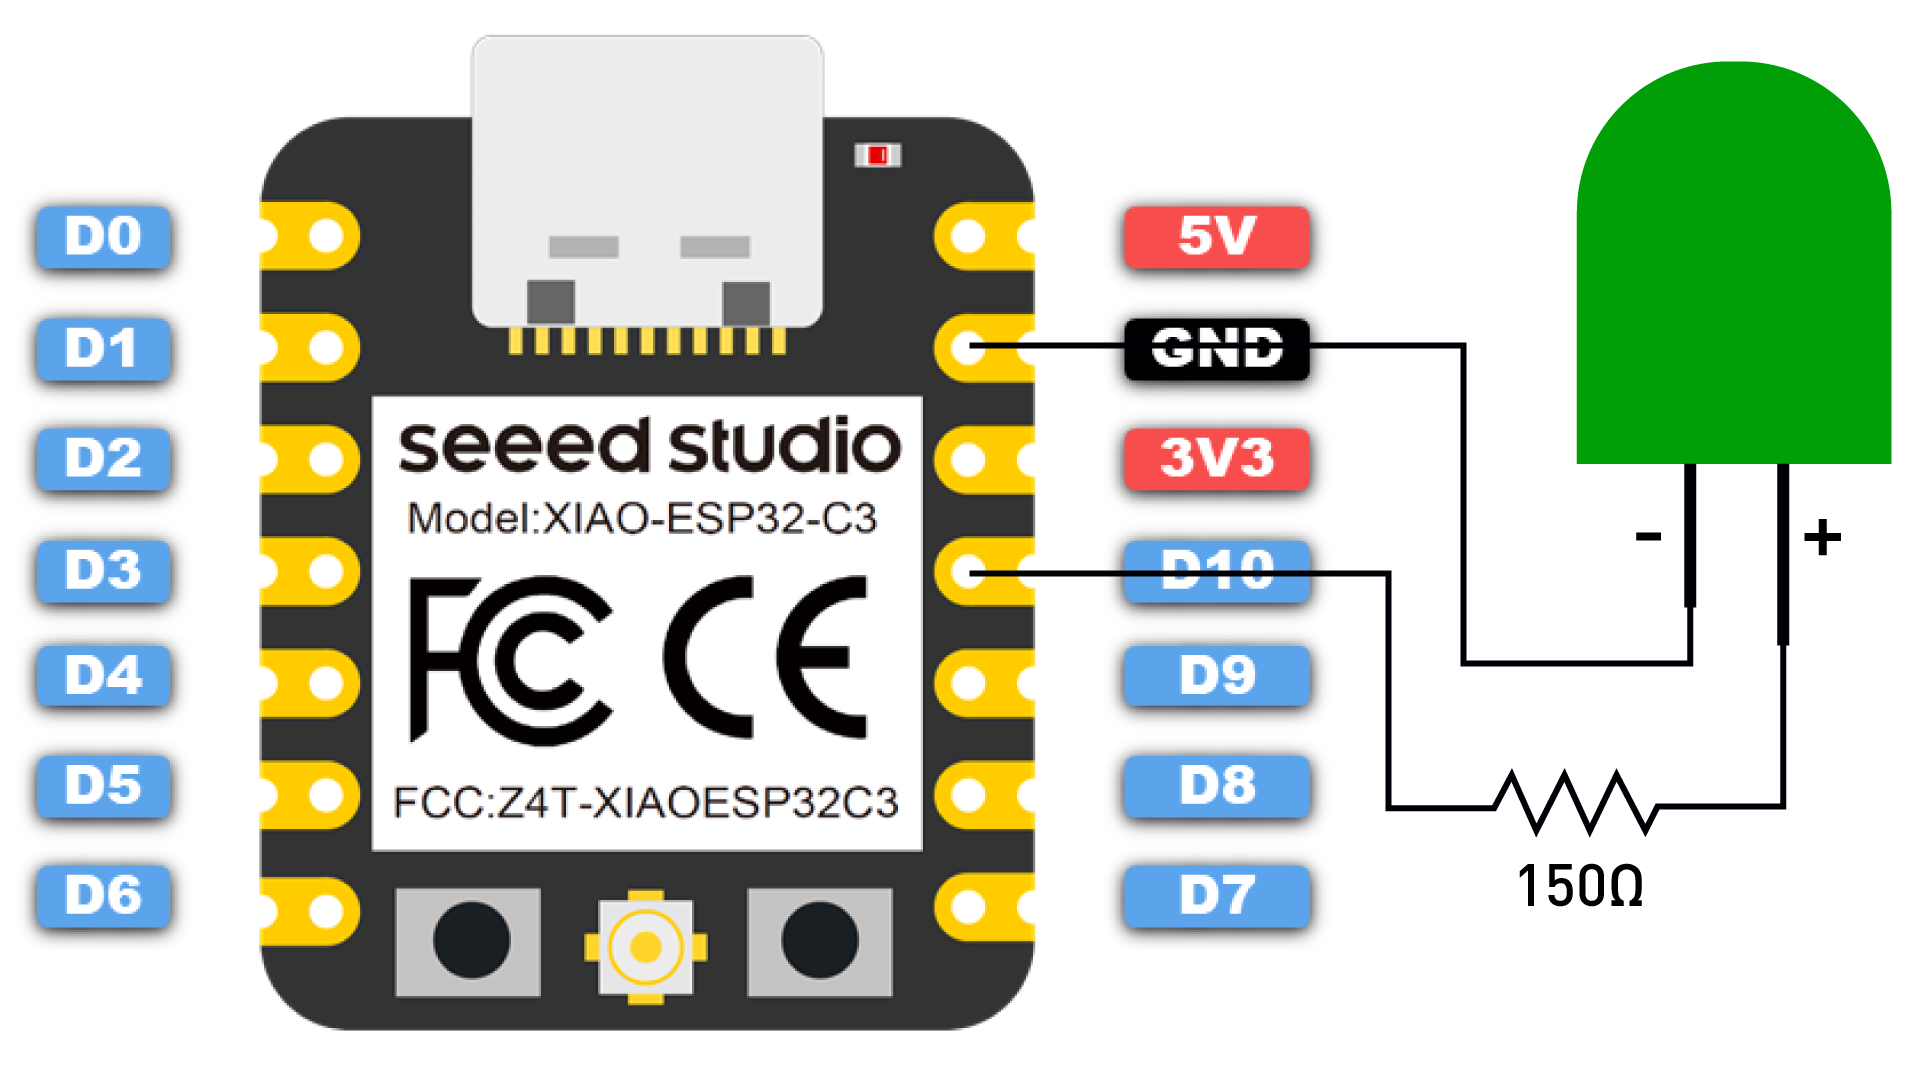
To show you how to save data in the XIAO ESP32C3 flash memory, we’ll save the last state of an output, in this case an LED.
Wire an LED to the XIAO ESP32C3 as shown in the following schematic diagram.
First, you need to include the EEPROM library.
#include <EEPROM.h>
Then, you define the EEPROM size. This is the number of bytes you’ll want to access in the flash memory. In this case, we’ll just save the LED state, so the EEPROM size is set to 1.
#define EEPROM_SIZE 1
We also define other variables that are required to make this sketch work.
// constants won't change. They're used here to set pin numbers:
const int ledPin = D10;      // the number of the LED pin

// Variables will change:
int ledState = LOW;  // ledState used to set the LED

// Generally, you should use "unsigned long" for variables that hold time
// The value will quickly become too large for an int to store
unsigned long previousMillis = 0;  // will store last time LED was updated

// constants won't change:
const long interval = 10000;  // interval at which to blink (milliseconds)
In the setup() you initialize the EEPROM with the predefined size.
EEPROM.begin(EEPROM_SIZE);
To make sure your code initializes with the latest LED state, in the setup(), you should read the last LED state from the flash memory. It is stored on address zero.
Then, you just need to turn the LED ON or OFF accordingly to the value read from the flash memory.
digitalWrite (ledPin, ledState);
In the loop() function section, all we need to do is flip the state of the LED over a period of time.
// check to see if it's time to blink the LED; that is, if the difference
// between the current time and last time you blinked the LED is bigger than
// the interval at which you want to blink the LED.
unsigned long currentMillis = millis();

if (currentMillis - previousMillis >= interval) {
    // save the last time you blinked the LED
    previousMillis = currentMillis;
    Serial.println("State changed");
    // if the LED is off turn it on and vice-versa:
    if (ledState == LOW) {
      ledState = HIGH;
    } else {
      ledState = LOW;
    }

    // set the LED with the ledState of the variable:
    digitalWrite(ledPin, ledState);
}
Next, we need to determine if the countdown has ended, flip the state of the LED after it has ended, and store it in flash memory.
EEPROM.write(0, ledState);
Finally, we use the EEPROM.commit() for the changes to take effect.
EEPROM.commit();
The following is the completed procedure.
Please note that you should not run this example for a long time. In this example, we will write the EEPROM every ten seconds, and running this example for a long time will greatly reduce the life of the EEPROM.
// include library to read and write from flash memory
#include <EEPROM.h>

// define the number of bytes you want to access
#define EEPROM_SIZE 1

// constants won't change. They're used here to set pin numbers:
const int ledPin = D10;      // the number of the LED pin

// Variables will change:
int ledState = LOW;  // ledState used to set the LED

// Generally, you should use "unsigned long" for variables that hold time
// The value will quickly become too large for an int to store
unsigned long previousMillis = 0;  // will store last time LED was updated

// constants won't change:
const long interval = 10000;  // interval at which to blink (milliseconds)

void setup() {
  Serial.begin(115200);

  // initialize EEPROM with predefined size
  EEPROM.begin(EEPROM_SIZE);

  pinMode(ledPin, OUTPUT);

  // read the last LED state from flash memory
  ledState = EEPROM.read(0);
  // set the LED to the last stored state
  digitalWrite(ledPin, ledState);
}

void loop() {
  // here is where you'd put code that needs to be running all the time.

  // check to see if it's time to blink the LED; that is, if the difference
  // between the current time and last time you blinked the LED is bigger than
  // the interval at which you want to blink the LED.
  unsigned long currentMillis = millis();

  if (currentMillis - previousMillis >= interval) {
    // save the last time you blinked the LED
    previousMillis = currentMillis;
    Serial.println("State changed");
    // if the LED is off turn it on and vice-versa:
    if (ledState == LOW) {
      ledState = HIGH;
    } else {
      ledState = LOW;
    }
    // save the LED state in flash memory
    EEPROM.write(0, ledState);
    EEPROM.commit();
    Serial.println("State saved in flash memory");

    // set the LED with the ledState of the variable:
    digitalWrite(ledPin, ledState);
  }
}
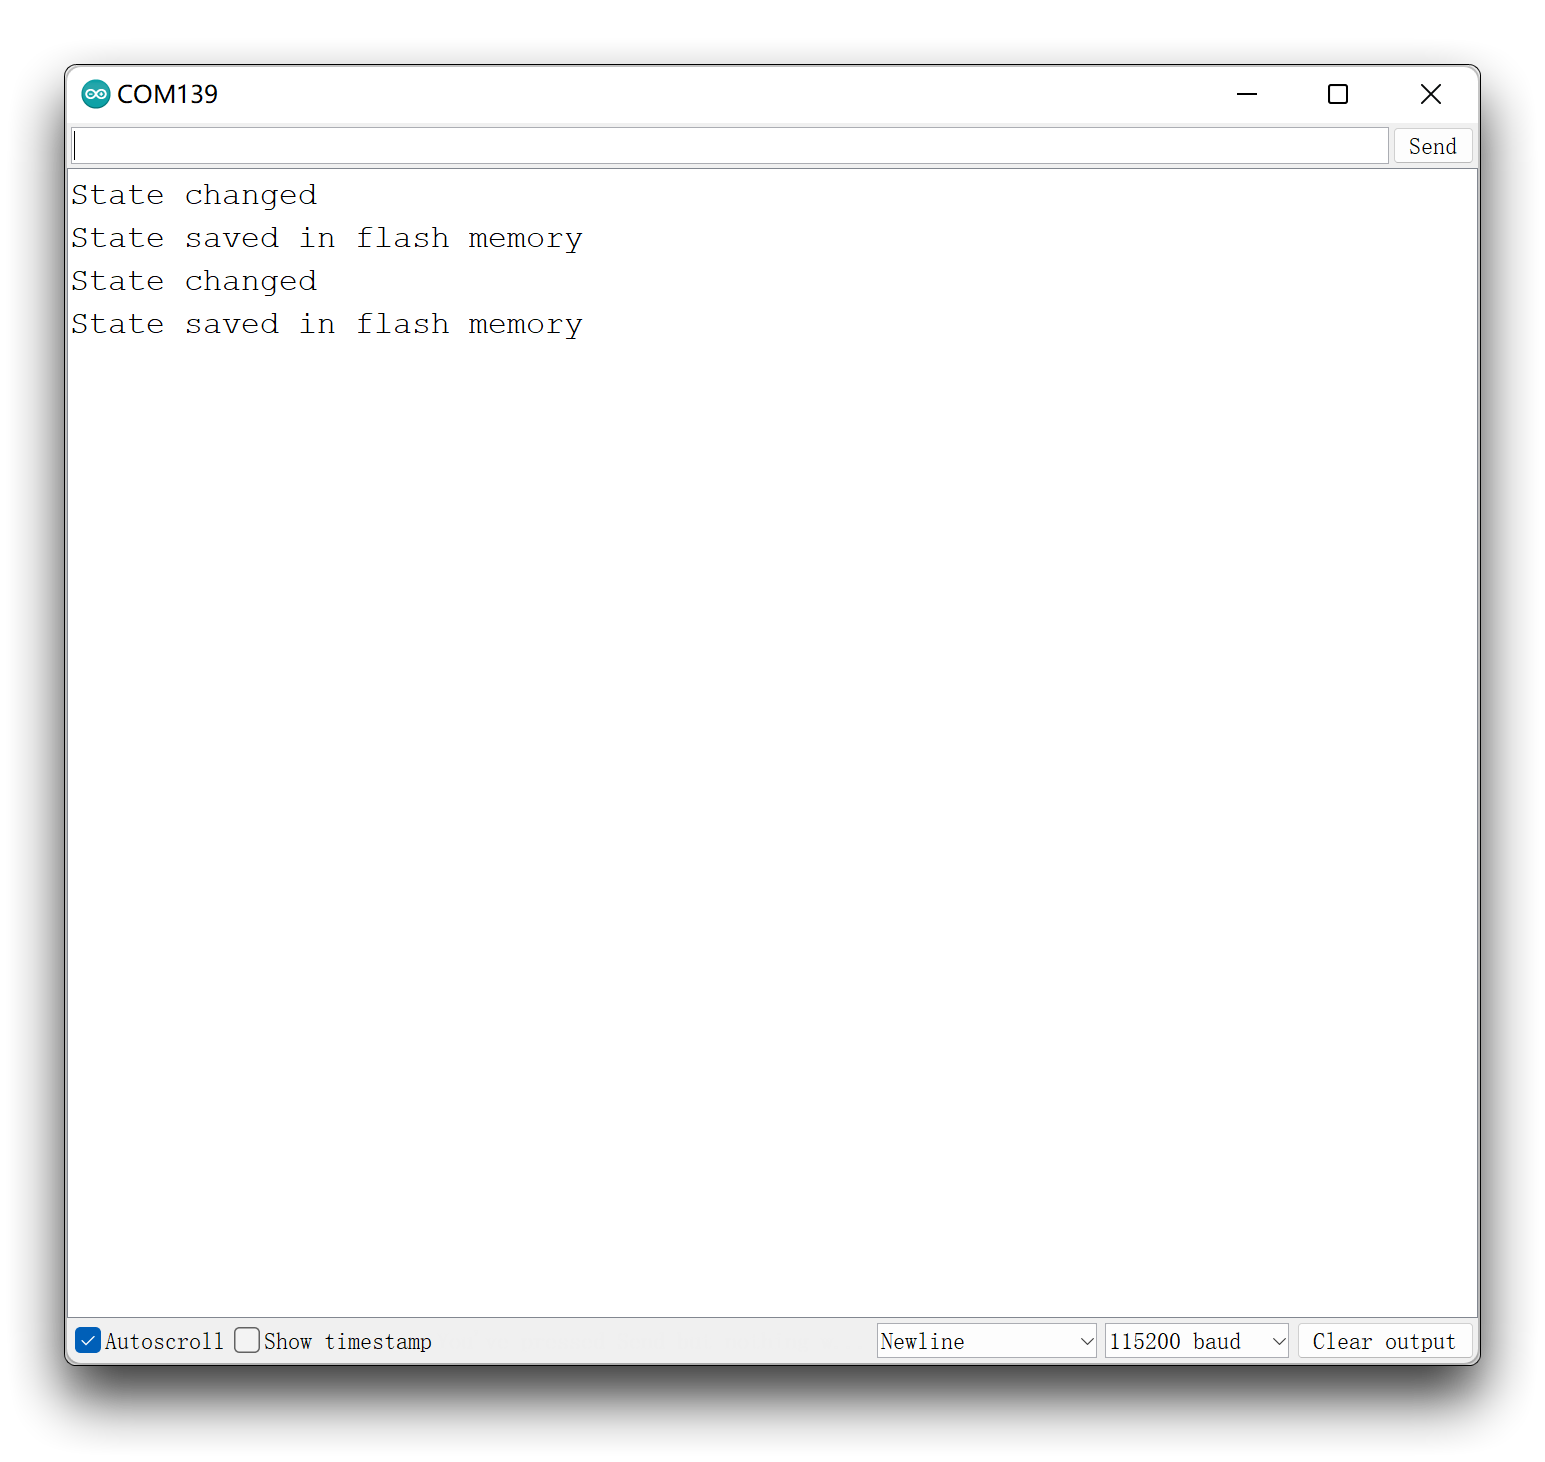
Upload the code to your board and this is what you should get on the Serial Monitor:
Tech Support & Product Discussion
Thank you for choosing our products! We are here to provide you with different support to ensure that your experience with our products is as smooth as possible. We offer several communication channels to cater to different preferences and needs.